Upload a new file
Uploading a new file with OneNode is the easiest way to store and access your documents anytime.
It's similar to uploading a Pipedrive file, but with significant advantages:
-
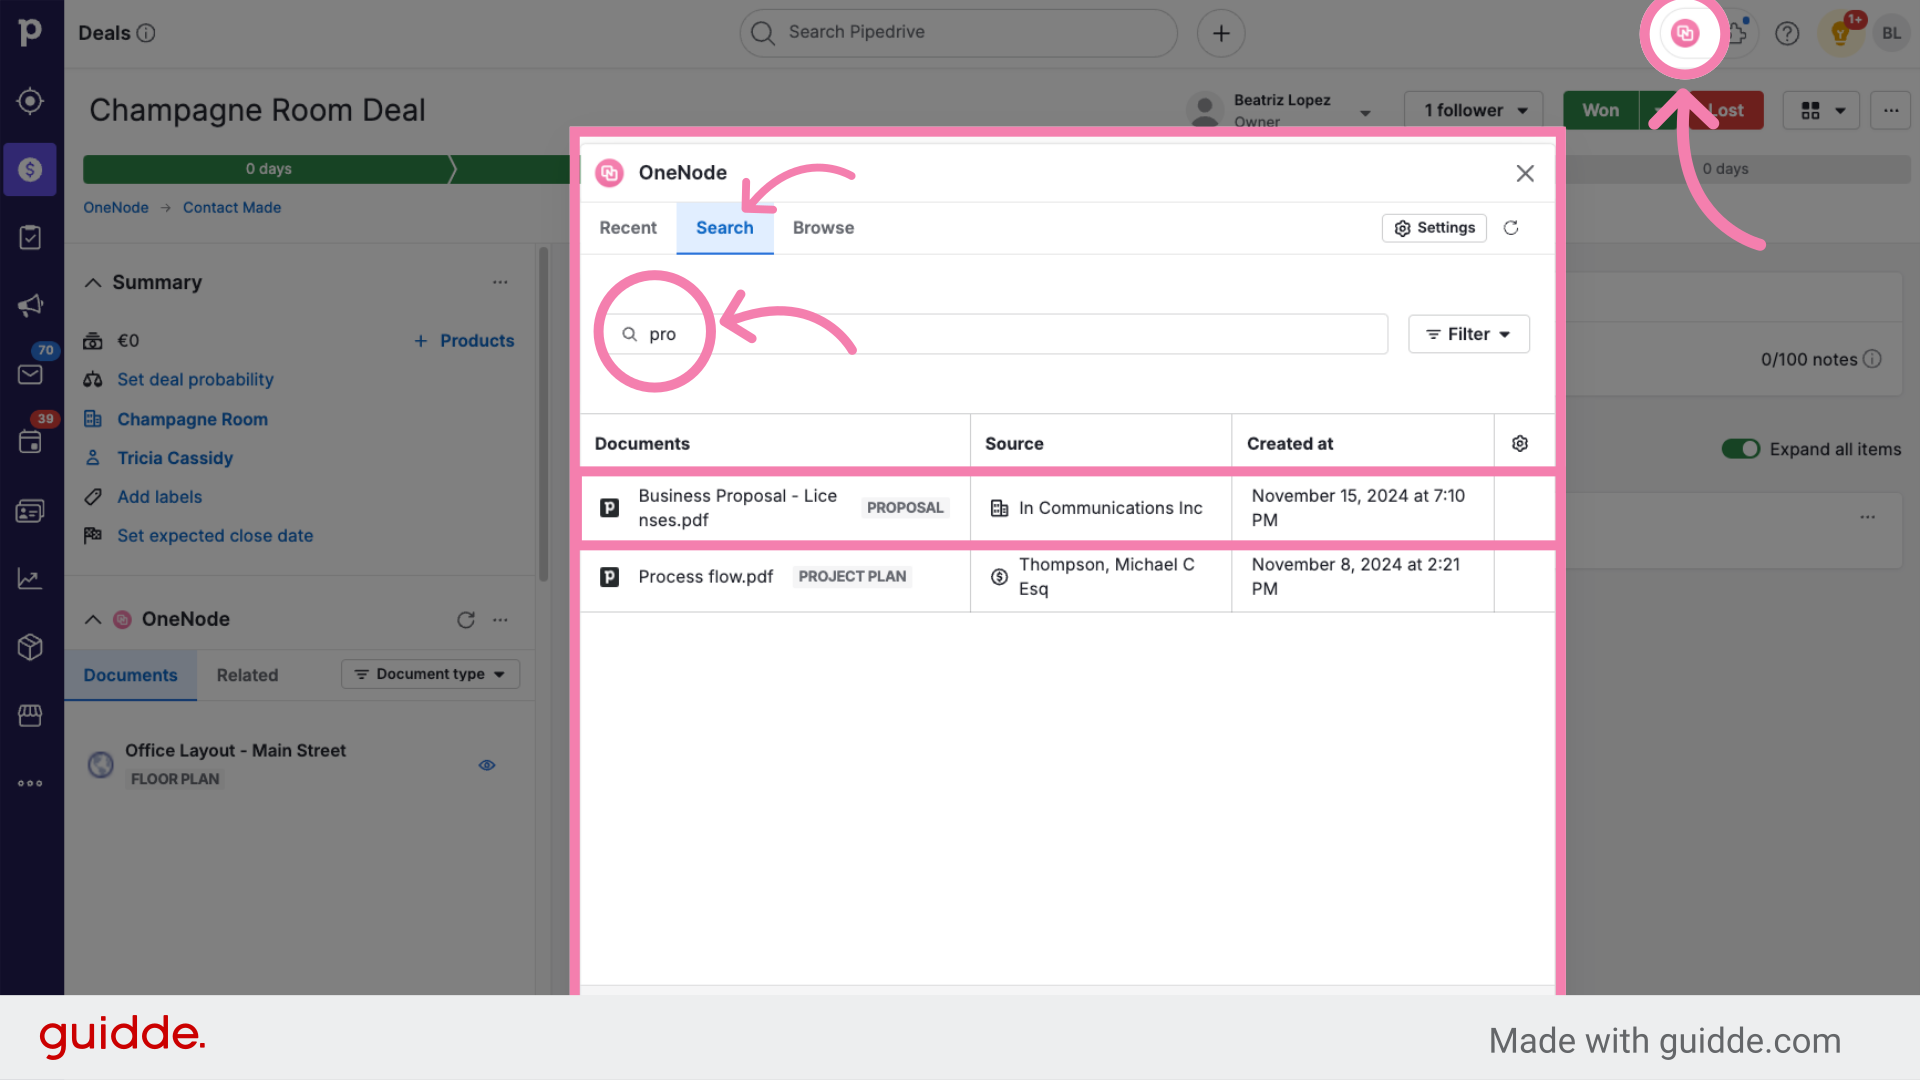
Search:
When users upload files, they are easily accessible through OneNode’s advanced search feature. Simply type a few letters, and OneNode will instantly display the file’s location and details. Unlike with Pipedrive's search bar, there's no need to open the deal or detail view—just search and quickly confirm if that's the file you are looking for. This makes finding and managing your files faster and more efficient.
-
Browse:
OneNode allows you to navigate your company’s folder structure and even create your own custom folders. You can apply filters like Proposal Type, Value, Creation Date, and more, making it easier to organize and find your documents.
As you explore OneNode, you’ll discover even more benefits.
The biggest advantage is that OneNode simply acts as a guiding layer—it doesn’t store, move or duplicate your documents. Your files remain exactly where they are, just like any Pipedrive document.
If you've already uploaded files via Pipedrive, no need to worry—OneNode allows you to add those files as well, so you can take full advantage of all its features.
Uploading is quick and easy—watch and see how it’s done!
Upload a new file
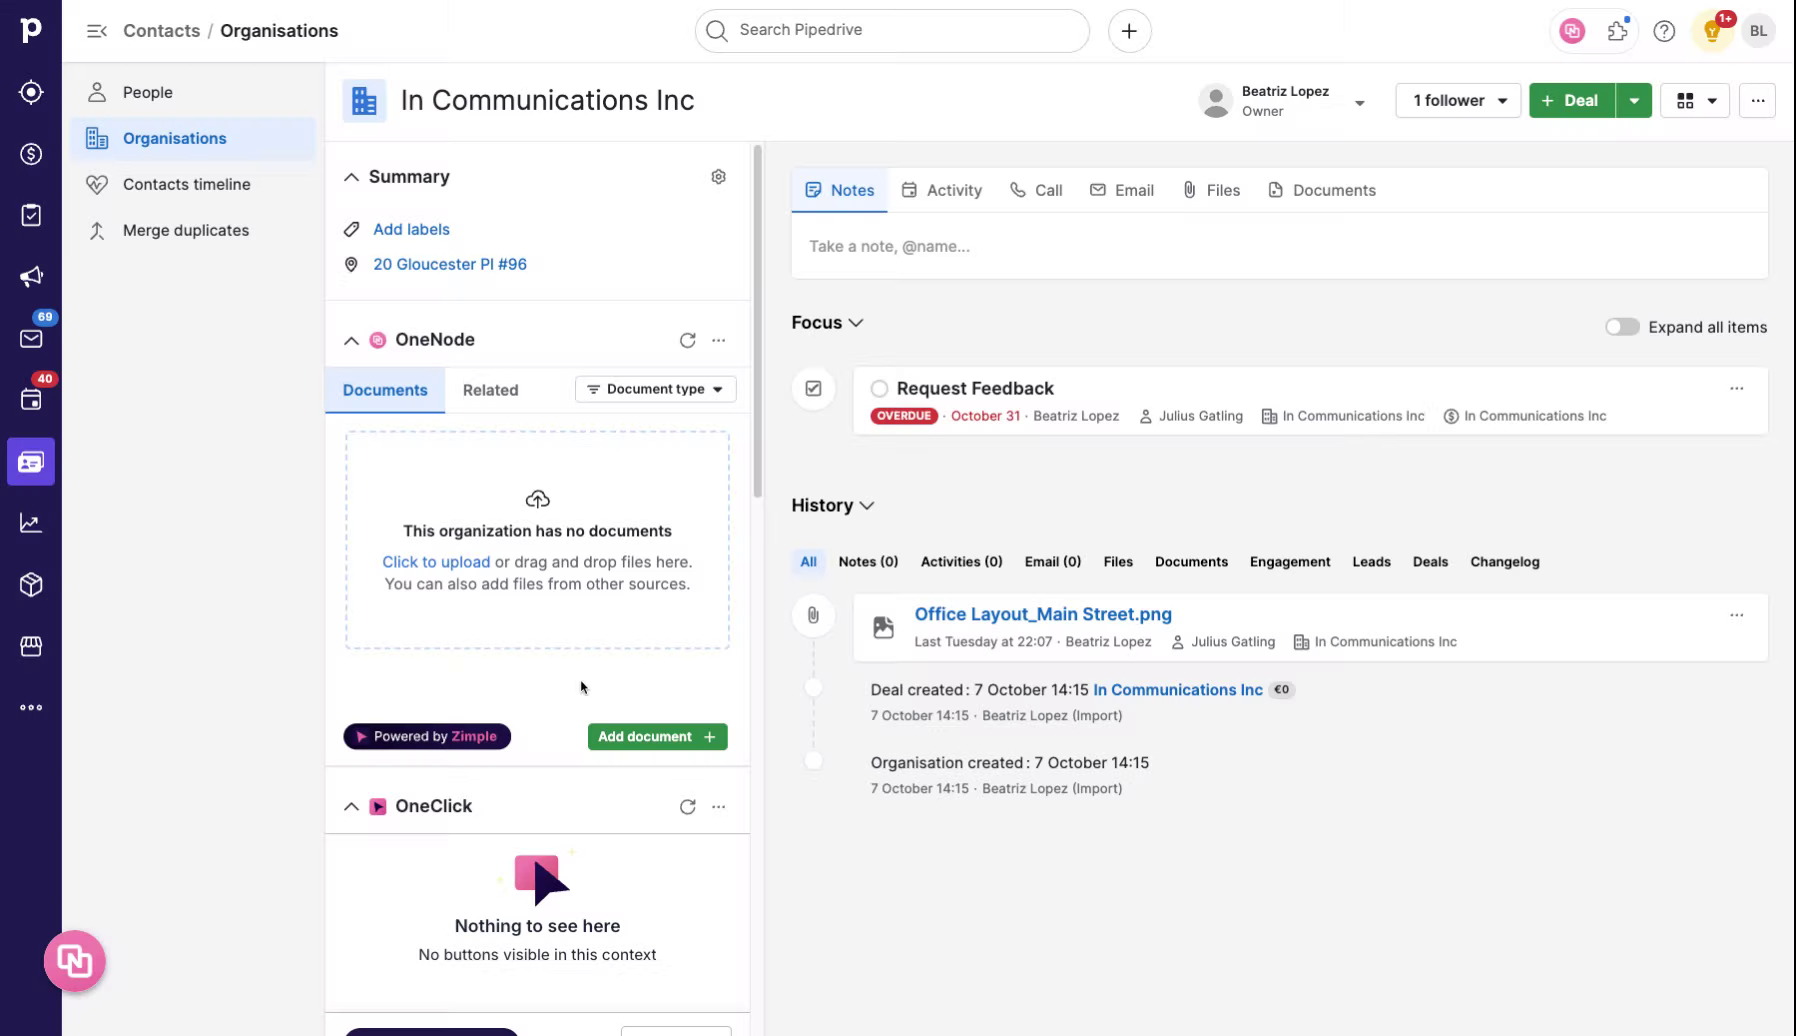
This video will walk you through the process of uploading a new file directly from the Organization view in Pipedrive
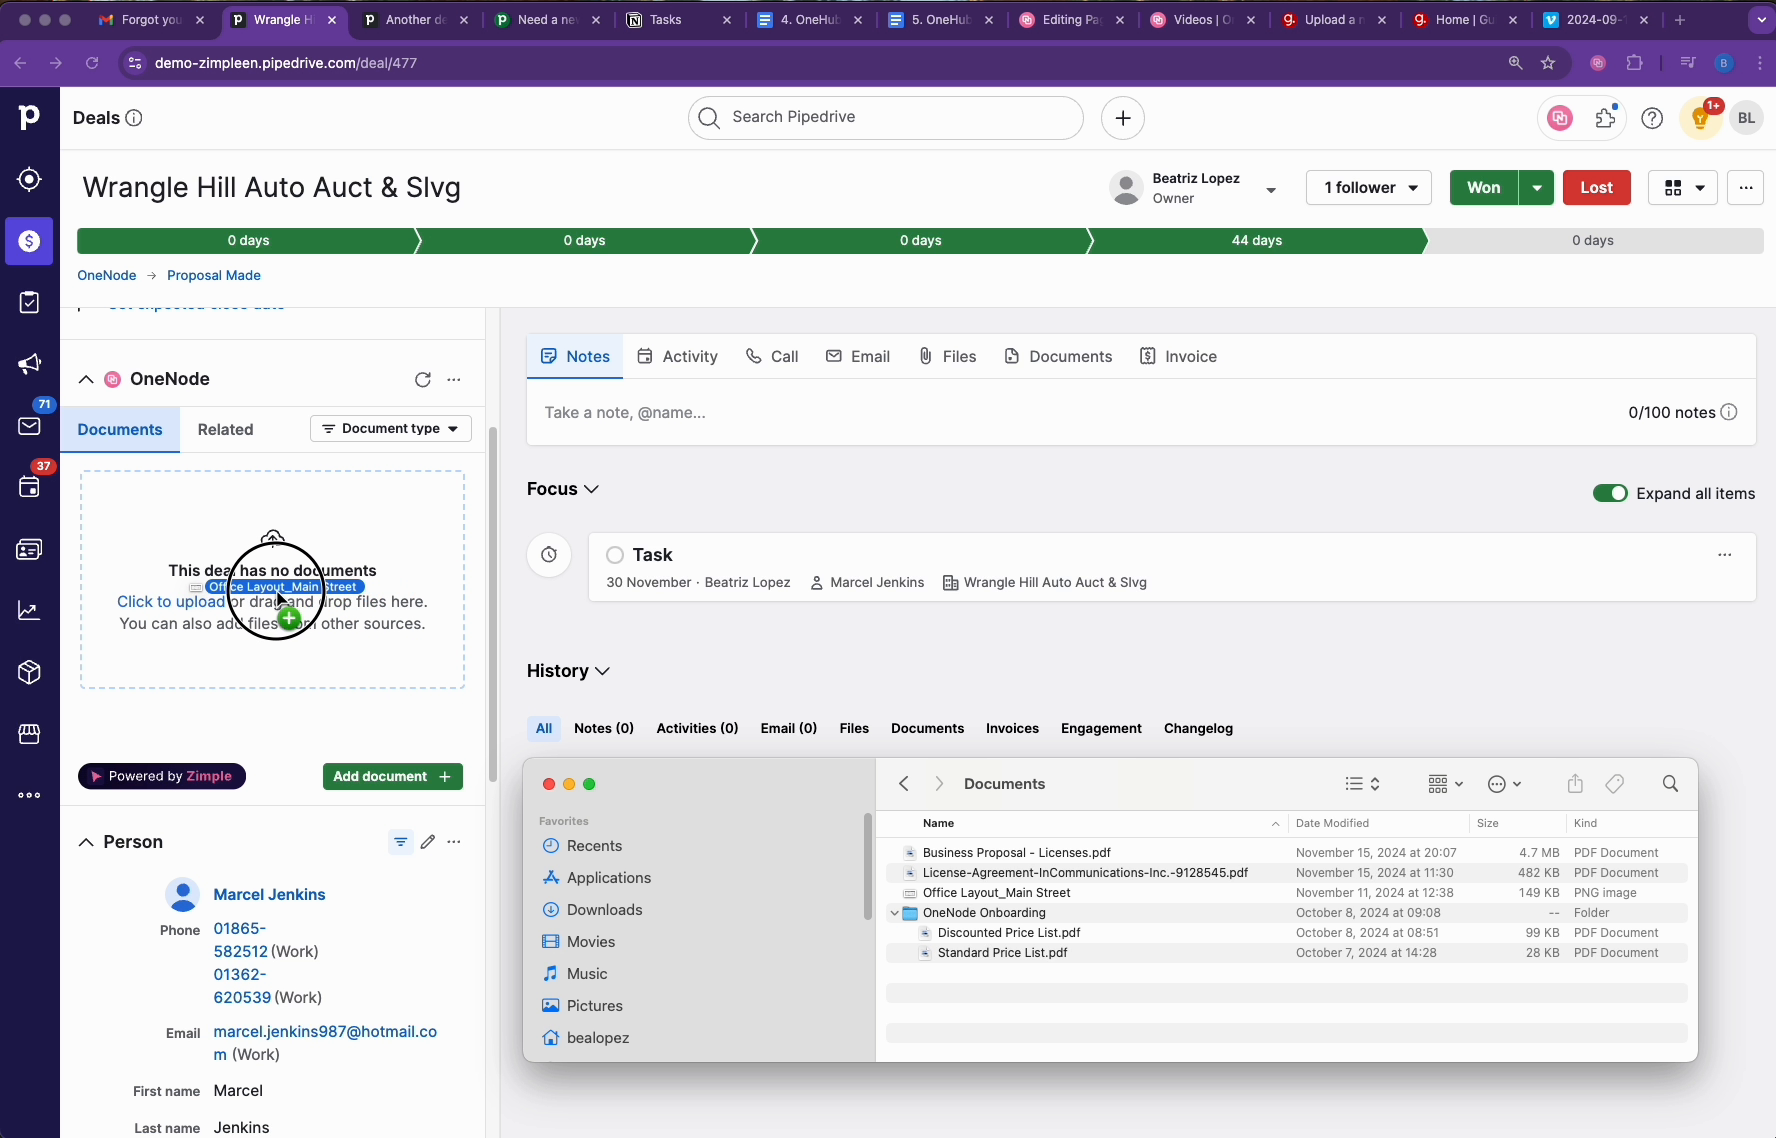
1. Drag & Drop
It’s as simple as Drag & Drop! Just drag the file from your device to OneNode’s panel on the left side of the detail view. Classify it by document type and then complete the additional fields. That's it, click Save—your file is uploaded!
2. Upload using the OneNode panel
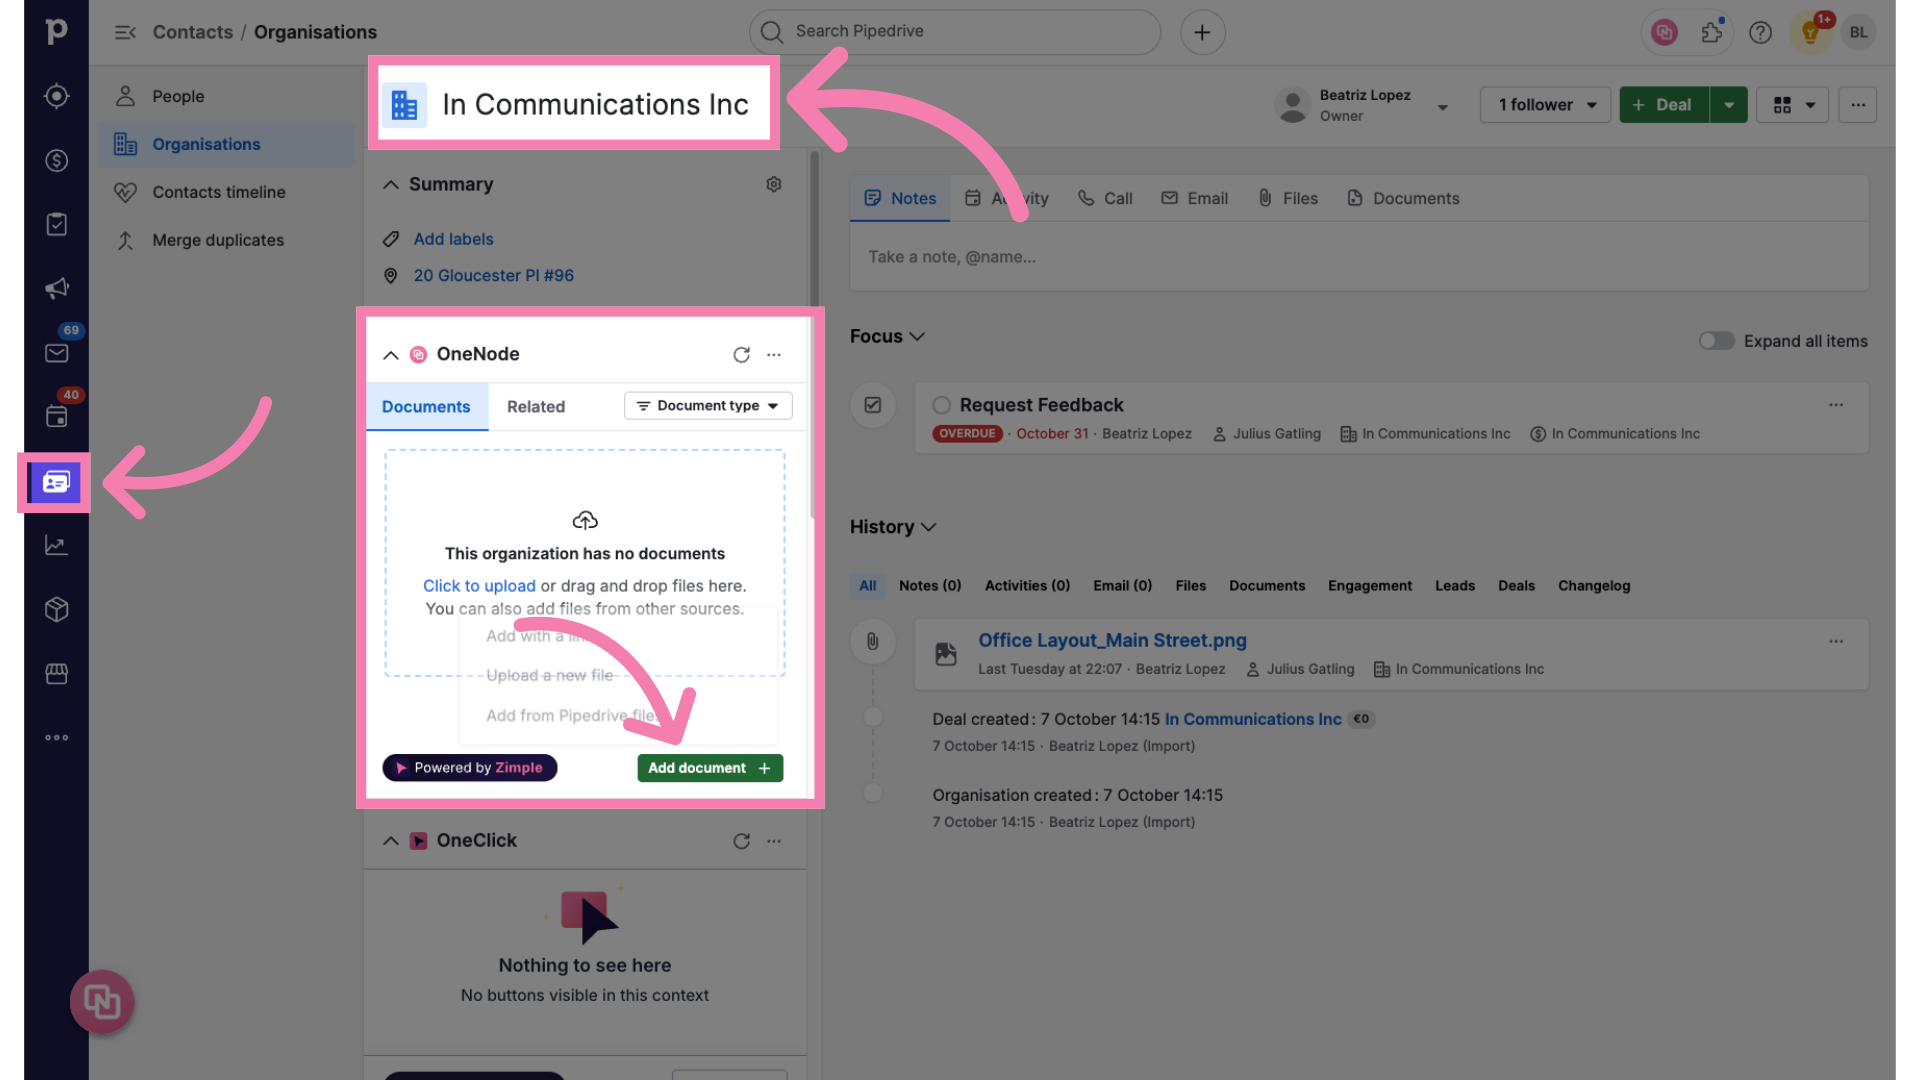
3. Click on "Add new document"
Click on Add new document
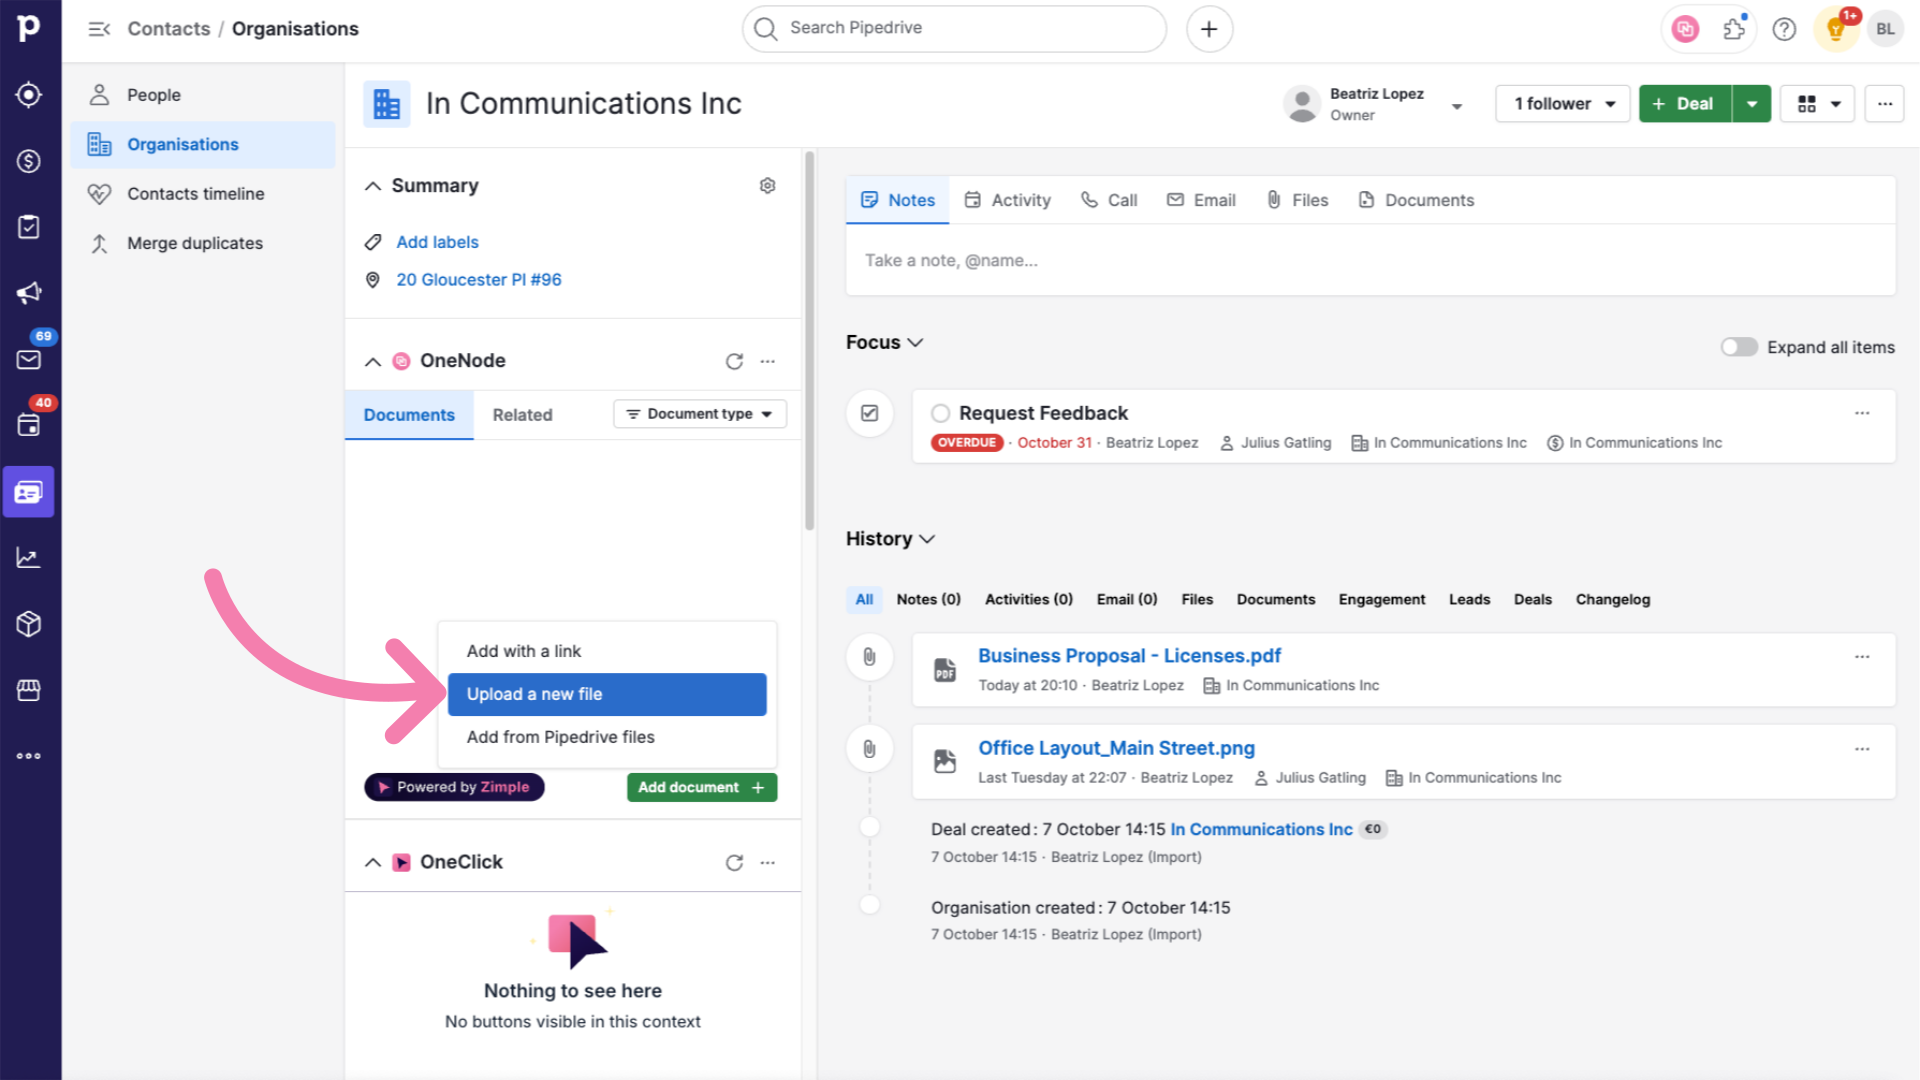
4. Select "Upload new file"
and select Upload a new file
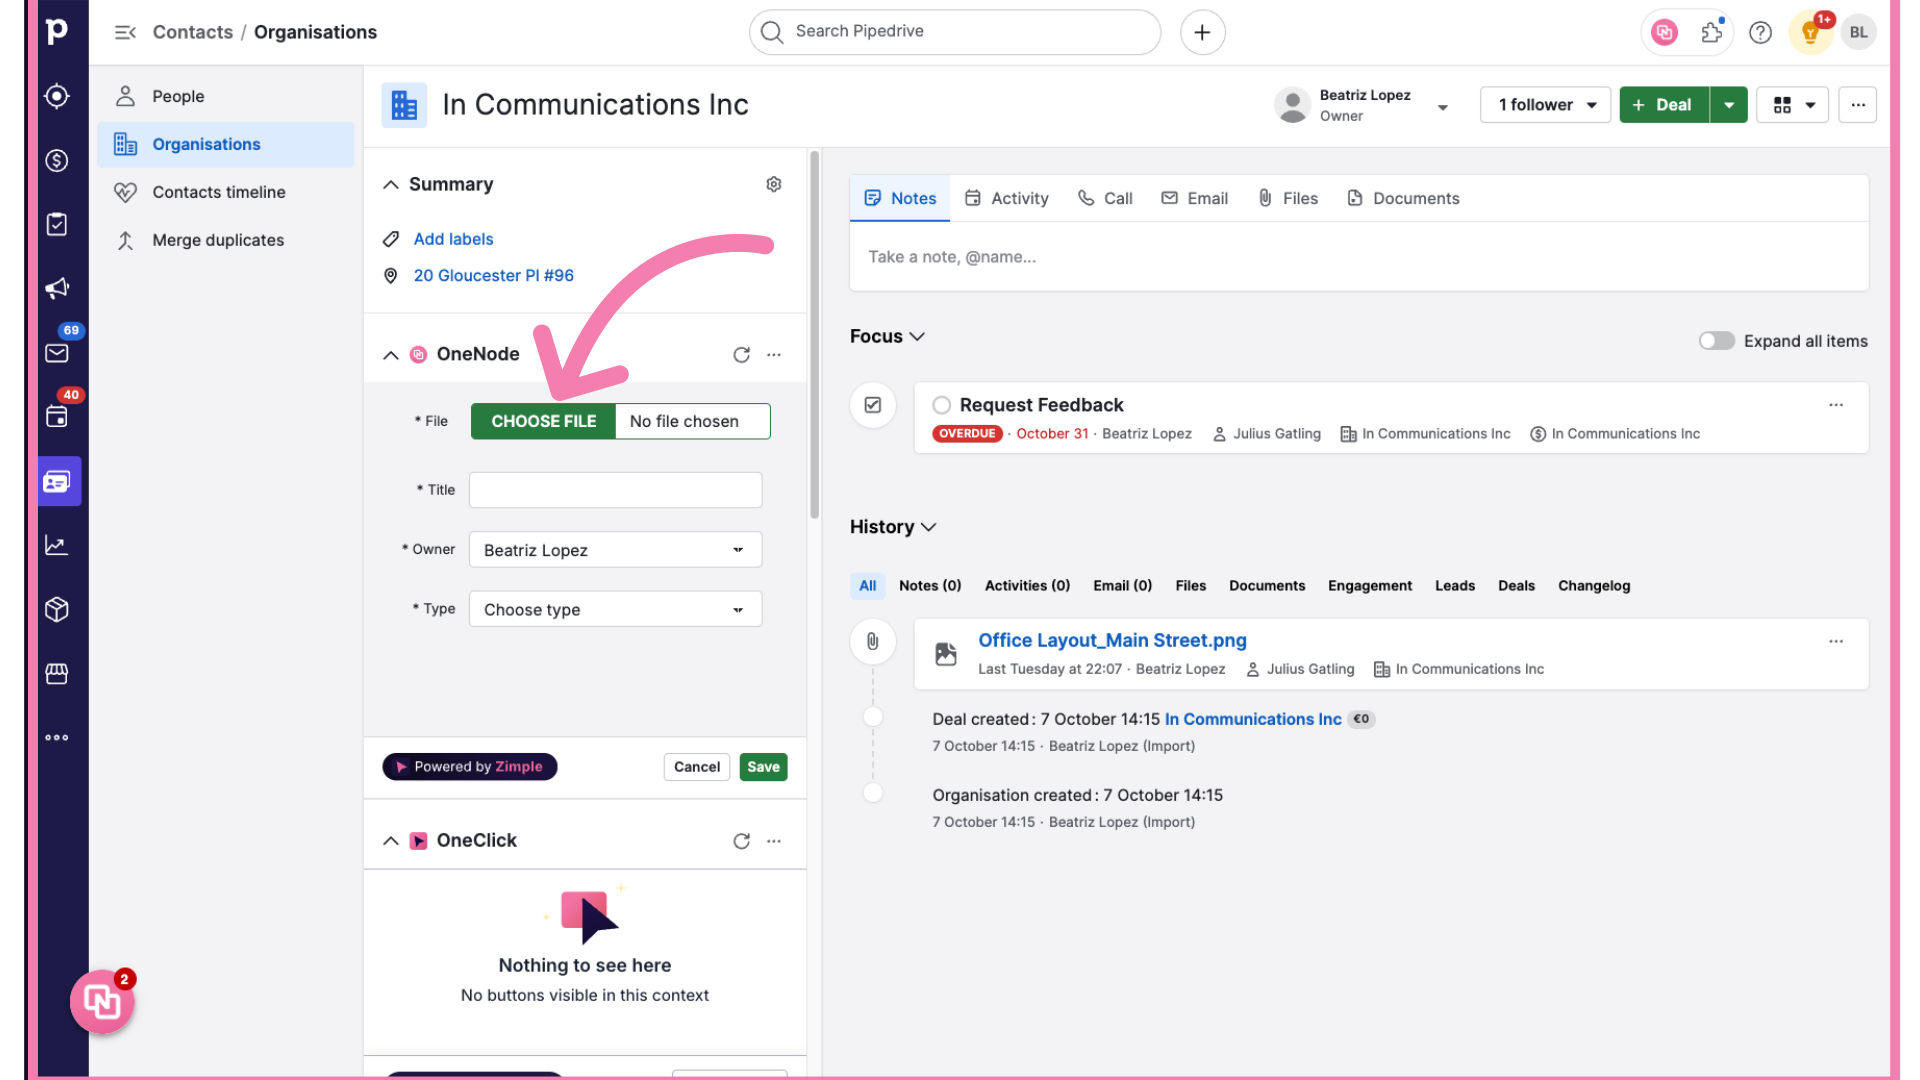
5. Click "Choose file"
Now Click on the "Choose File" button
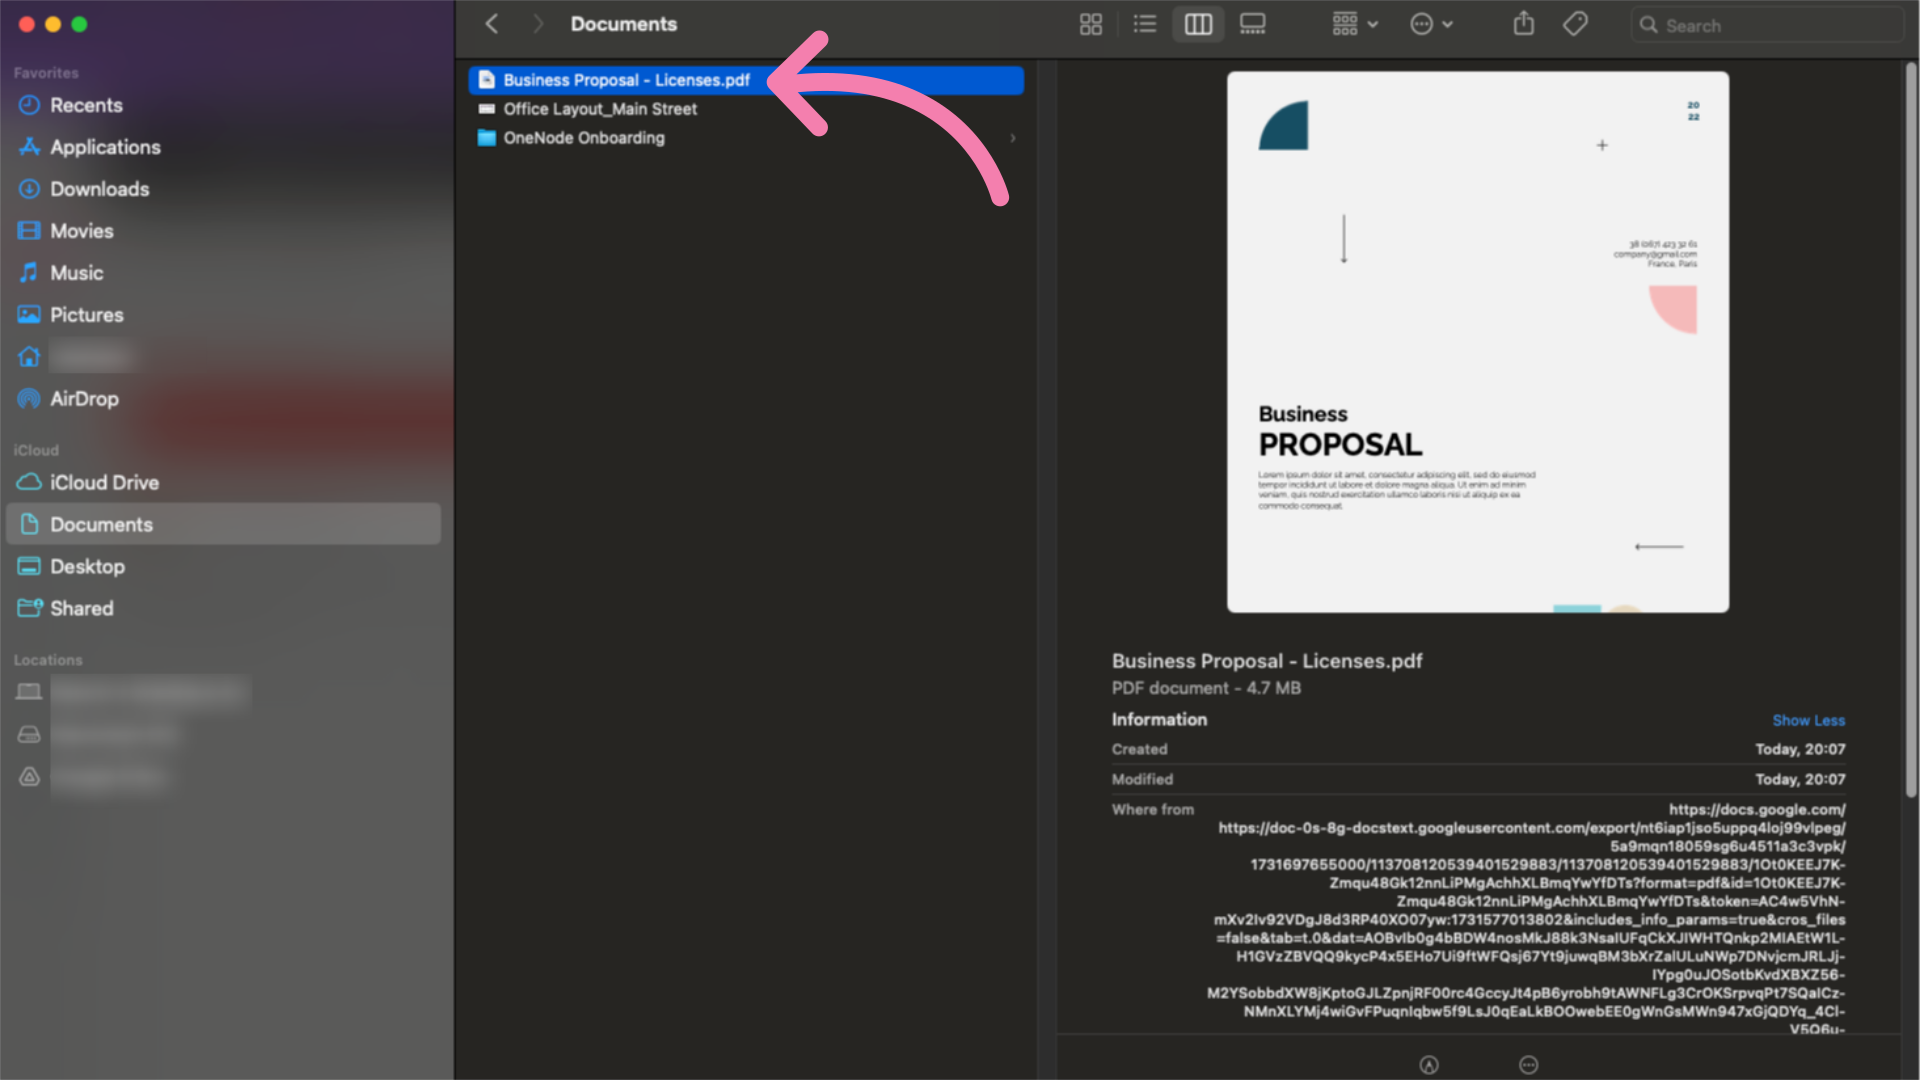
6. Select the document
and select the document from your files
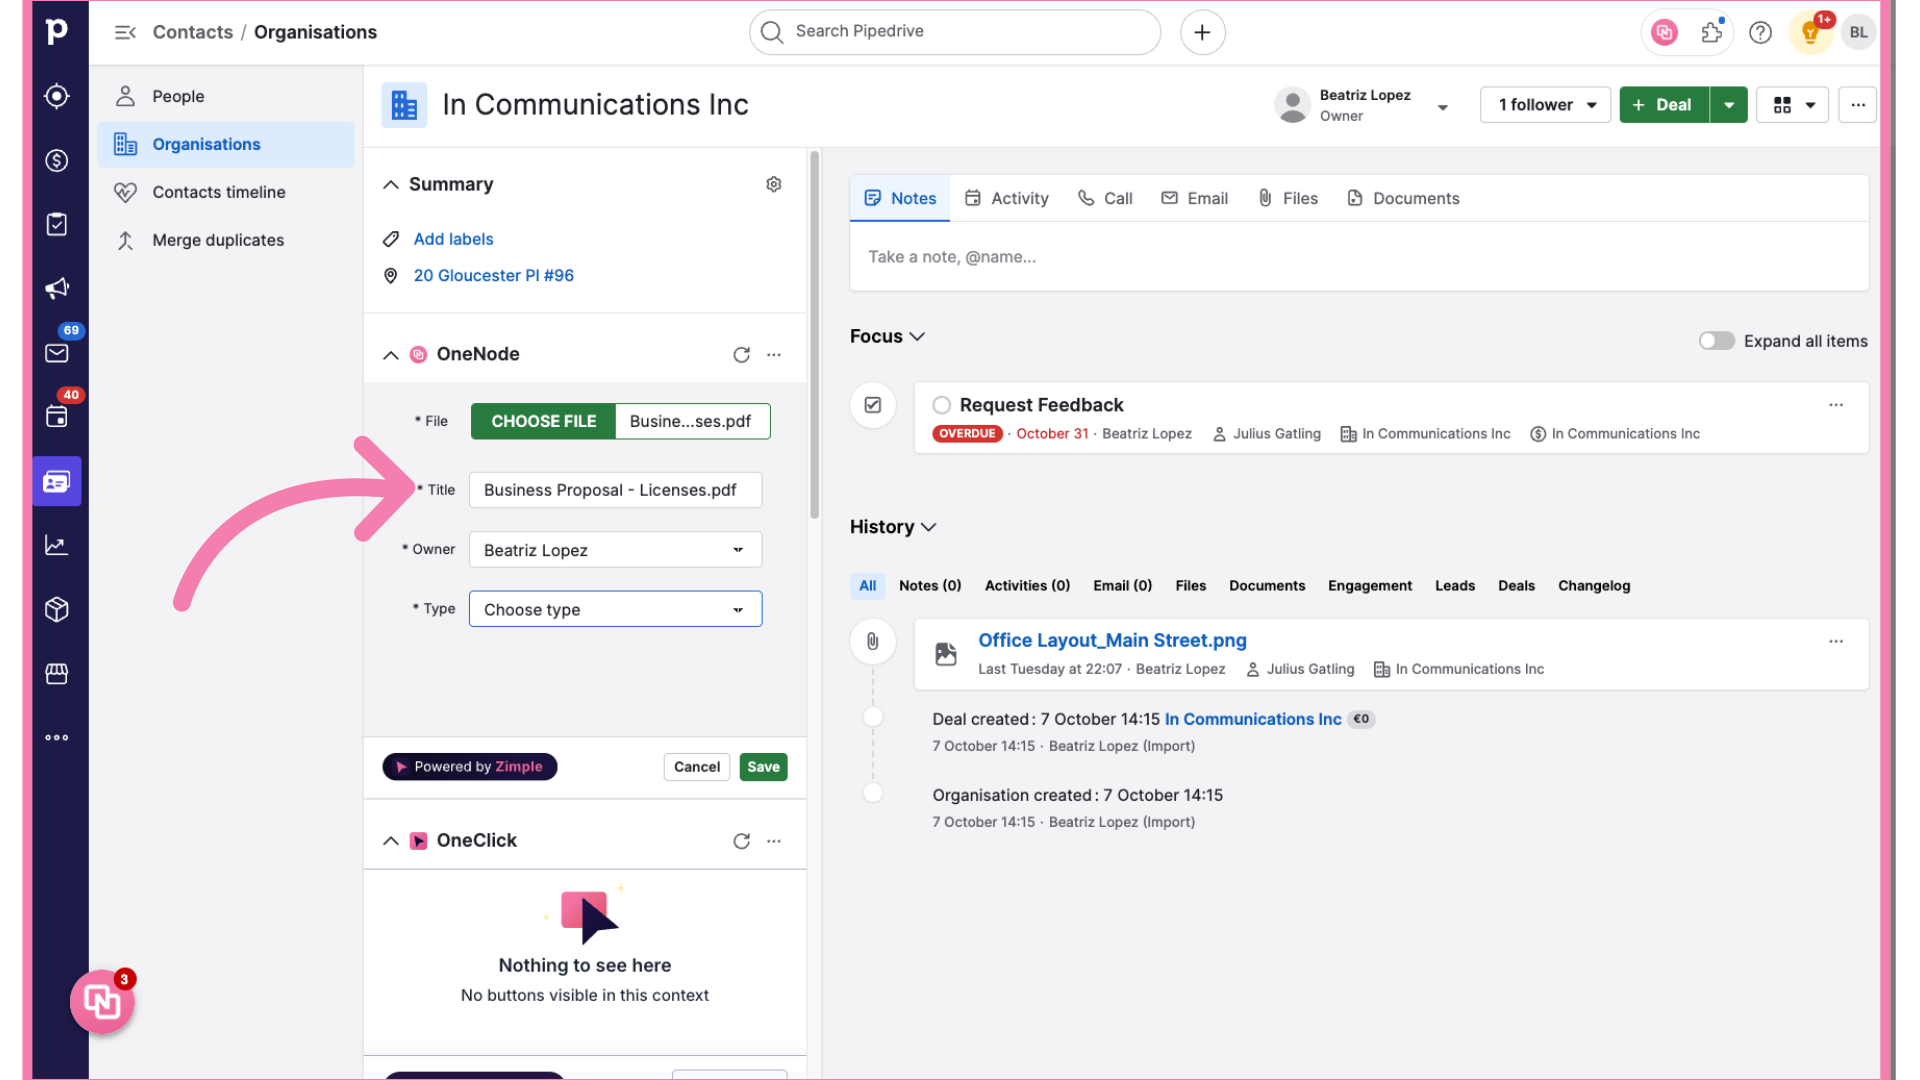
7. Type a document title
Type a Document title or keep the original file name if you'd like.
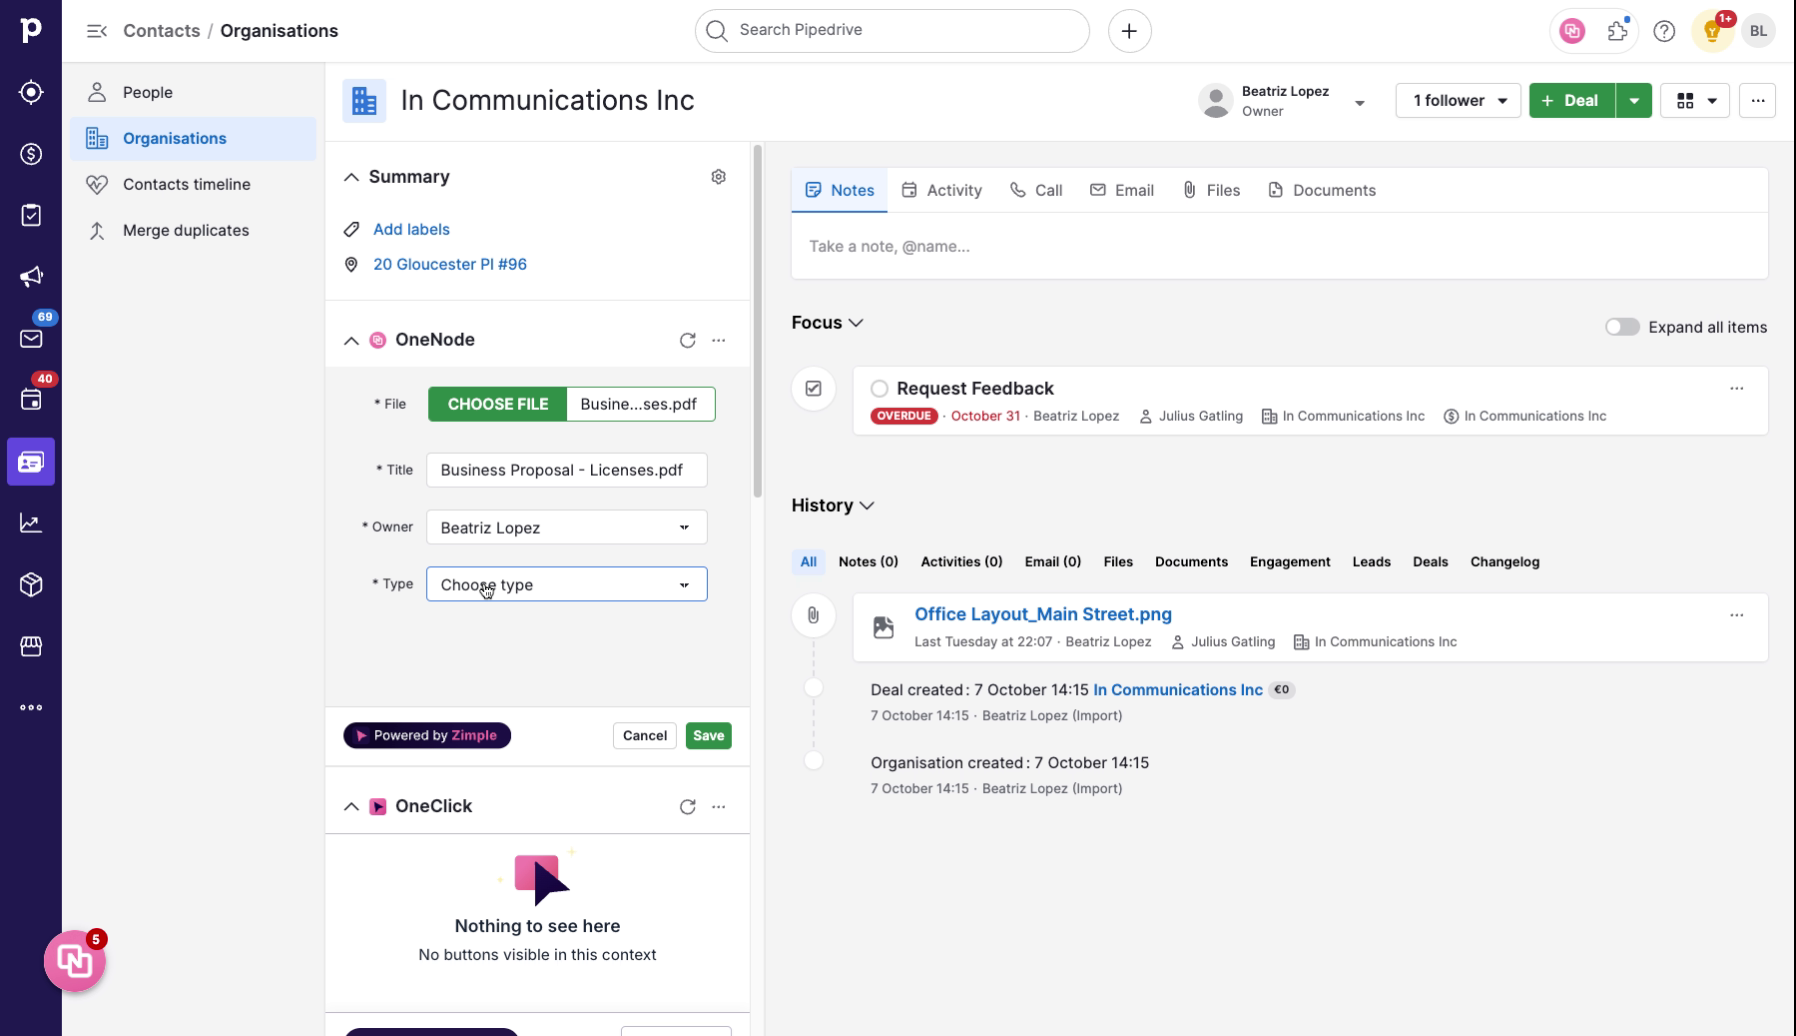
8. Select "Proposal"
and then, for the Document Type field, select "Proposal"
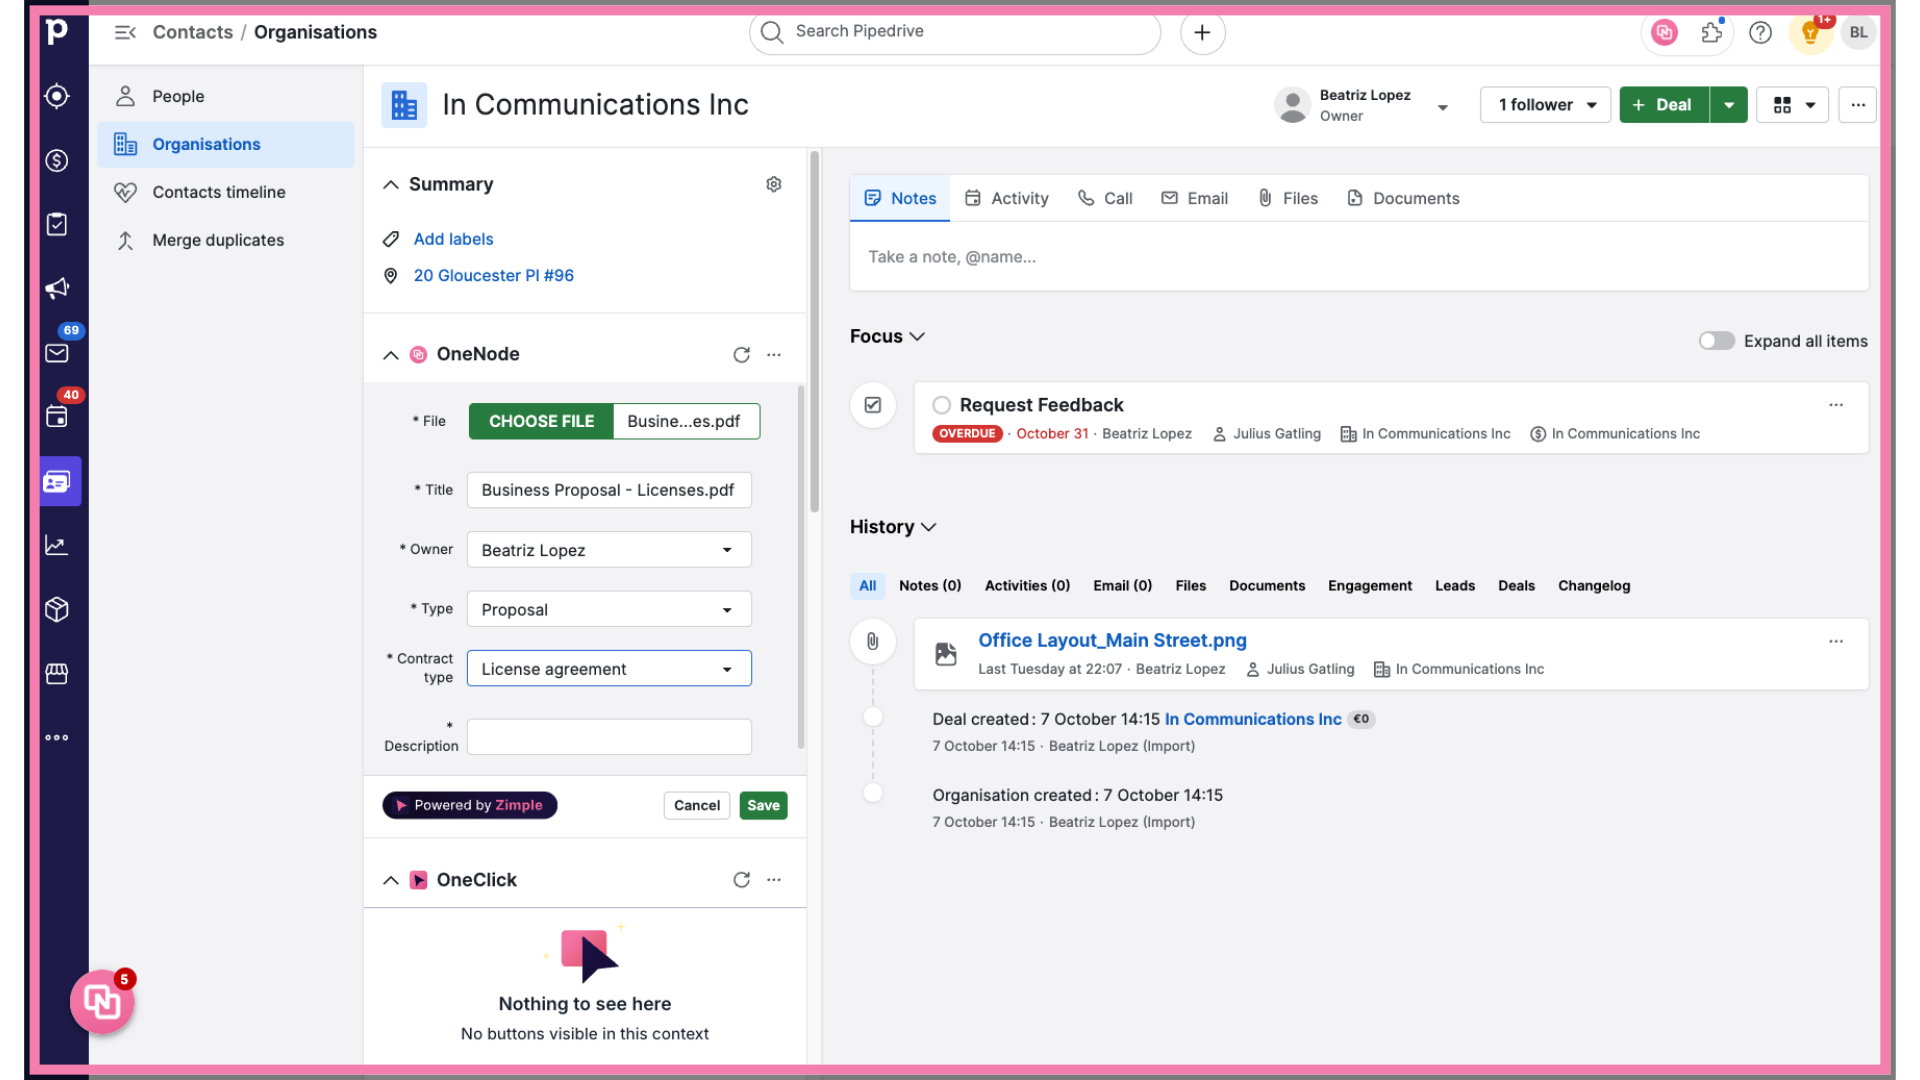
9. Complete the new fields
Two new fields will appear. Choose the contract type that matches this License Proposal. In this case it is the License Agreement
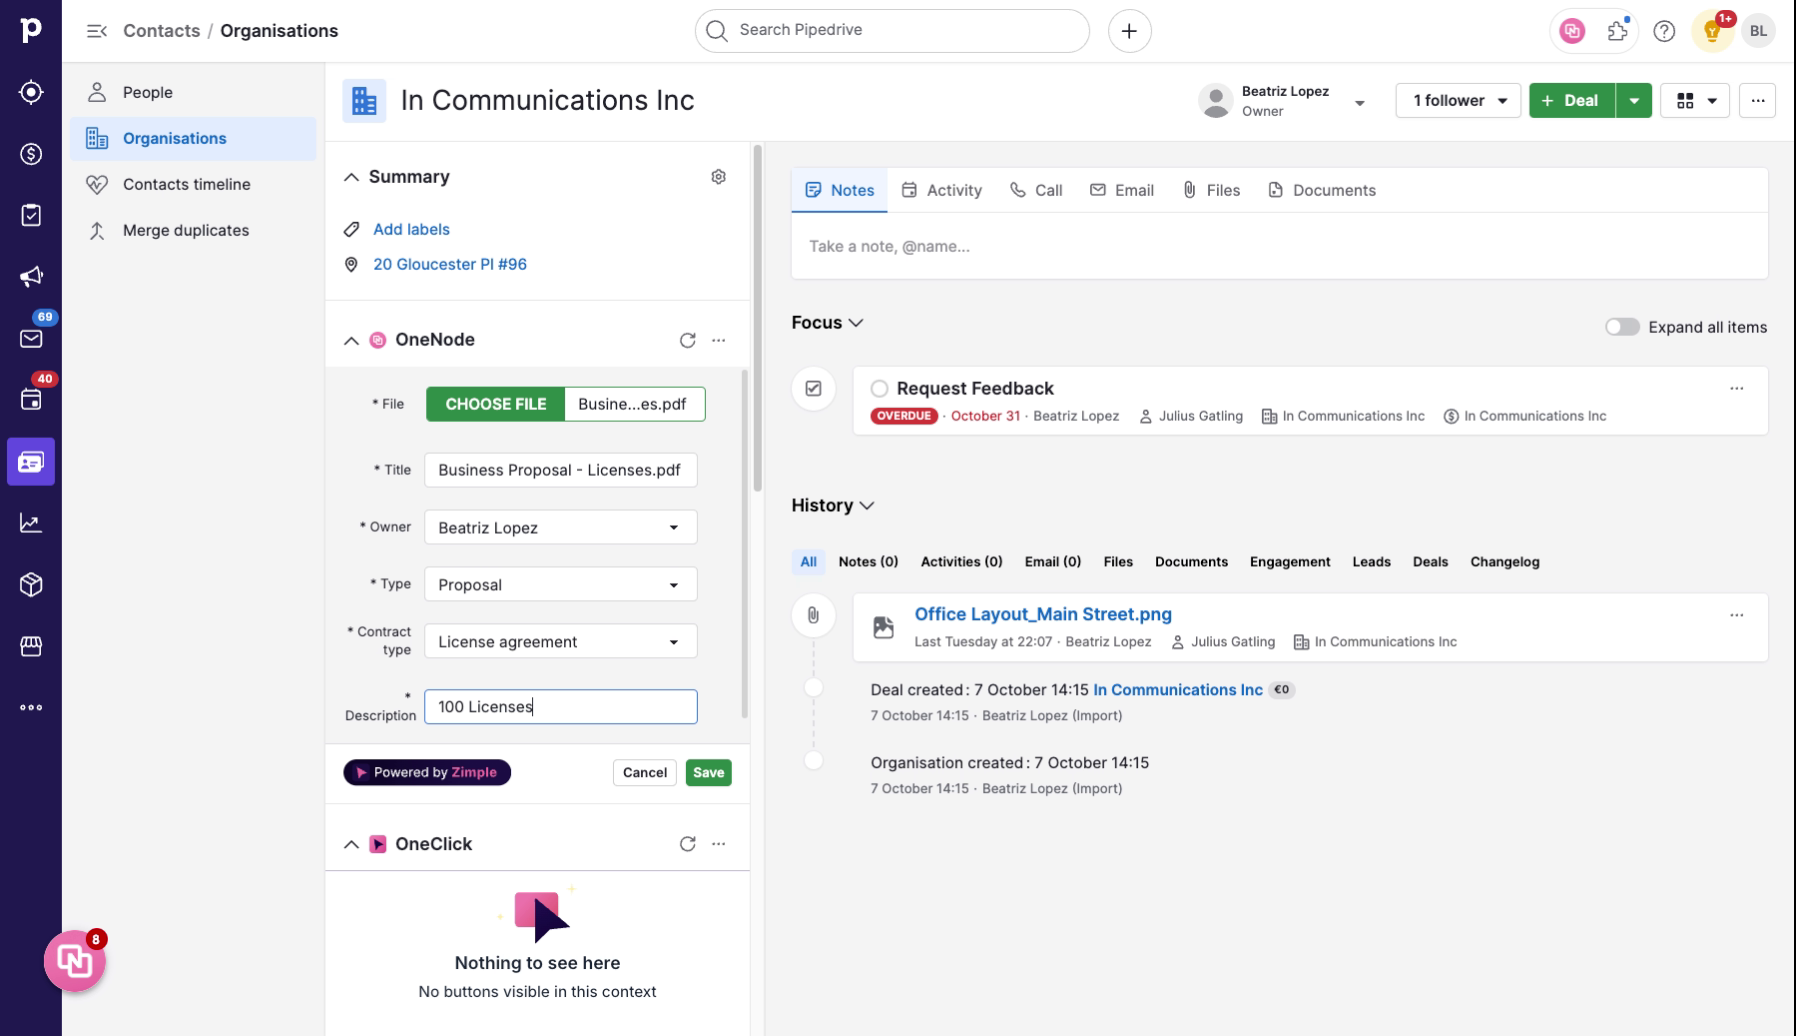
10. Add a description
Type any additional information in the Description field
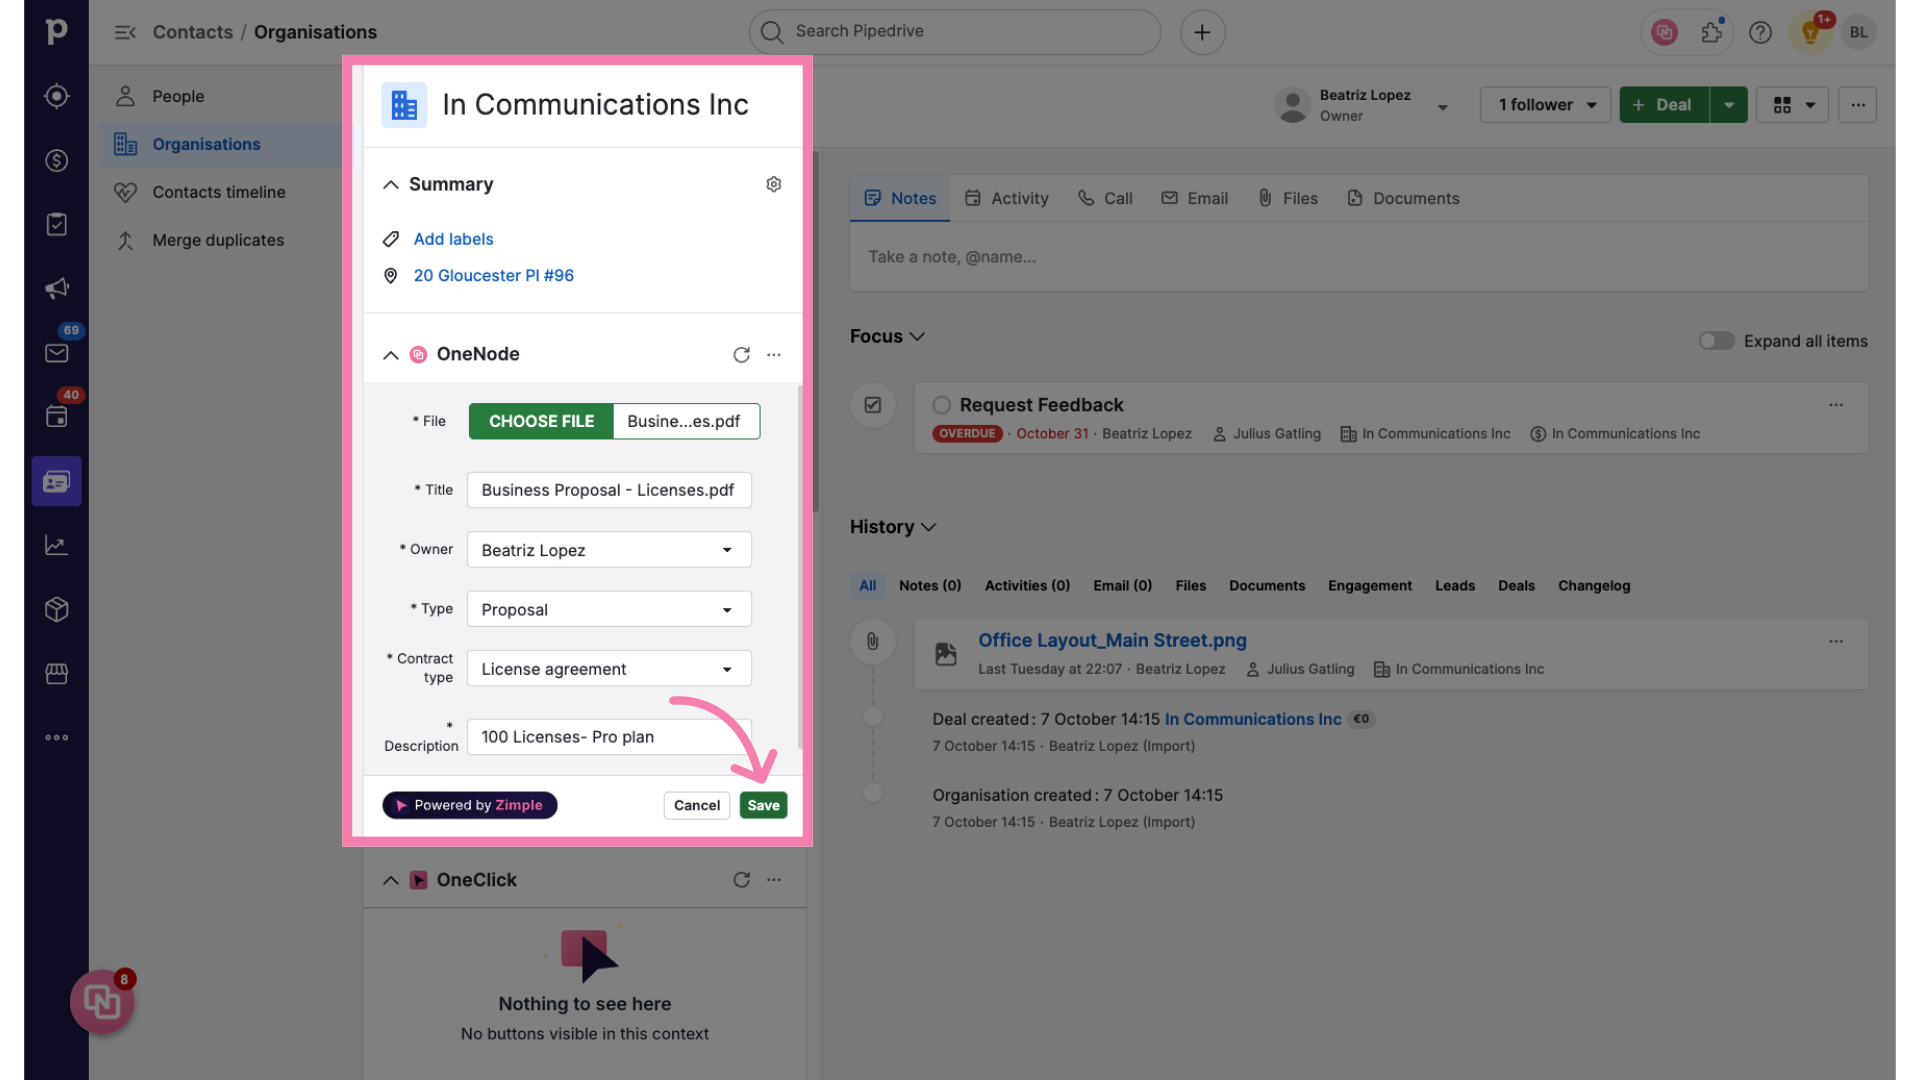
11. Click "Save"
And lastly, Save the changes made by clicking on the save button.
12. Review and edit
There you go! The Proposal for 100 licenses has been added to this organization.
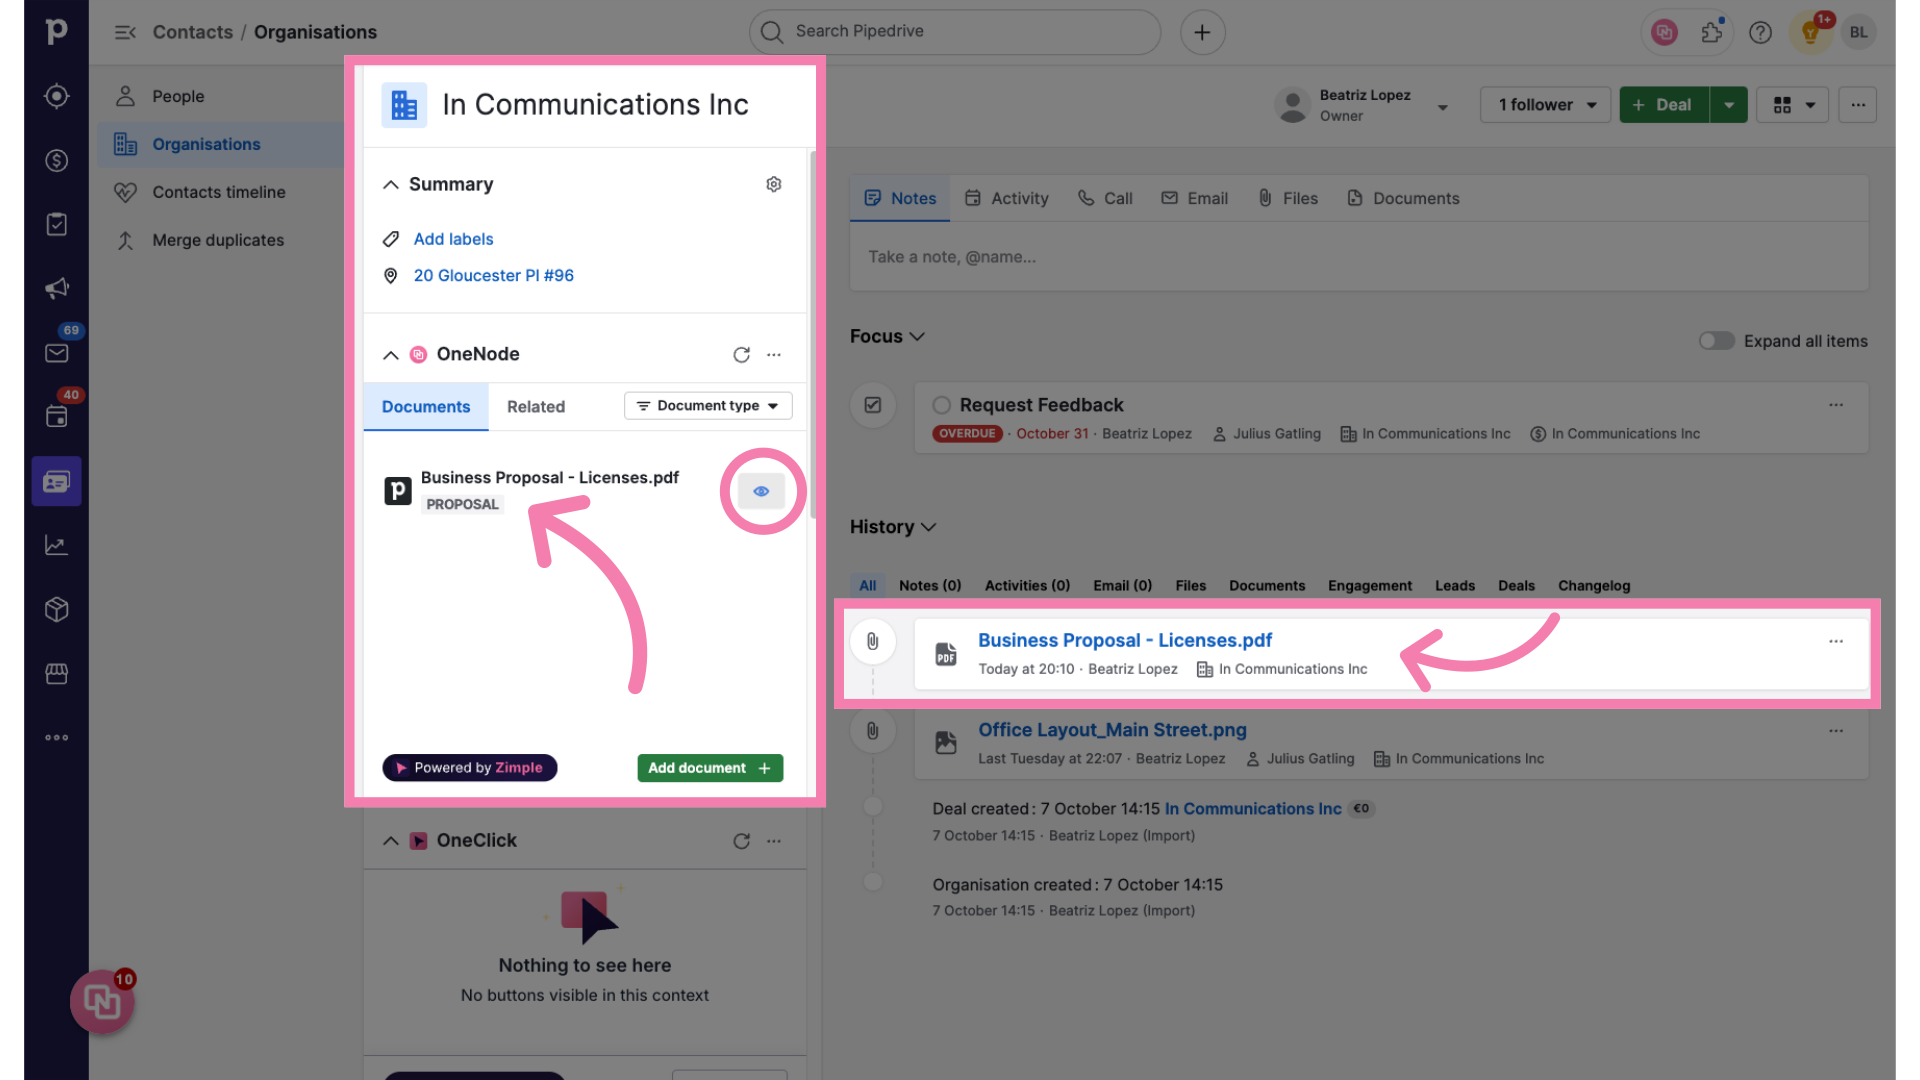
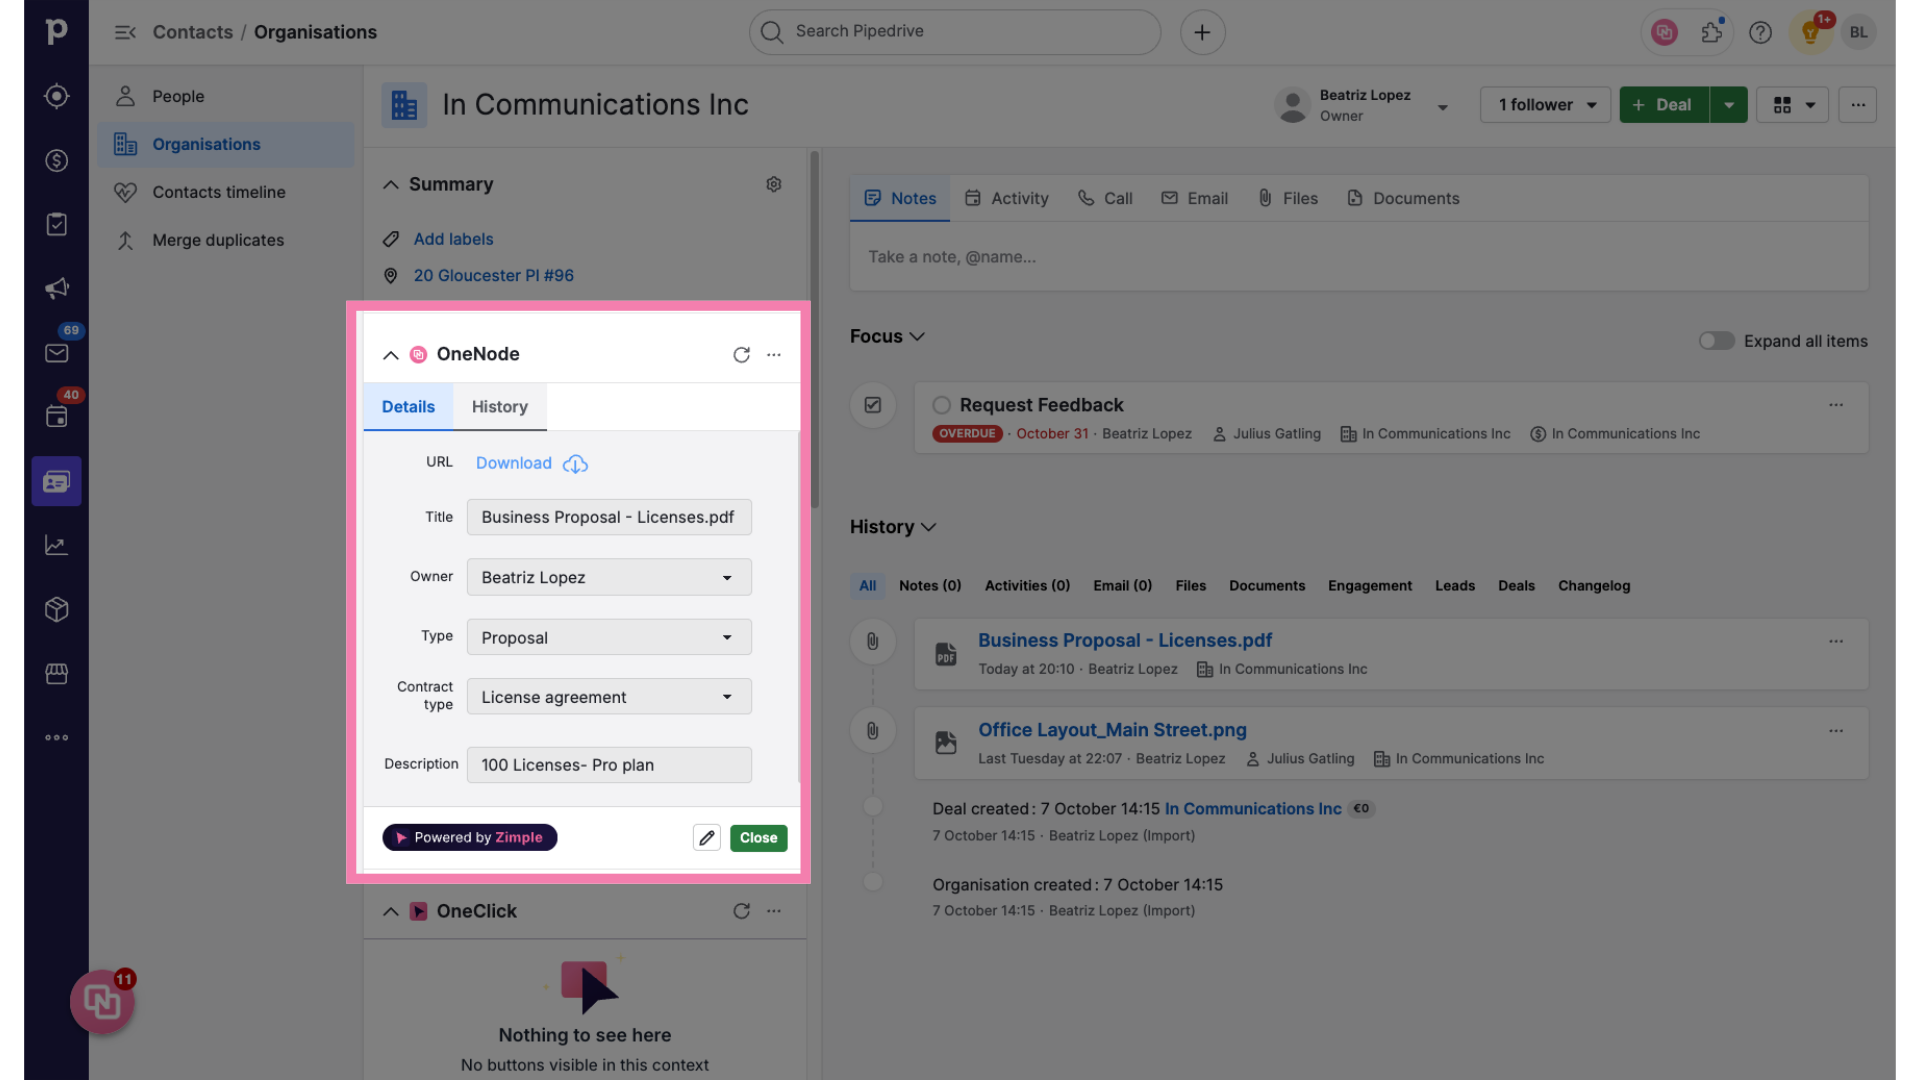
13. Check details and history
Edit and view the document details and history anytime from the OneNode panel at the Organization view
14. Use the Search tool
Or find this document by clicking on OneNode's main panel anytime and typing three letters in the Search bar.
