Admin part
Floor plan Management -Setup 5 fields
Real estate developers know how time-consuming it can be to share and track floor plans and property listings with potential clients.
1. Introduction
In this guide, we'll show you how to setup and manage Floor Plan Documents in Pipedrive with OneNode.
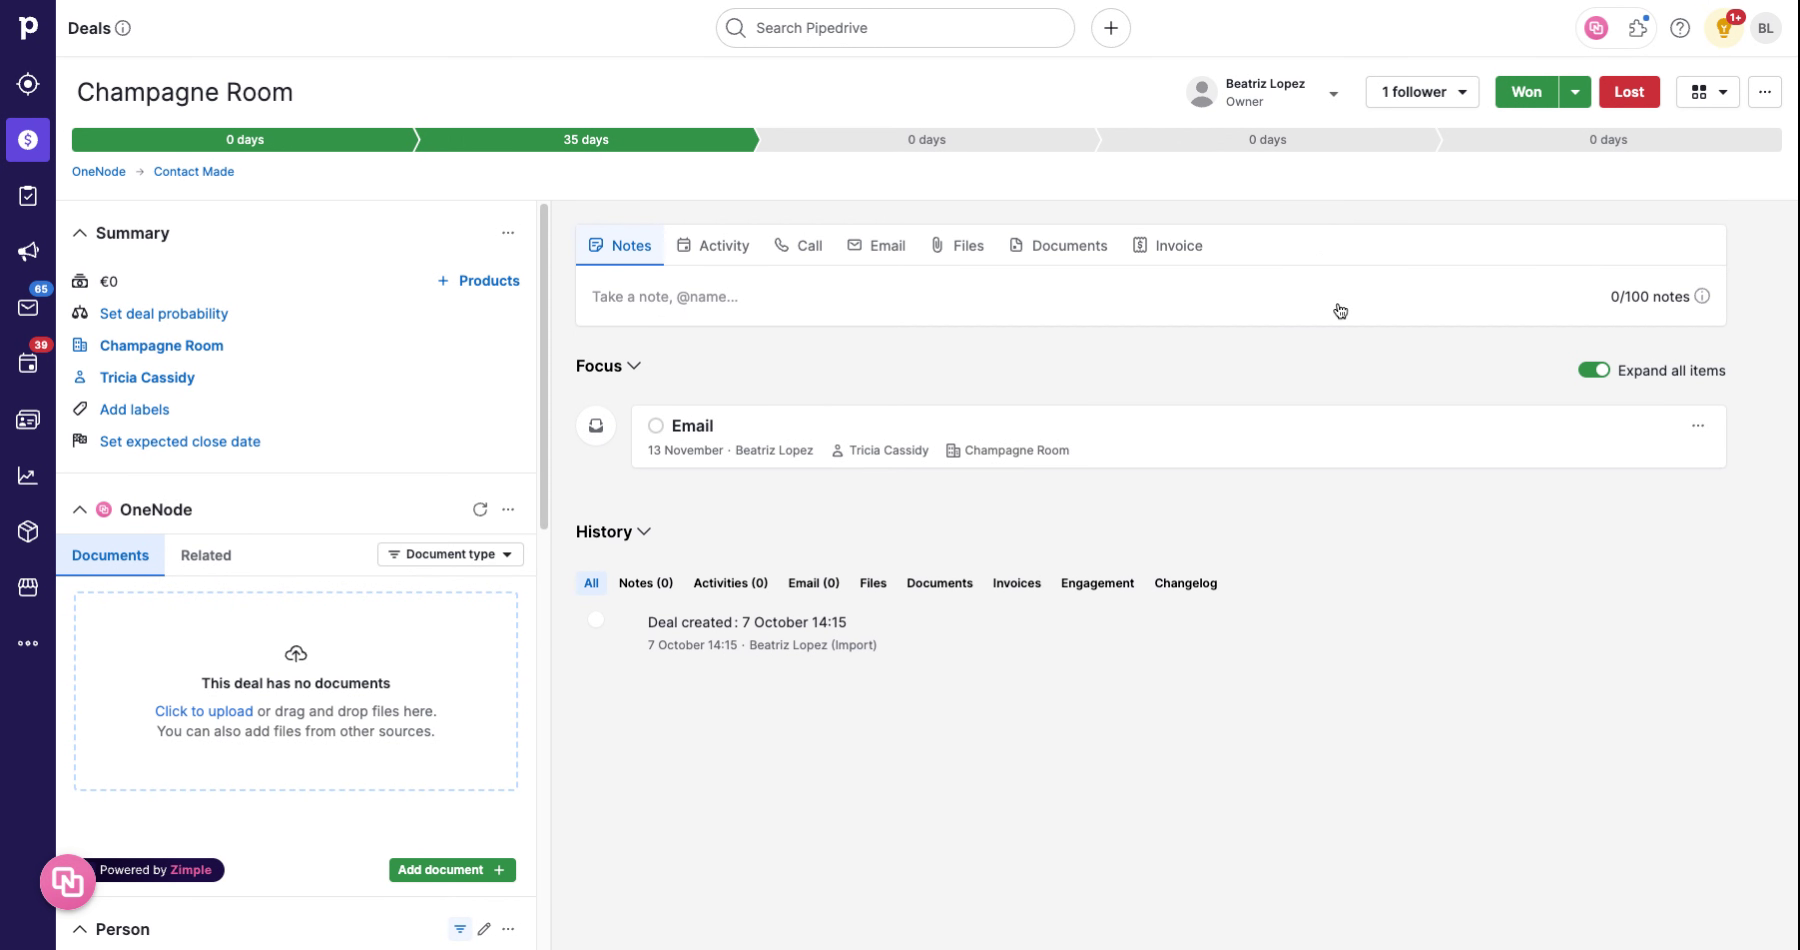
2. Open OneNode
There are endless ways to classify floor plans and properties, so let's dive in with an example. Open OneNode.
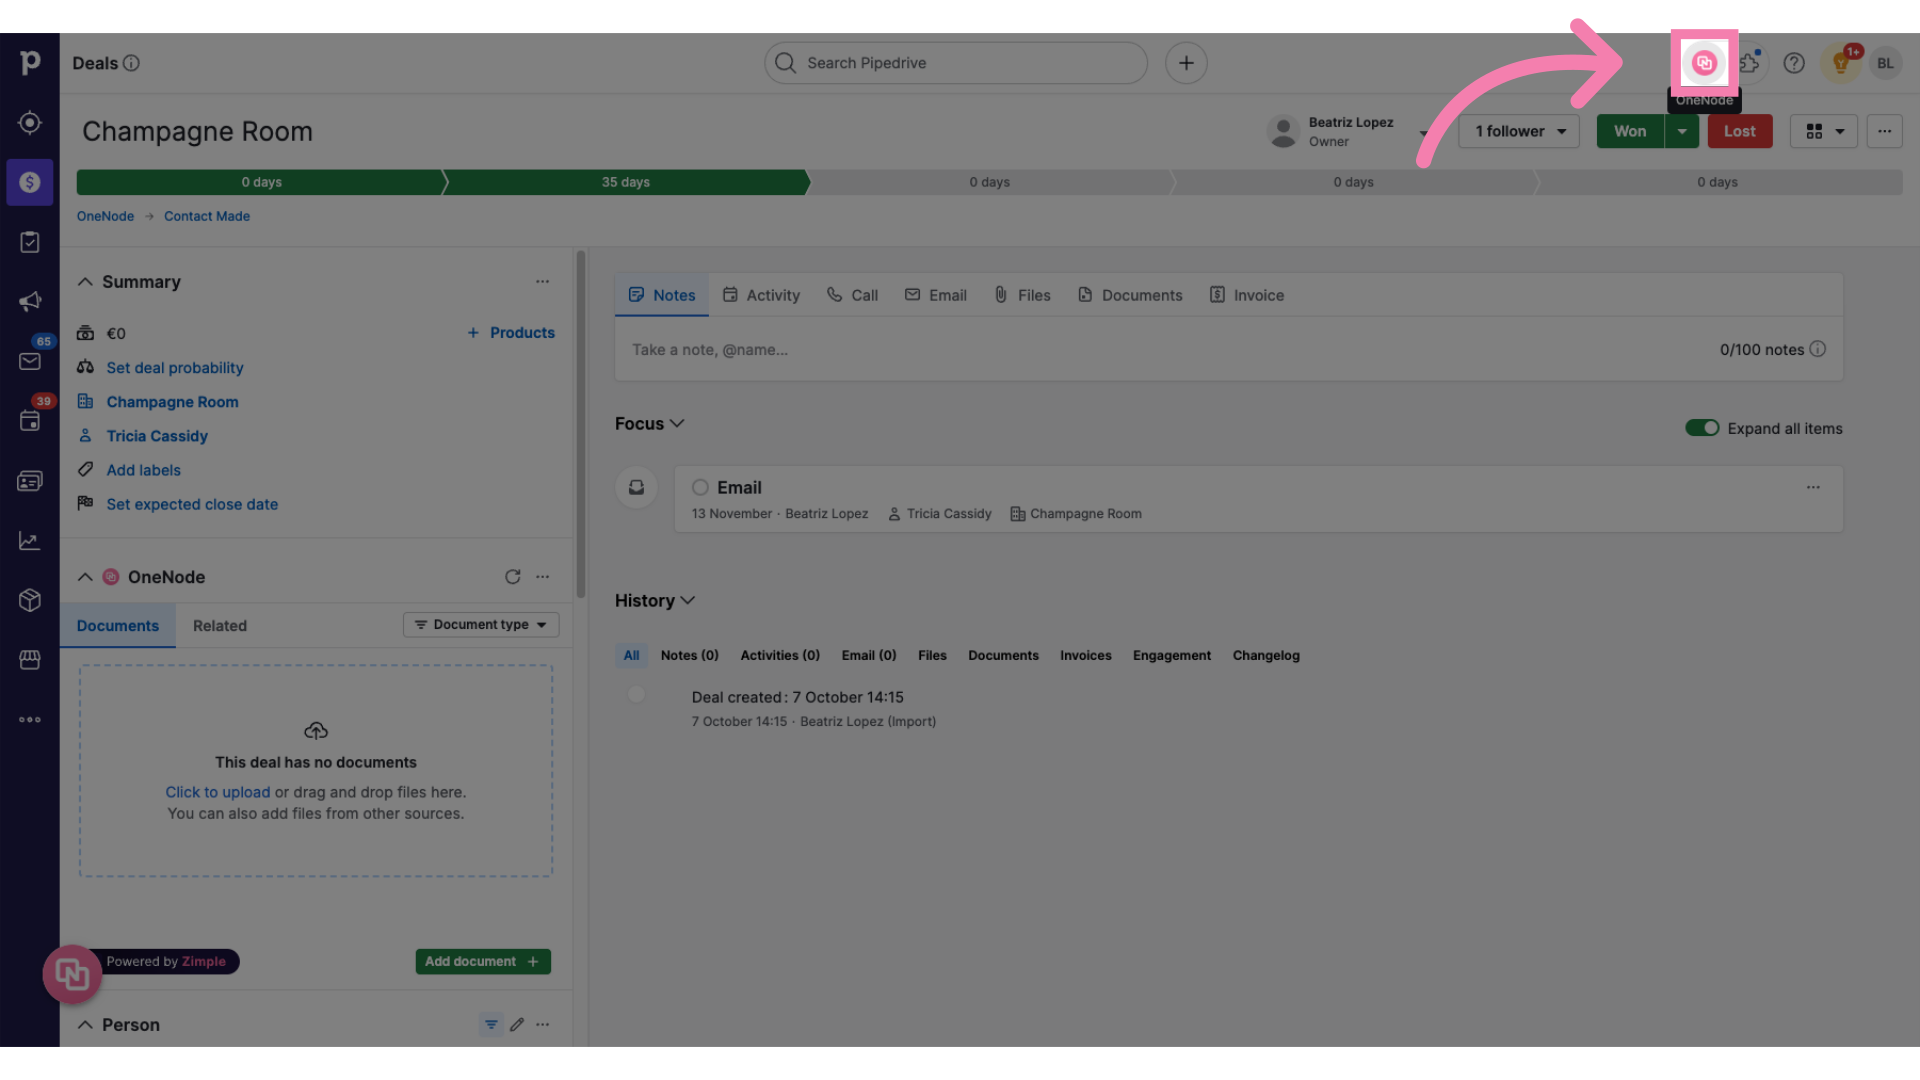
3. Click "Settings"
Click on Settings. If you are not an admin, you can skip this part and watch the video on adding Floor Plan documents.
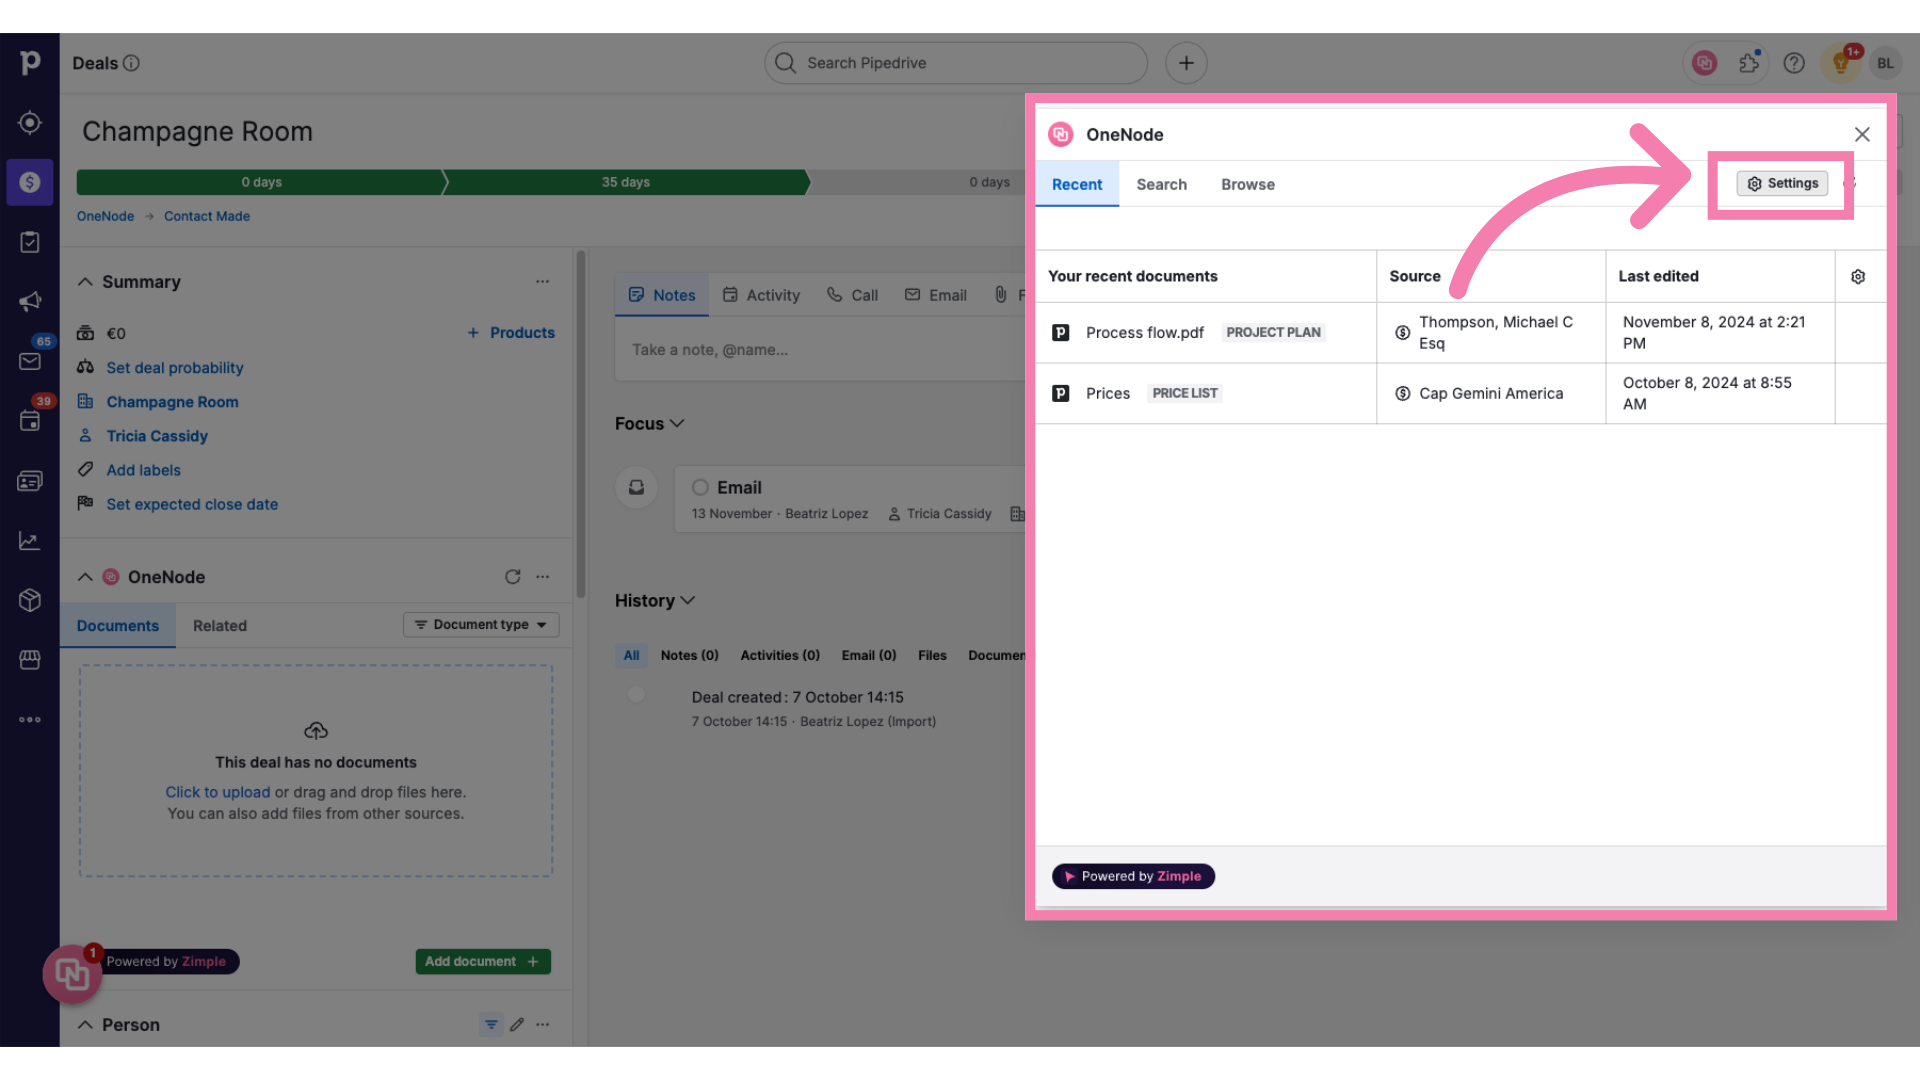
4. Click "Add new type"
Begin creating a new document type. Then we'll add fields to classify property floor plans by different criteria.
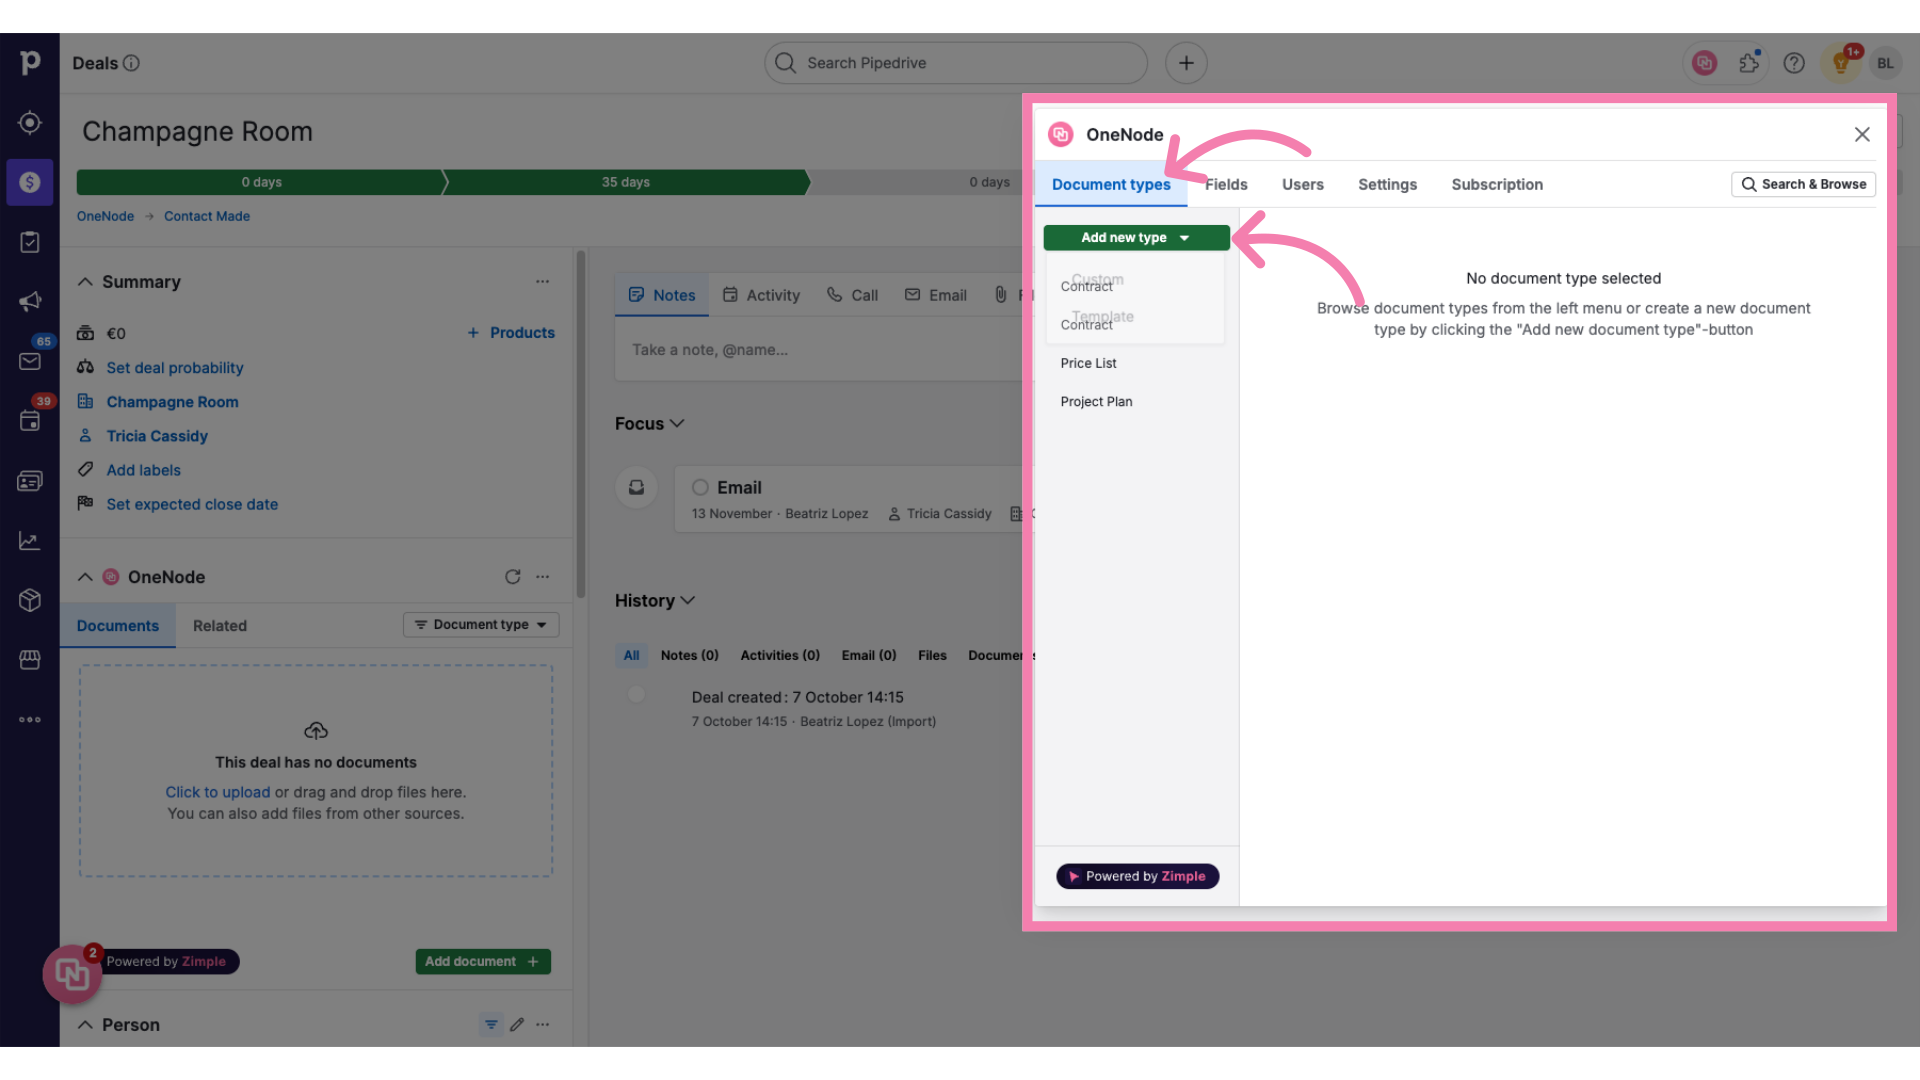
5. Click "Custom"
Select the Custom option.
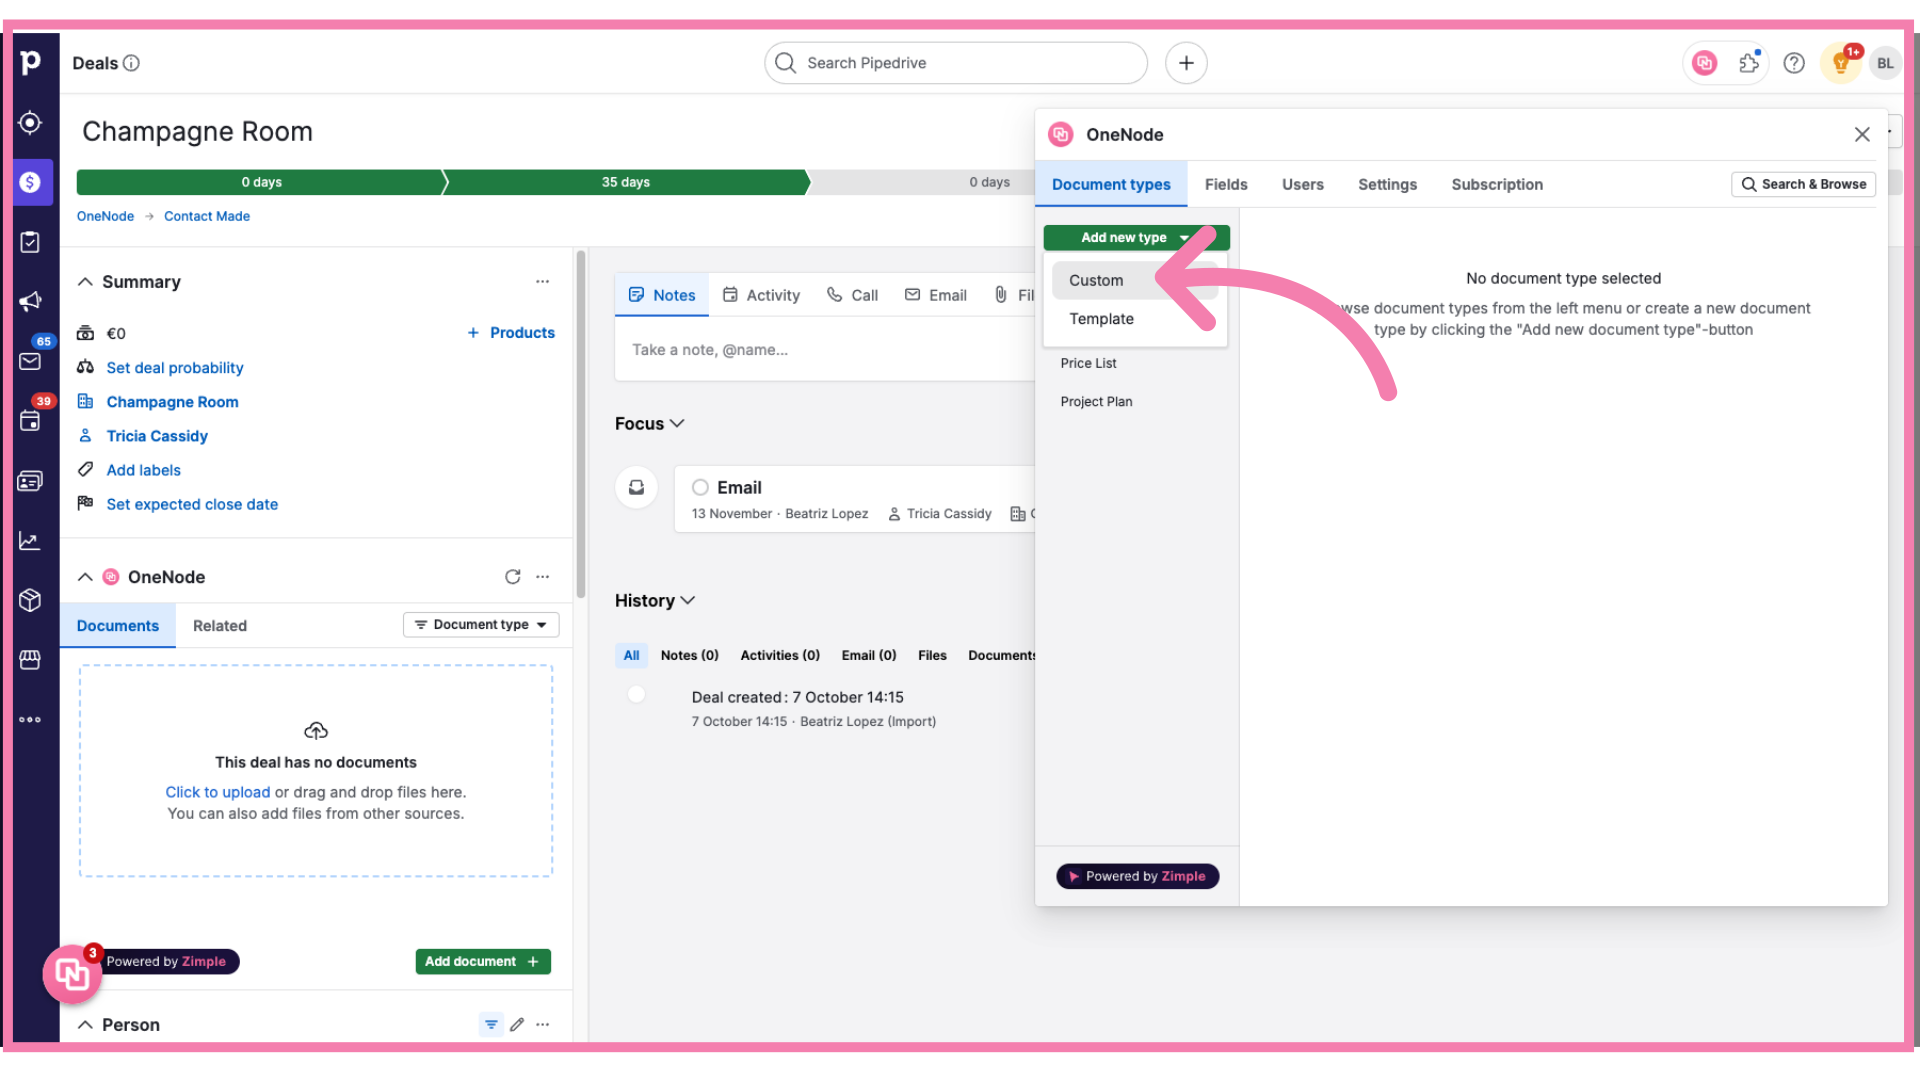
6. Fill "Floor Plan"
Type "Floor Plan", the name of the New document type
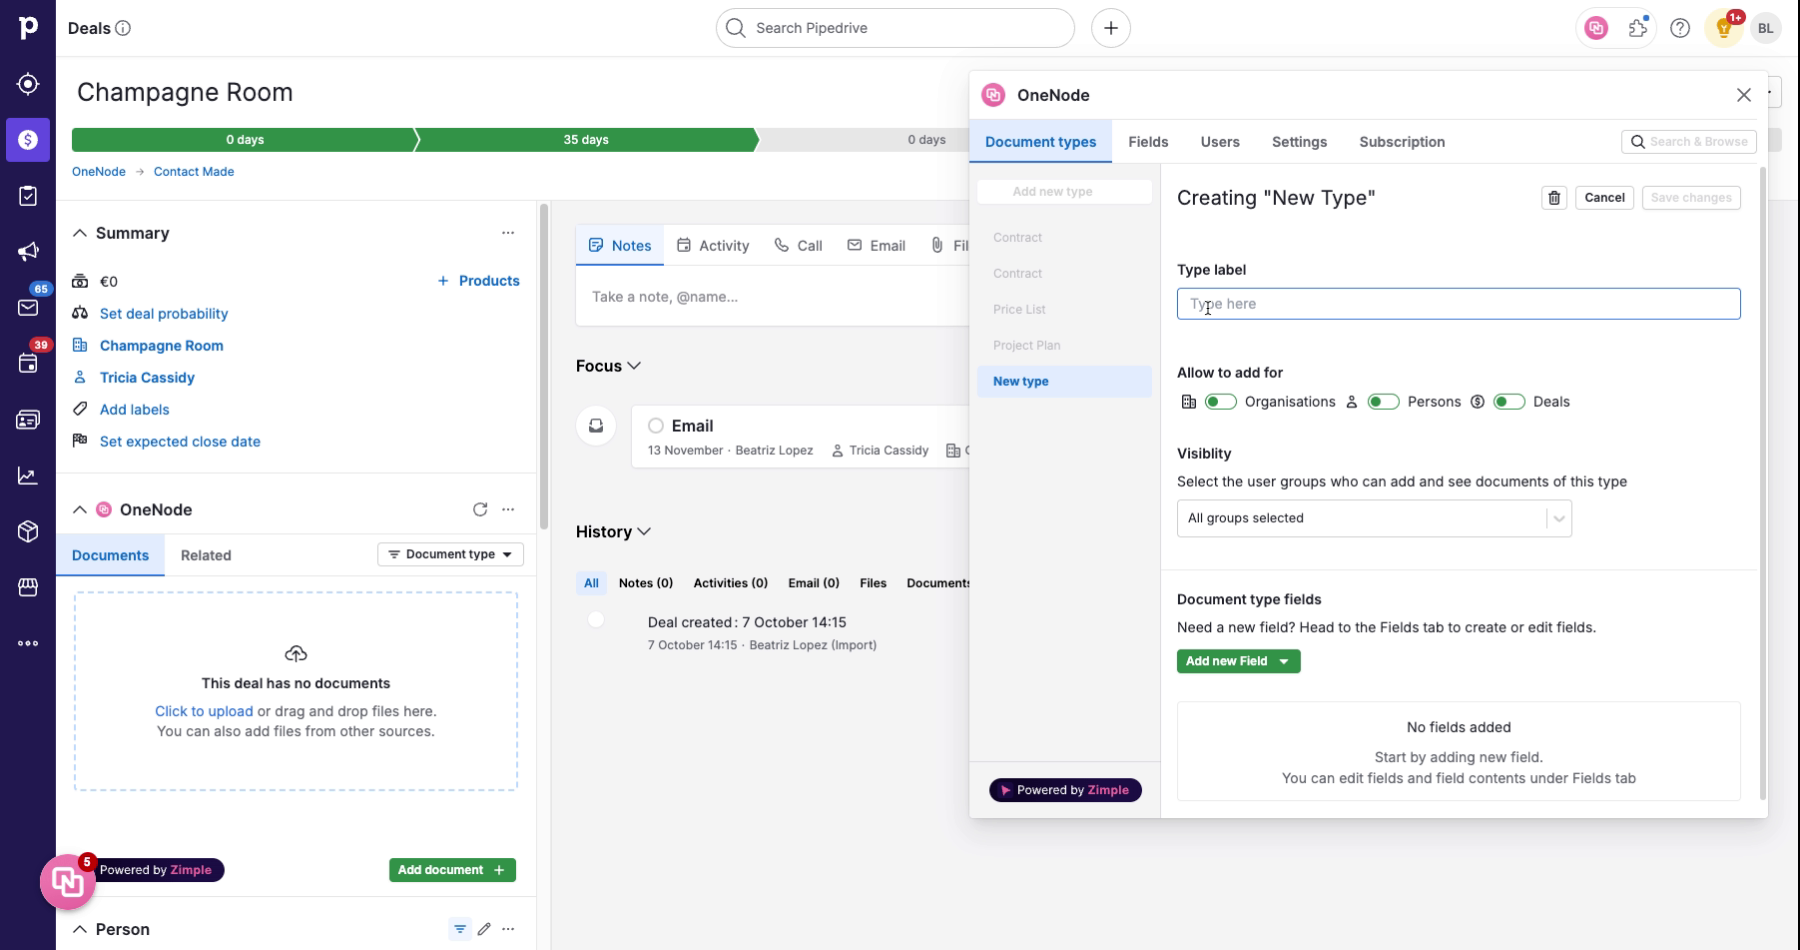
7. Toggle "on" for Persons
Toggle the switch to "on" for Persons
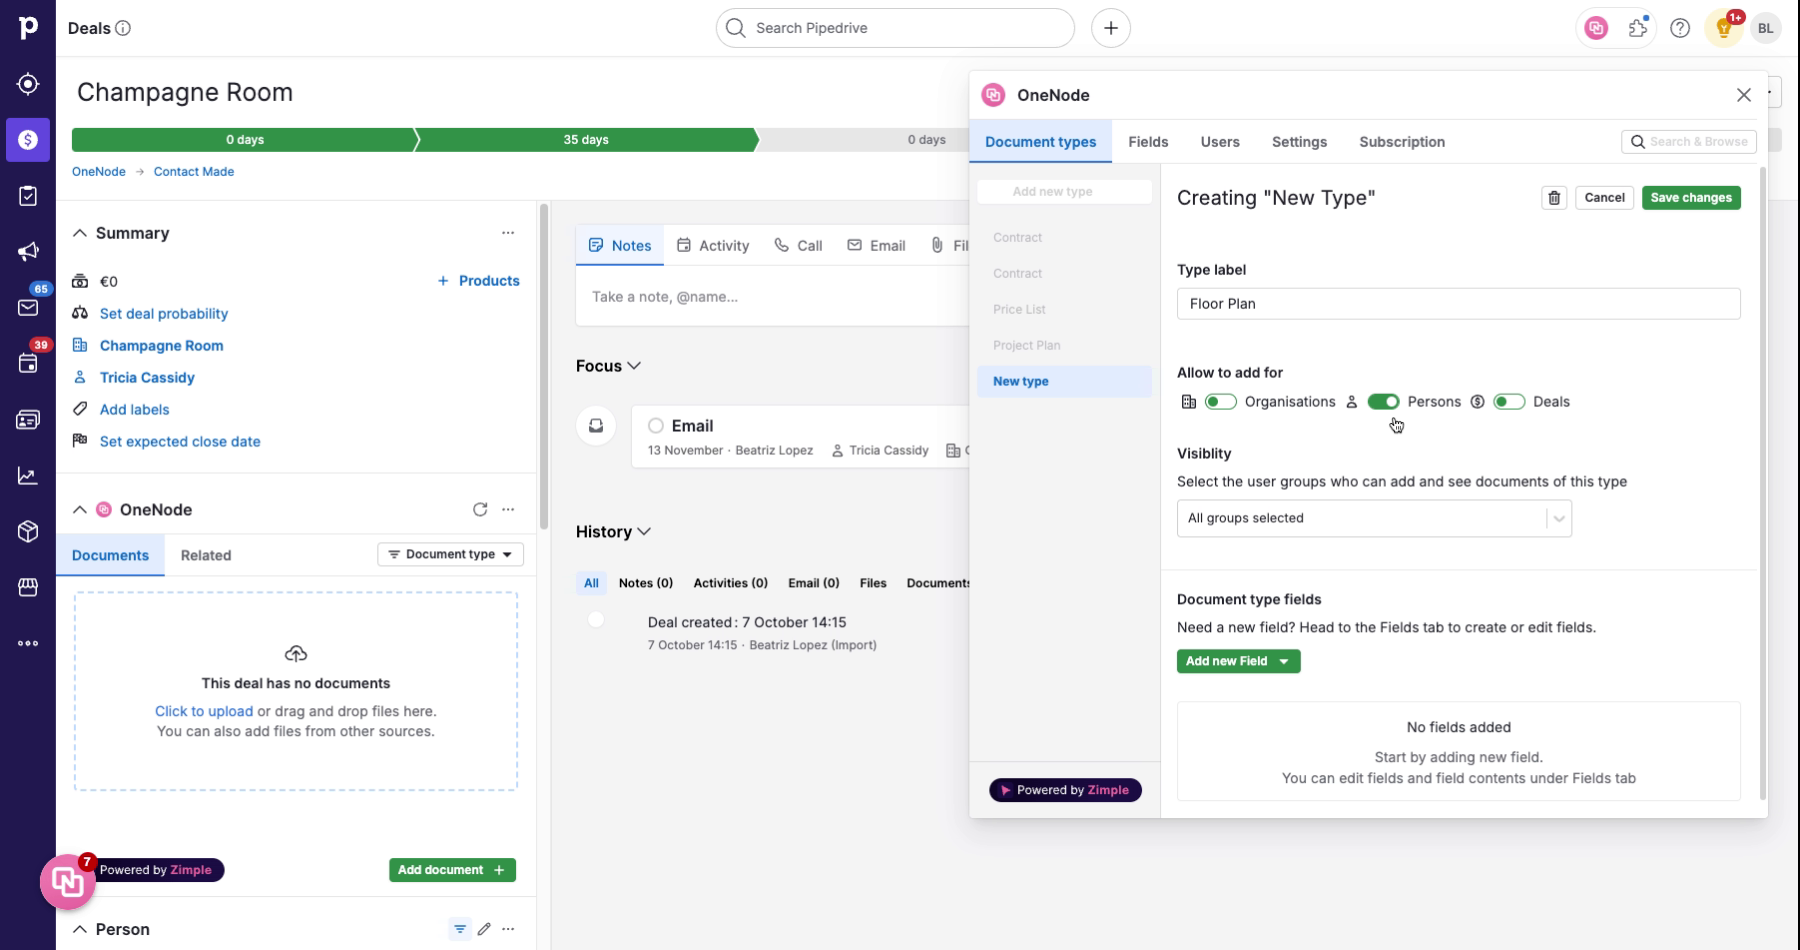
8. Toggle "on" for Deals
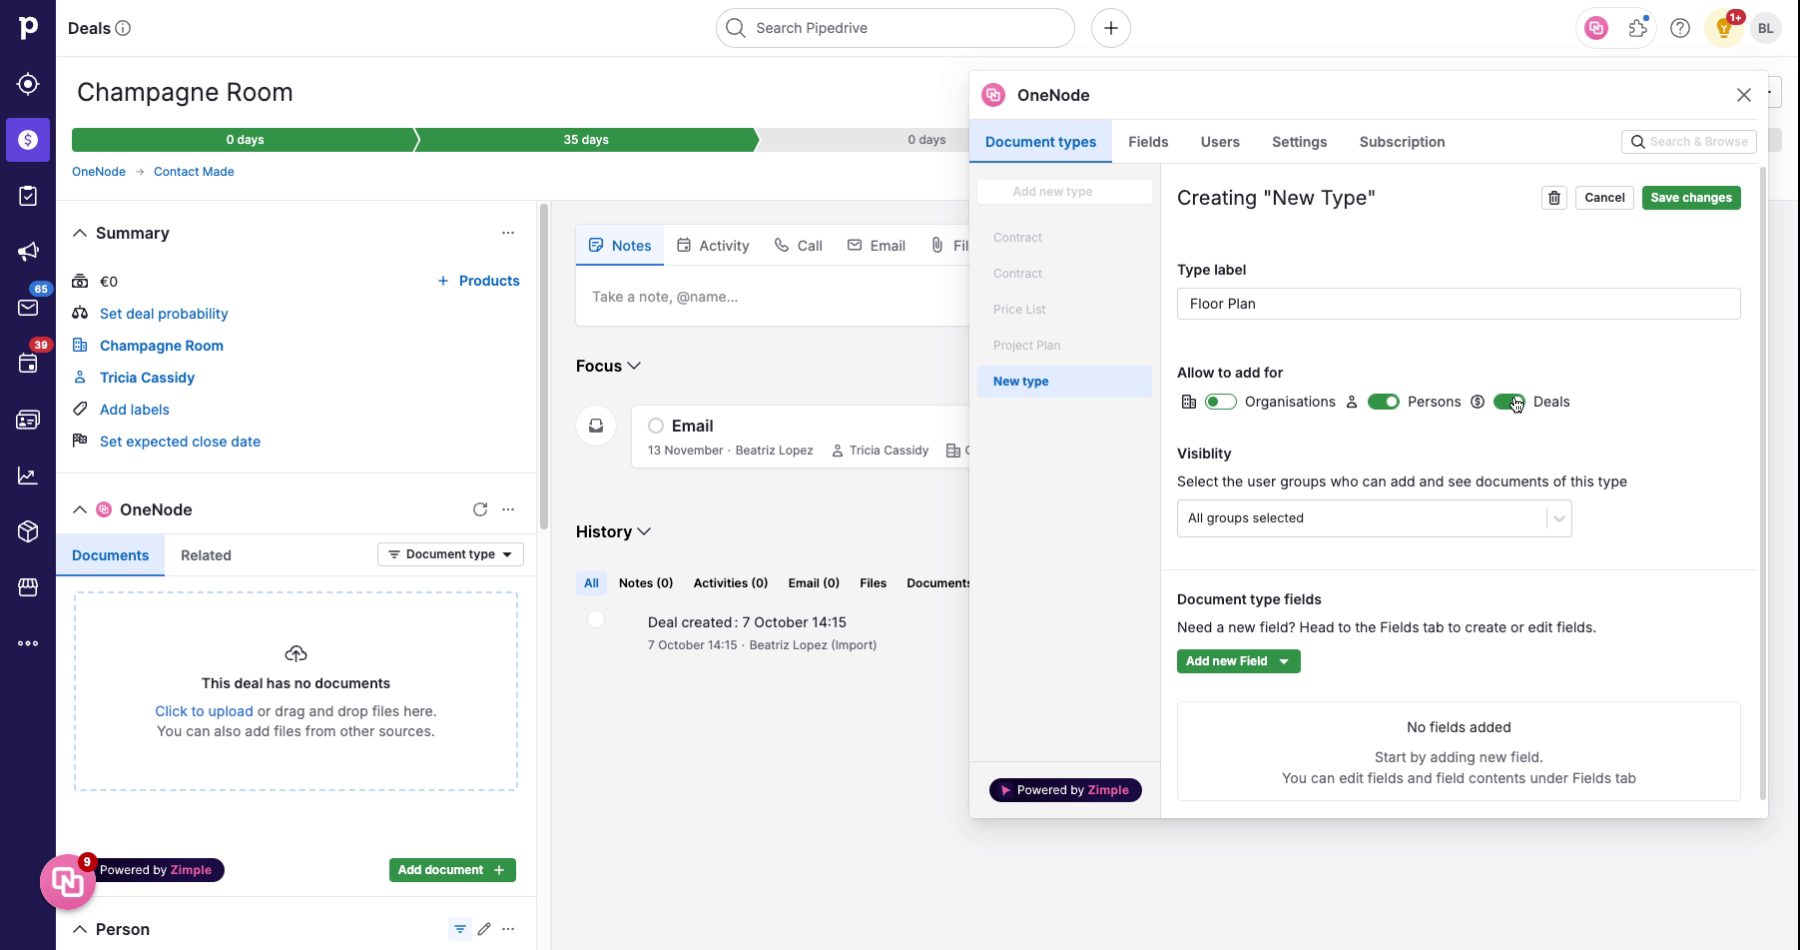
9. Define Visibility
Continue to define visibility. If you have not created any user Groups, select the "All users" option.
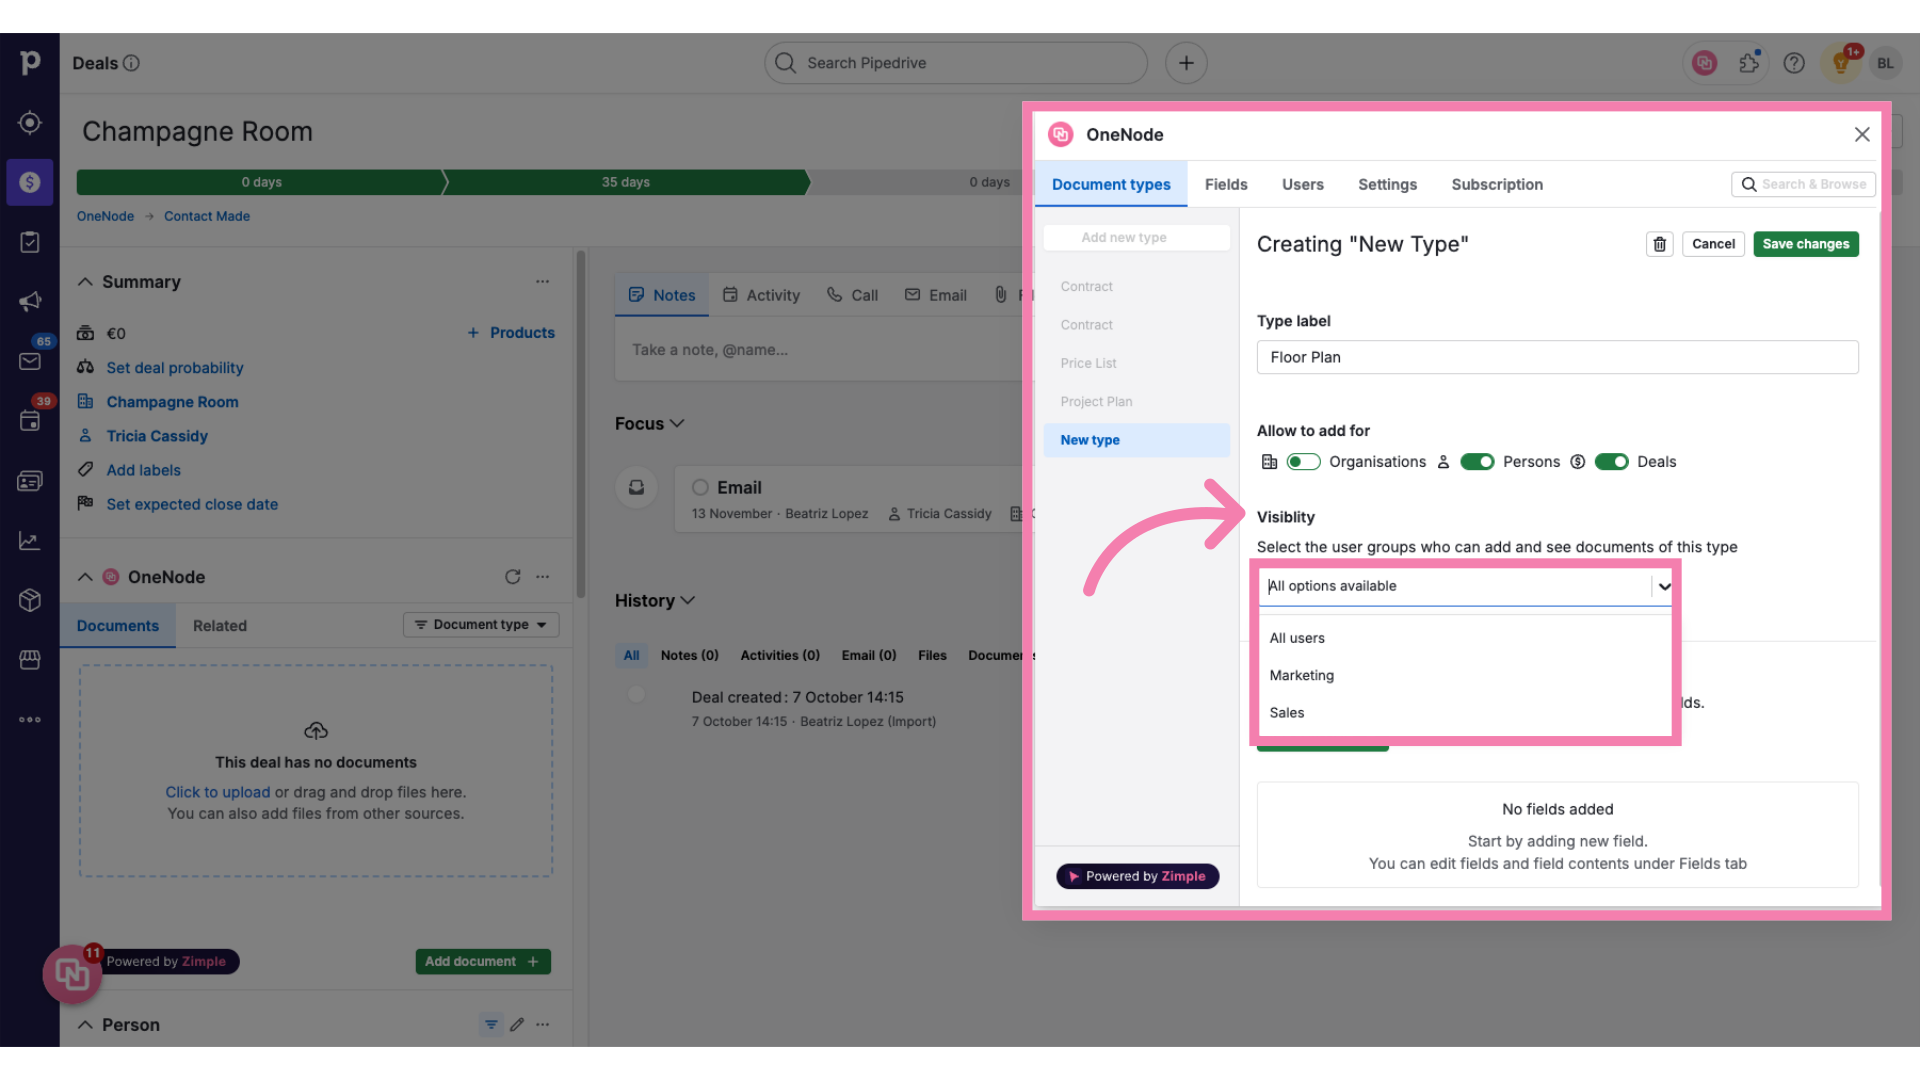
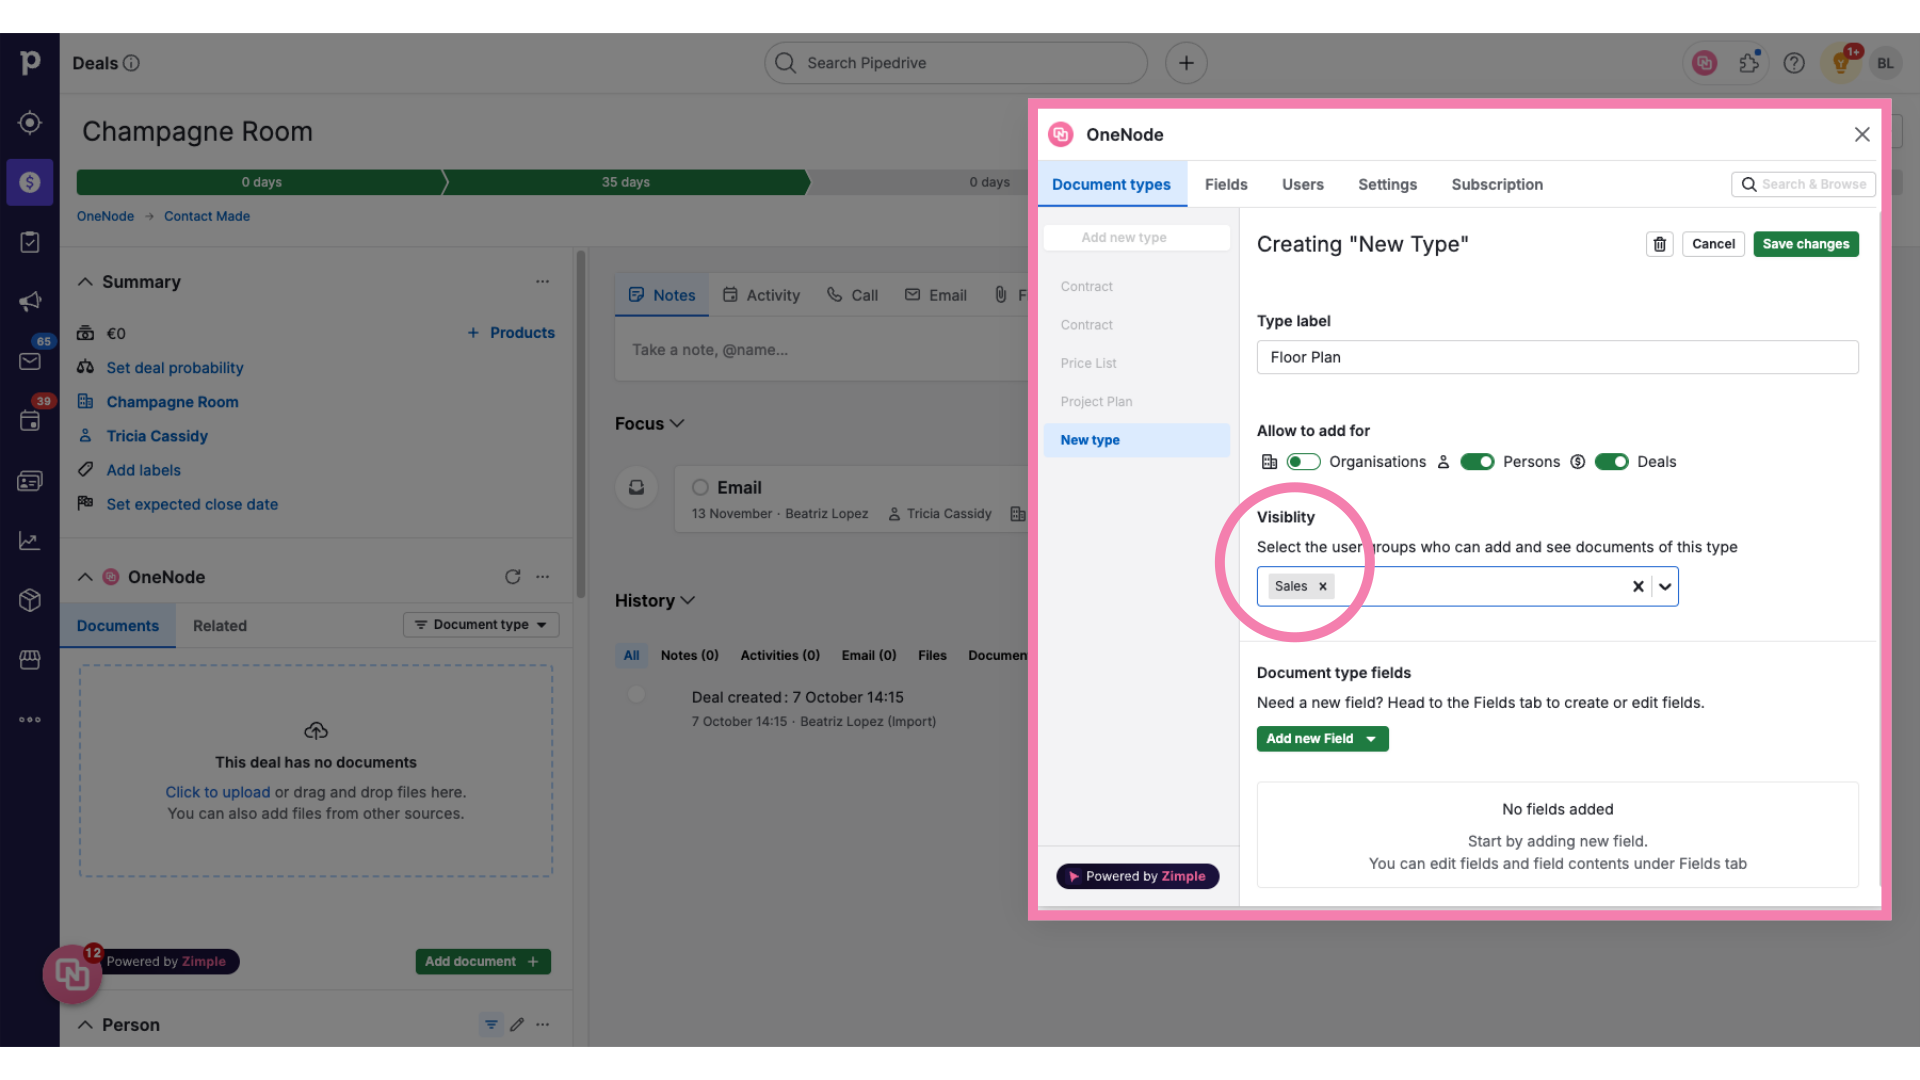
10. Select the "Sales" group
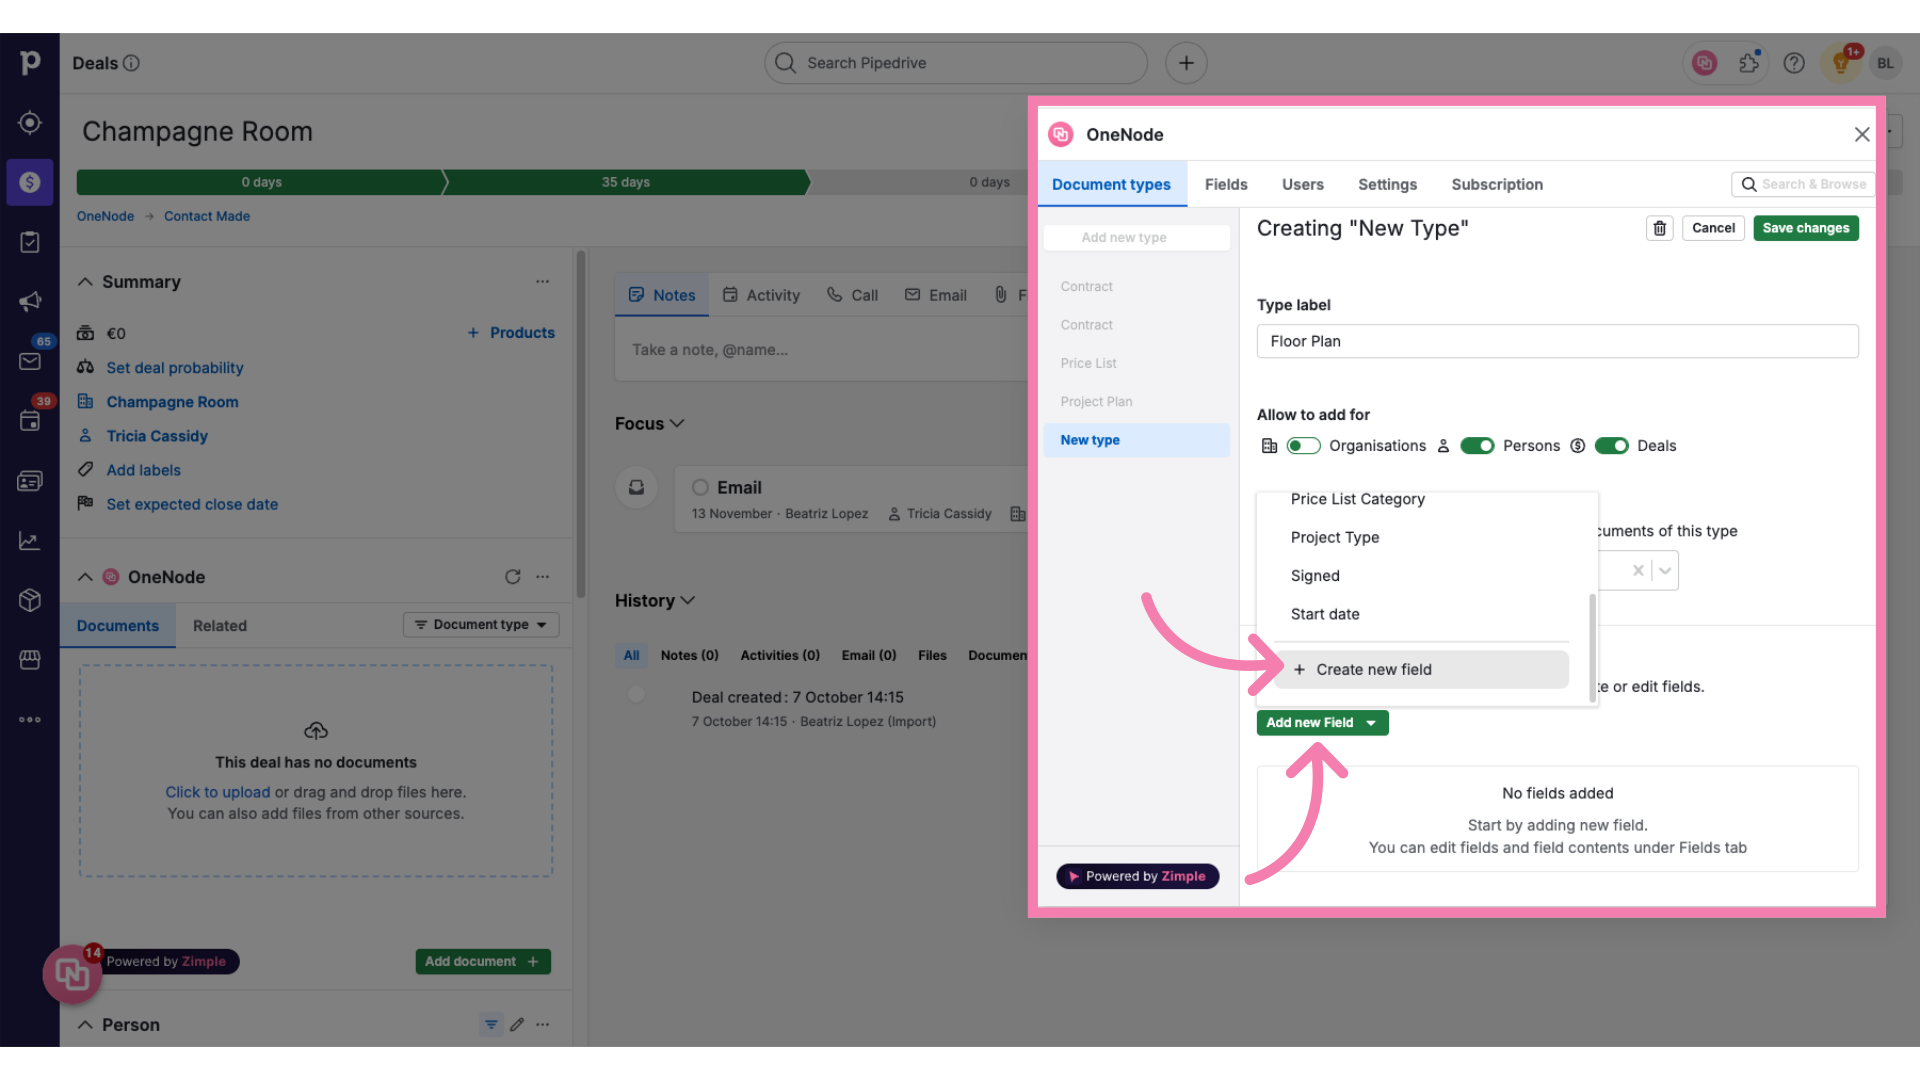
11. Click "Add new field" and "+Create new field"
Here's the exciting part! We will use fields to classify Floor plans by different criteria and be able to find documents easily later on. Click on the "Add New field" green button and choose "Create new field"
12. Create the First field
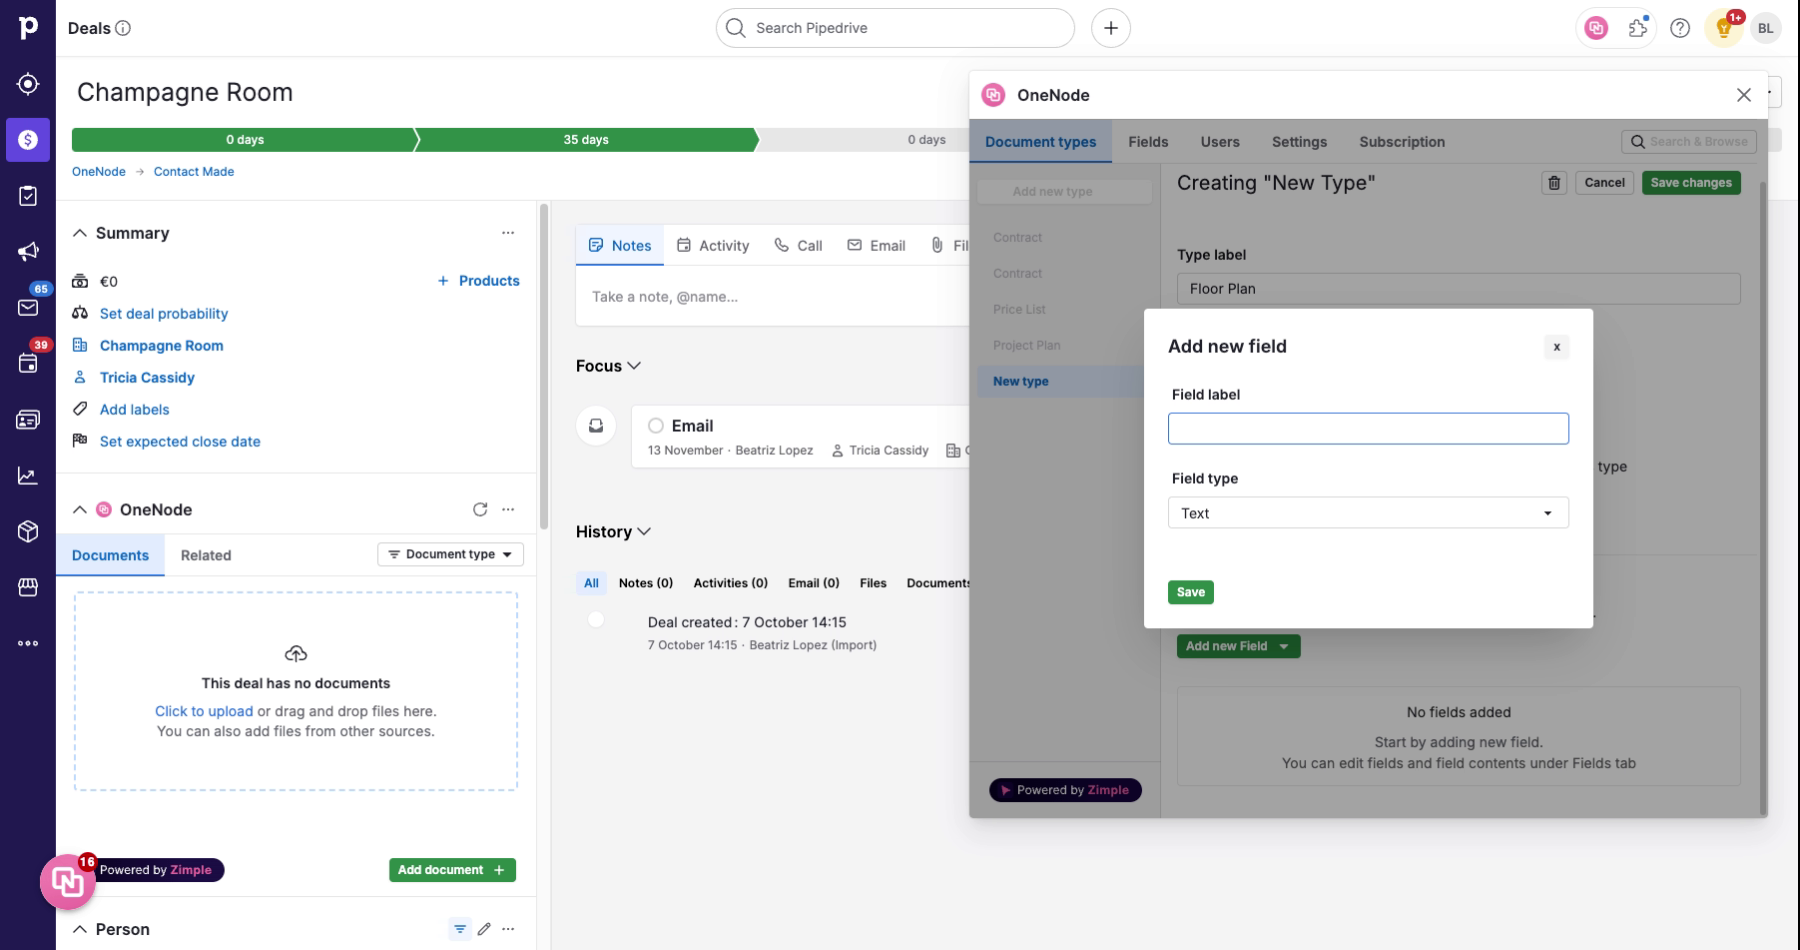
We will create 5 fields. Let's start by setting a Property Manager, who may be any Pipedrive user in charge of the given property
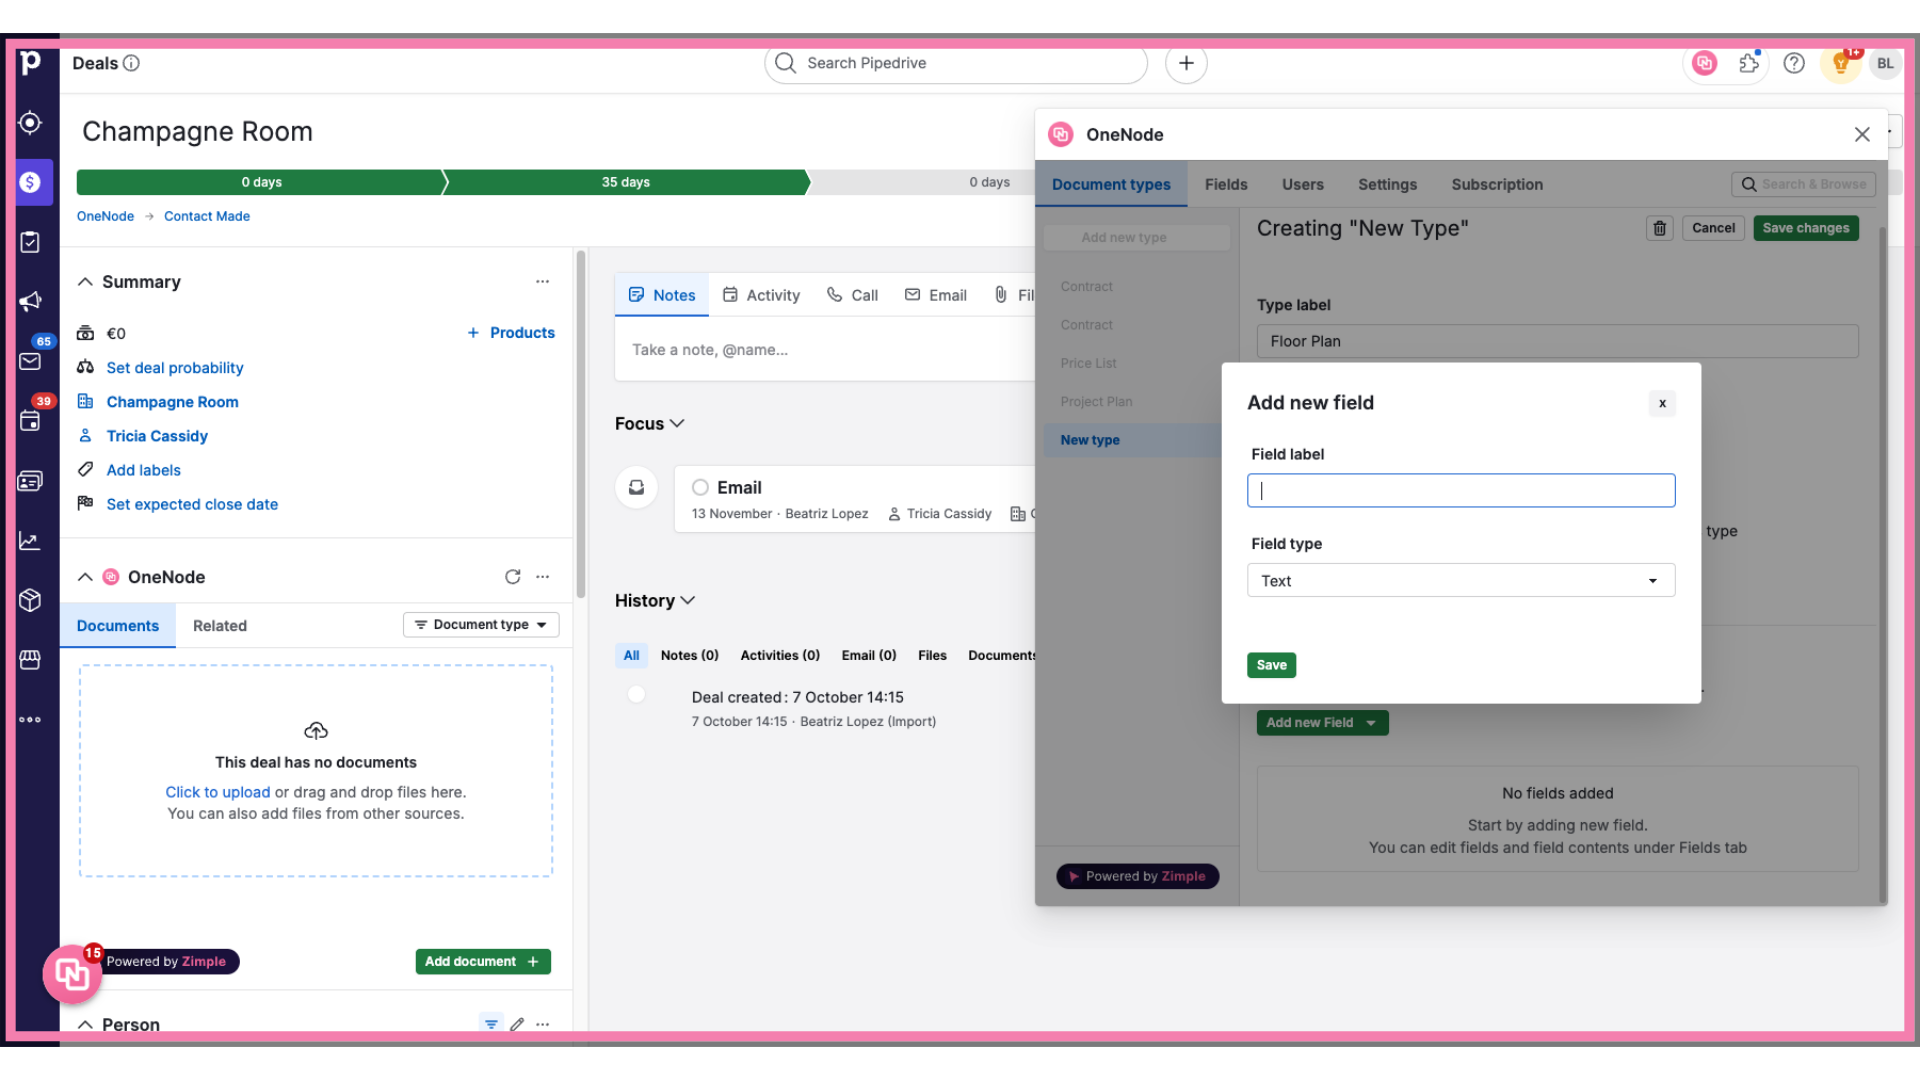
13. Fill "Property Manager"
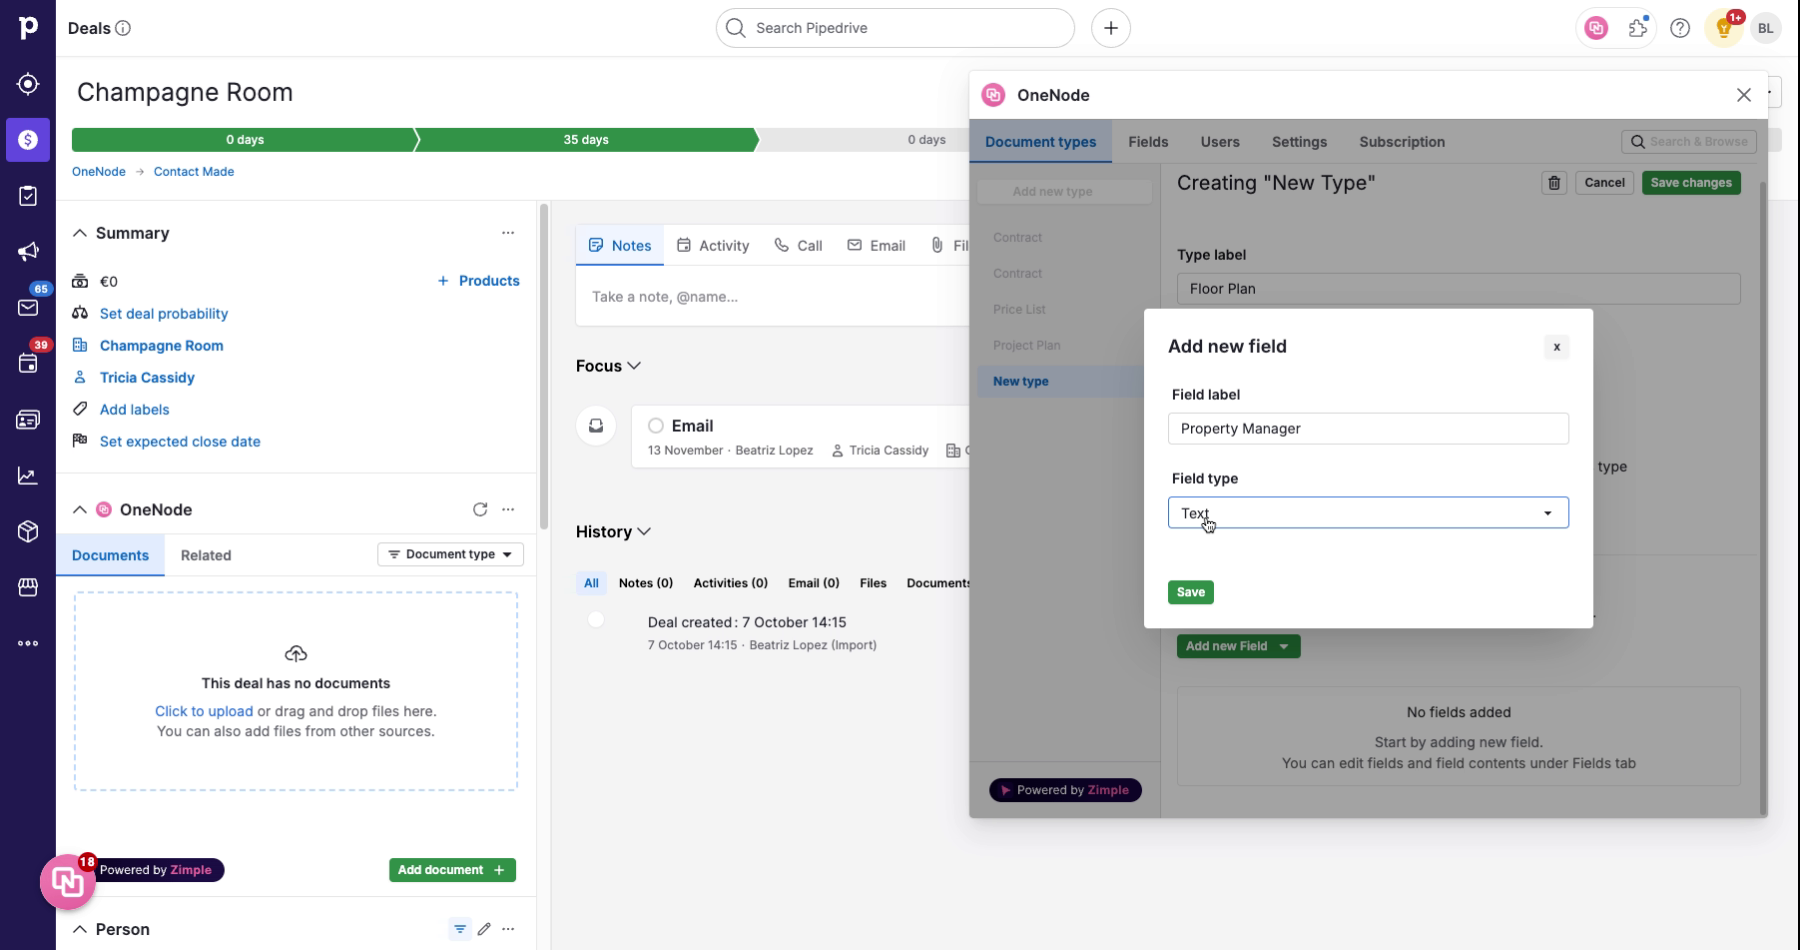
14. Select "User" field type
And make sure it is of the "User" type by choosing User from the drop down
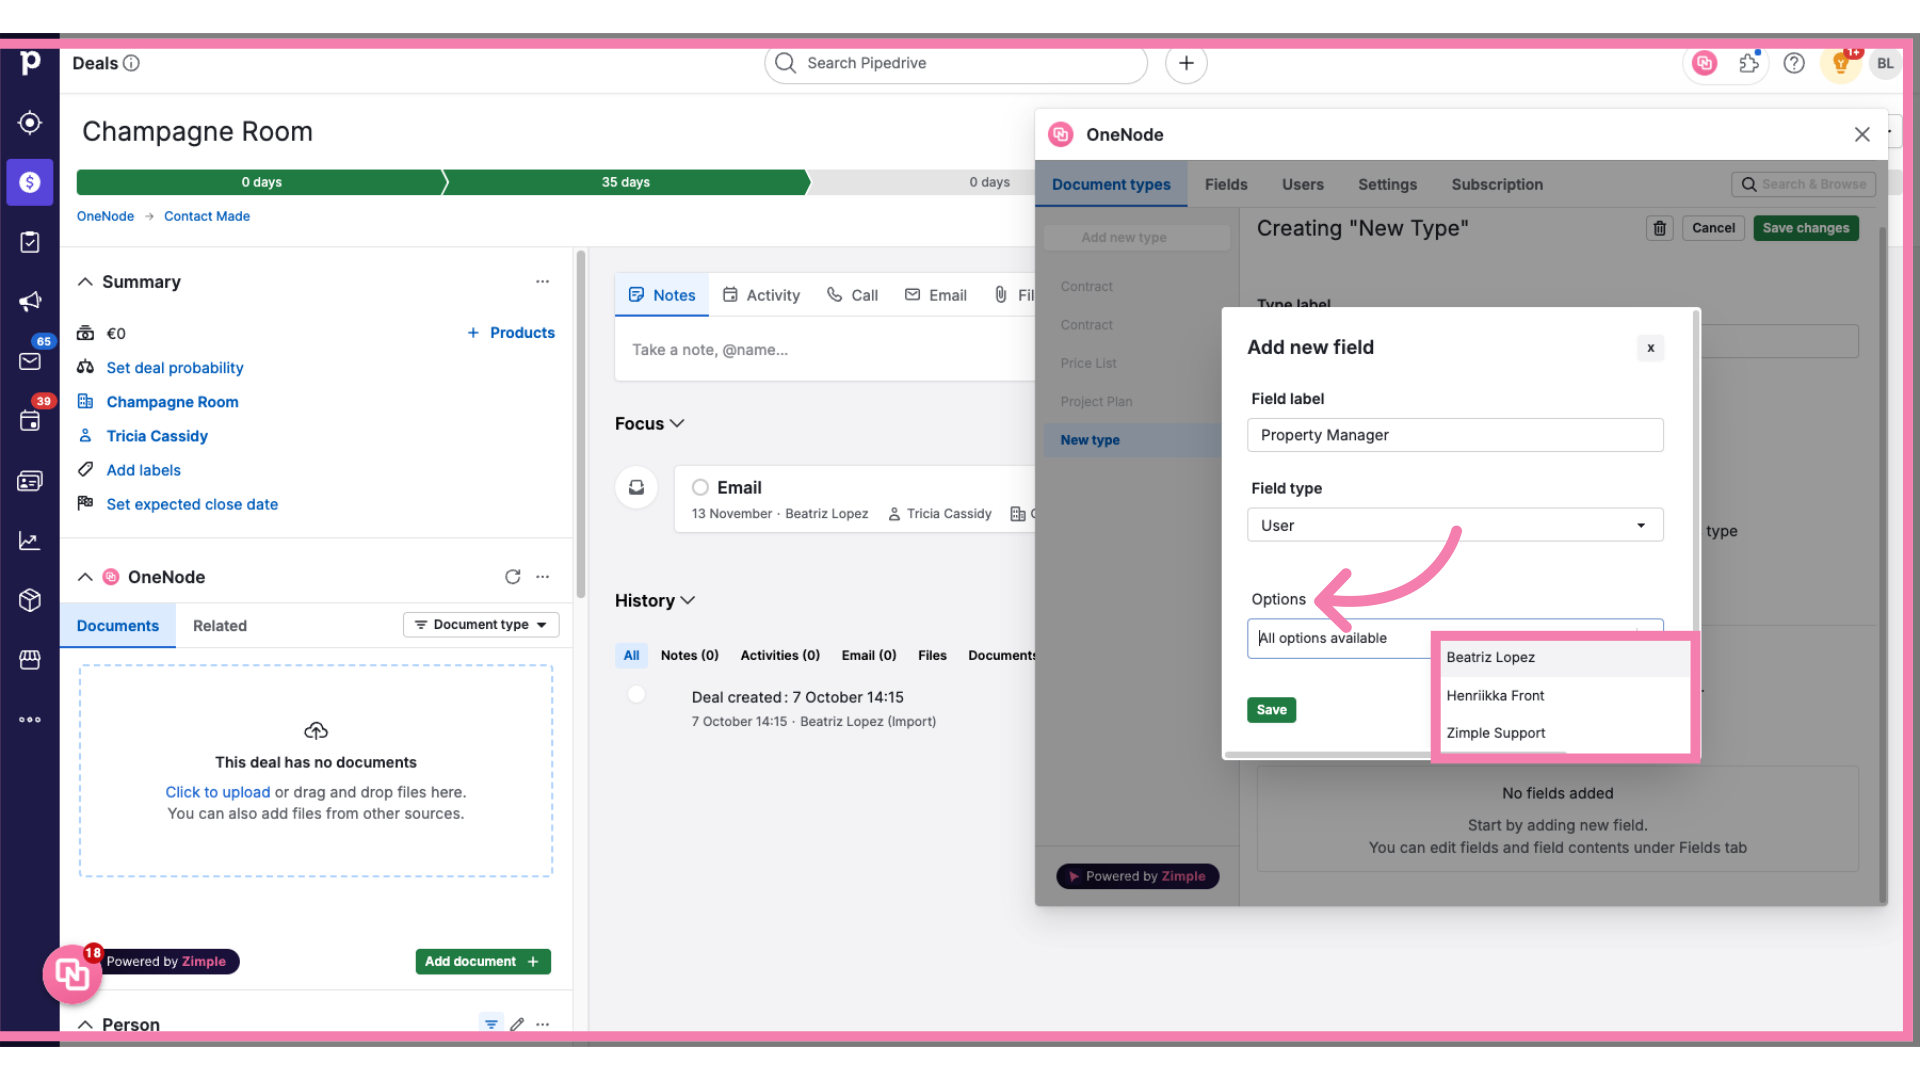
15. Select the Users
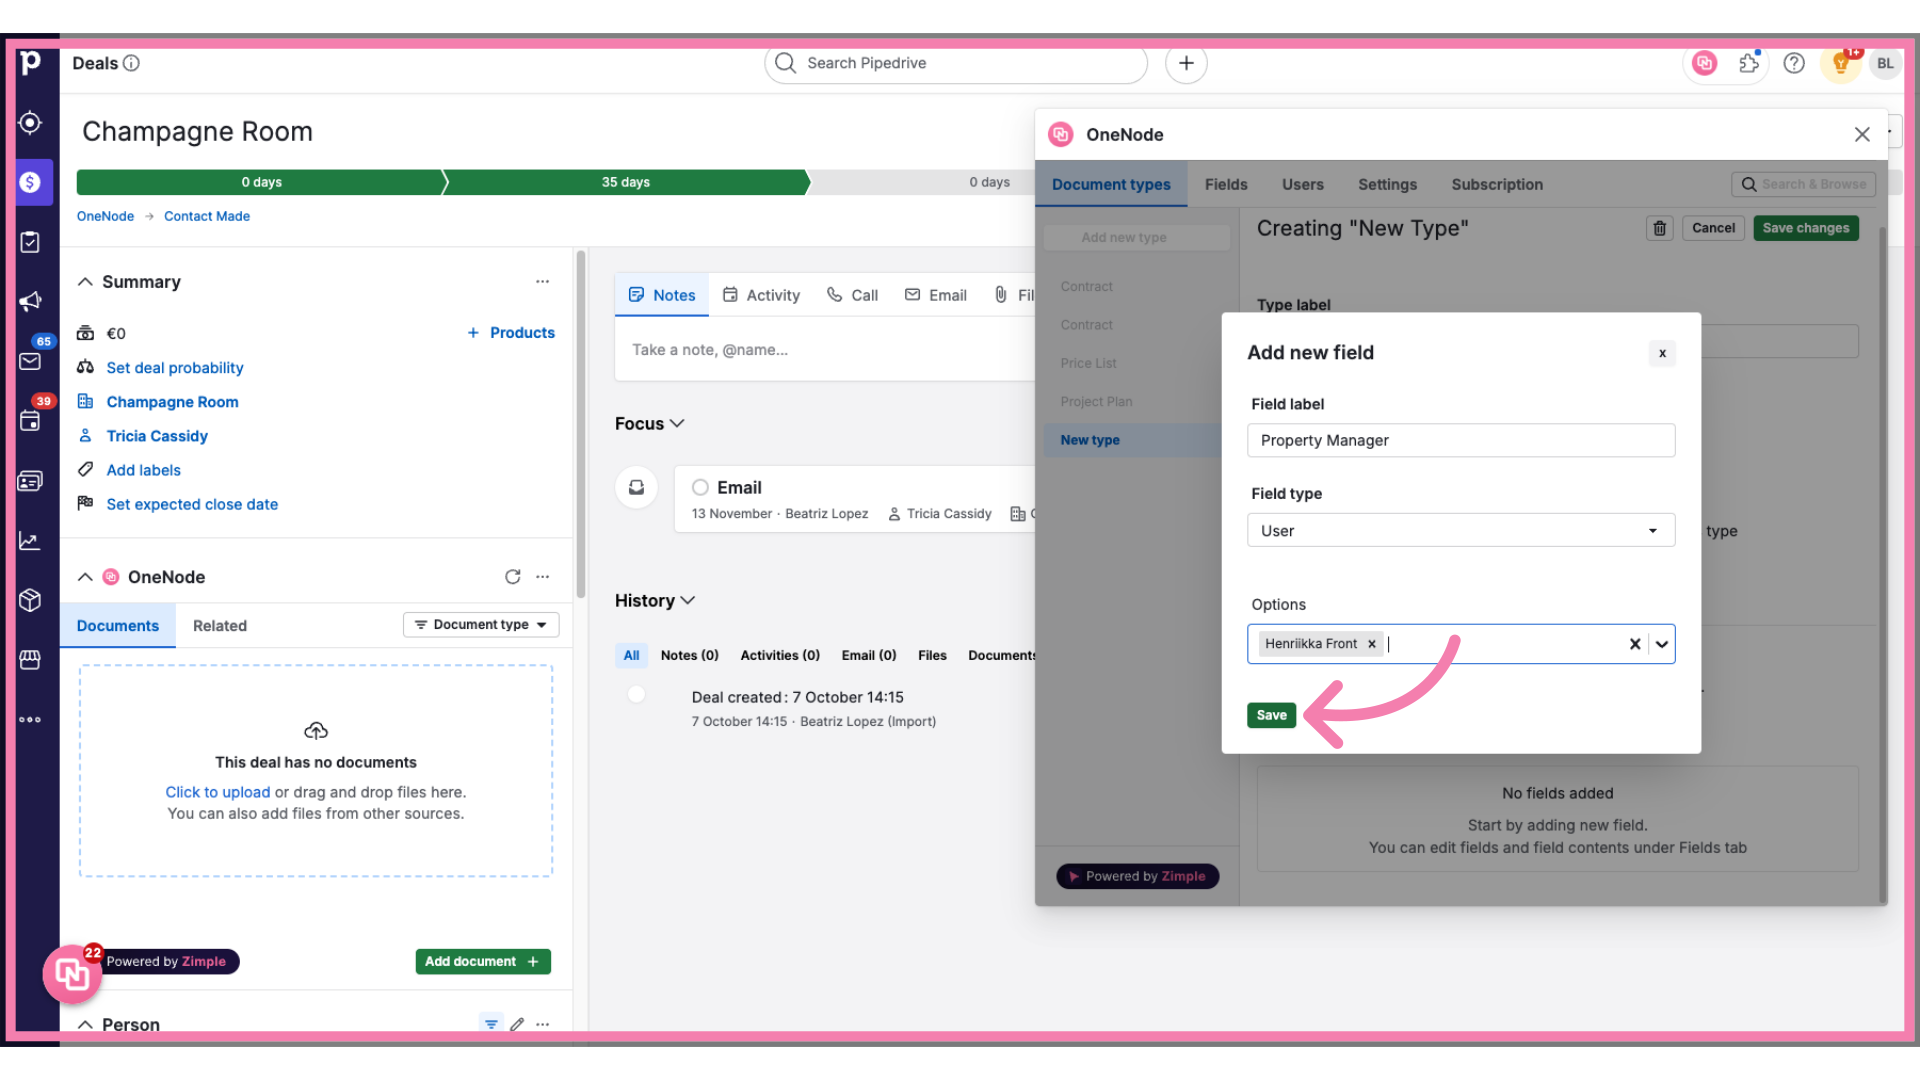
16. Click "Save"
Finally, click on the "Save" button
17. Set the Default user
In the next window, you will be able to set a Default user.
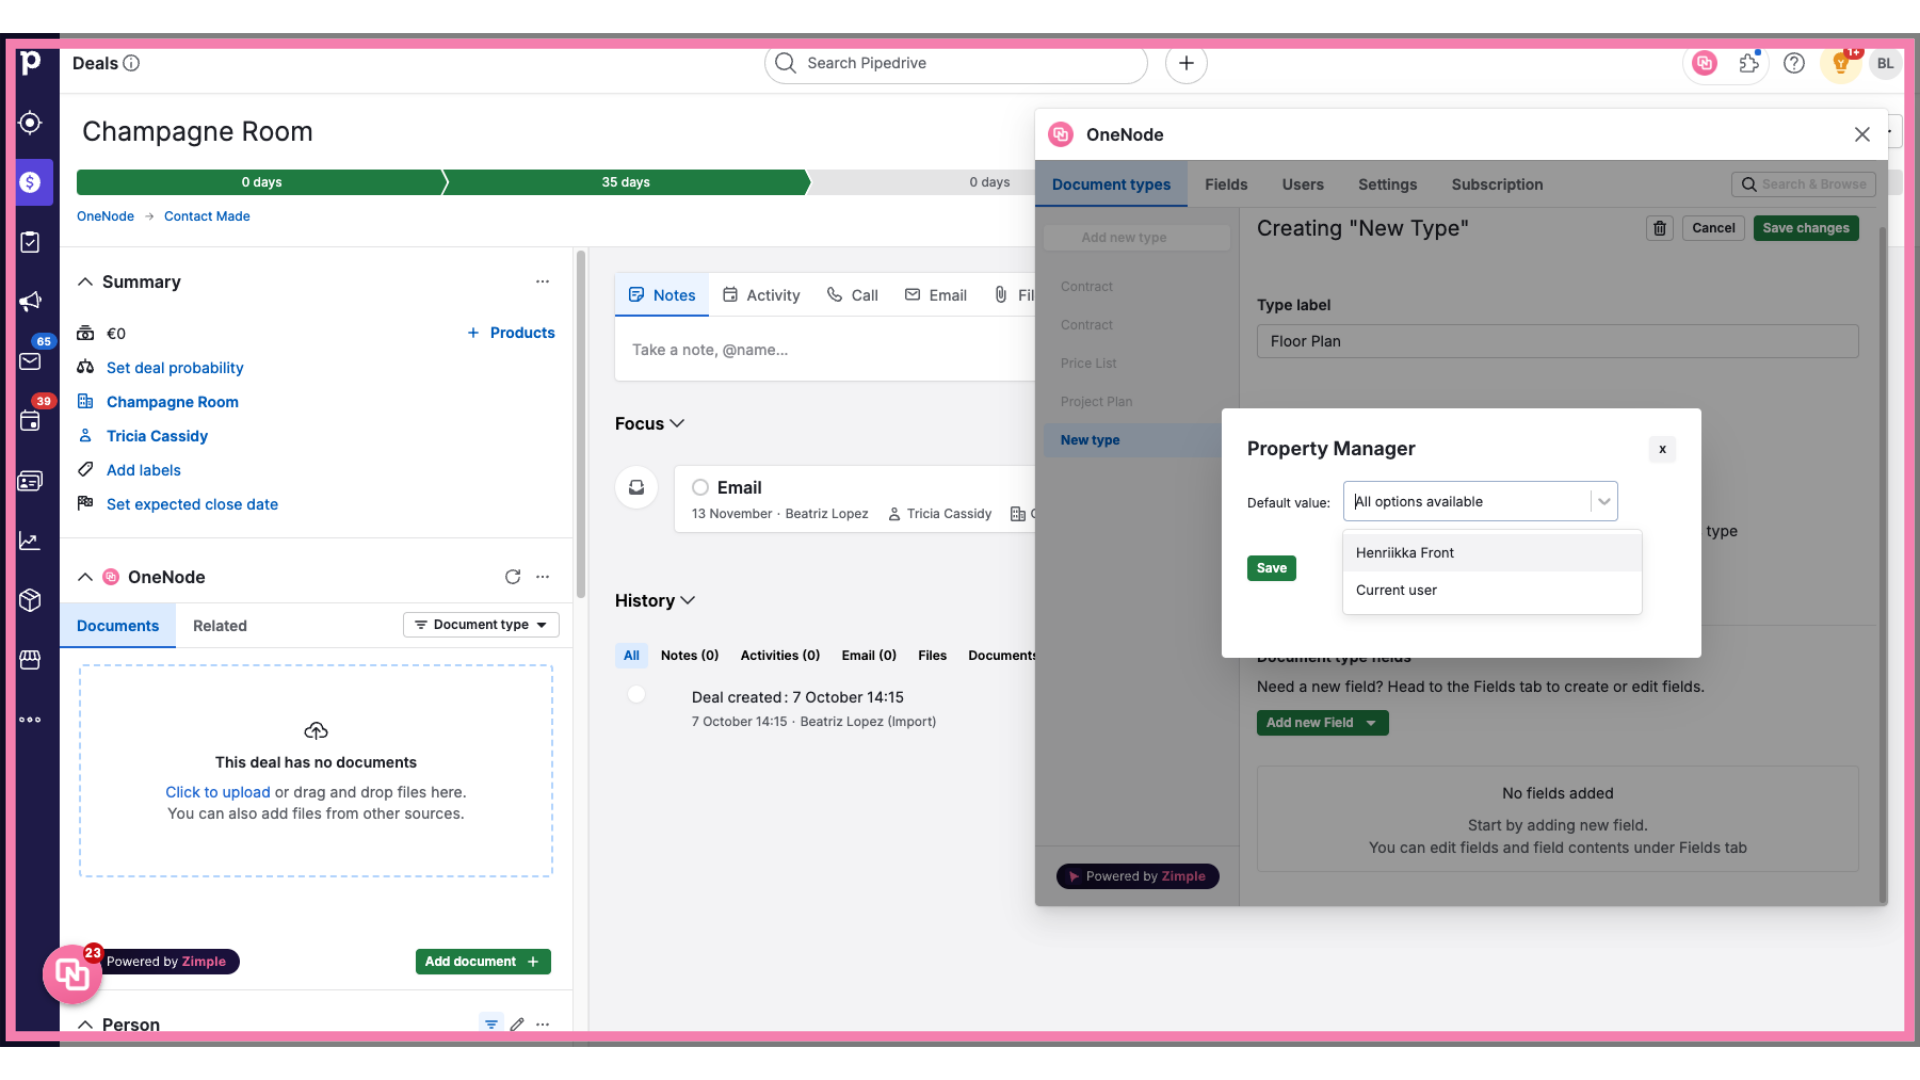
18. Click "Save"
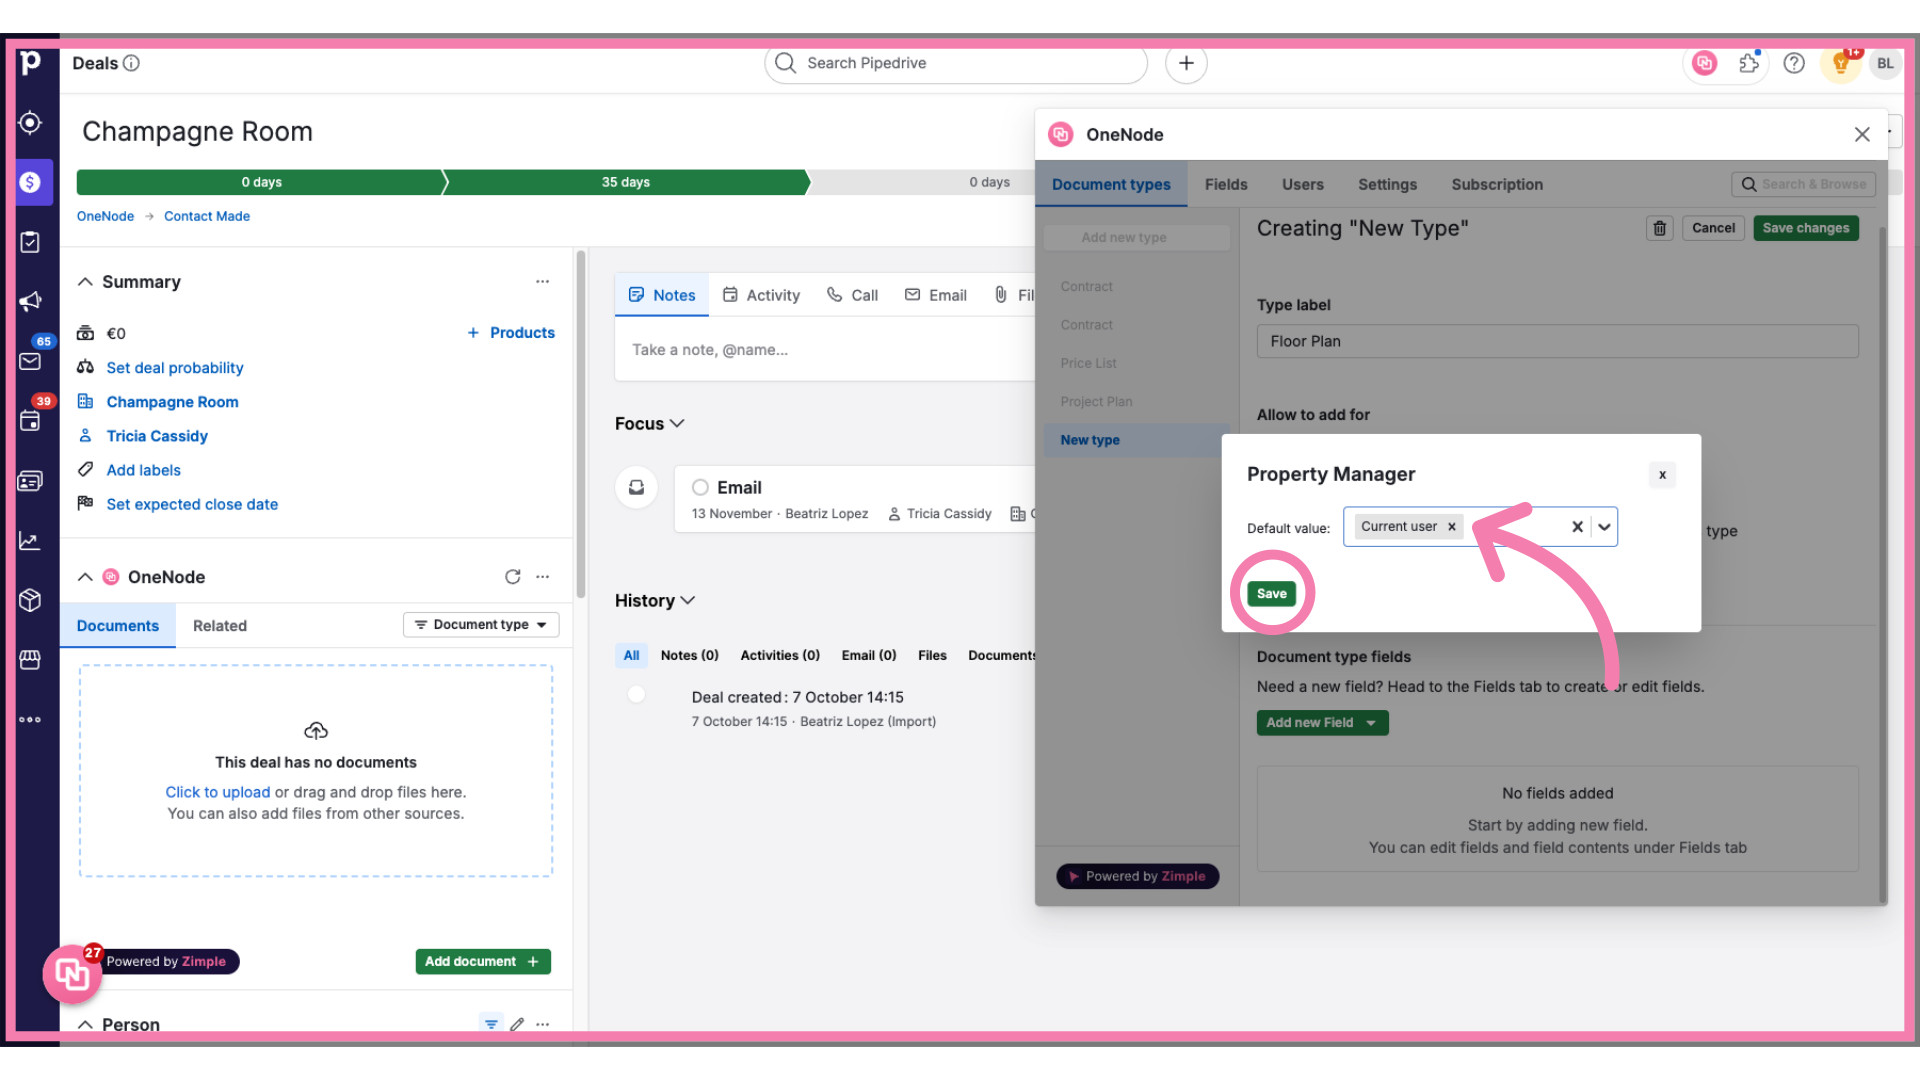
19. Click "Add new Field"
All right. The Property Manager field was created. Let's create a Second field!
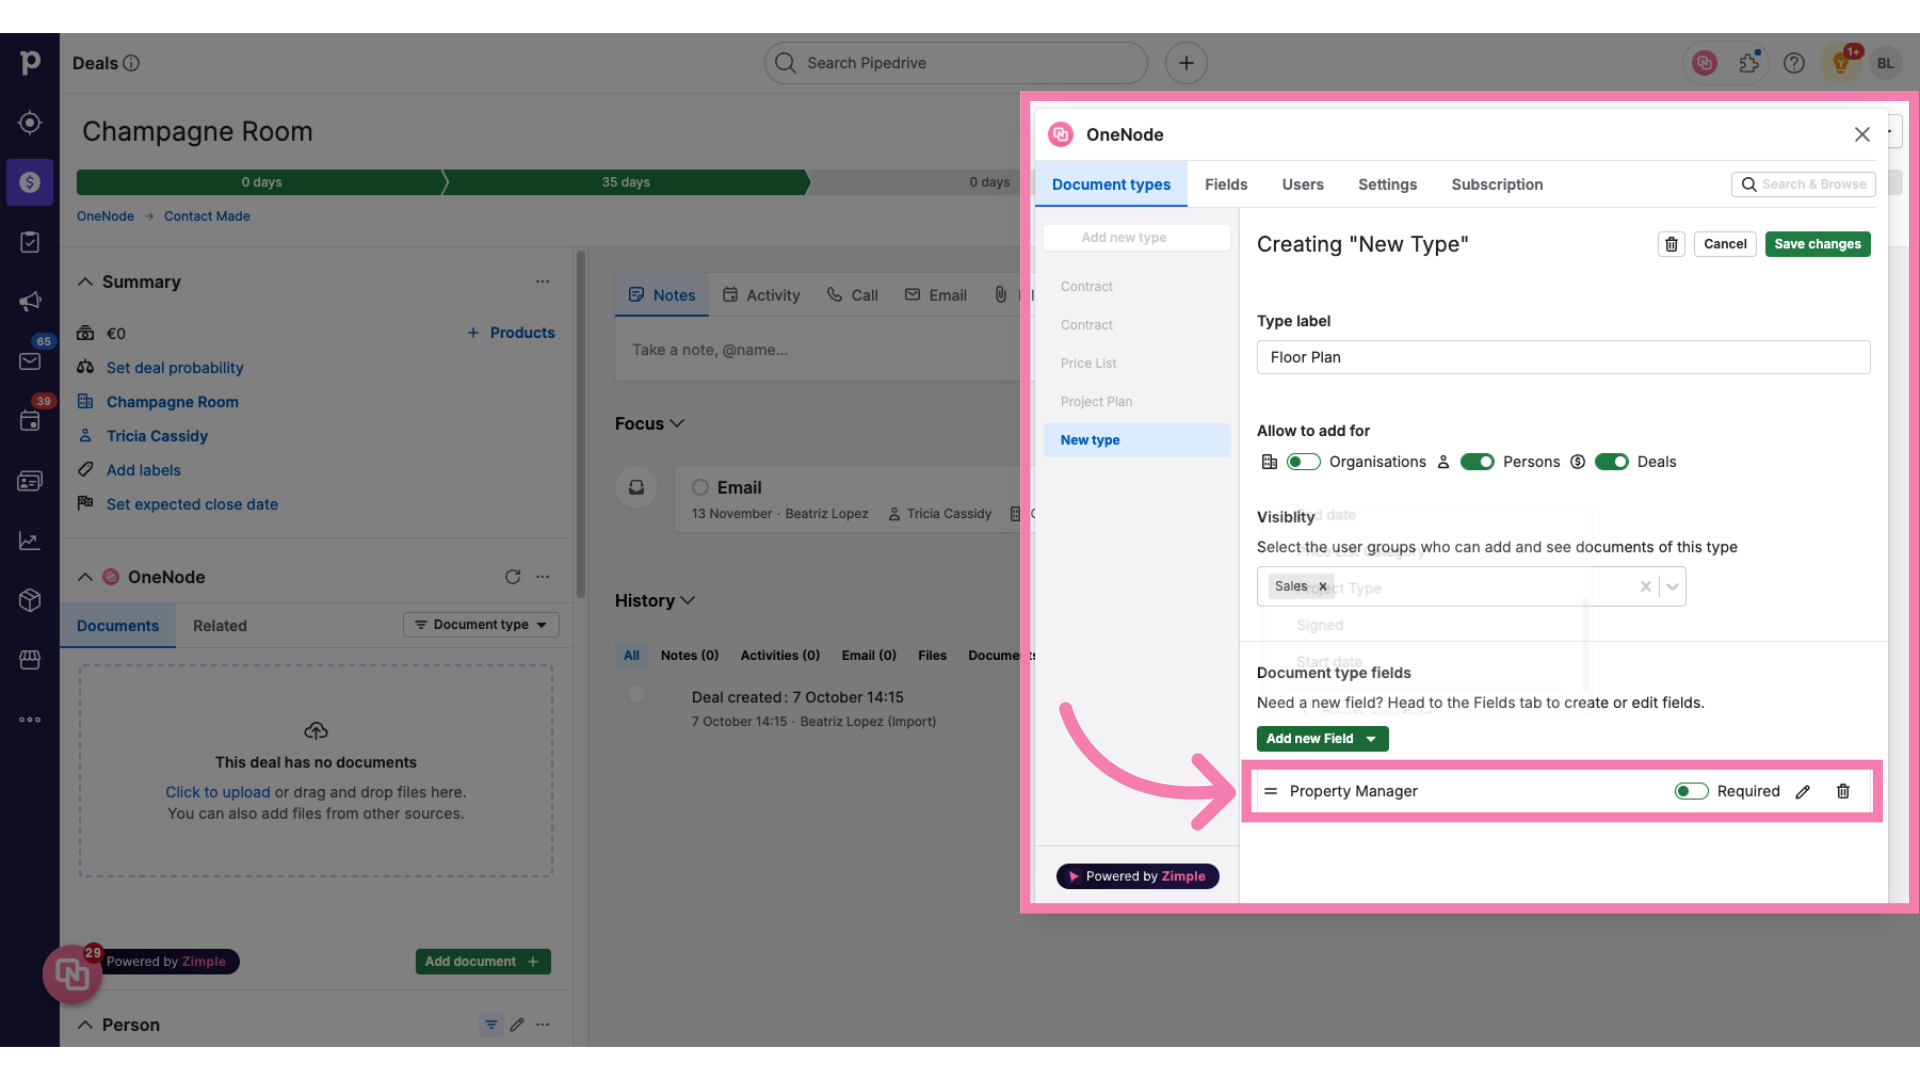
20. Click "Add new Field"
Let's start by clicking the "Add New Field" green button once again.
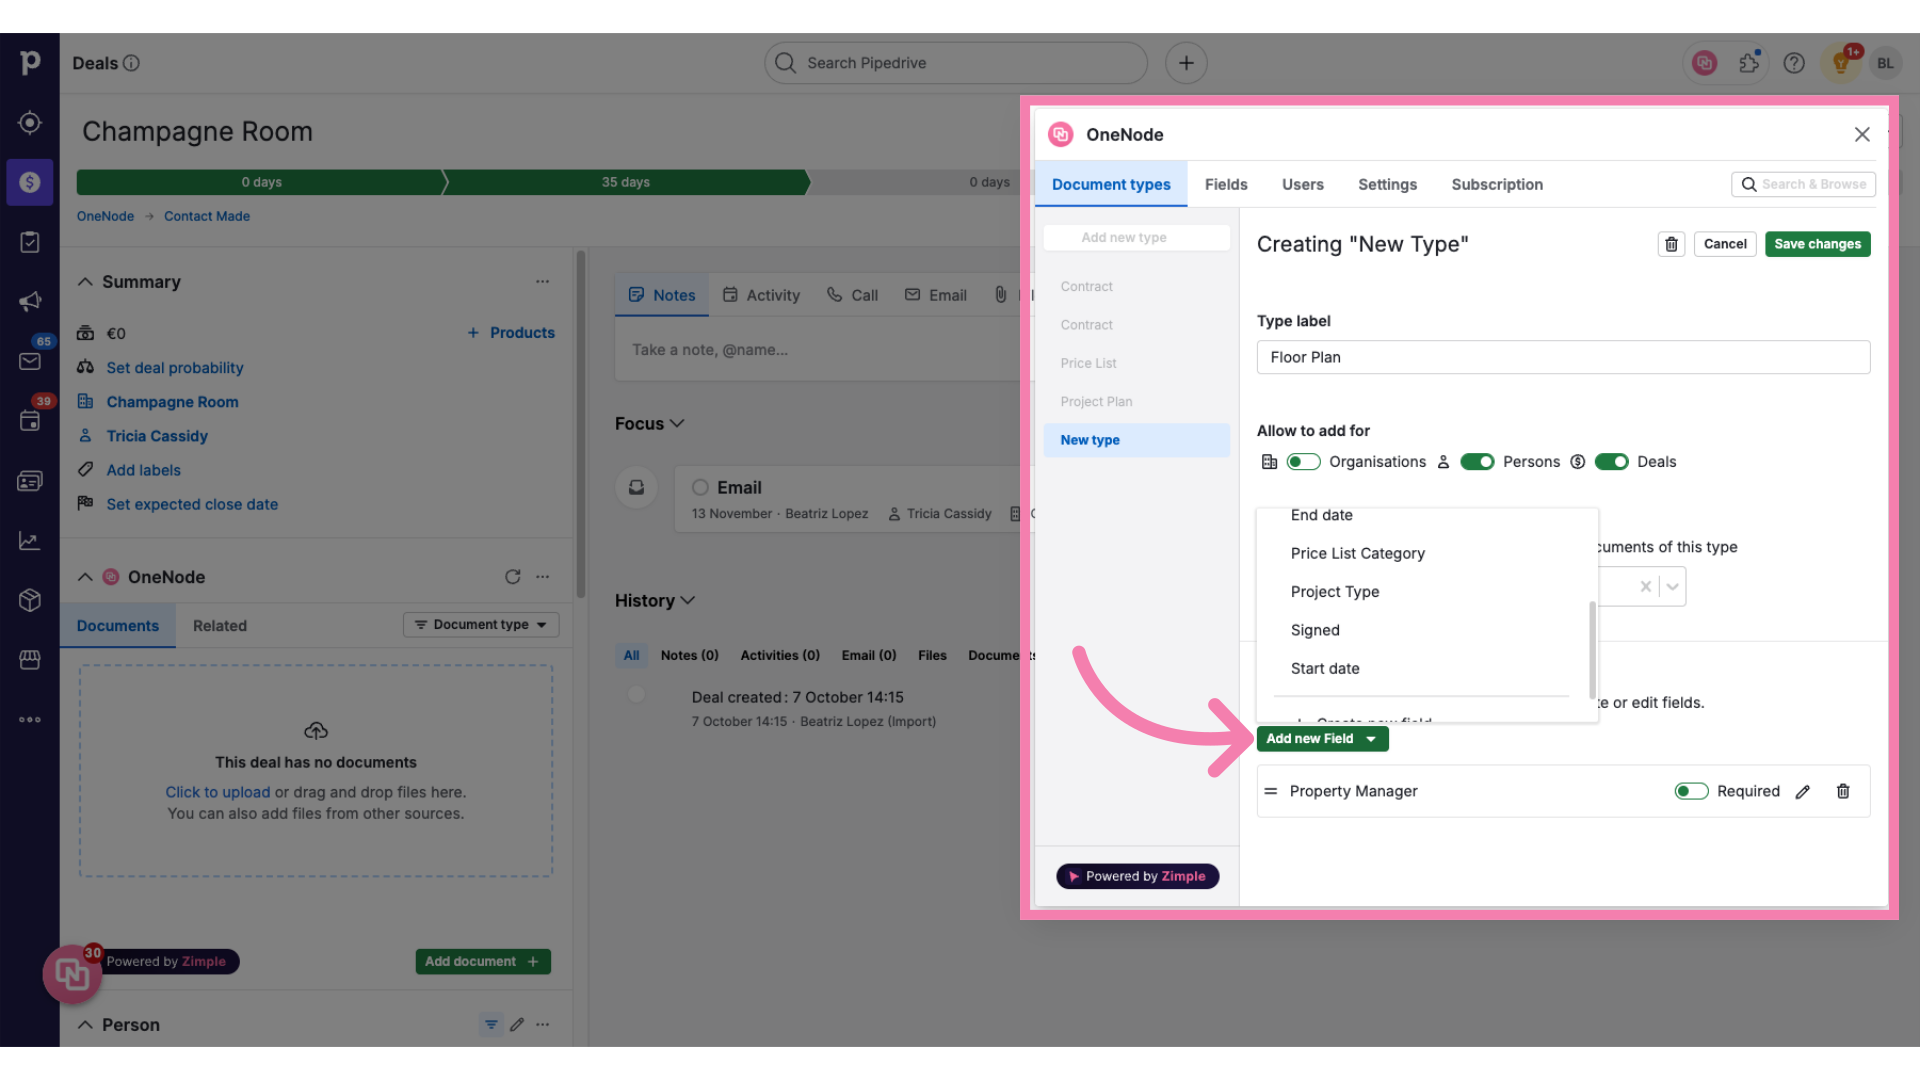
21. Click "Create new field"
And scroll down to Choose the "+Create new field" option
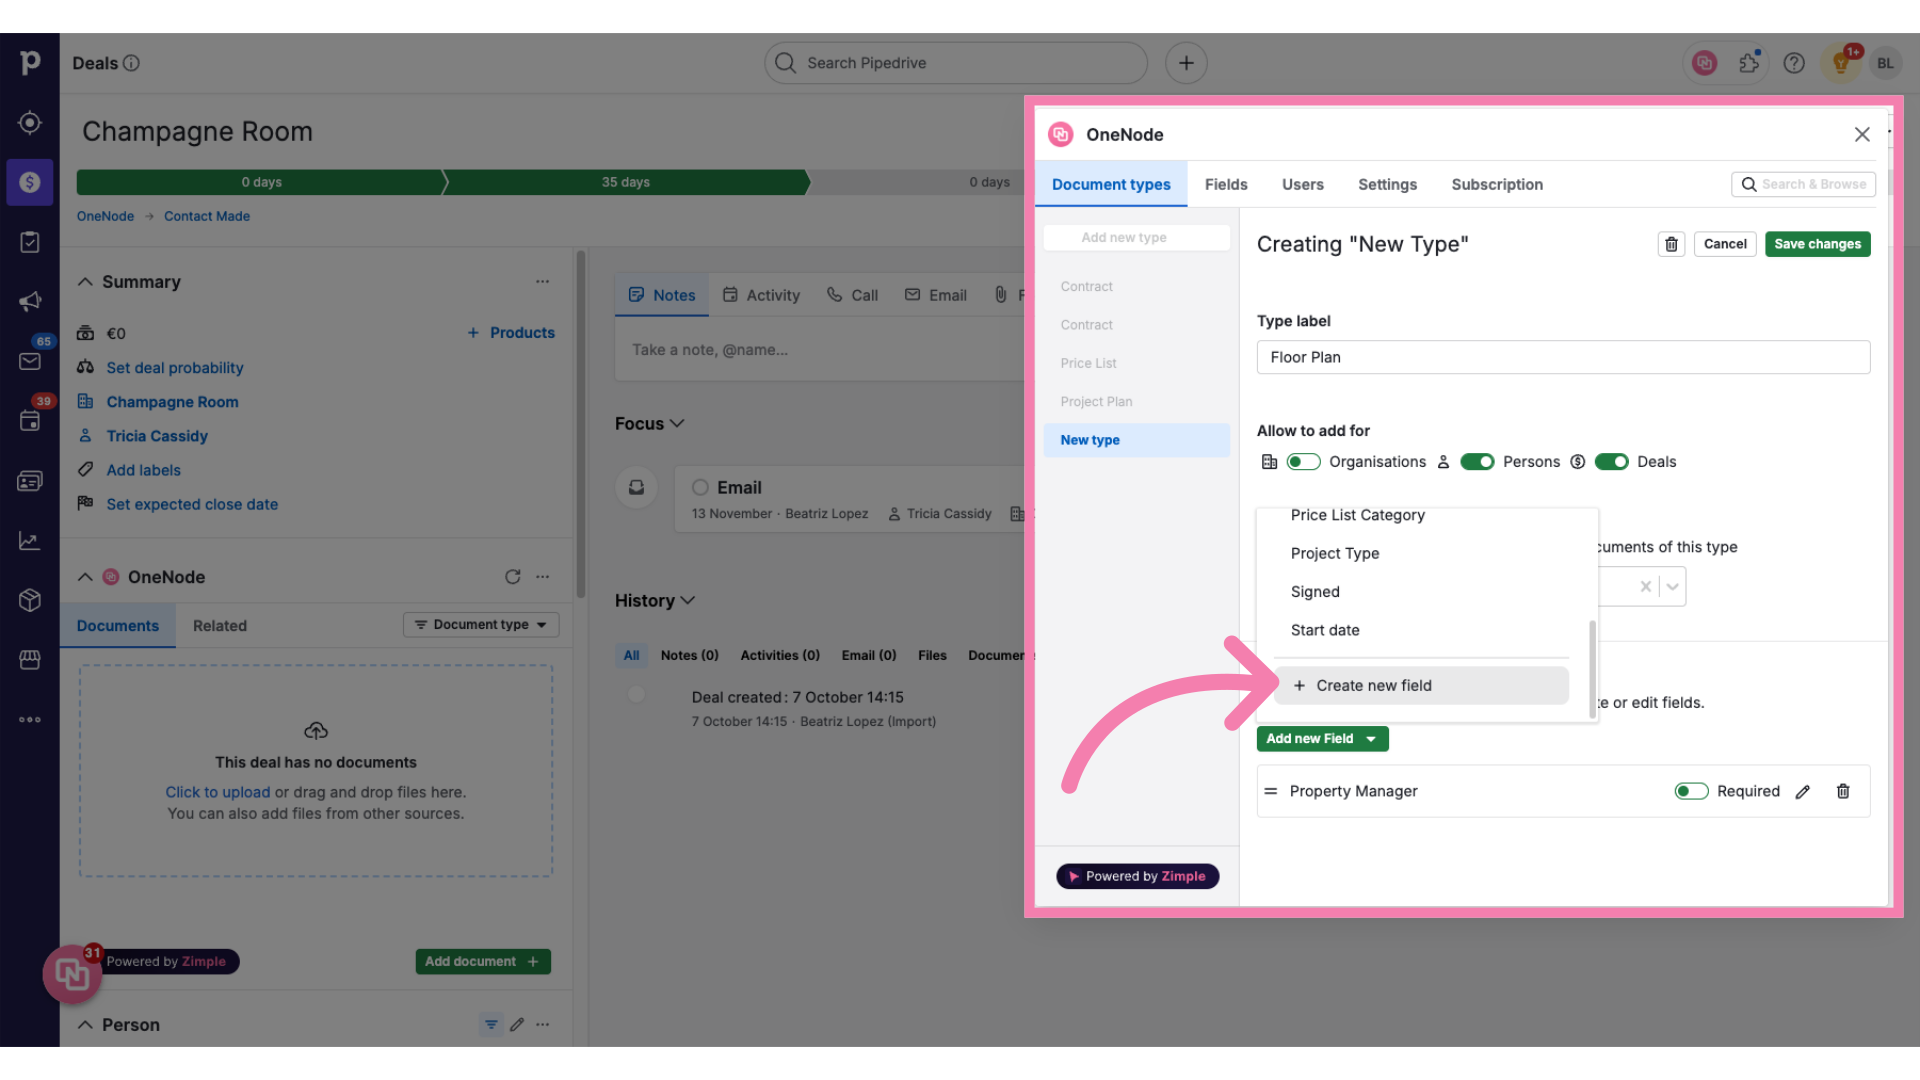
22. Type the field name
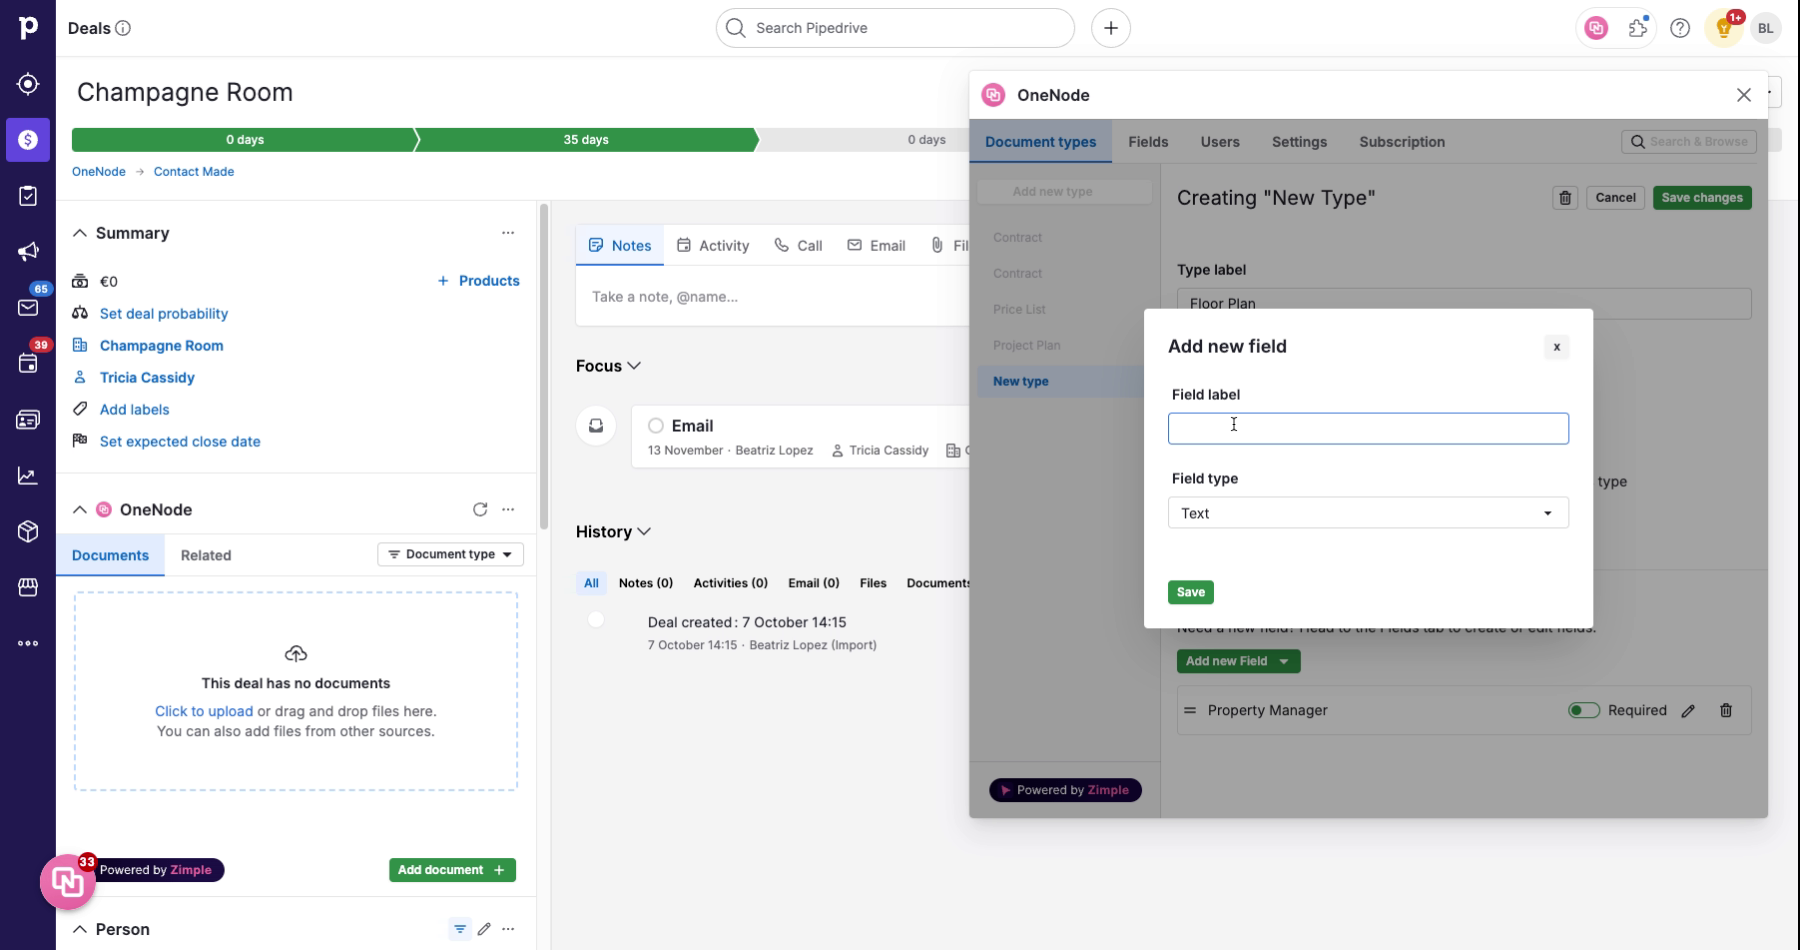
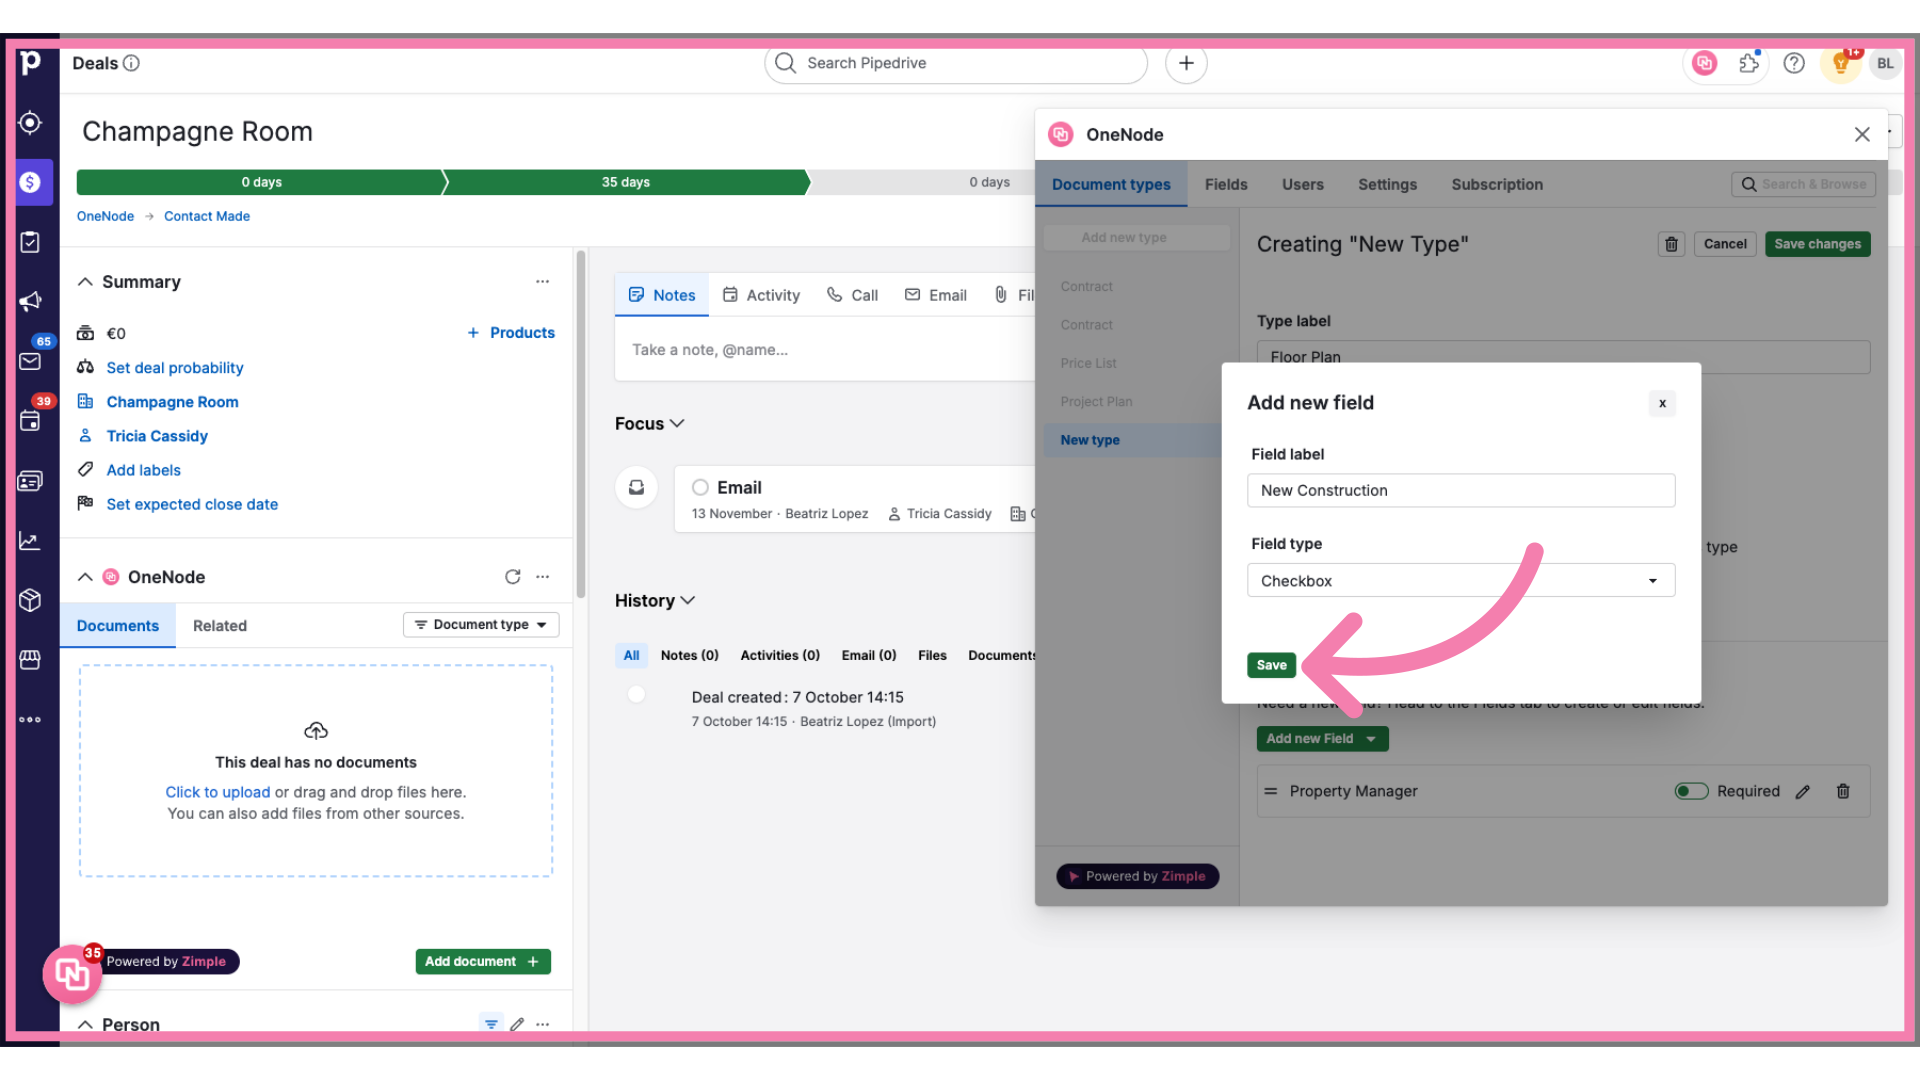
This time, we want to build a checkbox to mark floor plans when they are a New Construction
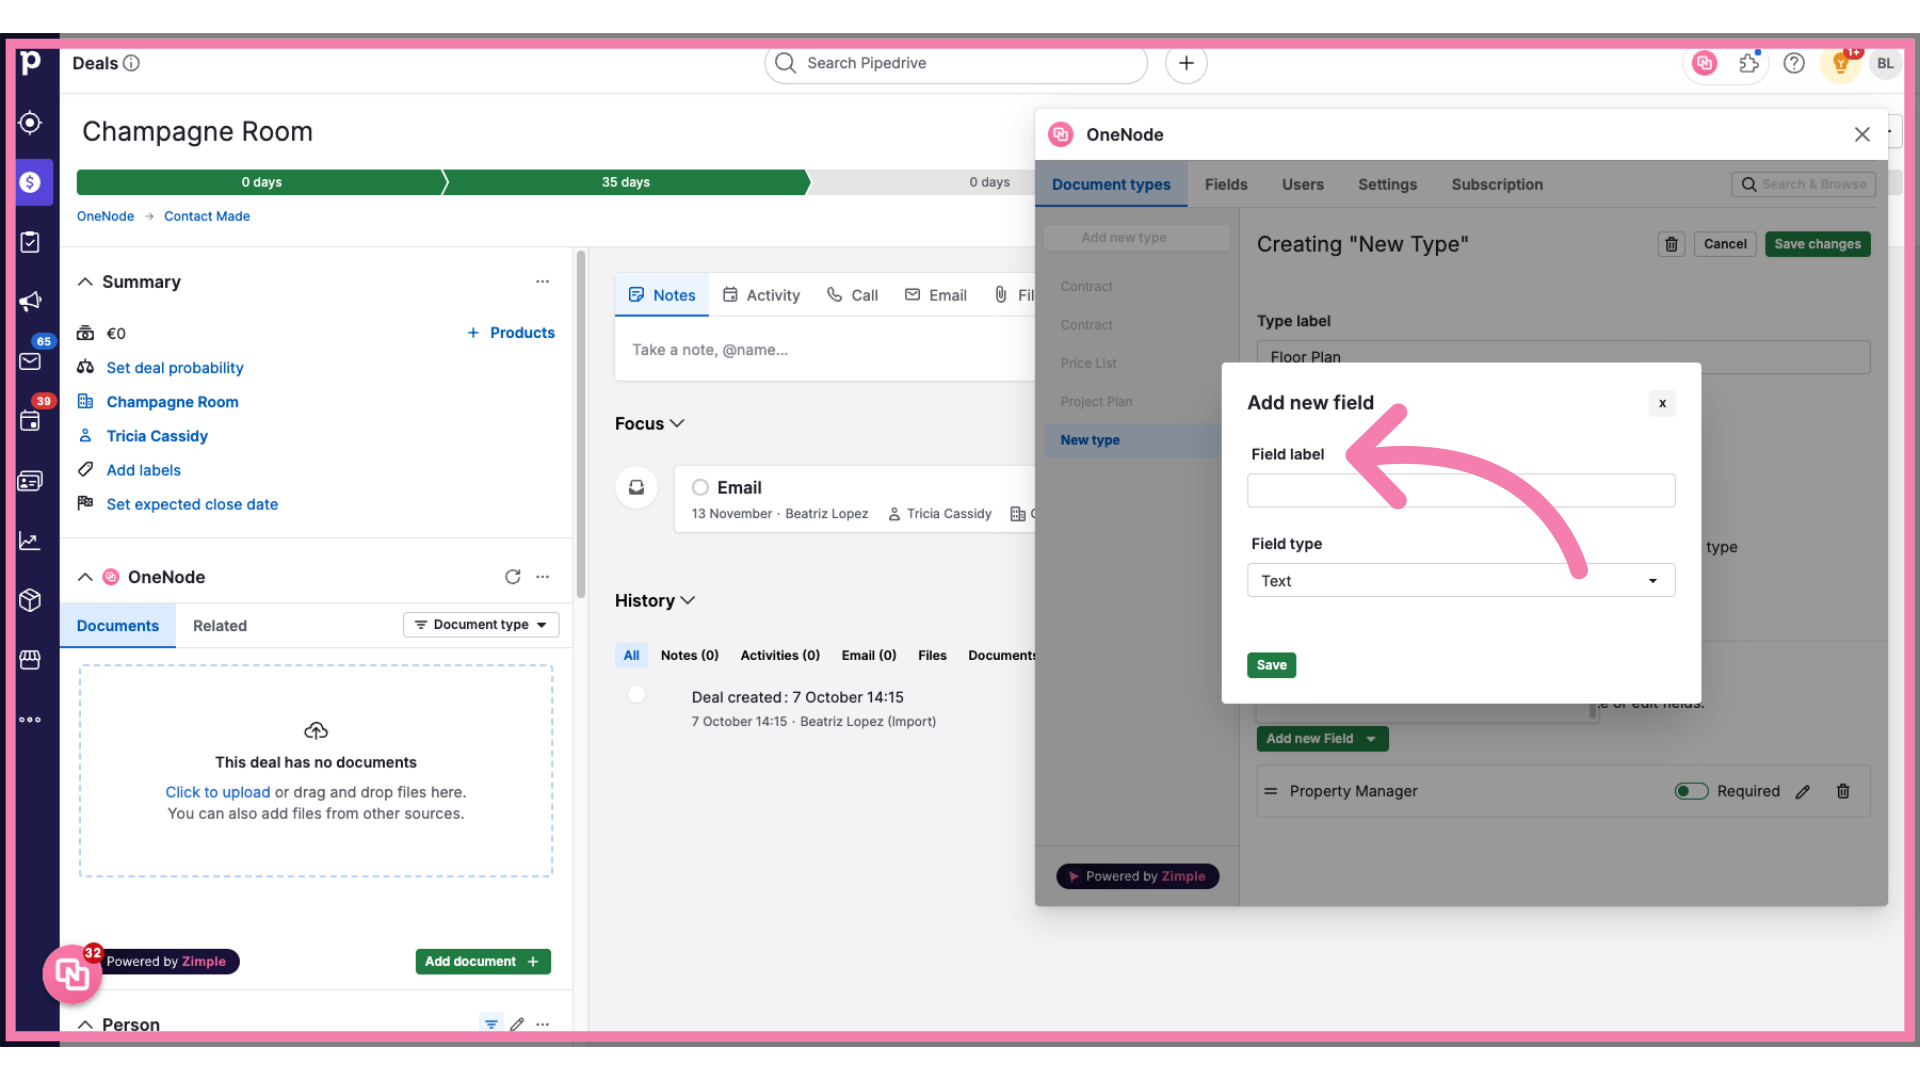
23. Type "New Construction"
24. Fill "Checkbox"
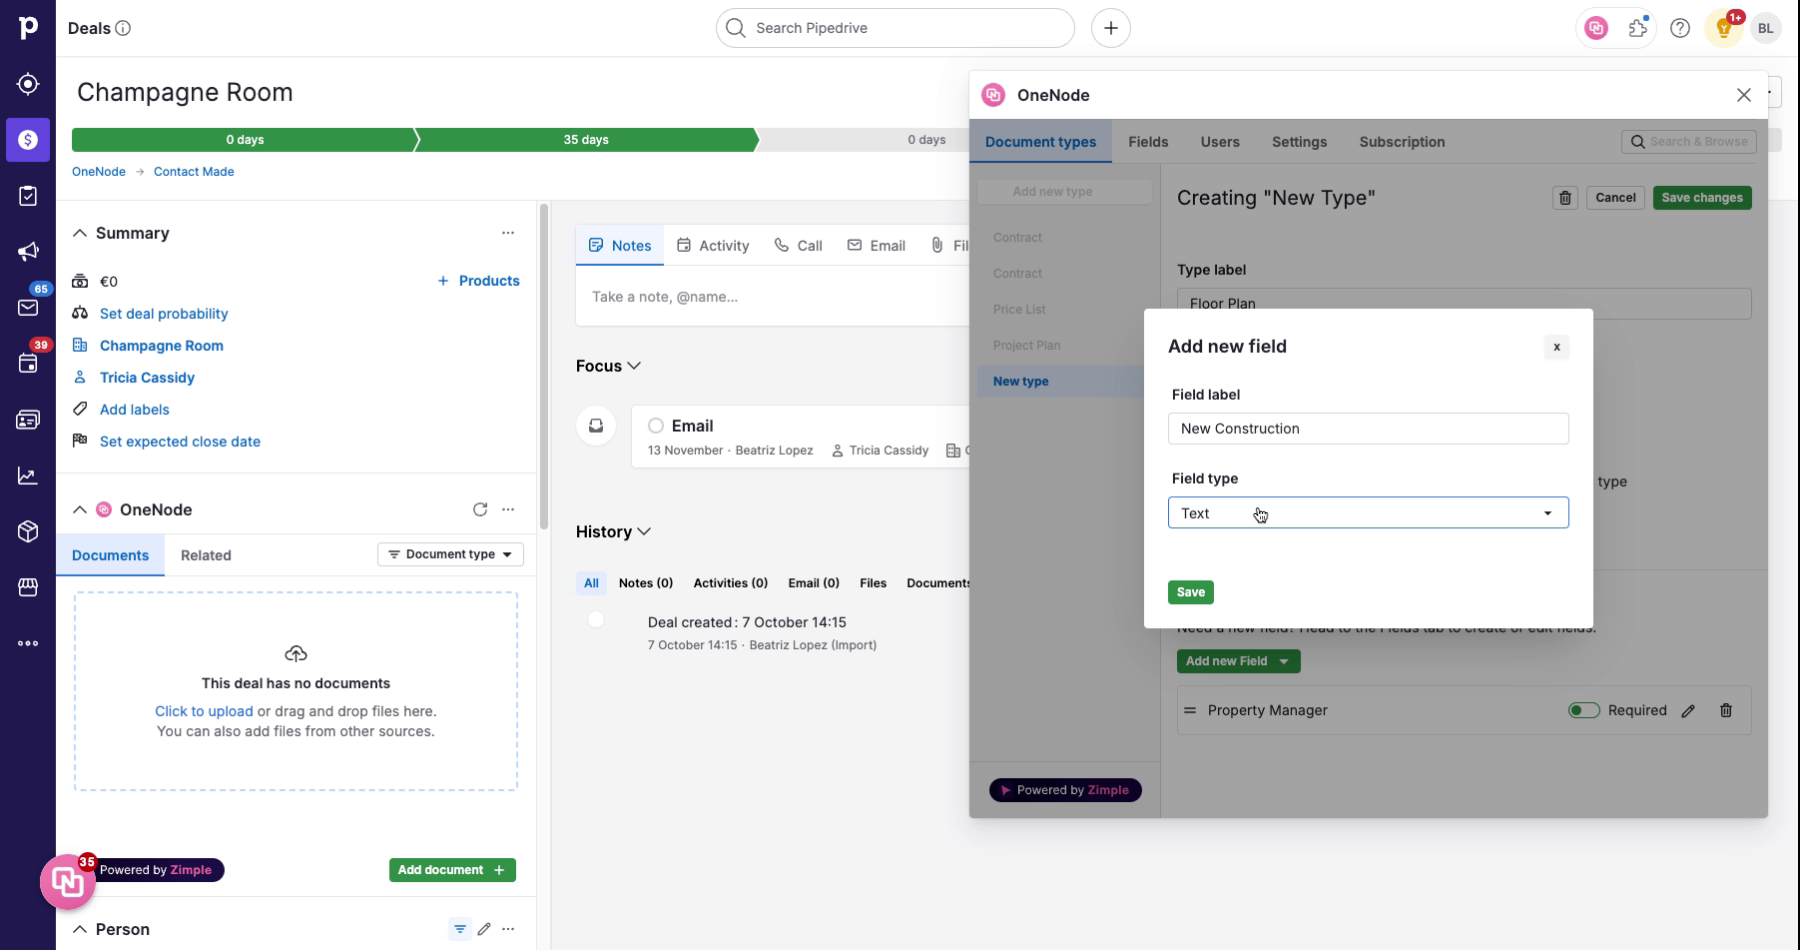
25. Click "Save"
Click "Save" to finish.
26. Set the checkbox default
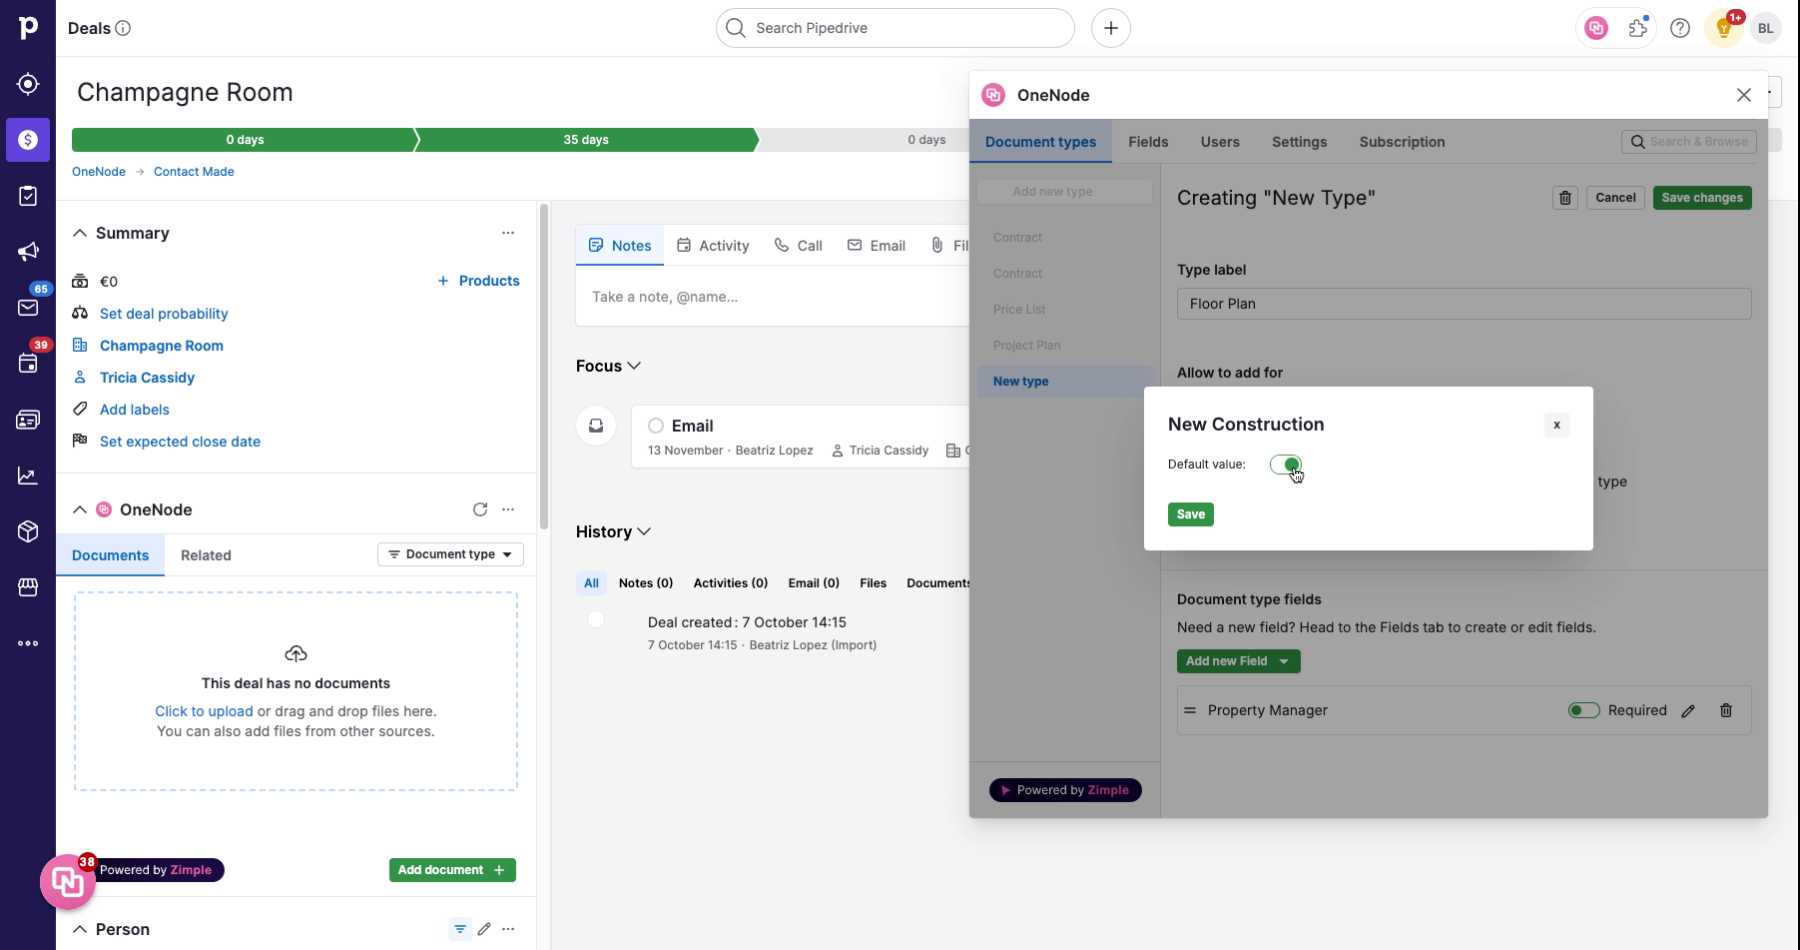
After saving, if you mostly sell New construction properties, you can set this as the default. Otherwise, users can uncheck it when it doesn't apply
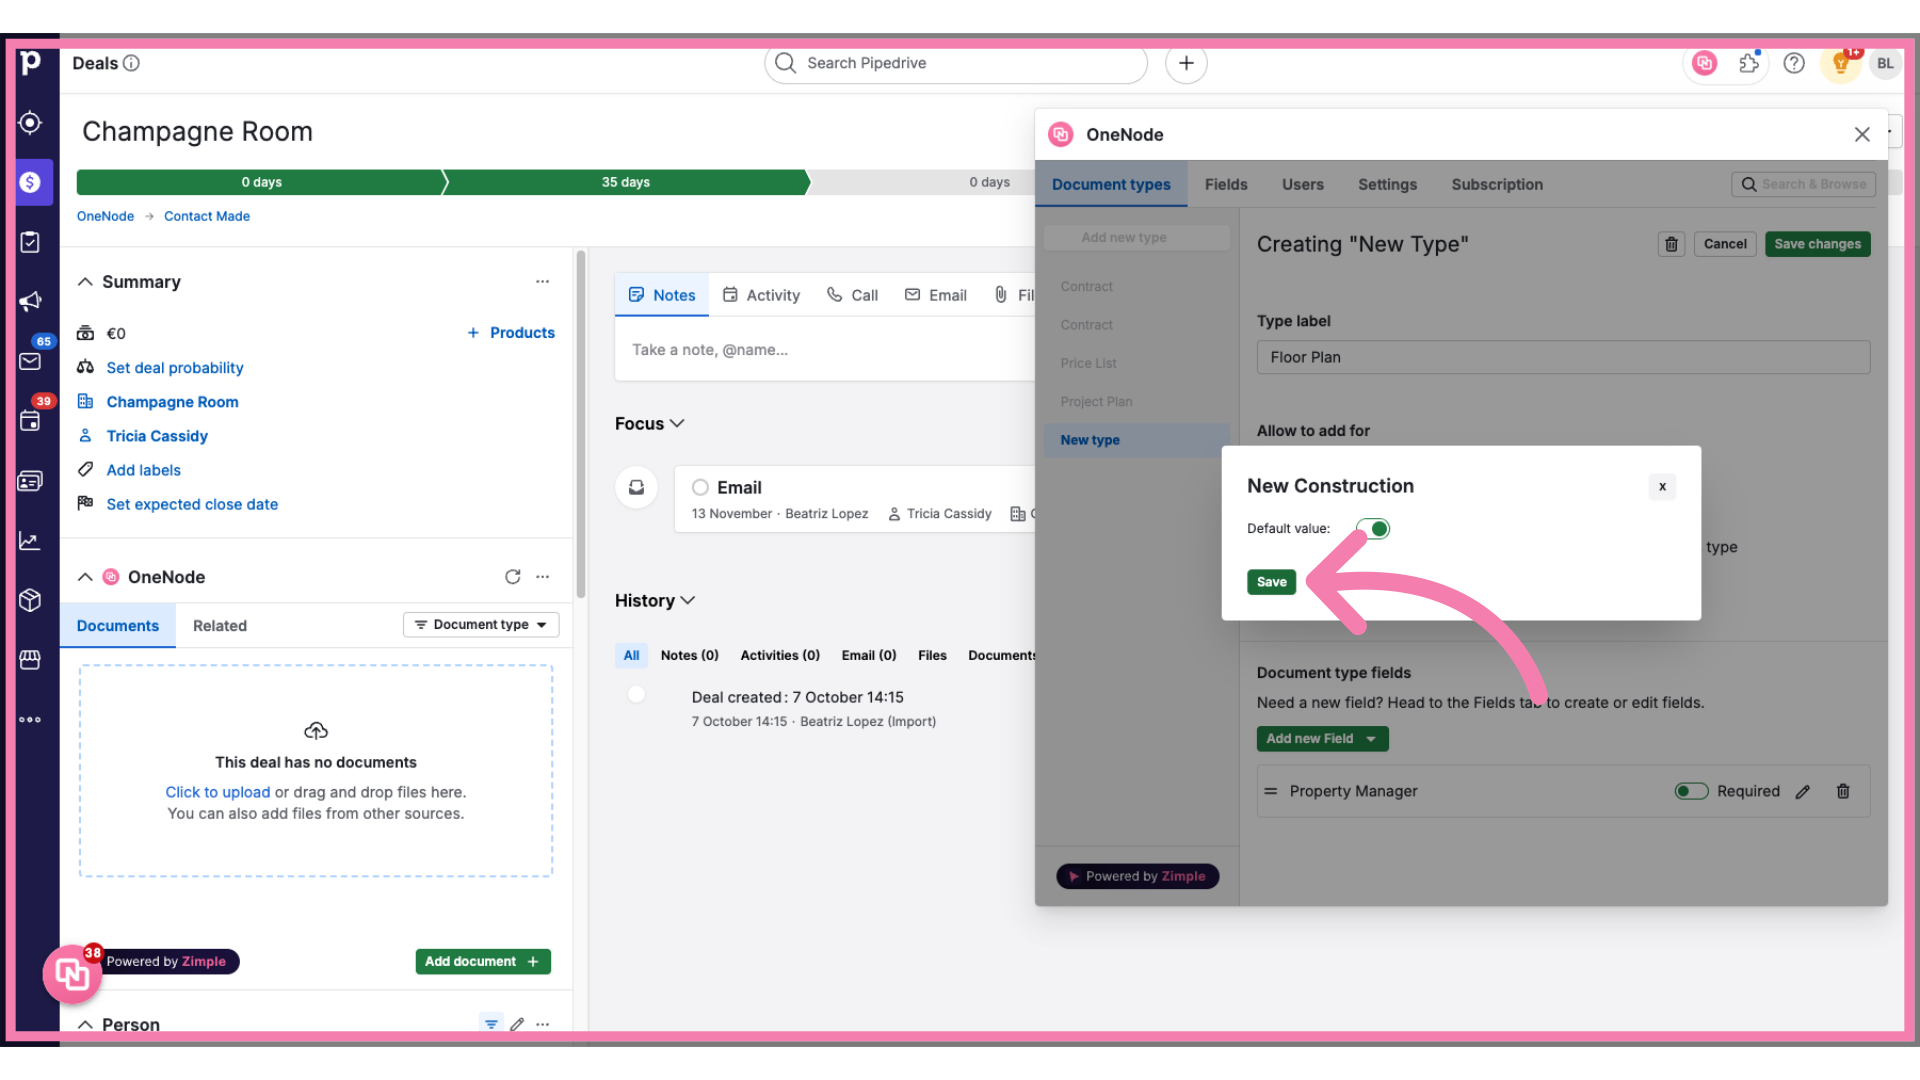
27. Click "Save"
Lastly, don't forget to click "Save". That's it.
28. Set required if needed
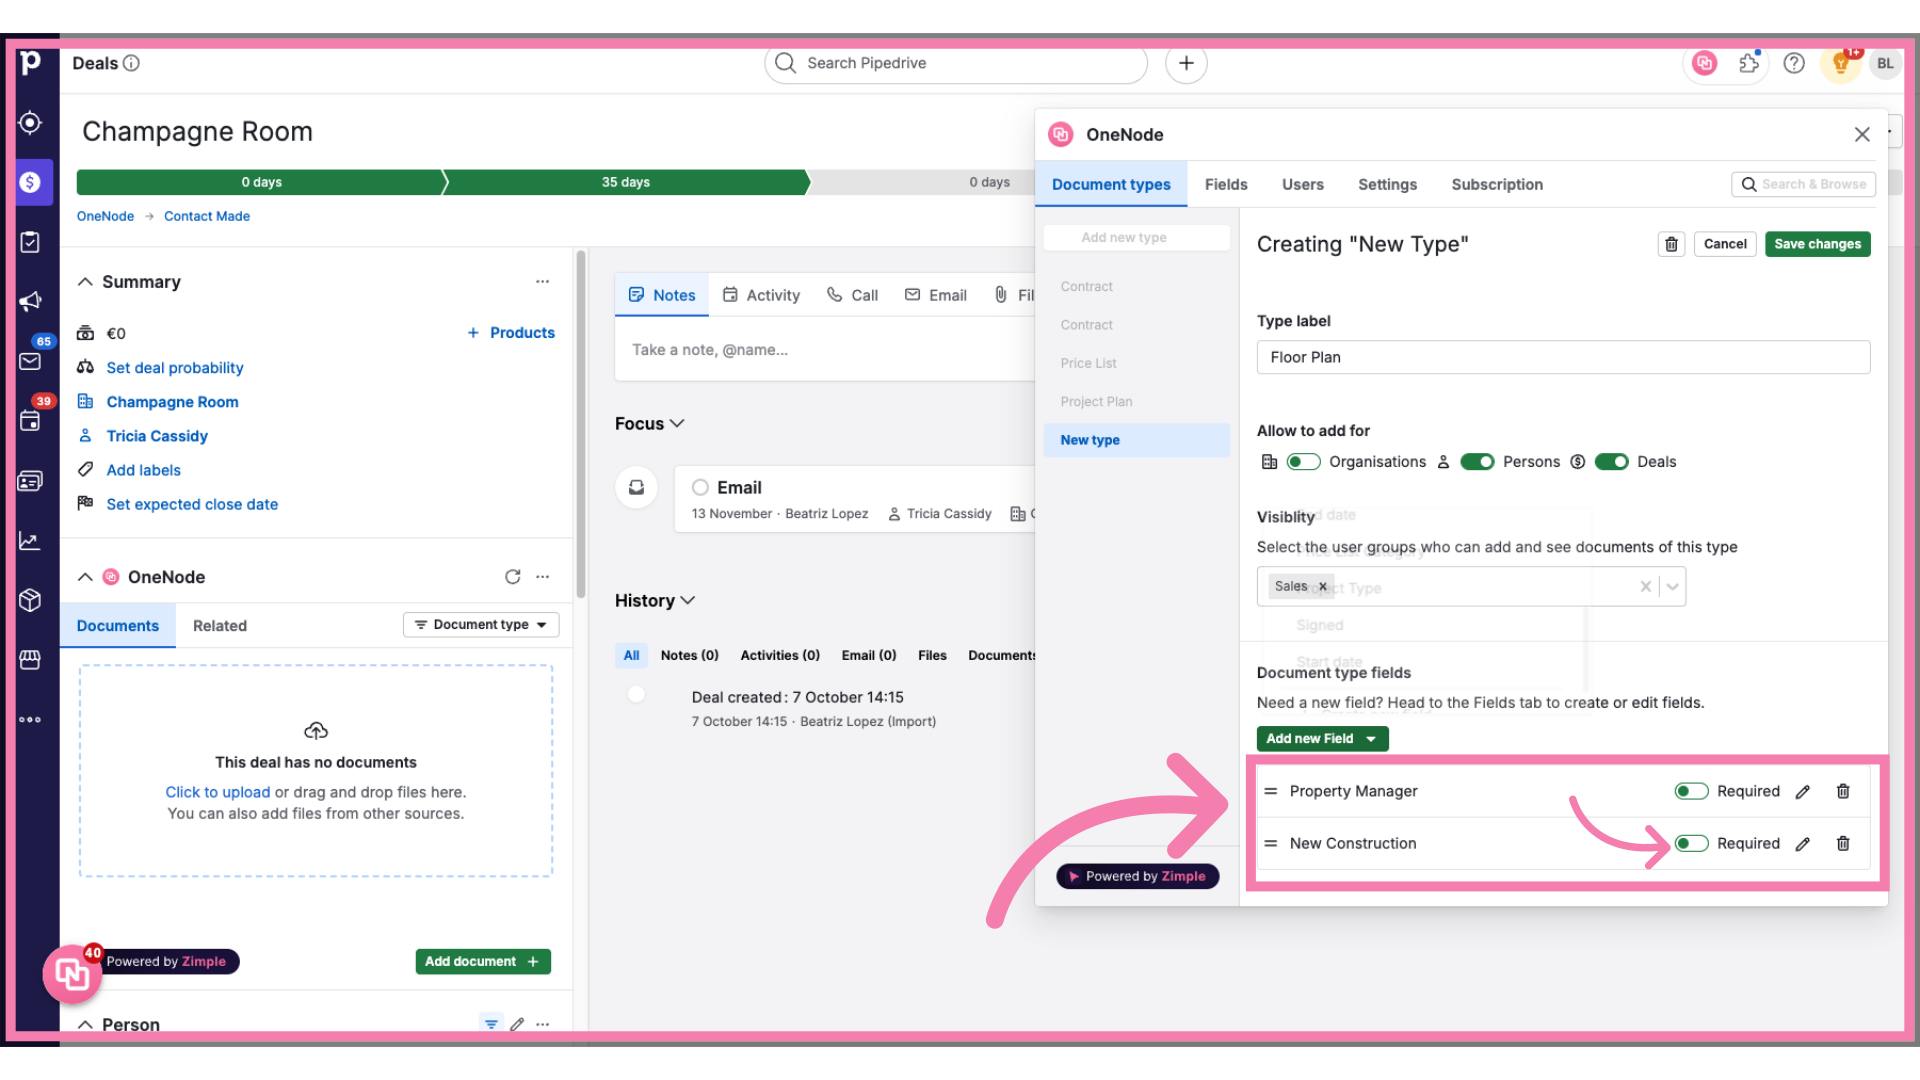
We have created two fields now. Toggle the switch to mark them as required if needed.
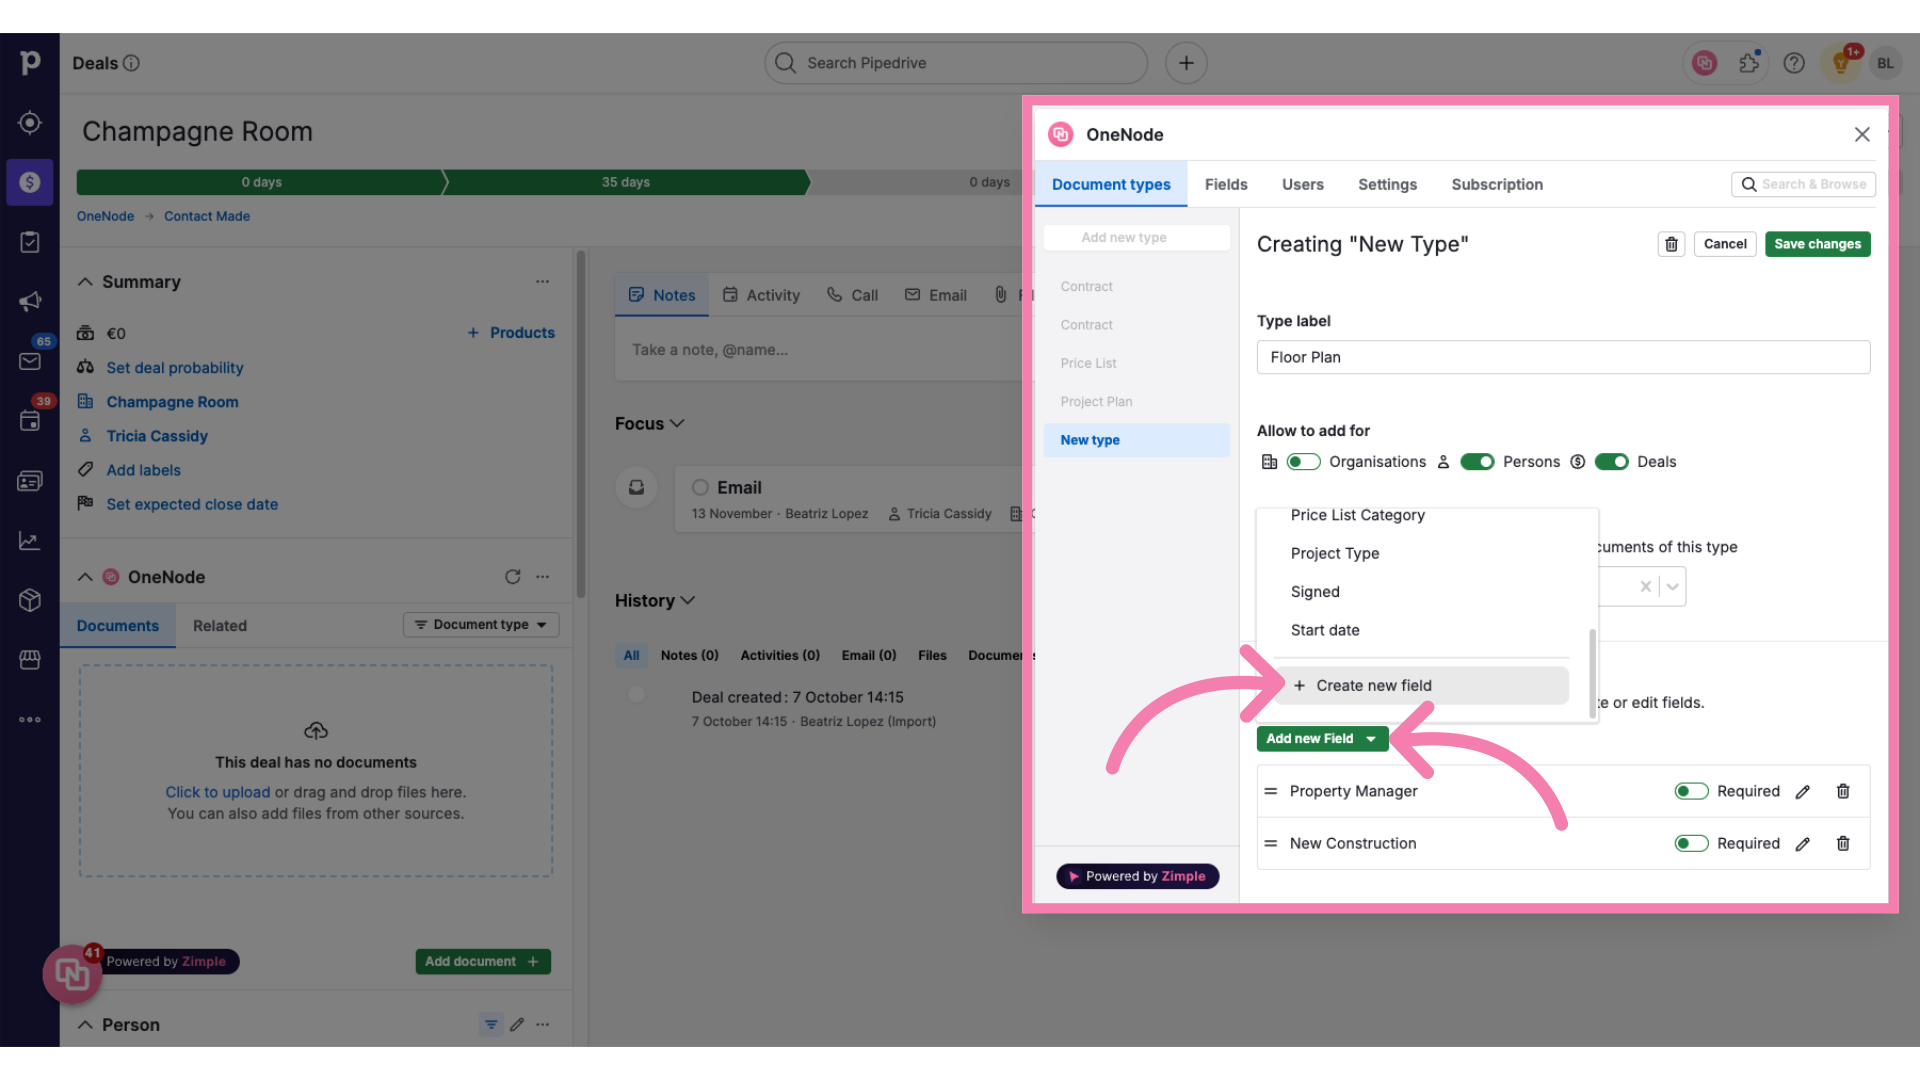
29. Click "Create new field"
Ok. Here goes our third field. Click on the "Add New Field" button and choose "+Create New"
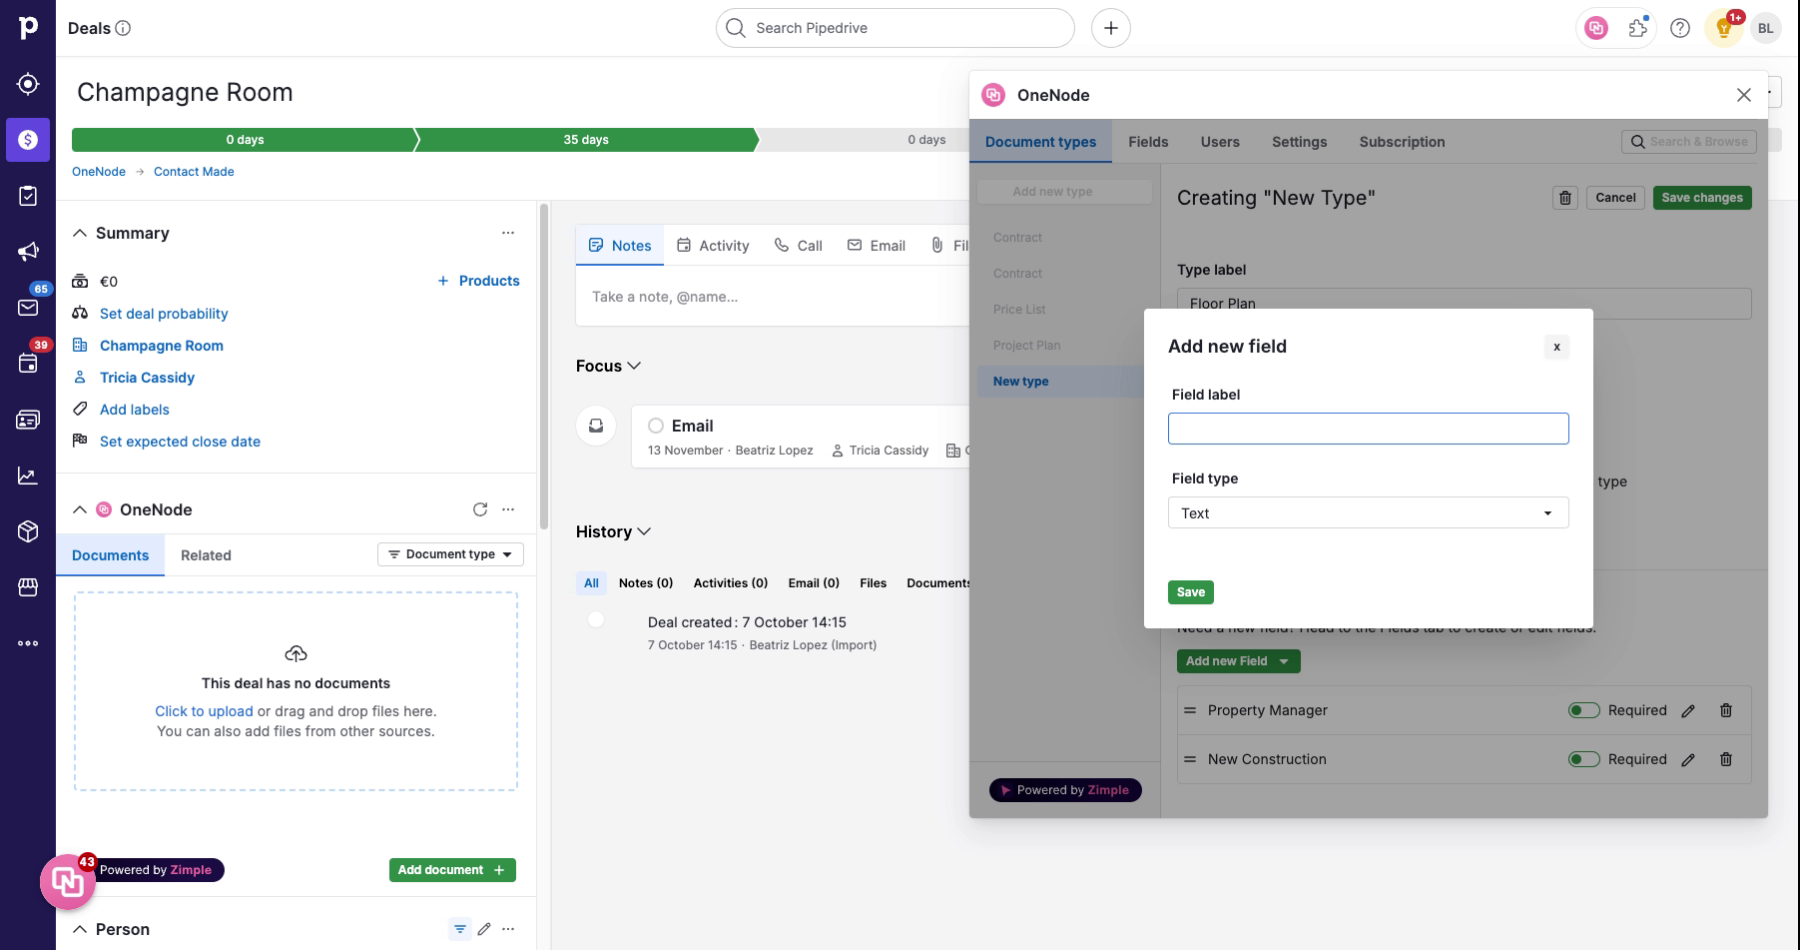
30. Fill "Property type"
This time around, we'll create a field called "Property type", to distinguish commercial from residential Floor Plans
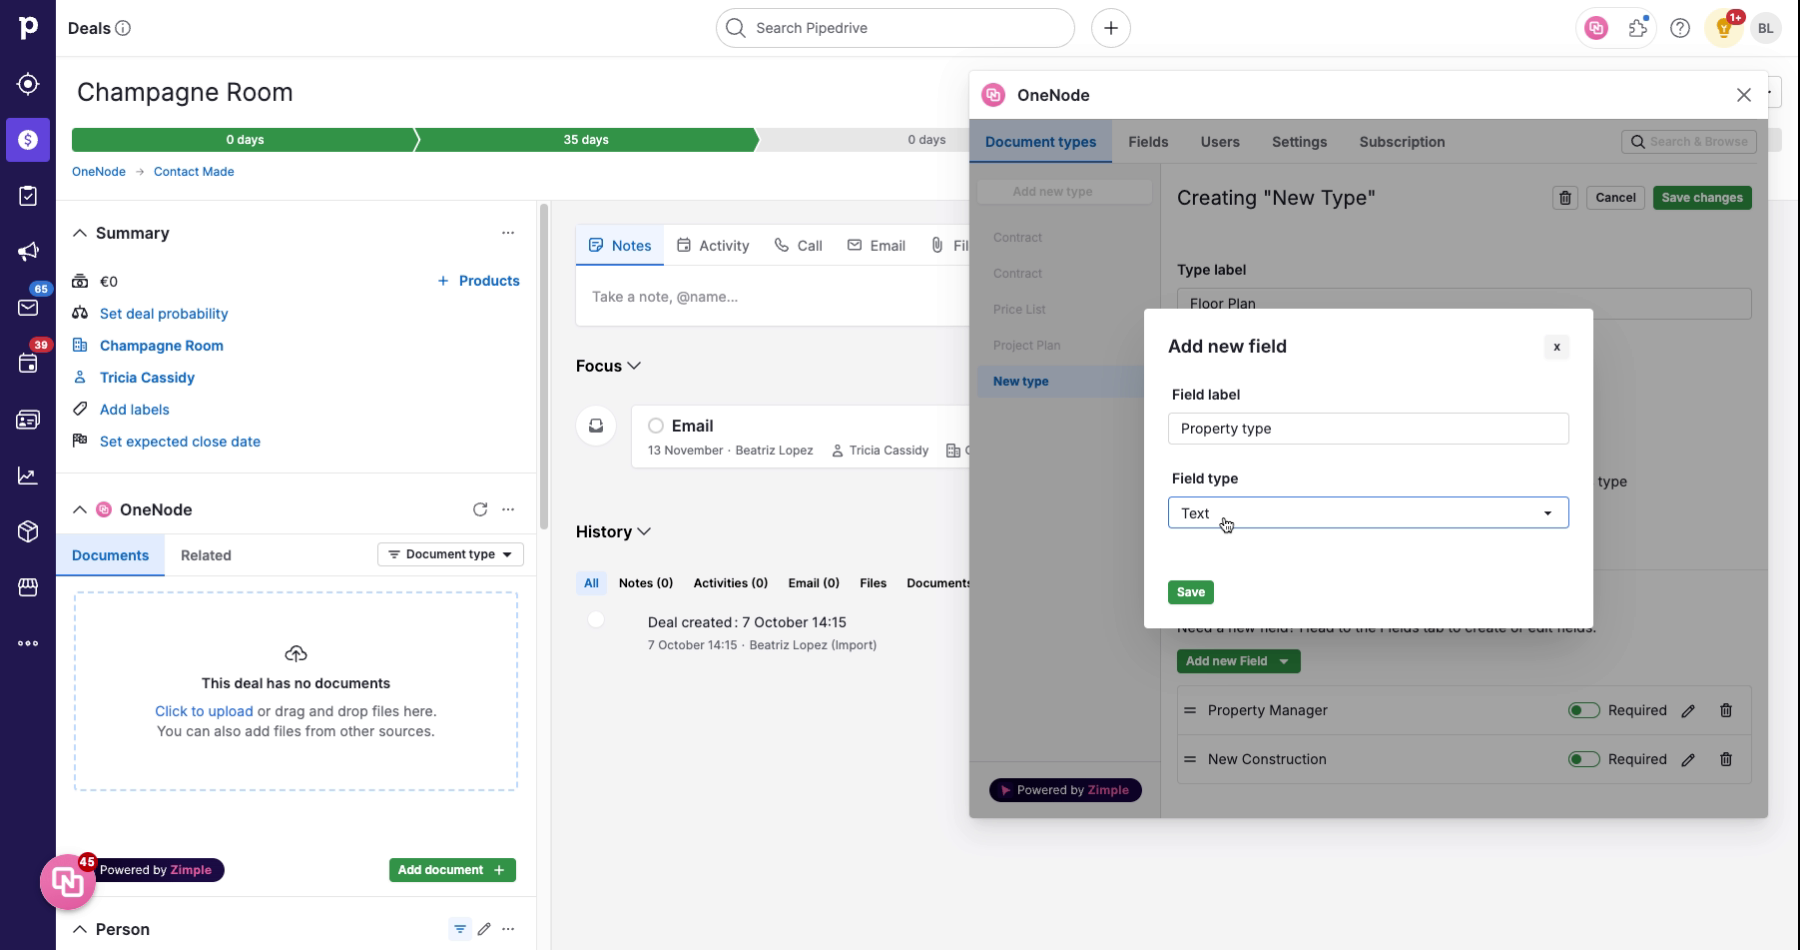
31. Fill "Single select"
So this will be a "Single Select" field type. Let's choose it from the dropdown
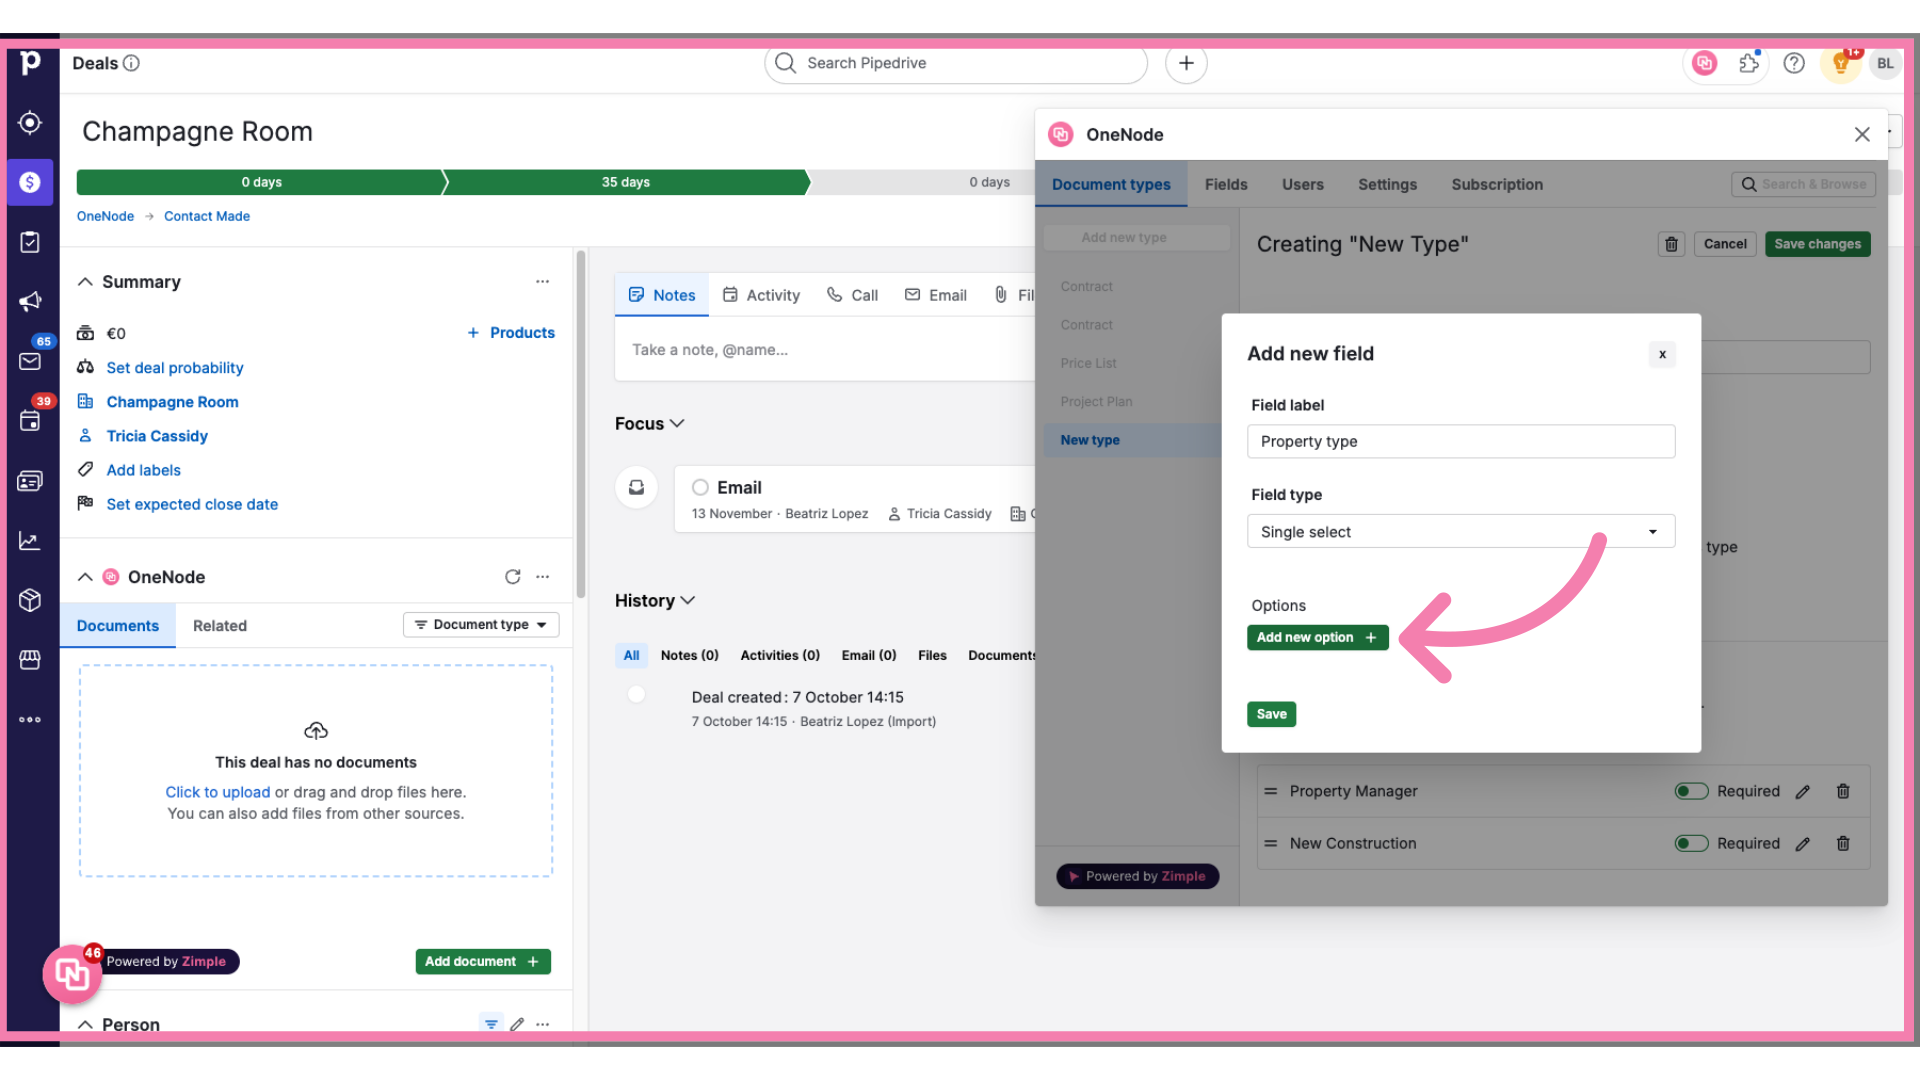
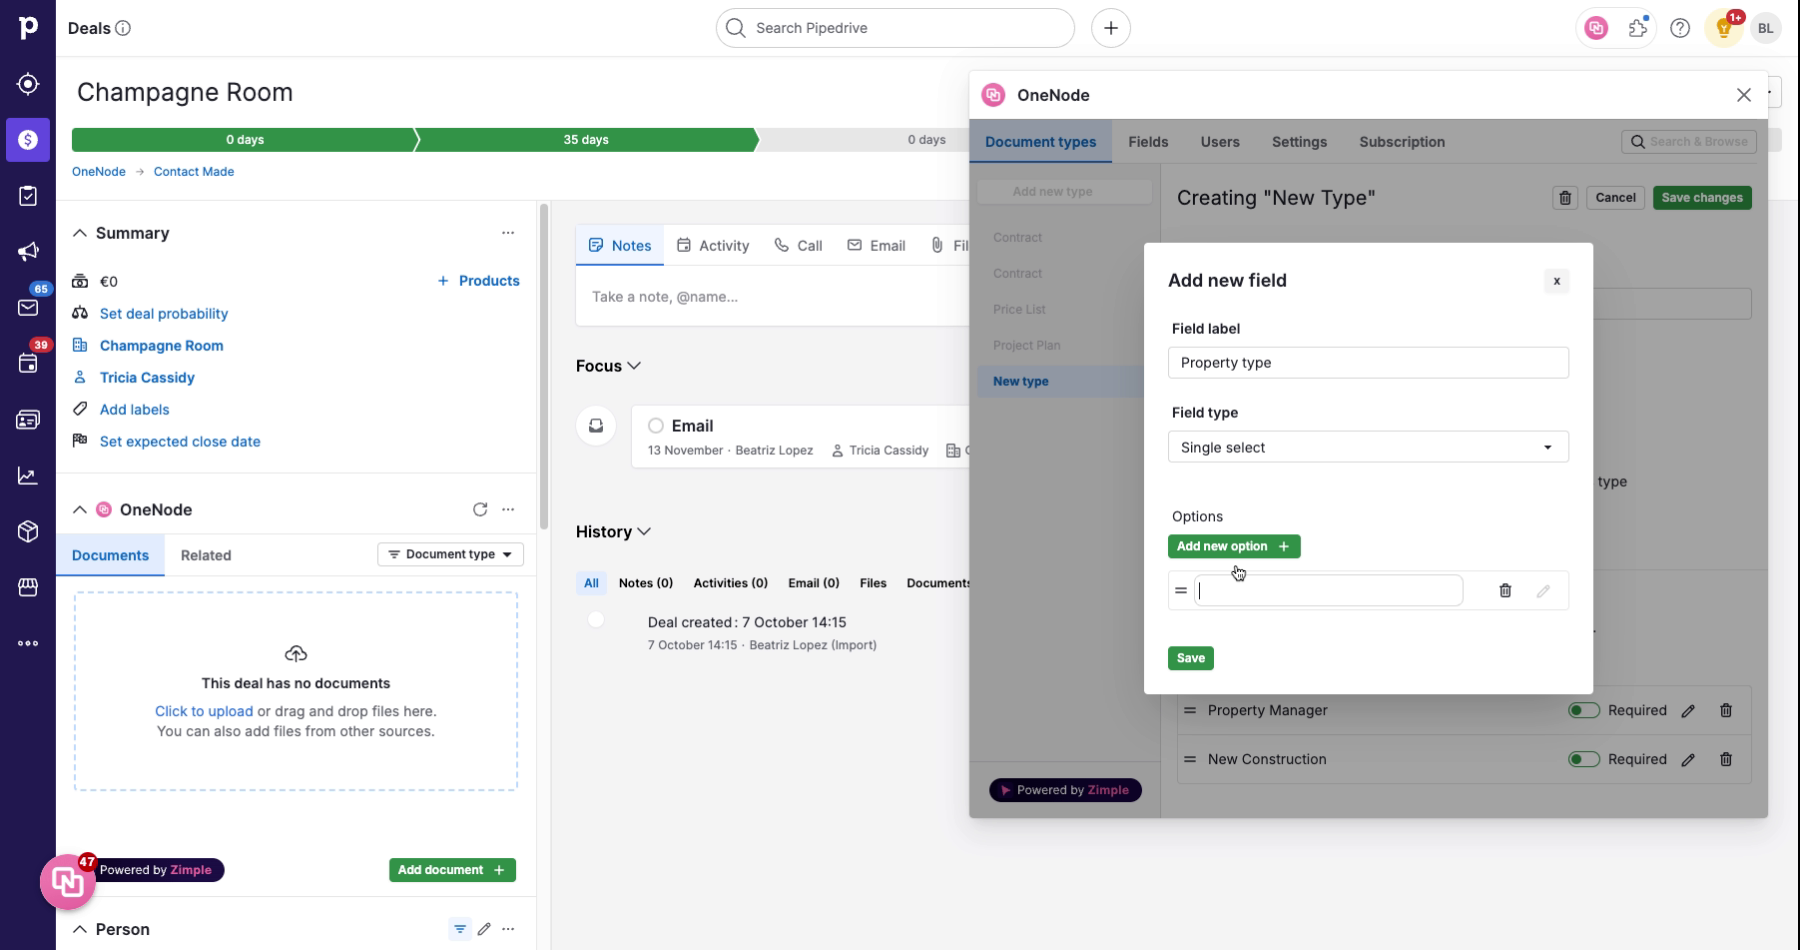
32. Click "Add new option"
Then, click on the "Add new option" button
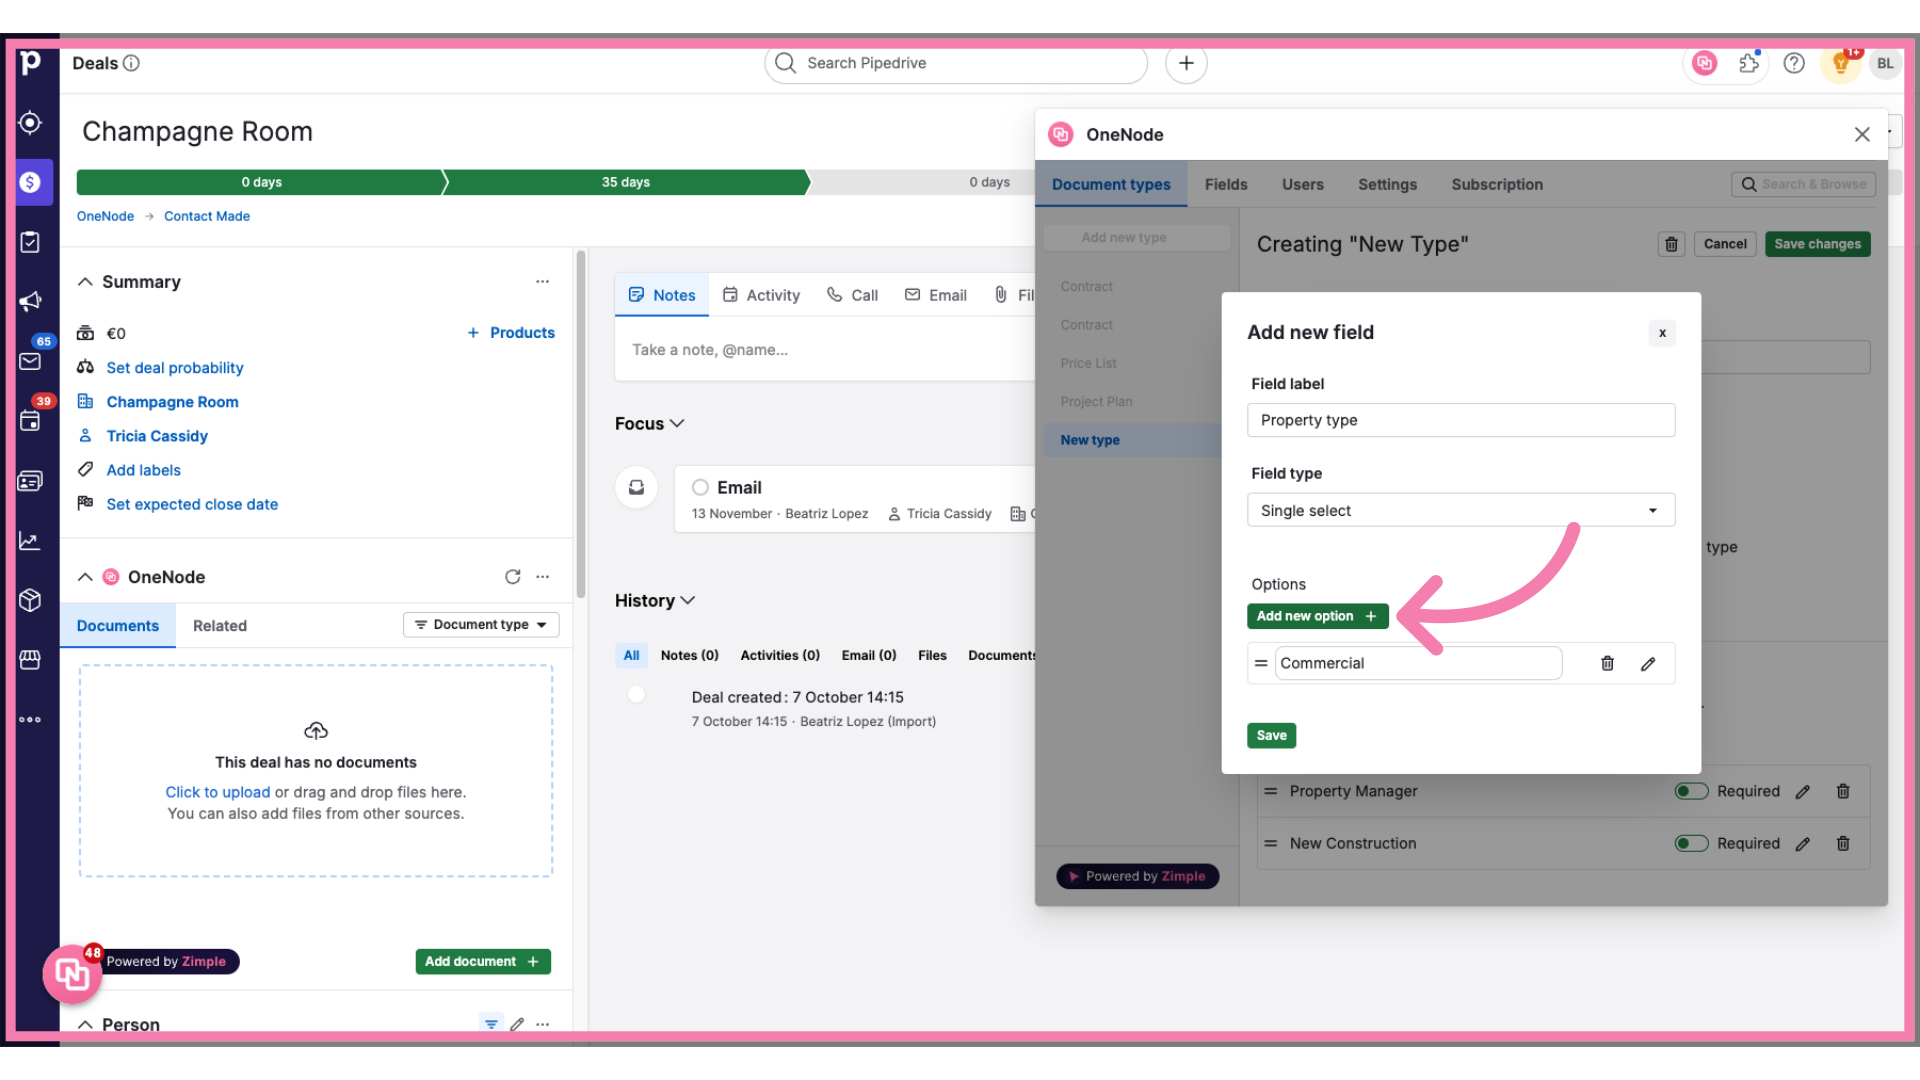
33. Fill "Commercial"
34. Click "Add new option"
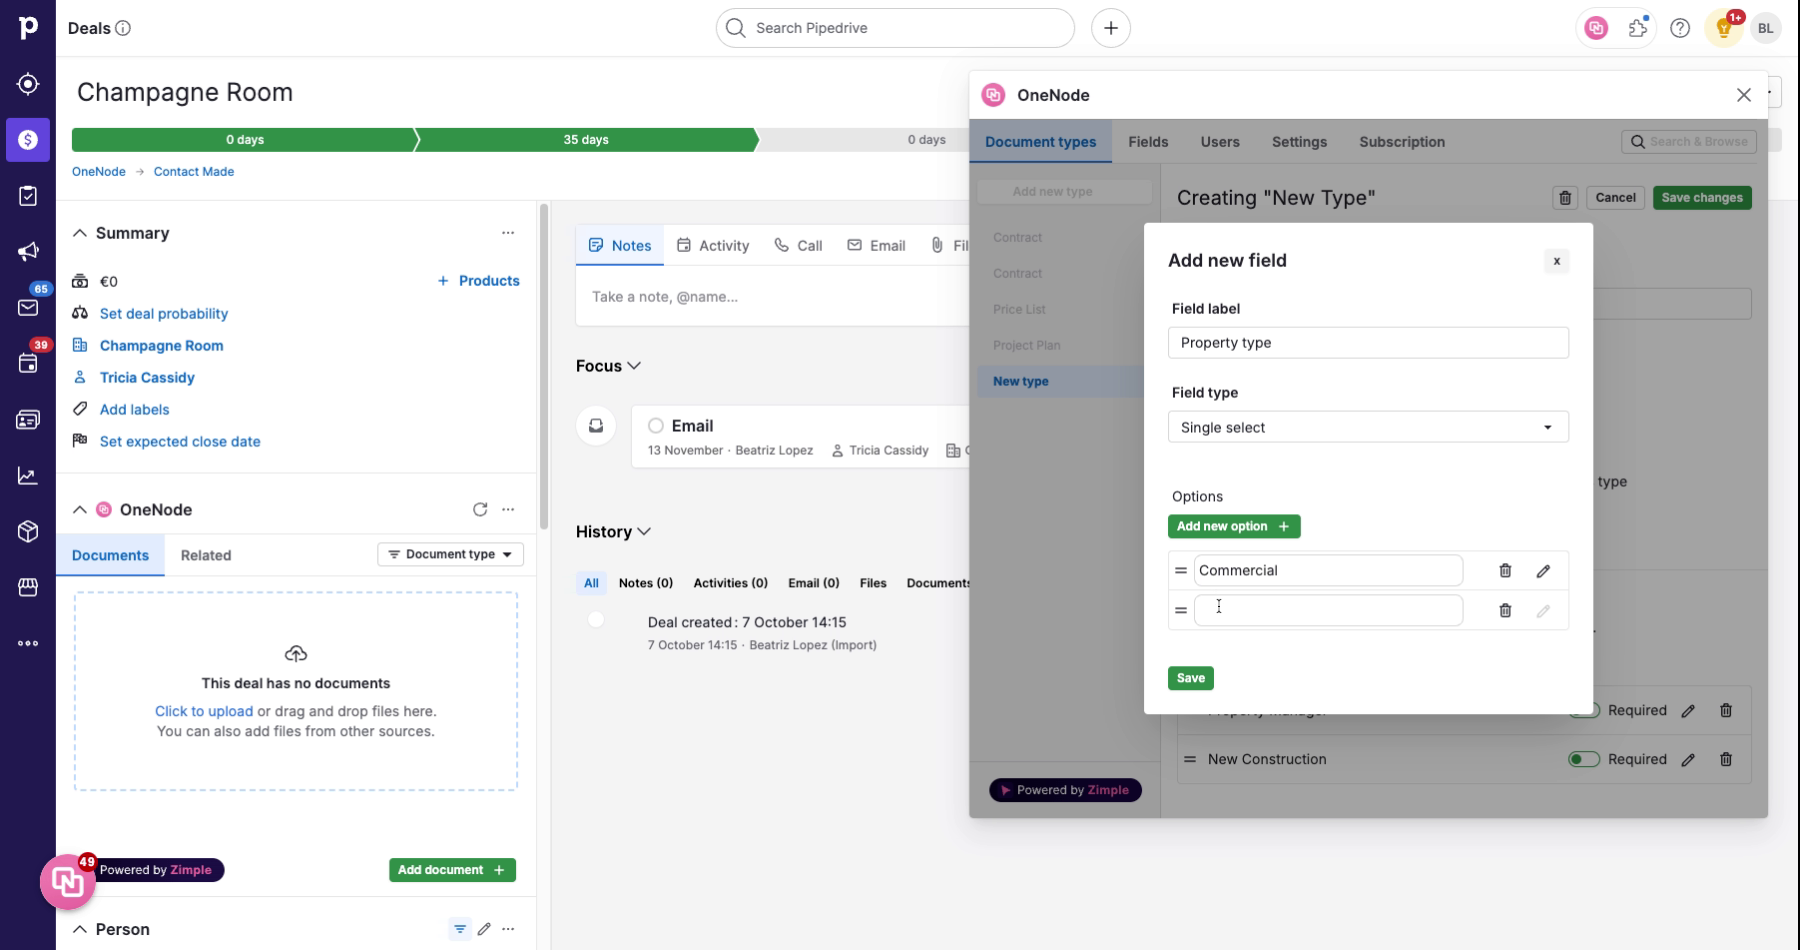
Click to Add another option
35. Fill "Residential"
36. Click "Save"
Easy as that! Now Click "Save"
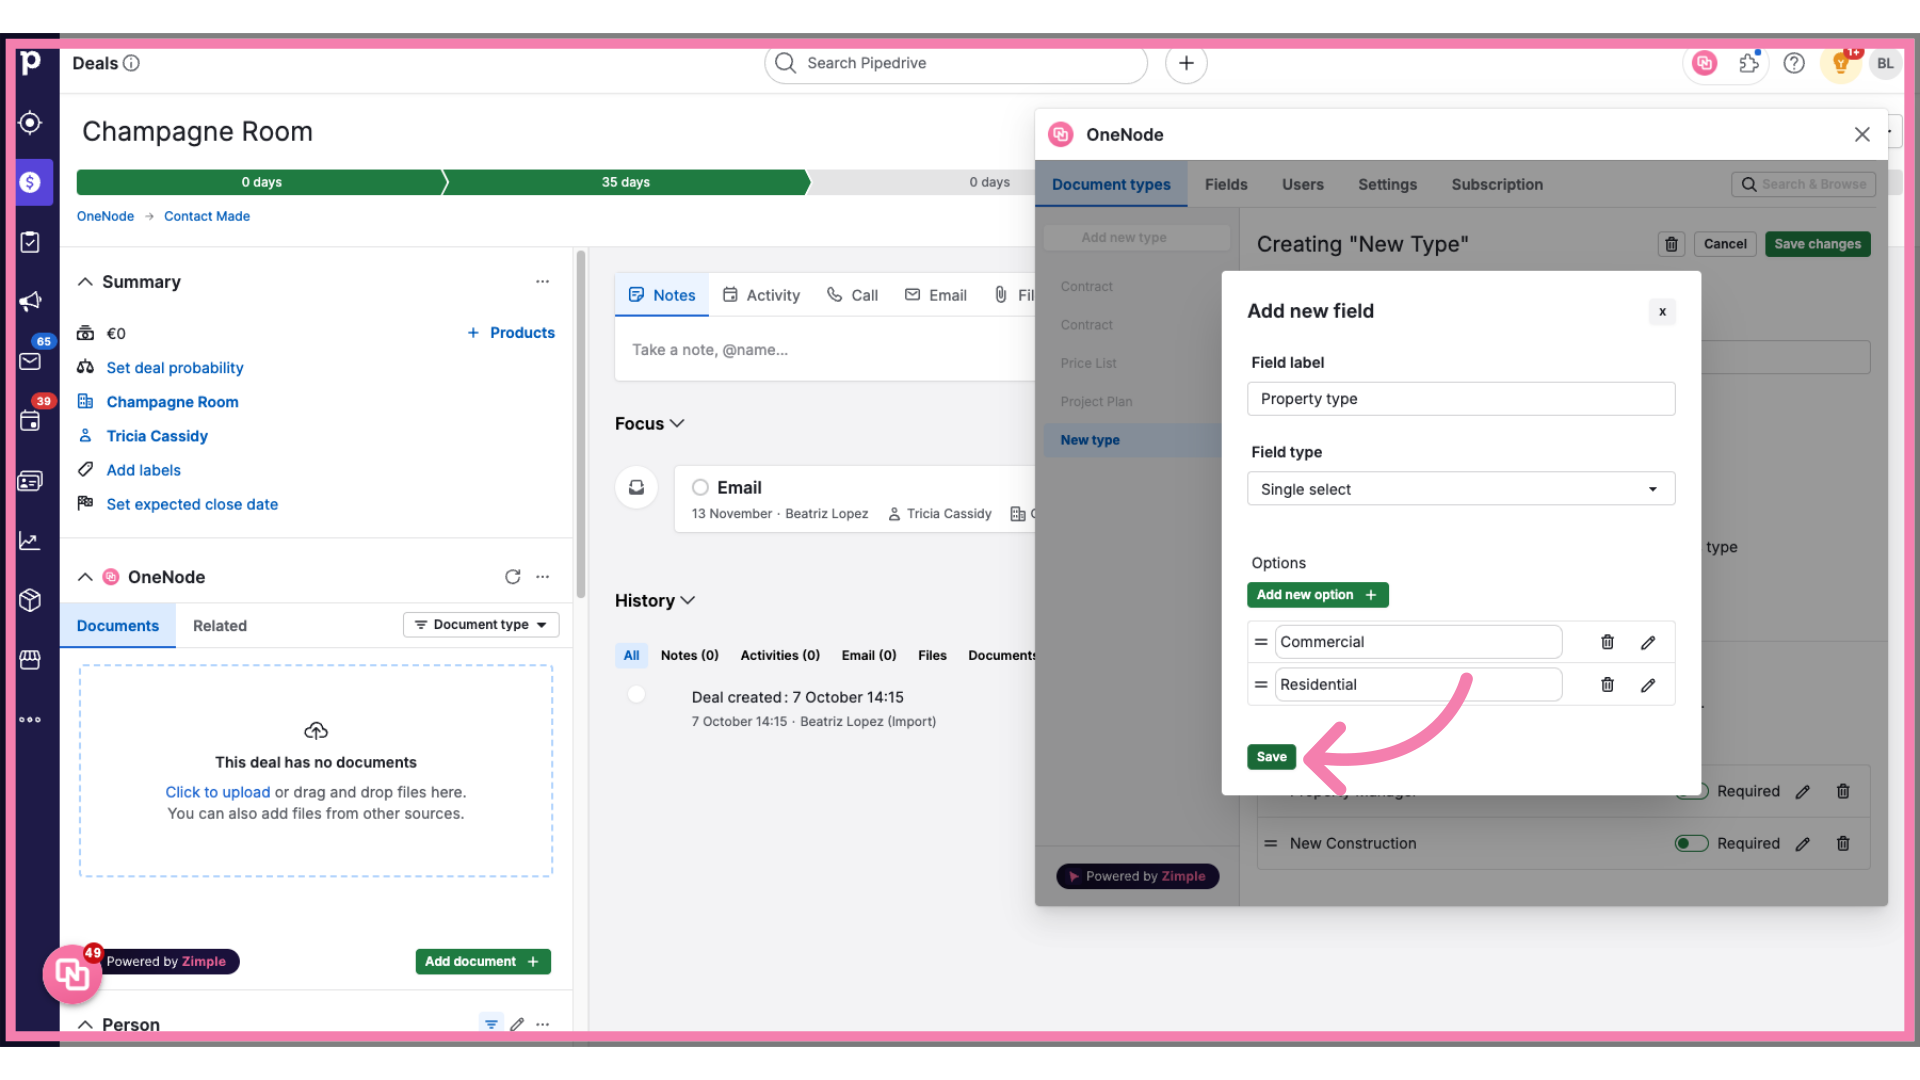
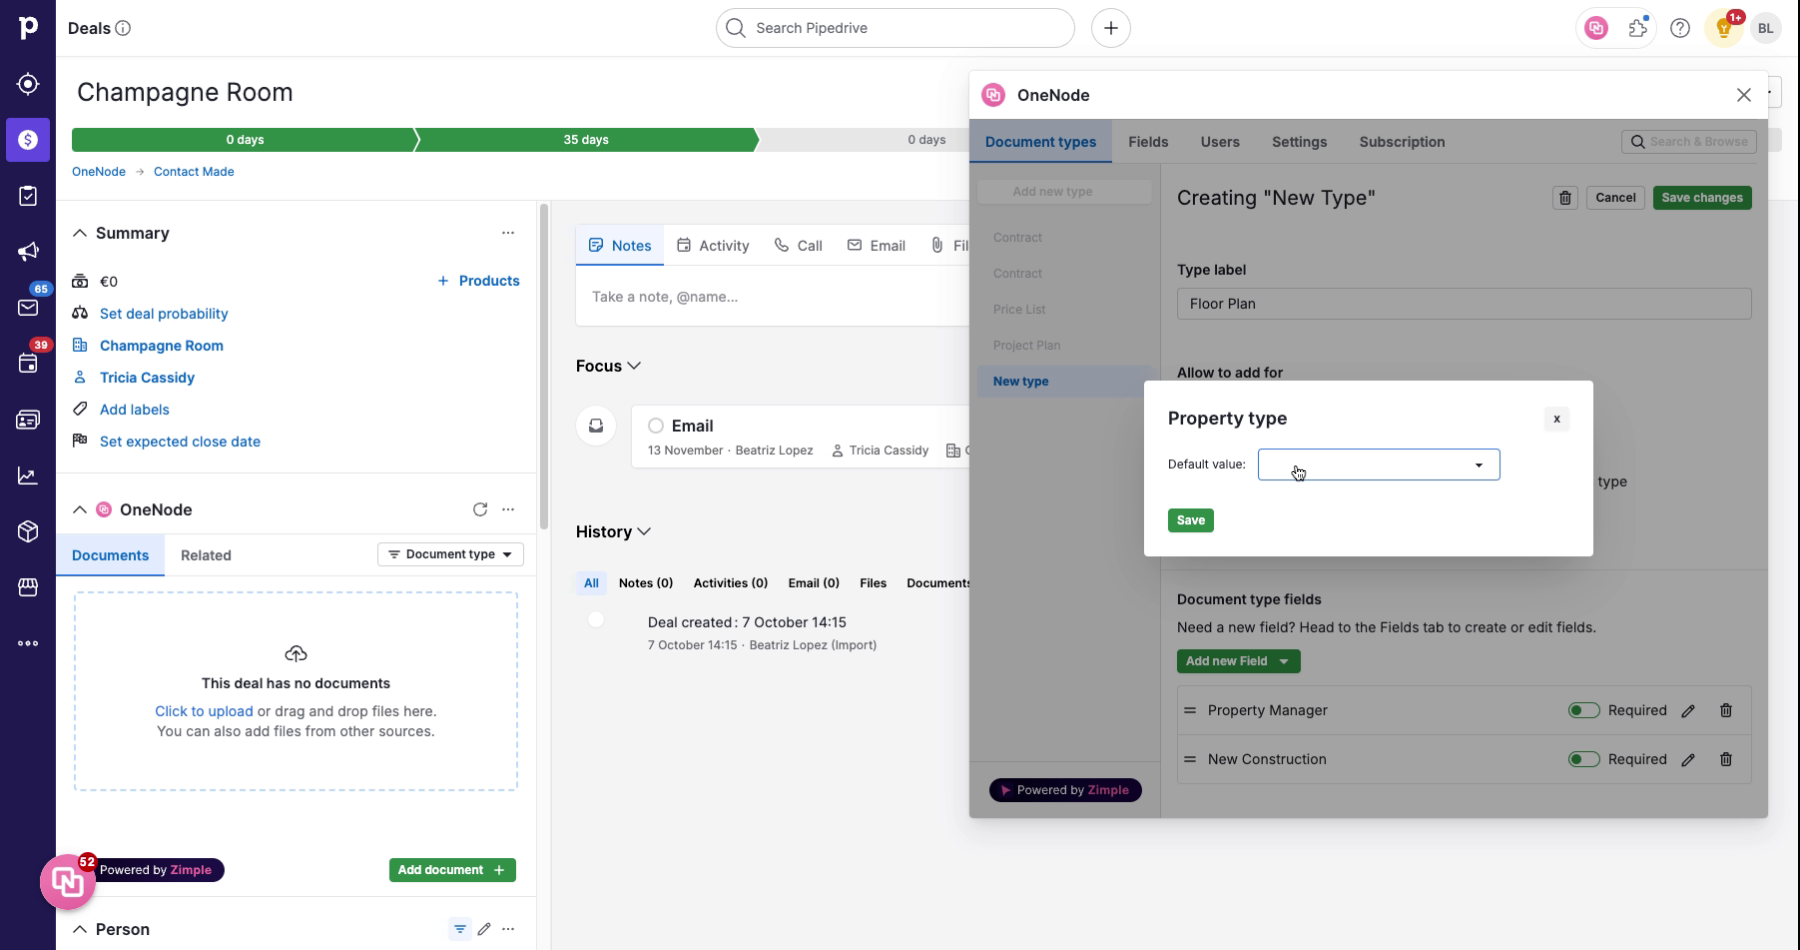
37. Fill "Commercial Residential"
And the field default dialog window will pop up. Set the default and don't forget to Save!
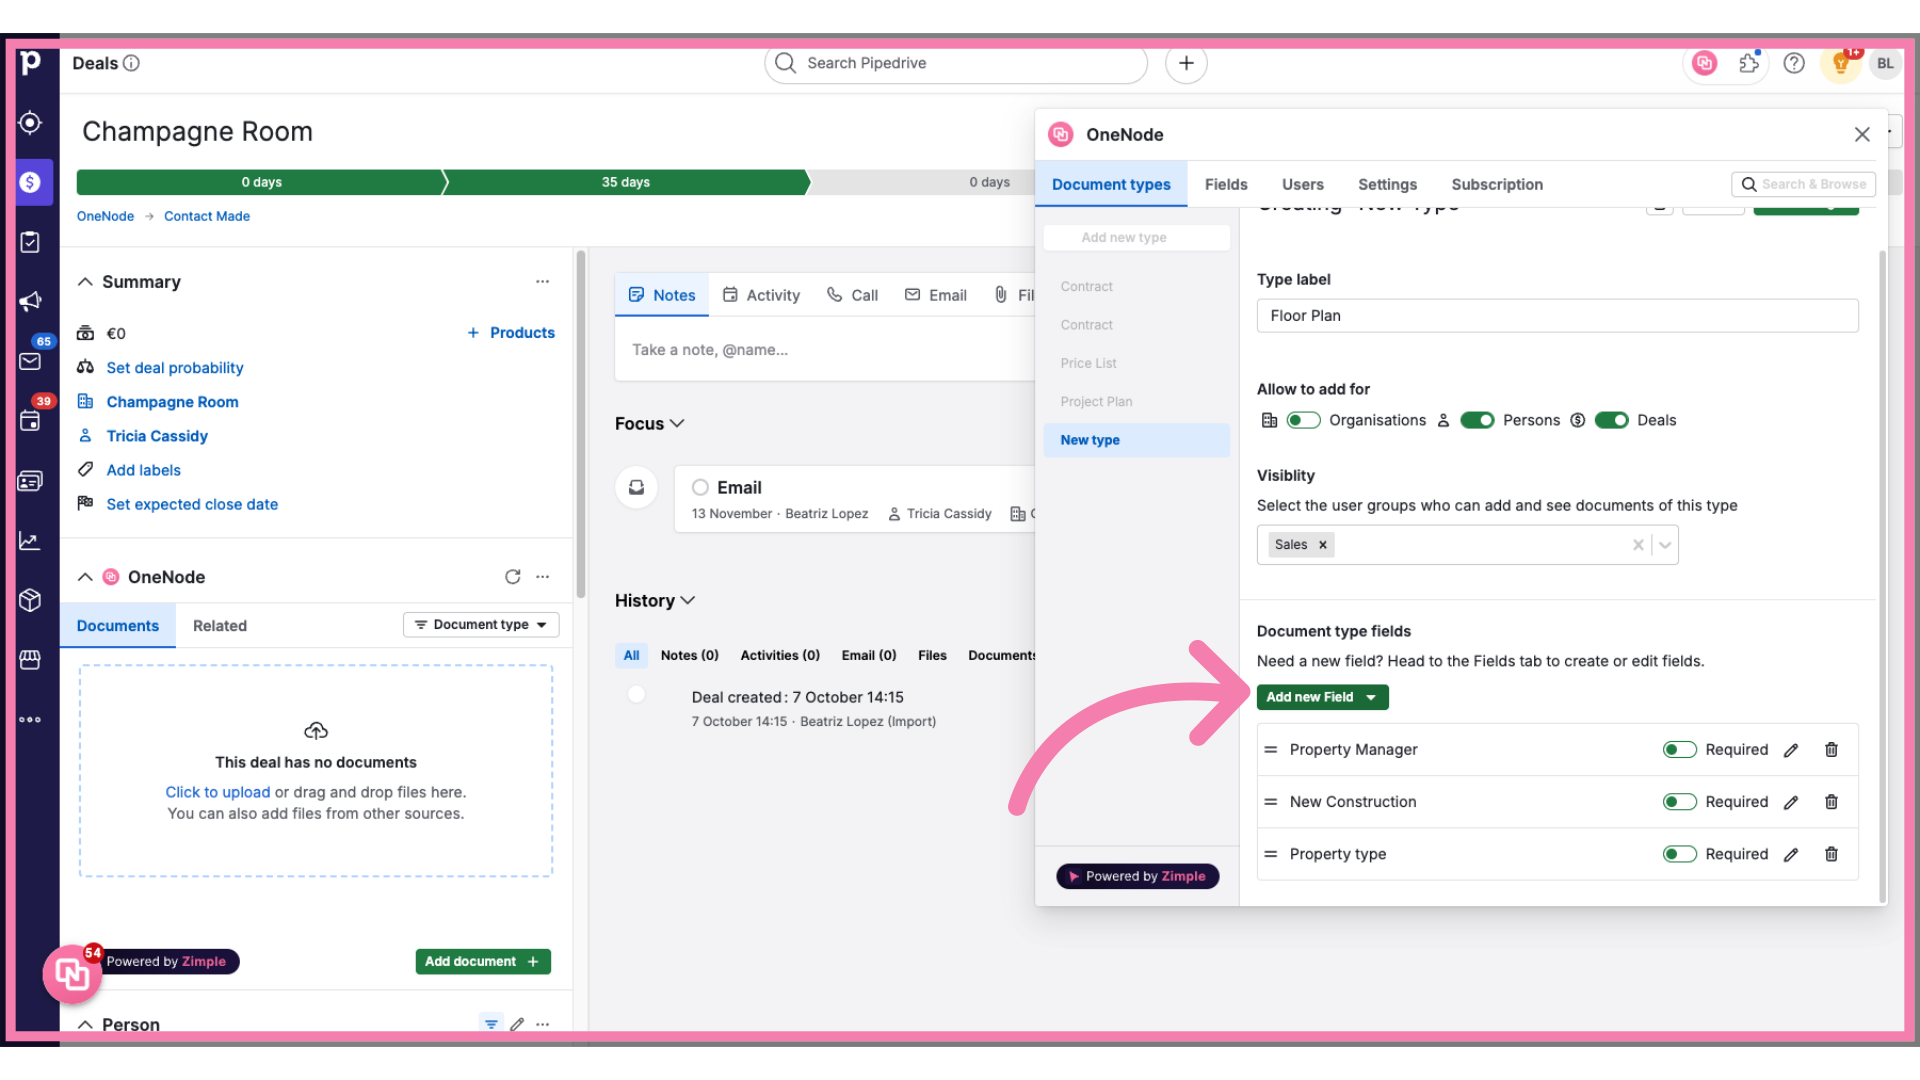
38. Click "Add new Field"
Excellent. Let's go ahead and create the fourth field. Click on "Add New"
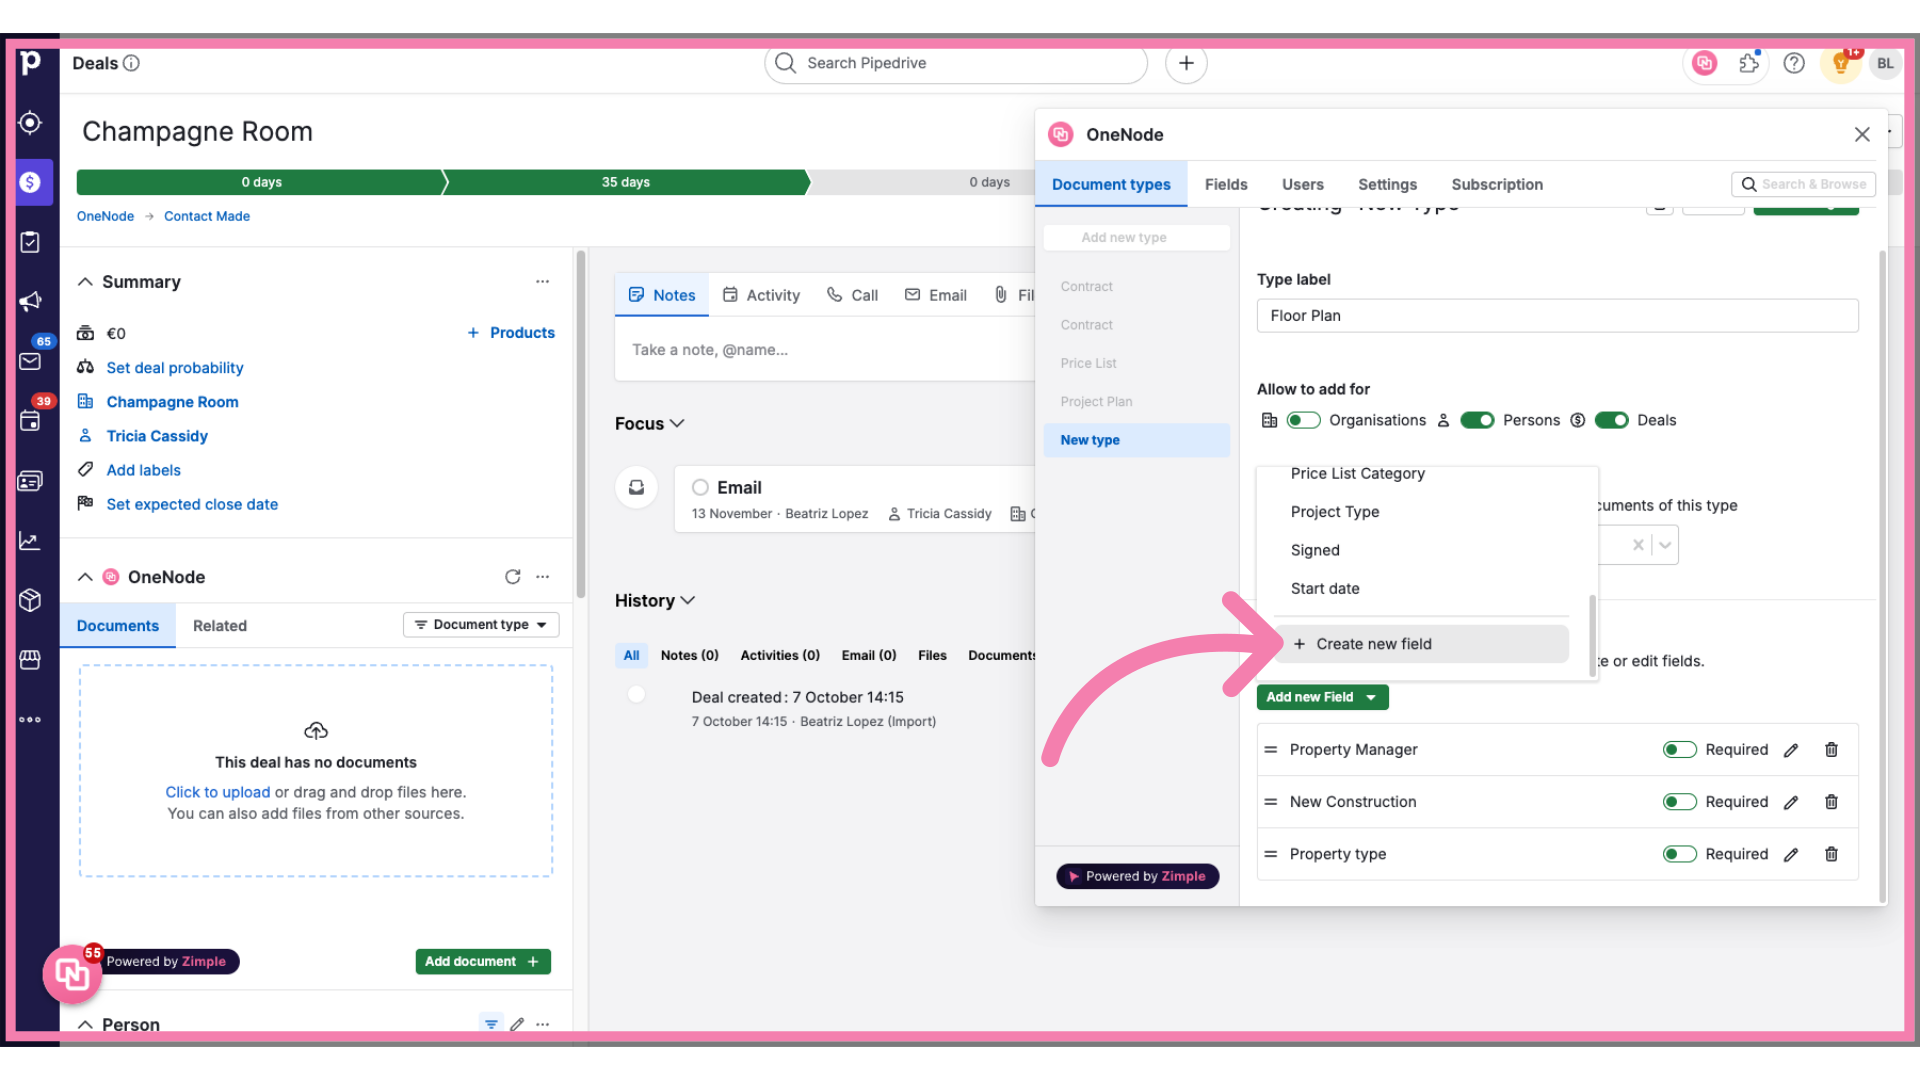
39. Click "Create new field"
and select "Create new"
40. Click here
Say you want to track when a floor plan is offered to a specific contact
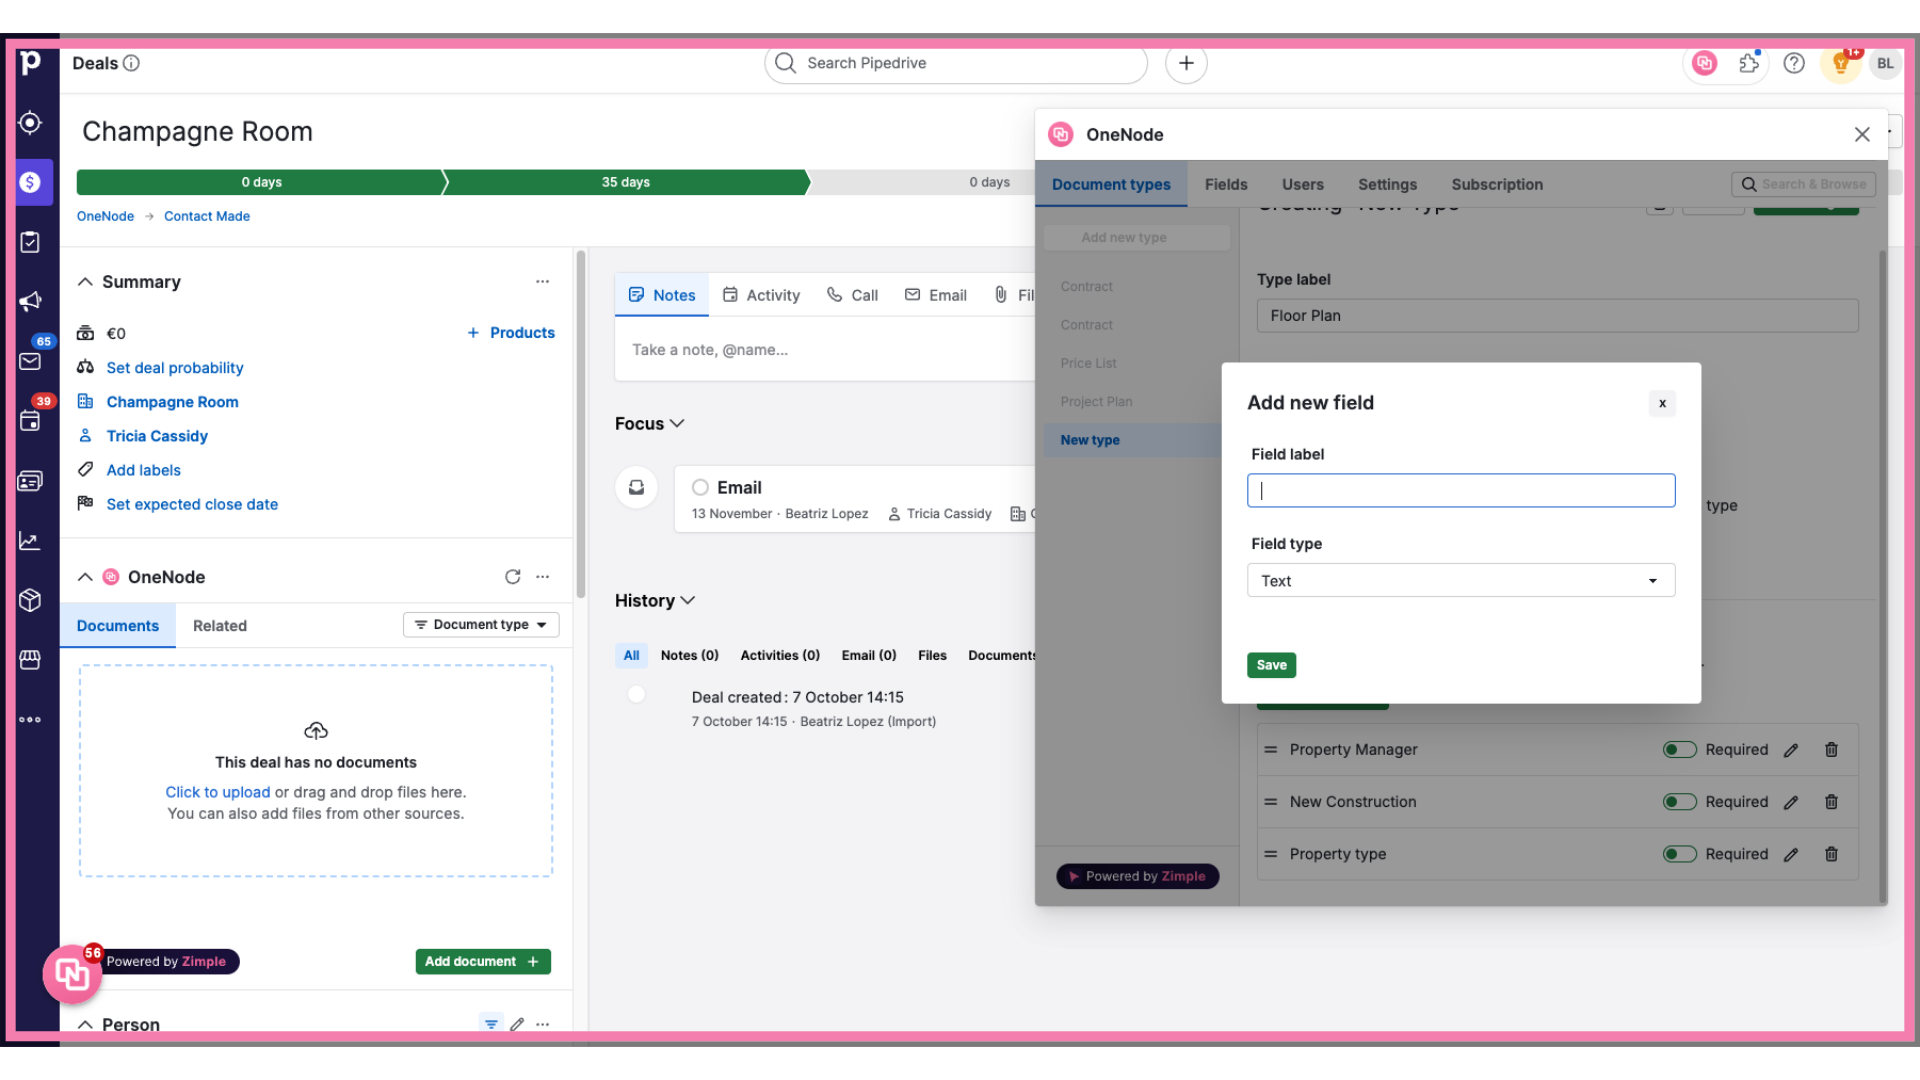
41. Type "Listing offered on"
so let's call this field "Listing offered on".
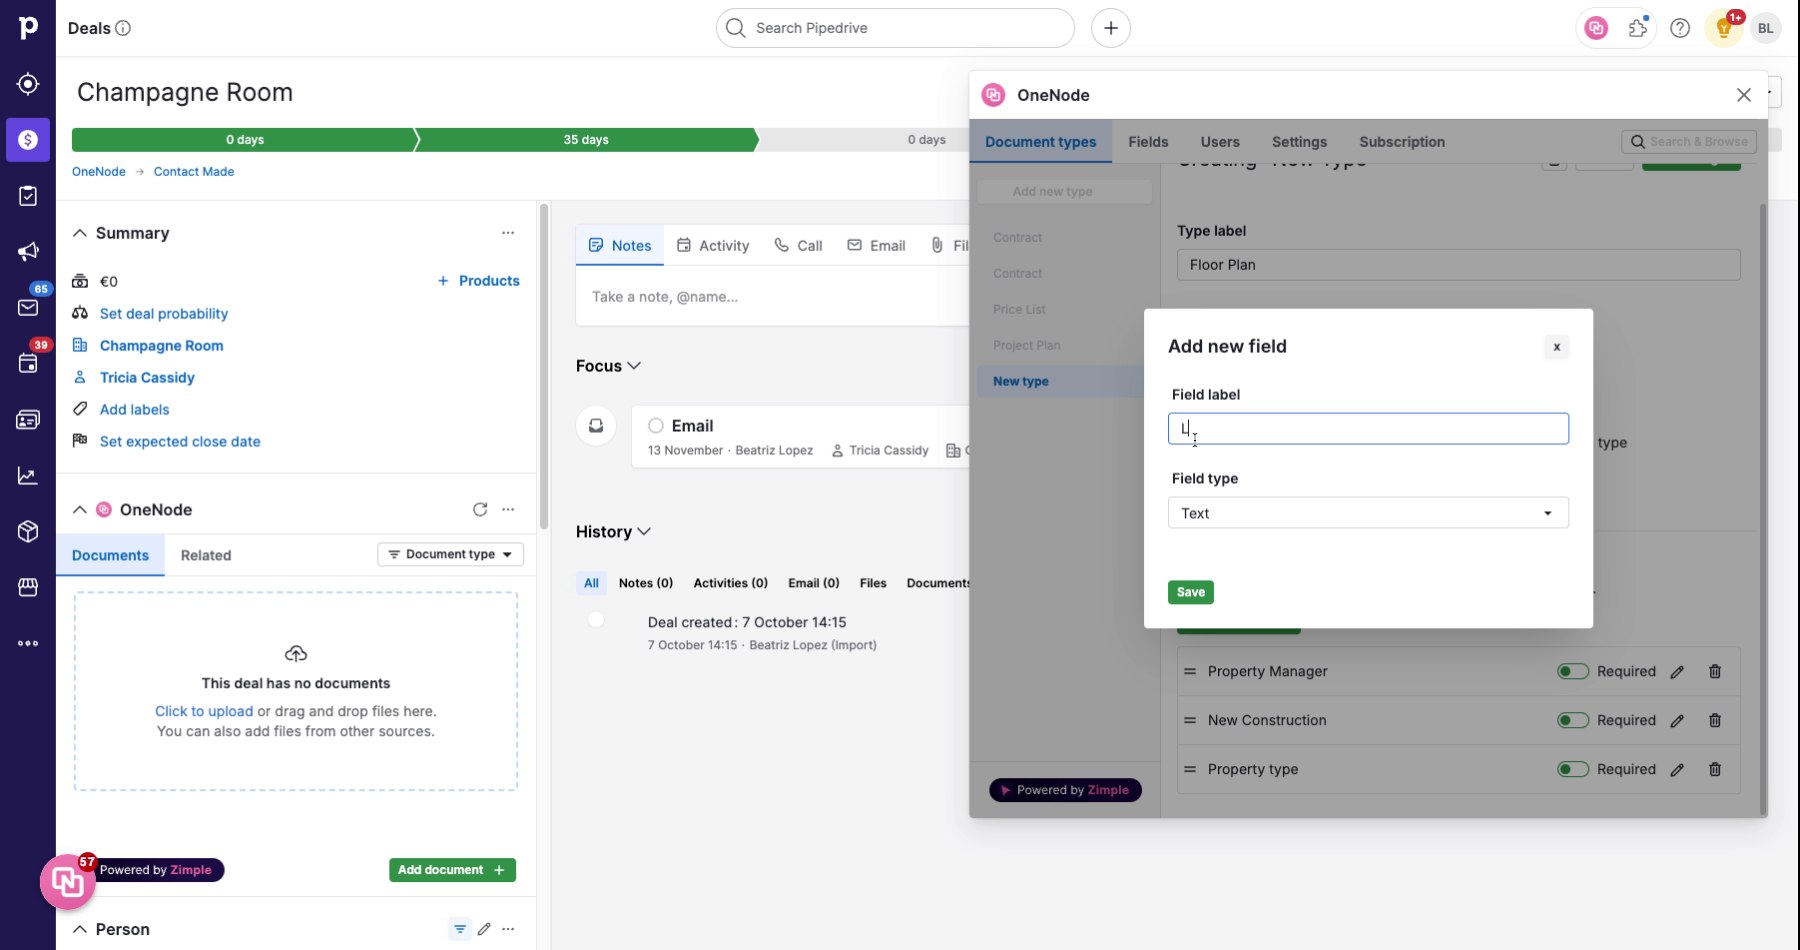
42. Select "Date" and Click "Save"
And make it a Date field type. Click on "Save"
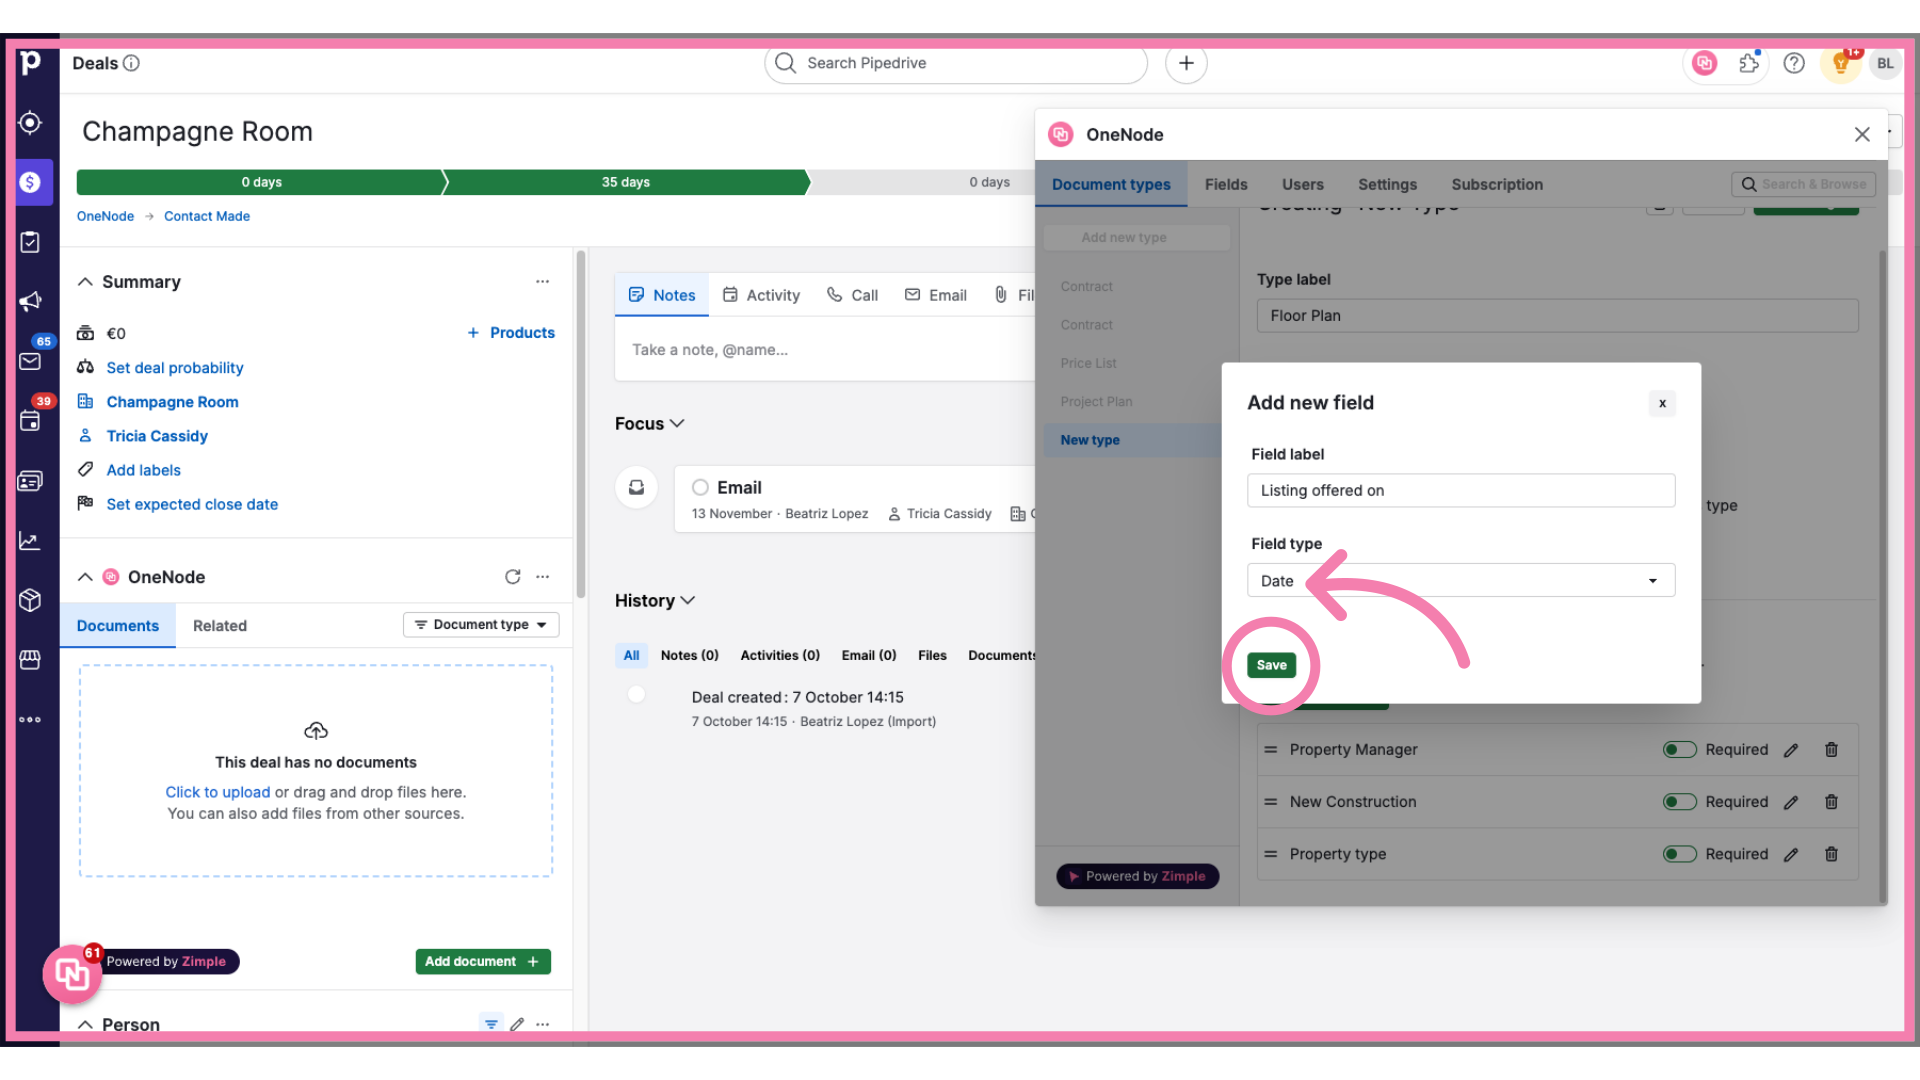
43. Click "today"
To finish creating this field, set the Default to Today
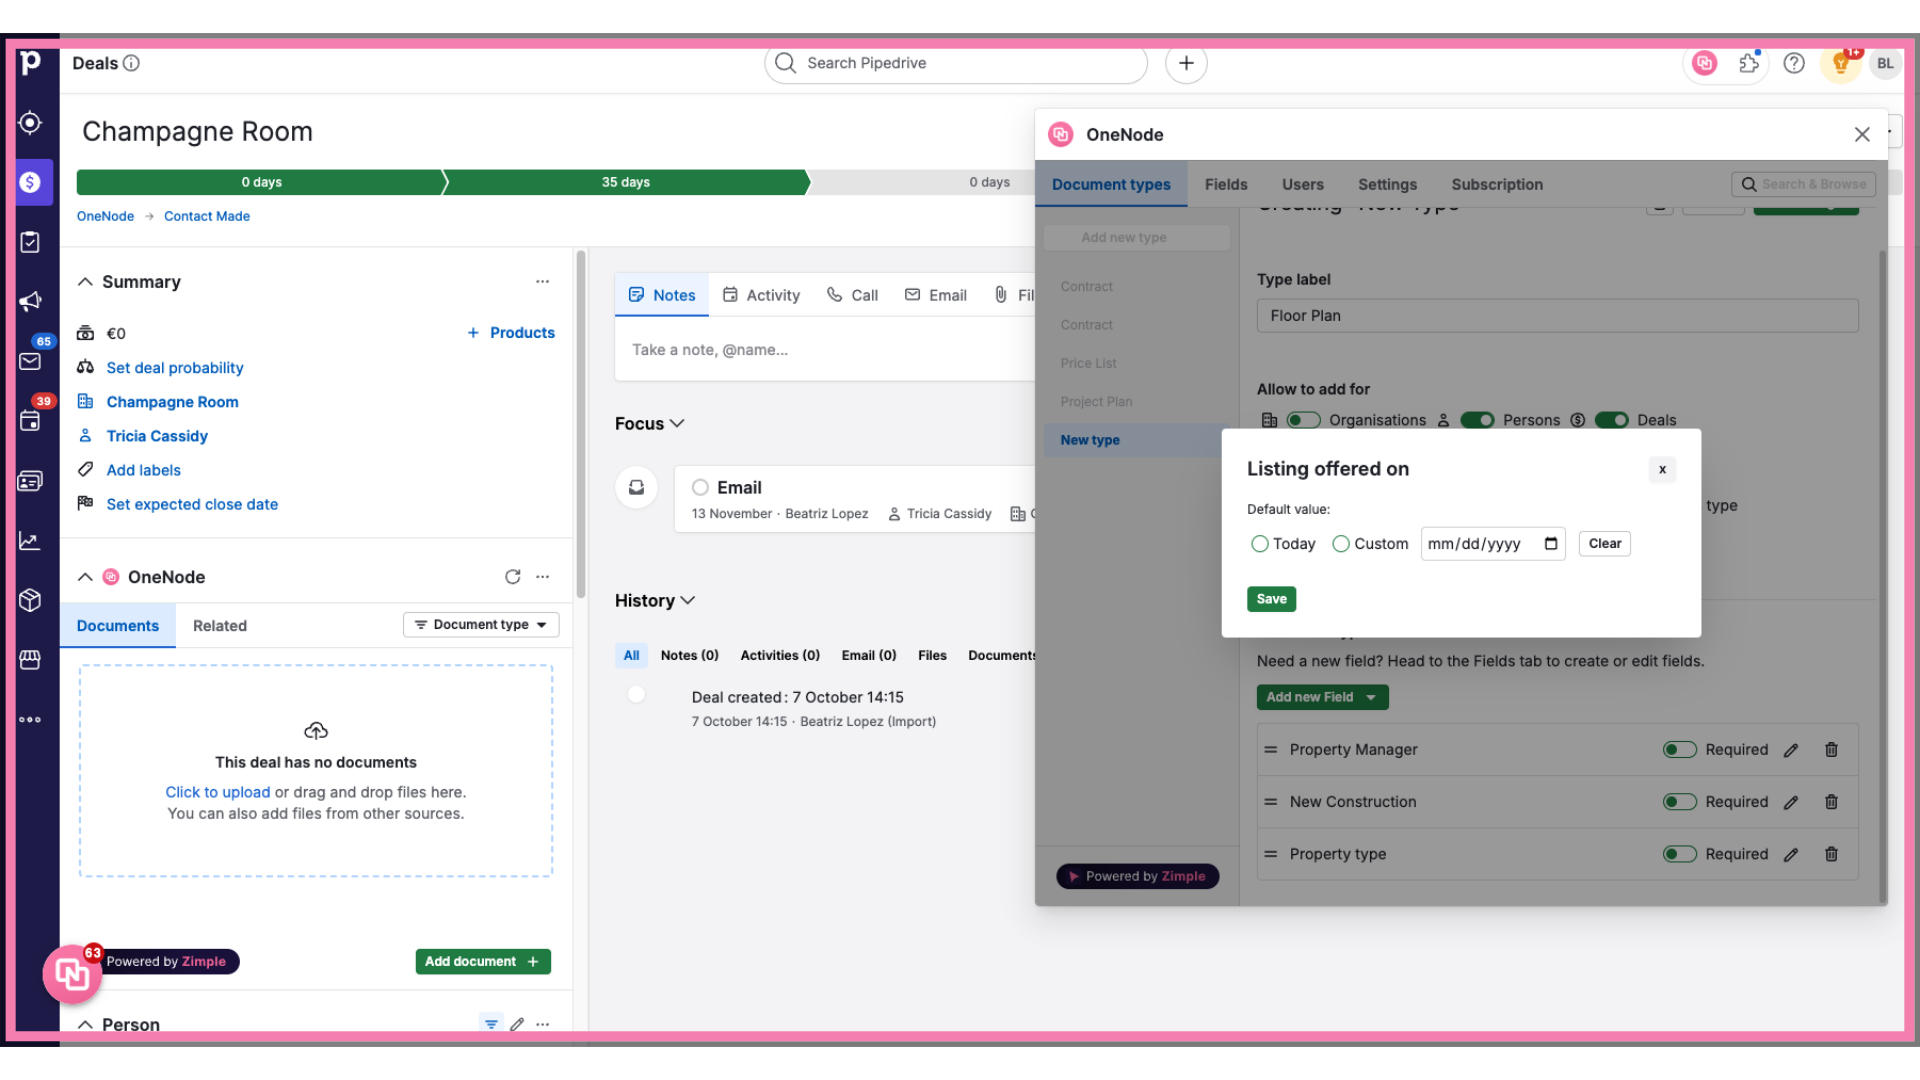
44. Select "Today"
And click save to finish.
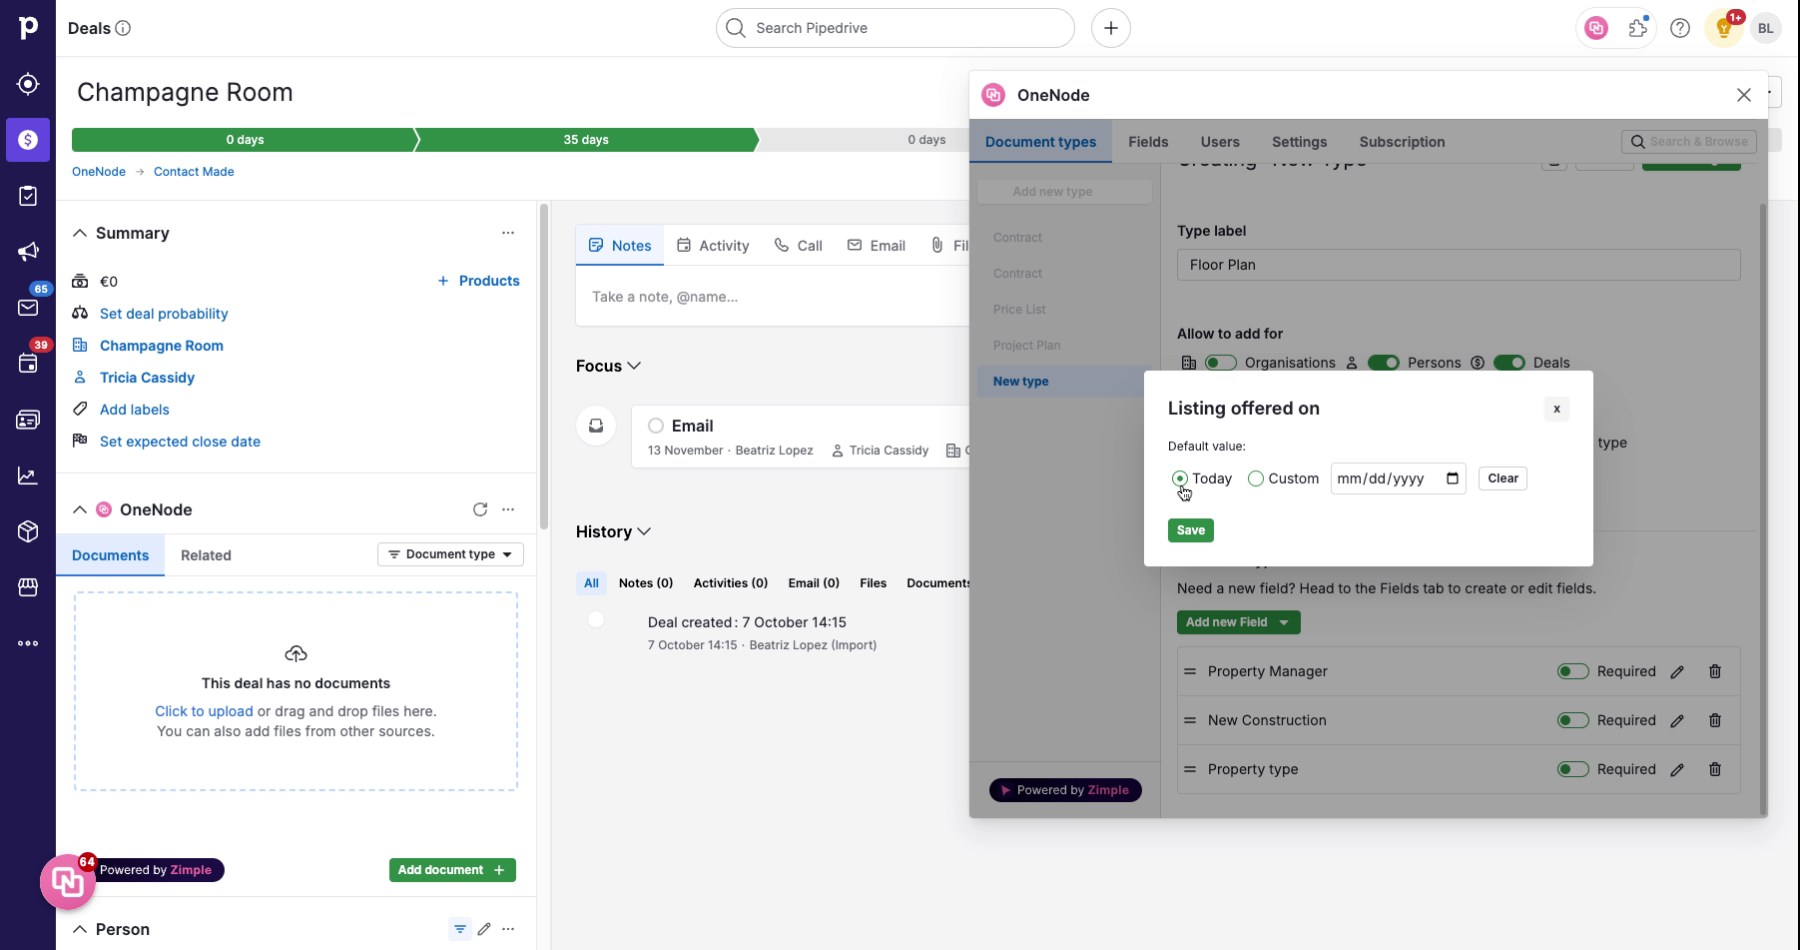
45. Select "Today"
Set "today" as the default
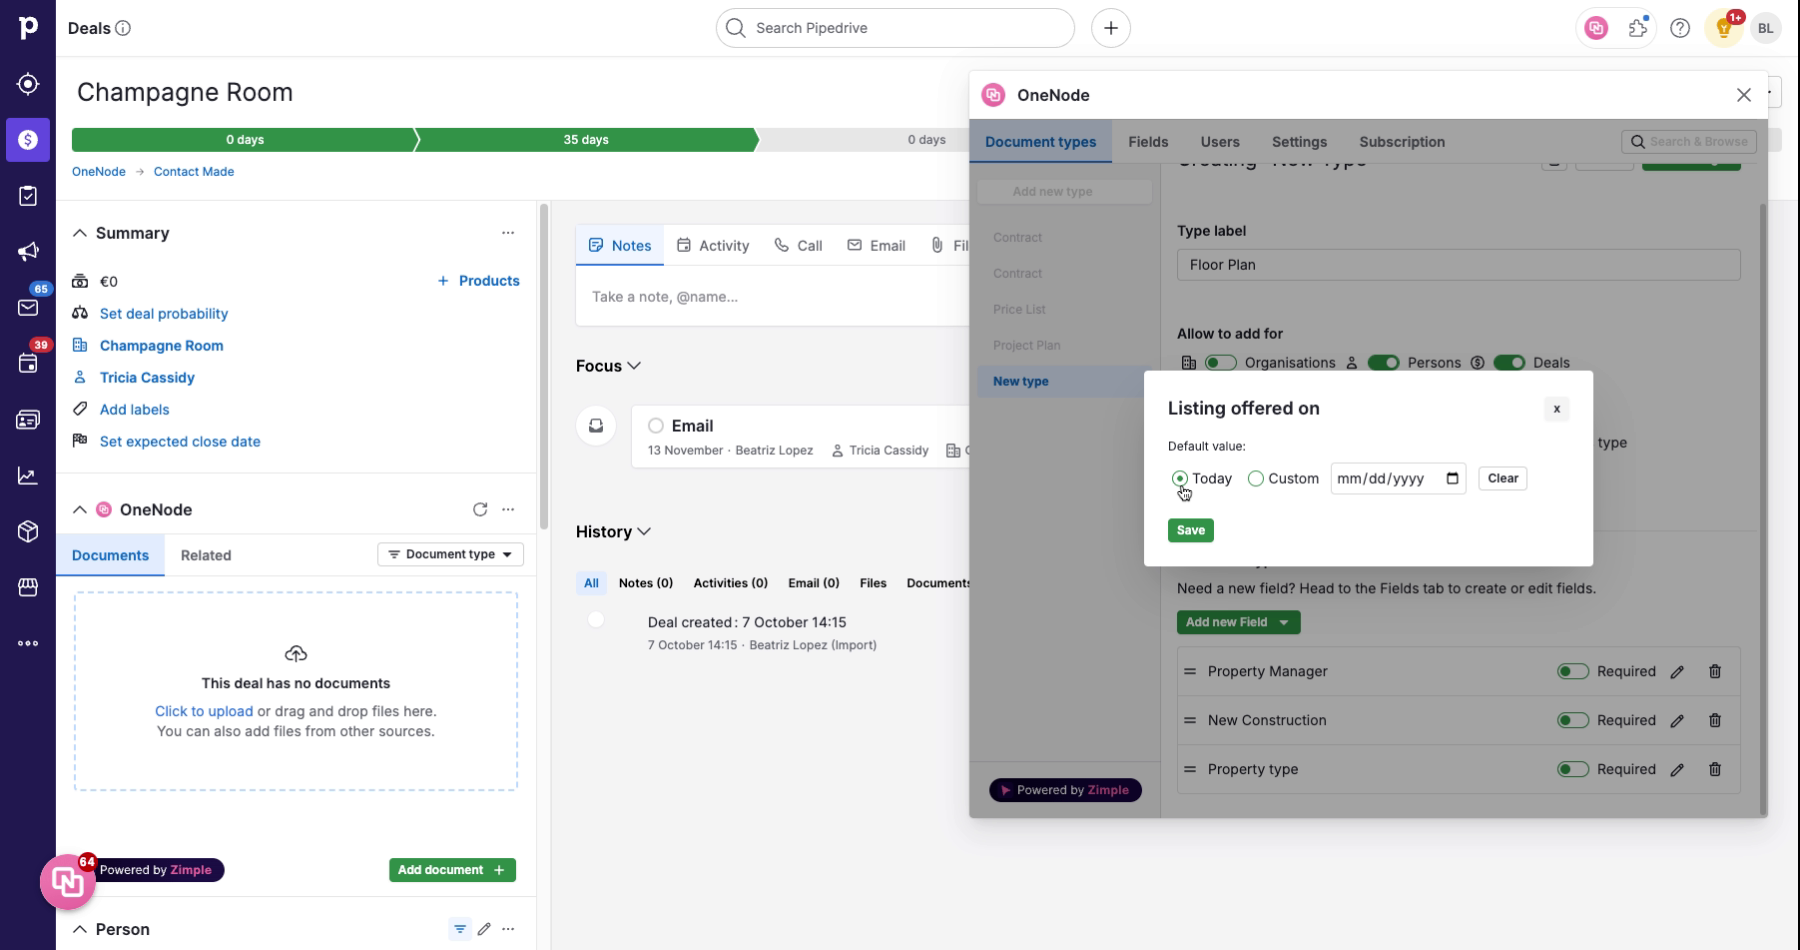
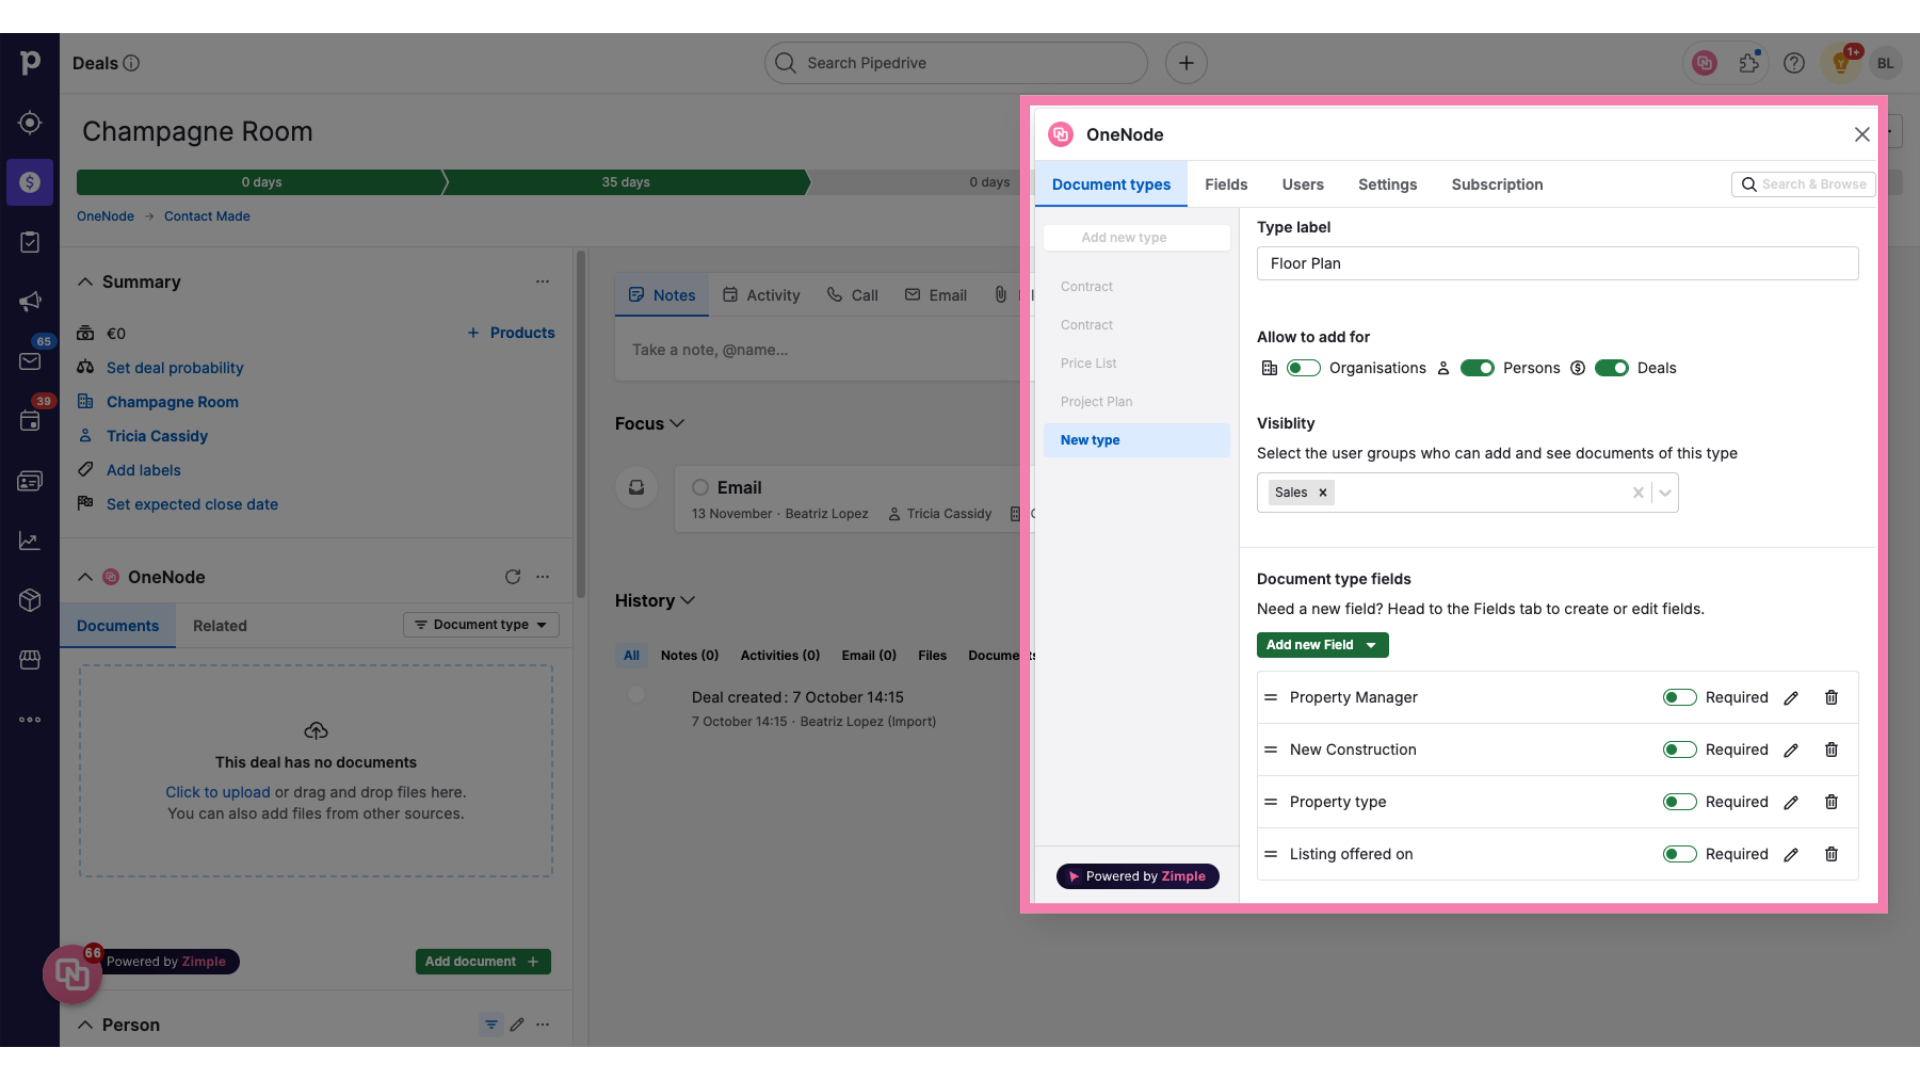
46. Click "Add new Field"
Let's create one last field. This will be the Price of the Property with this floor plan
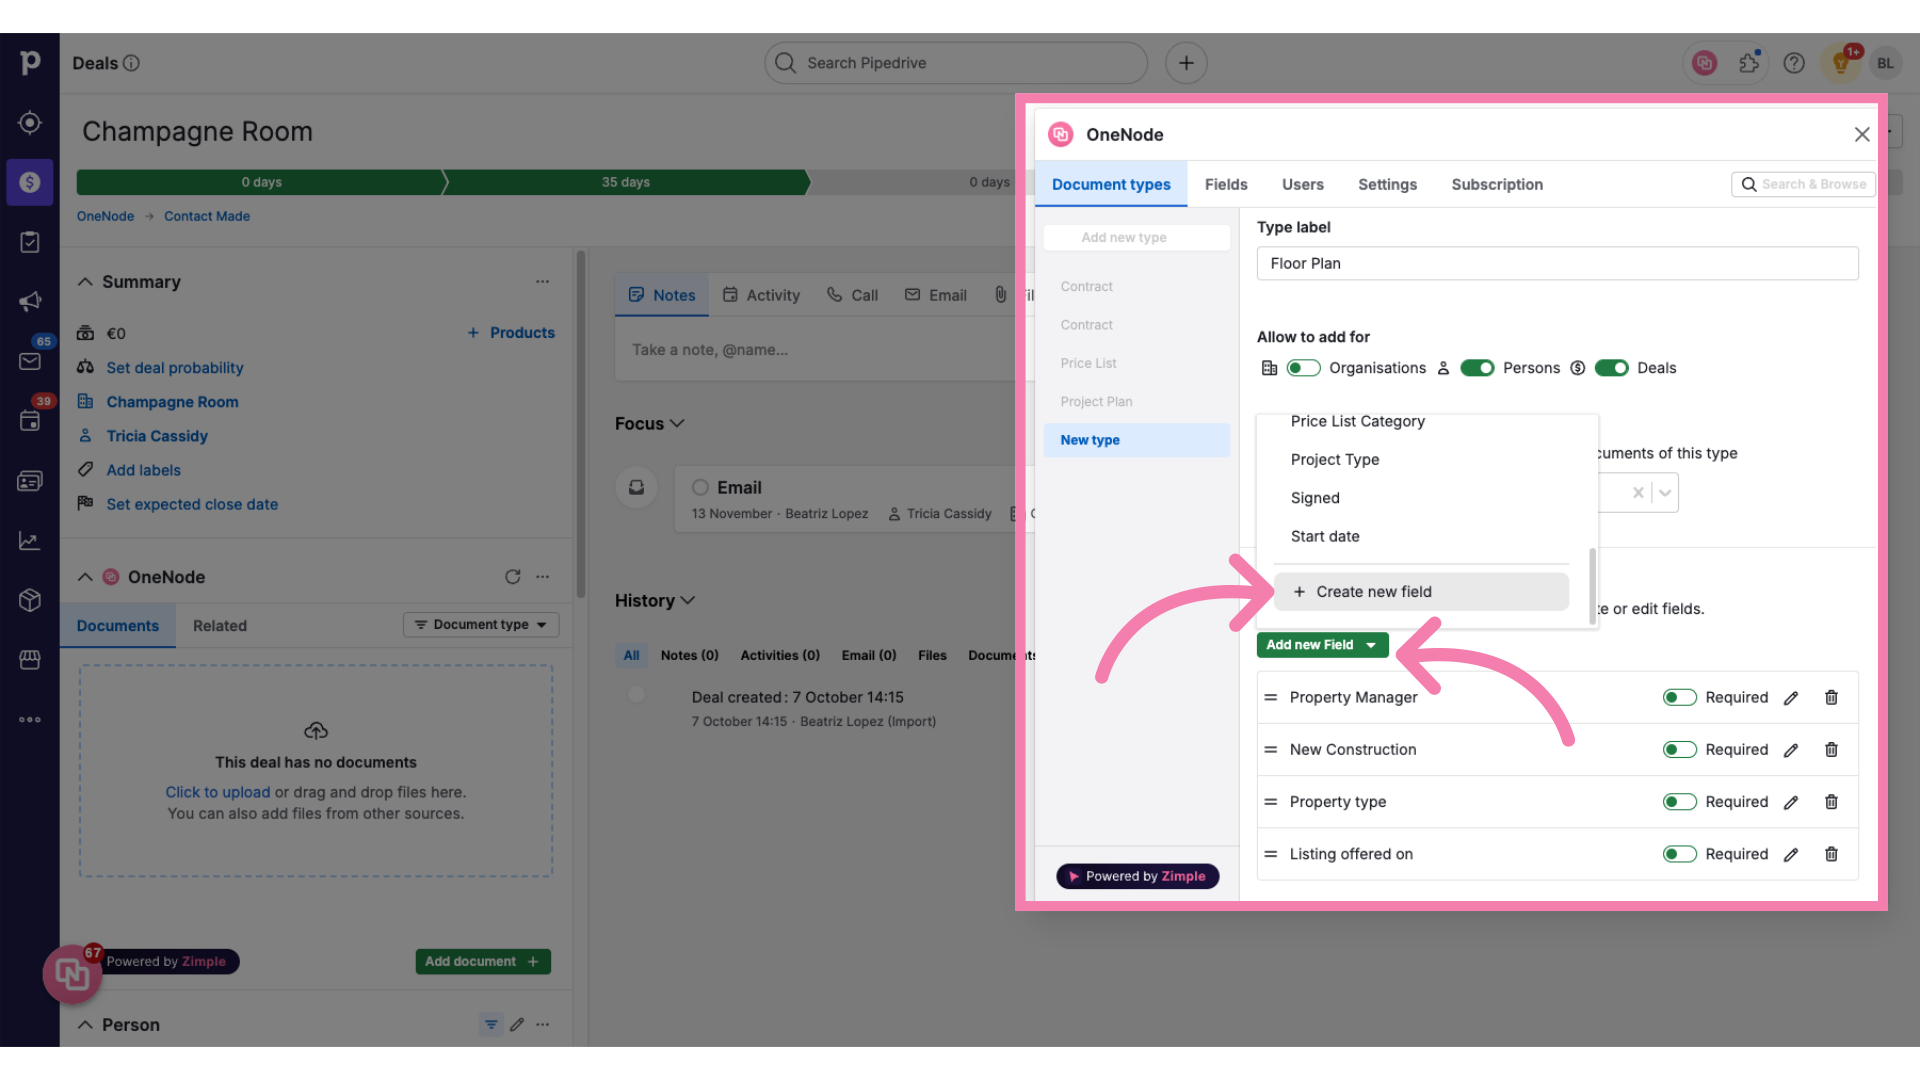
47. Click "Add New field" and choose "Create new field"
So as before, click on Add new Field and select Create New.
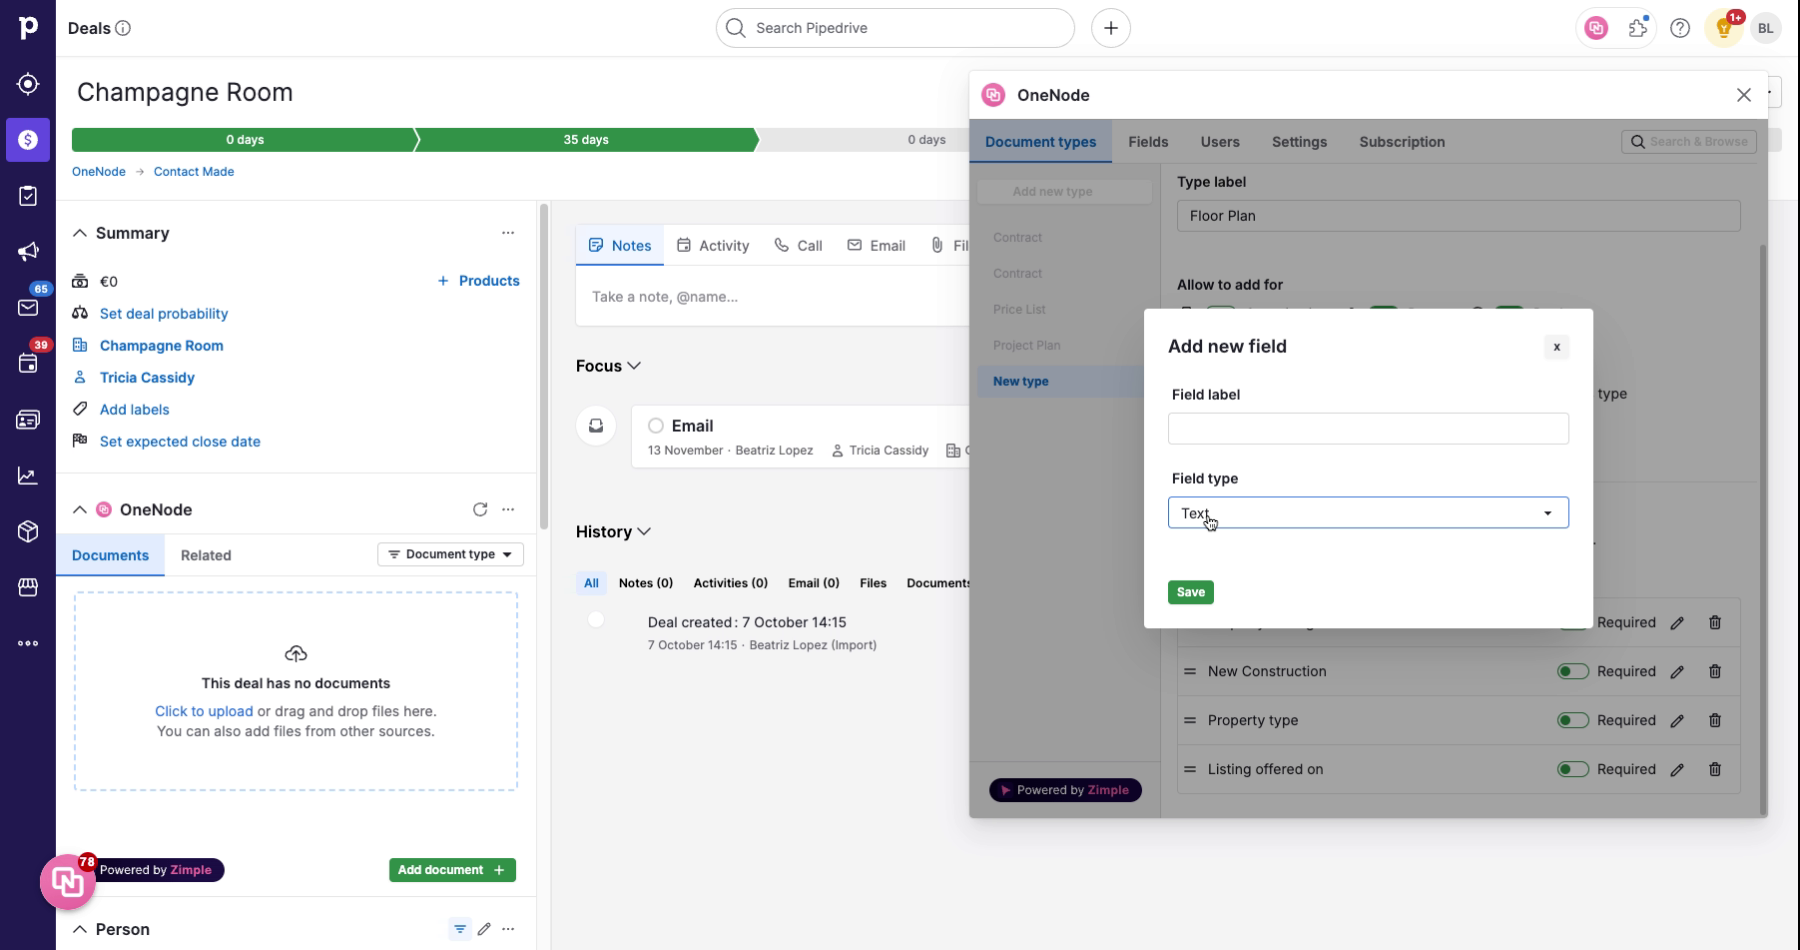
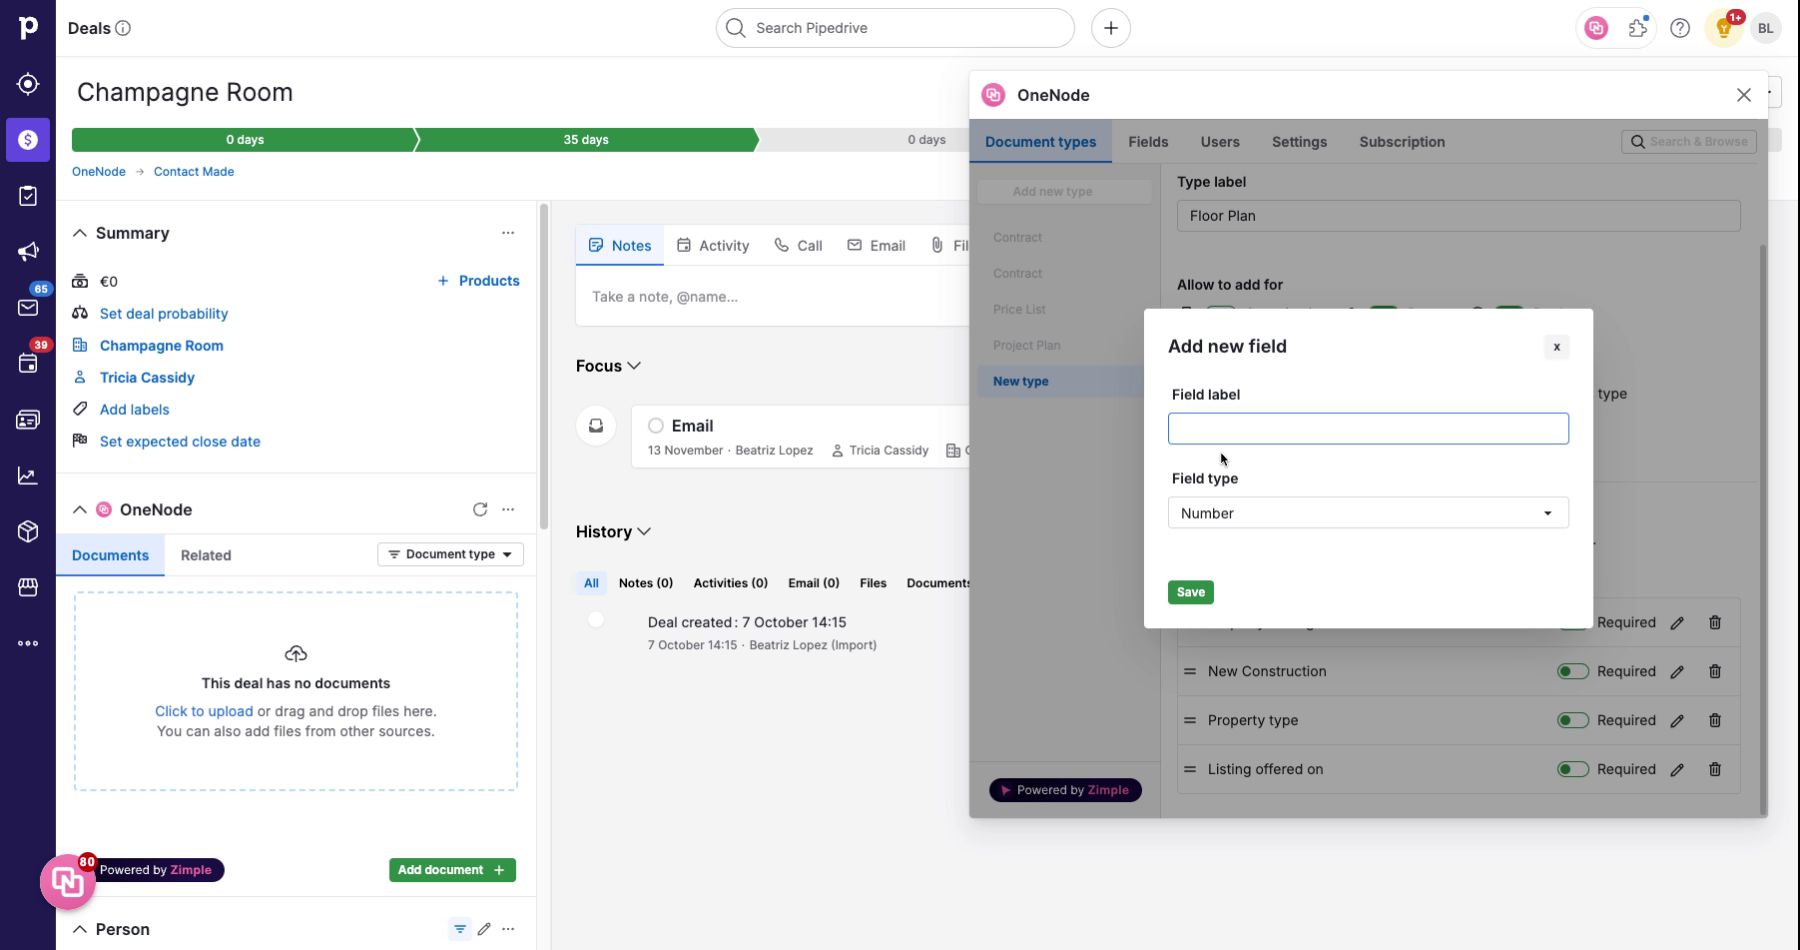
48. Select "Number" type
This will be a Number field type, so let's choose that option
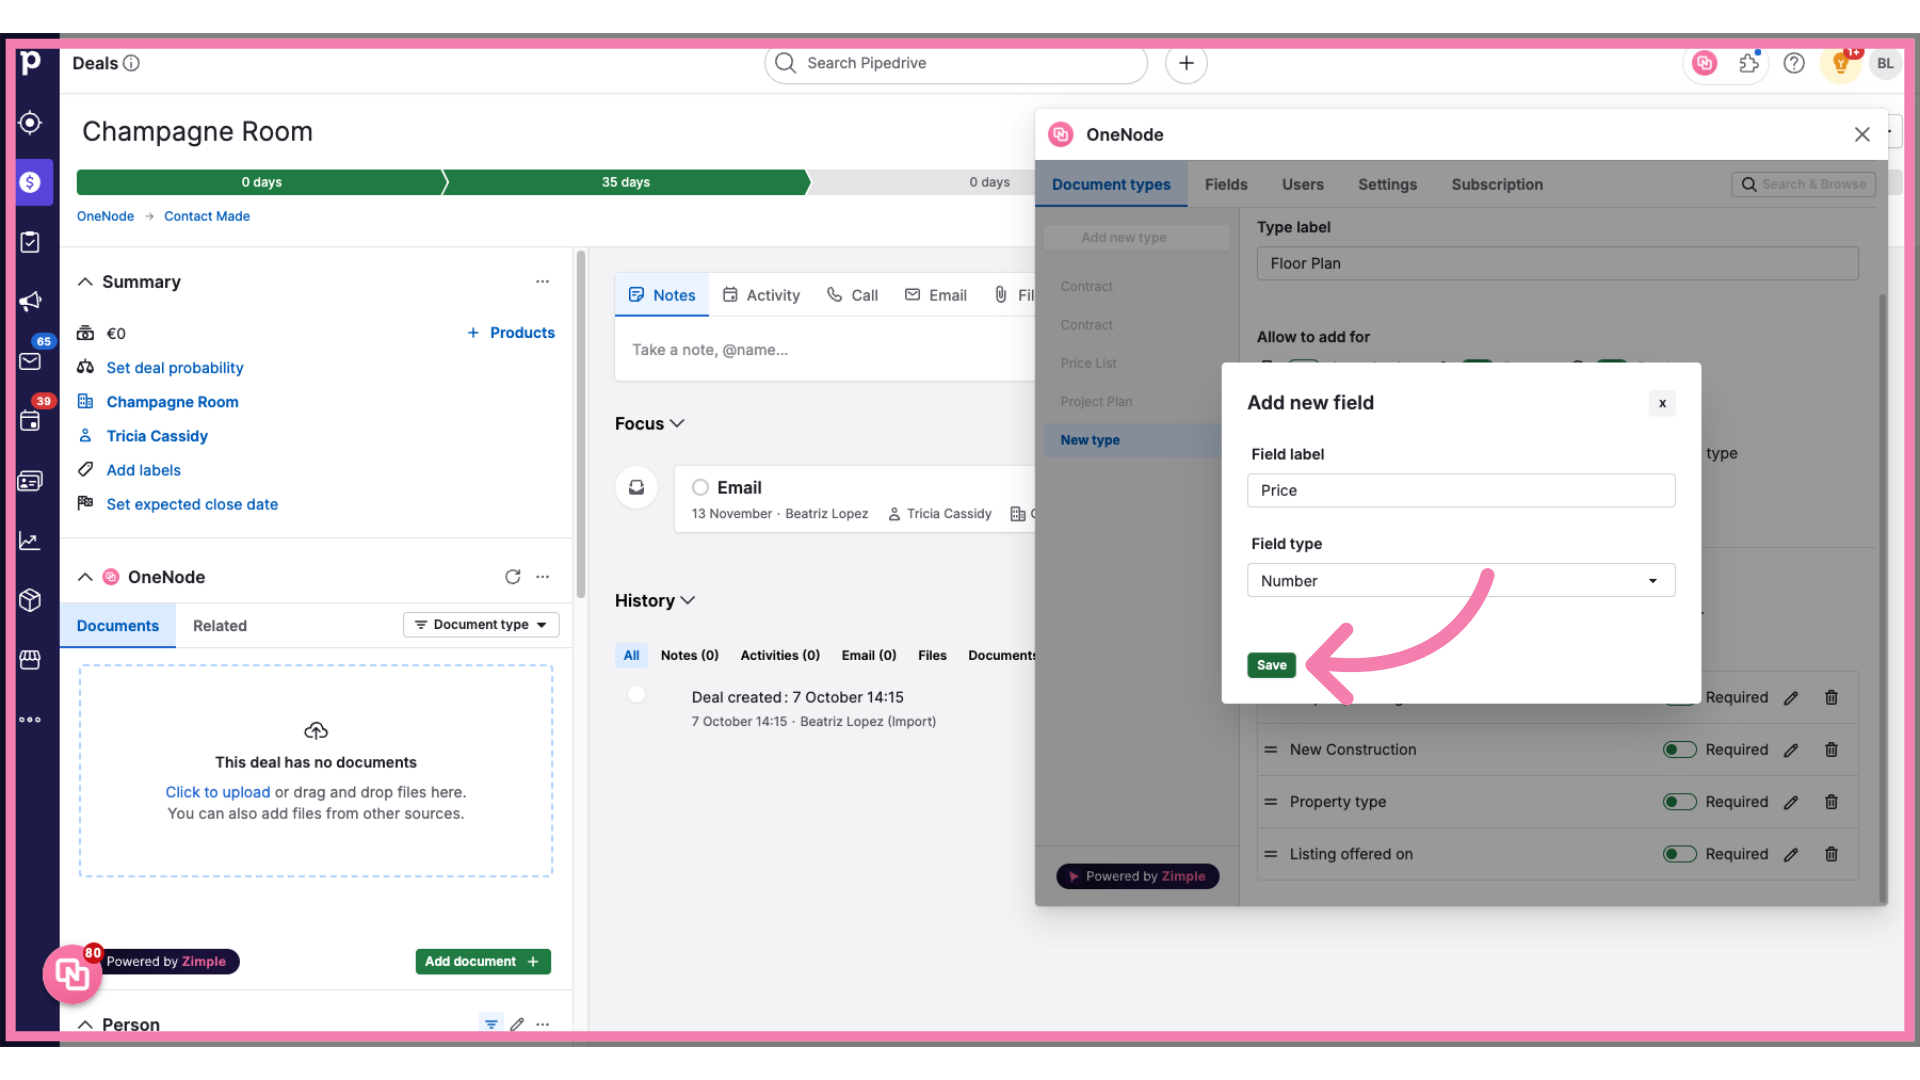
49. Fill "Price "
50. Click "Save"
then Click on "Save"
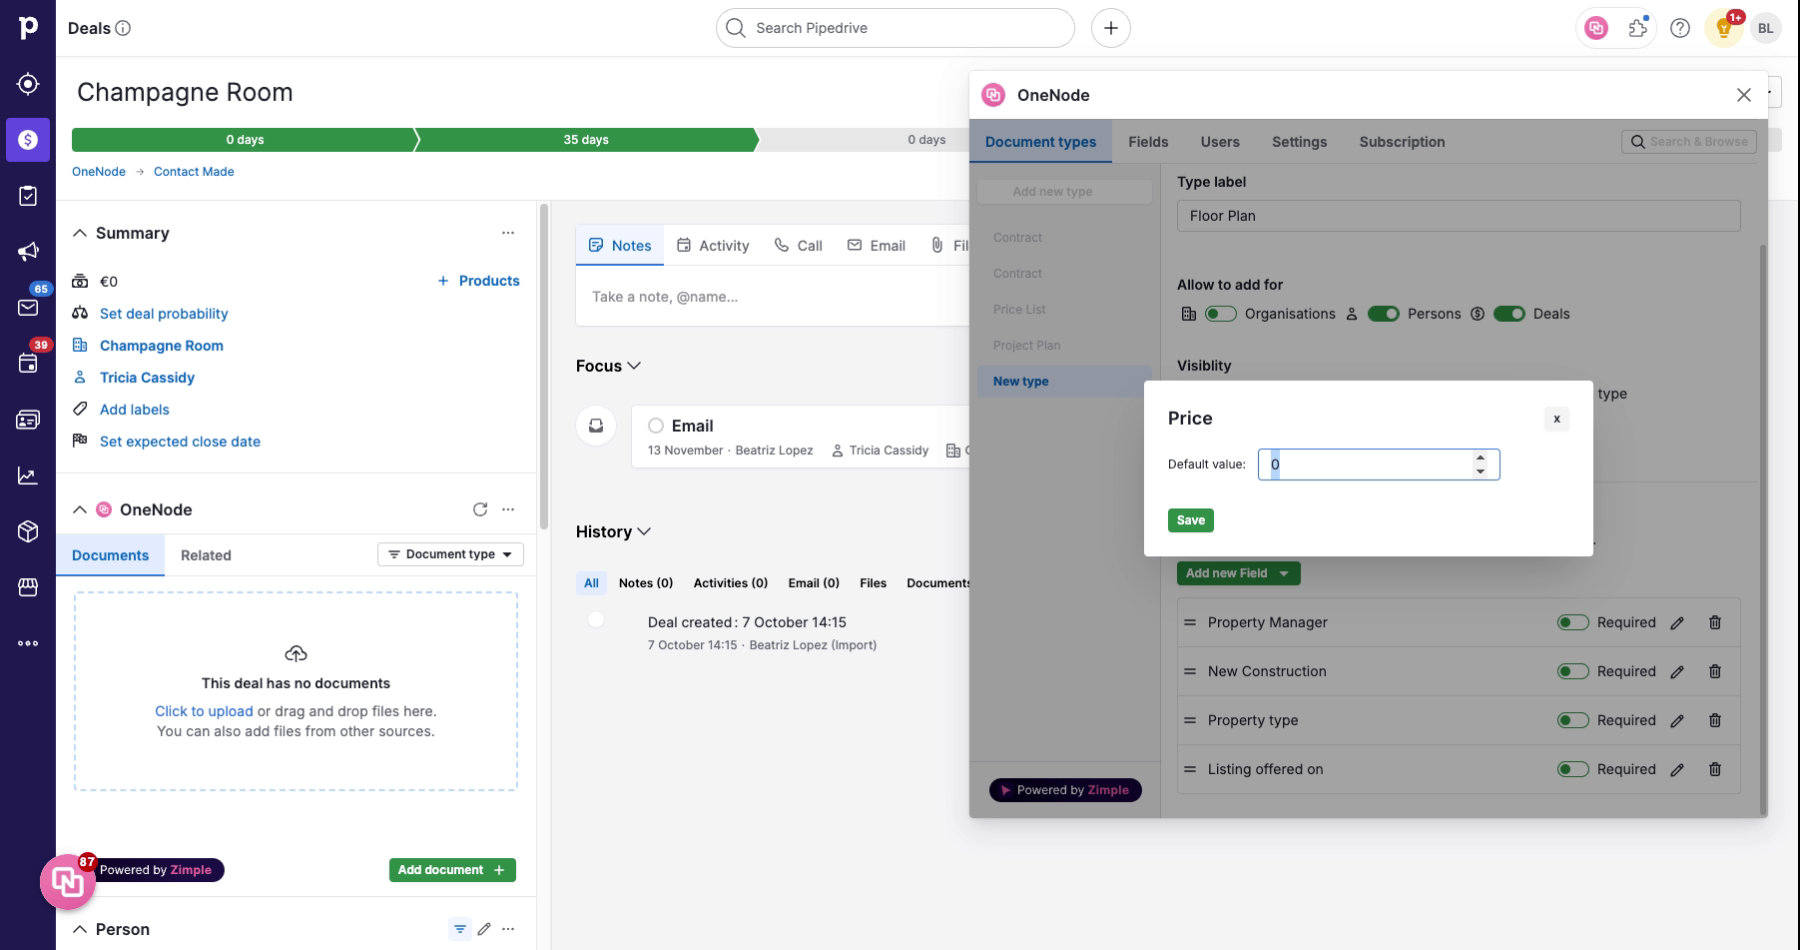
51. Set default and Save
Set the default field price and click save once again. And that's a wrap!
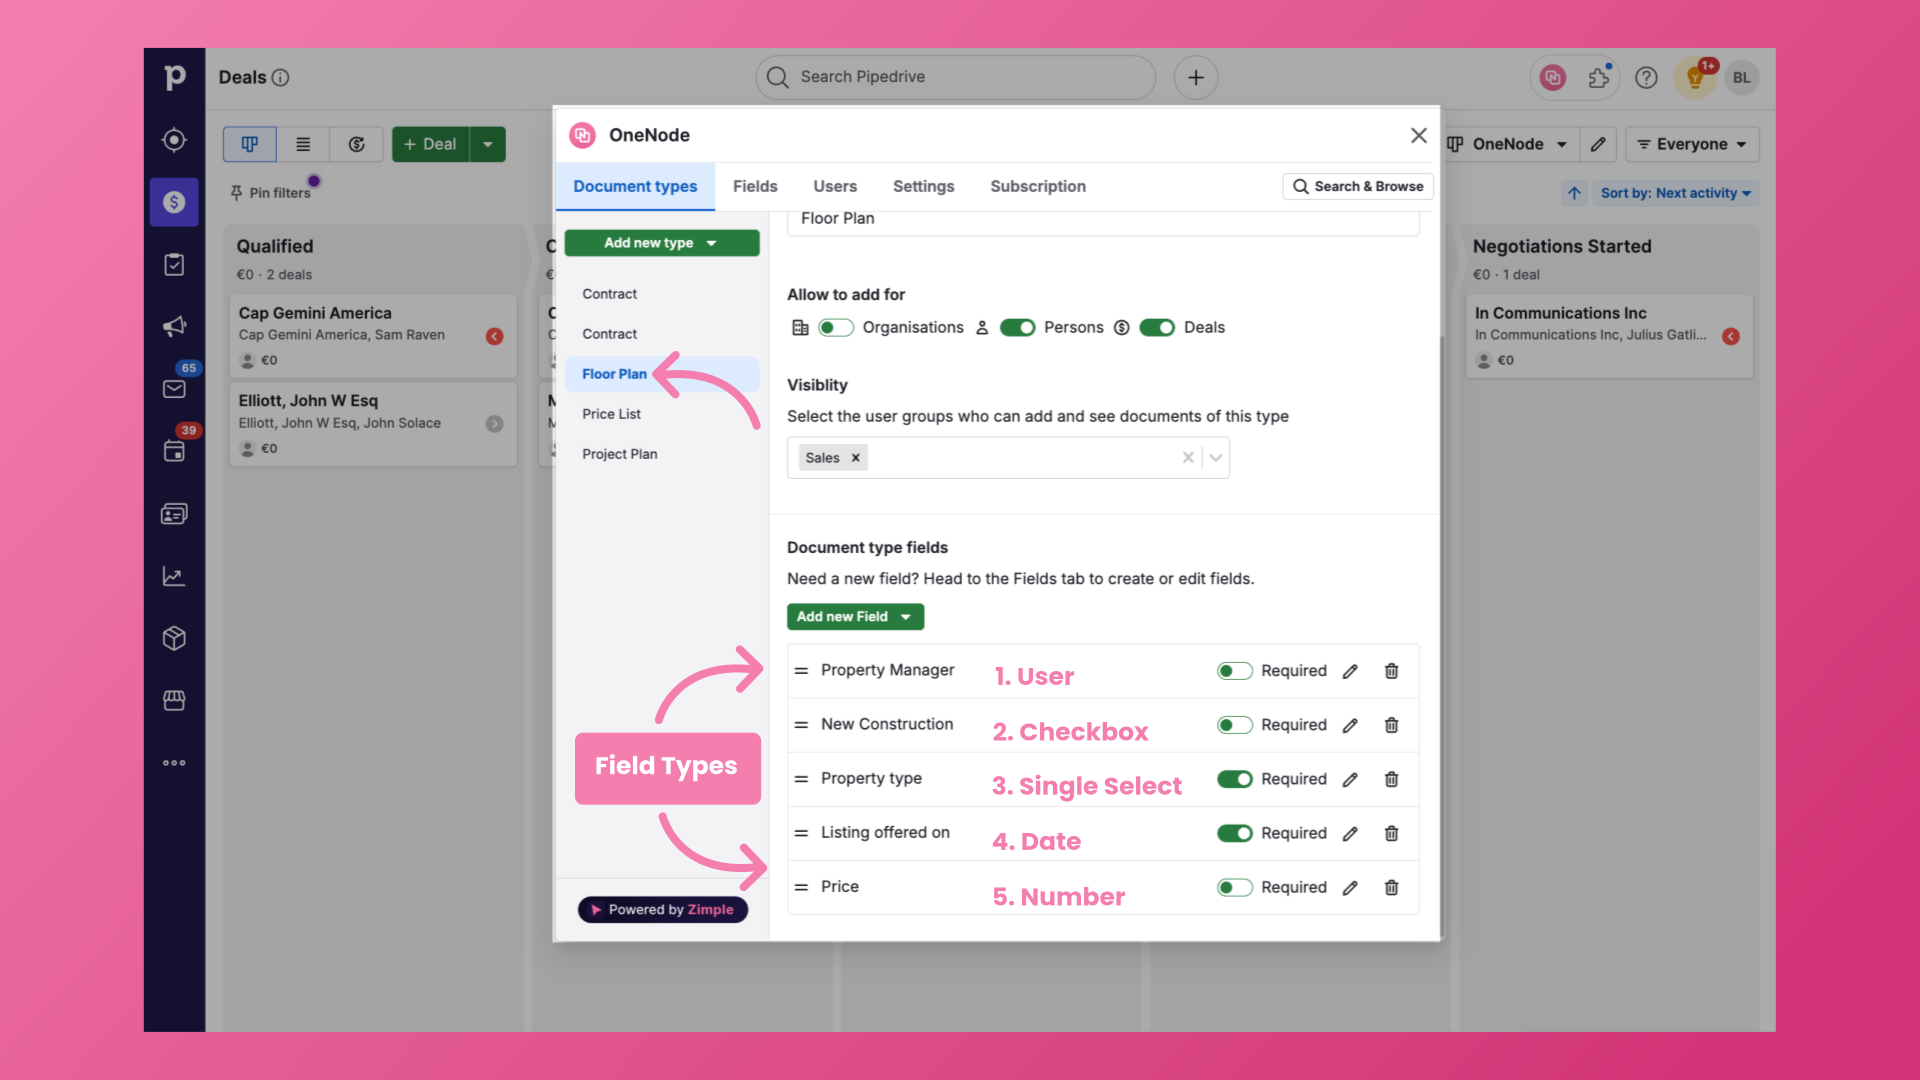
52. Review field types
This guide covered the creation of a Floor Plan Document type. We created five different Field types to help users classify floor plans better when adding them to Pipedrive.
In the next video, watch how easy it is to use the fields we created when Adding Floor Plans to Pipedrive with OneNode. Thanks for watching!
