Creating Dynamic Folders
Creating Dynamic Folders
Explore OneNode's Dynamic Folder creation—a powerful tool that ensures you find exactly what you need, when you need it.
1. User Pain points
Companies often wonder, which contracts are expiring in the next 3 months?, How to find all contracts created by a certain user in the last quarter? With OneNode, these questions—and many more—are a thing of the past.

2. Introduction
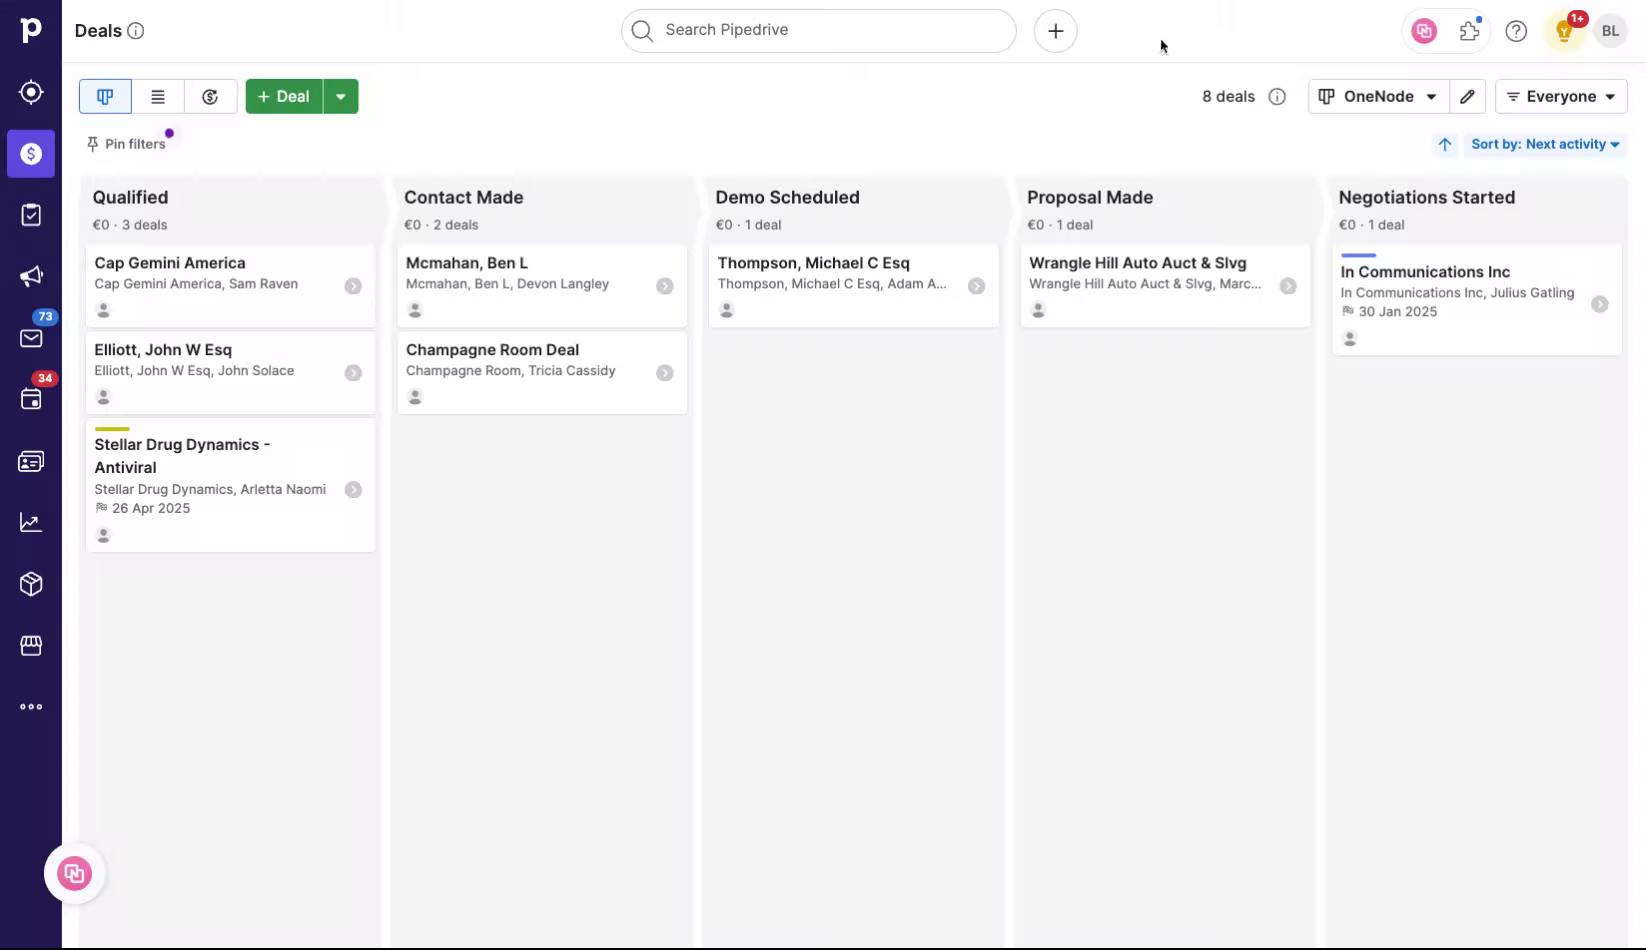
3. Open OneNode
Start by opening OneNode's main panel

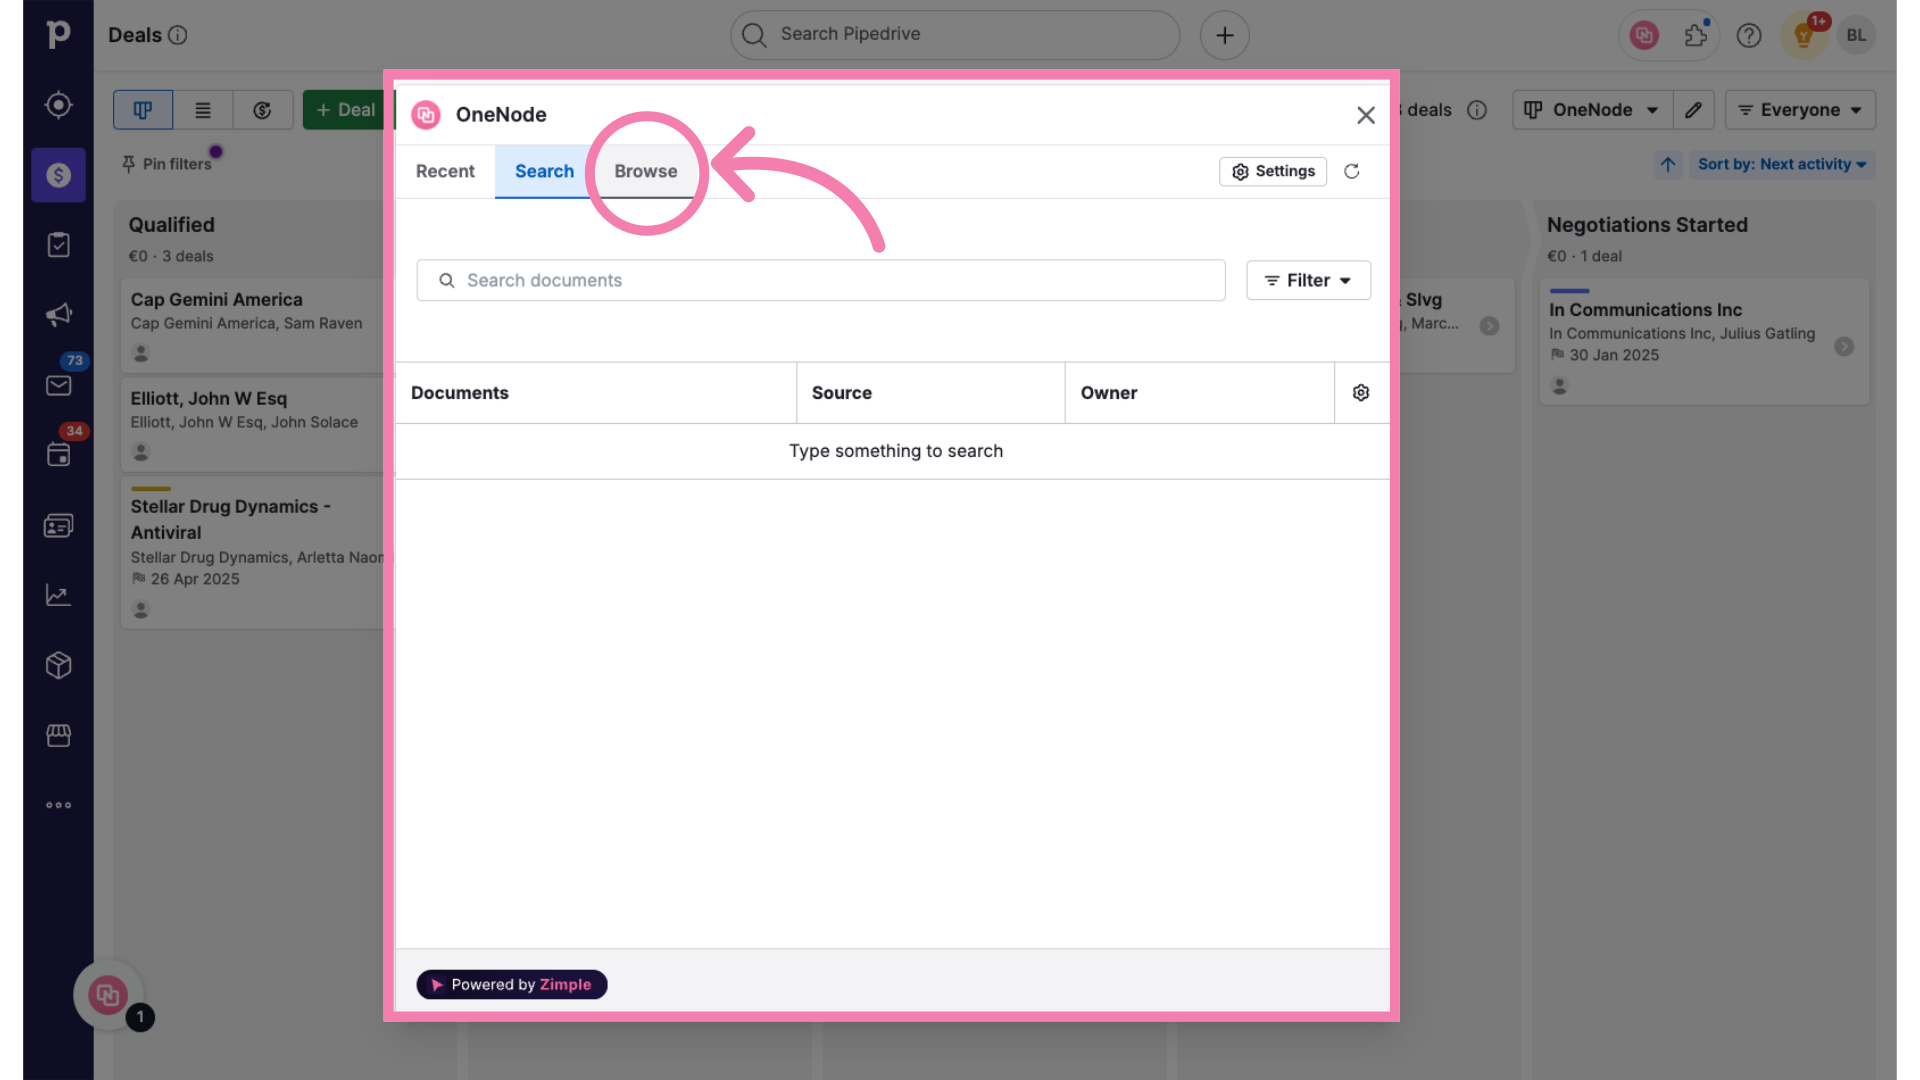
4. Click "Browse"
And select the "Browse" tab
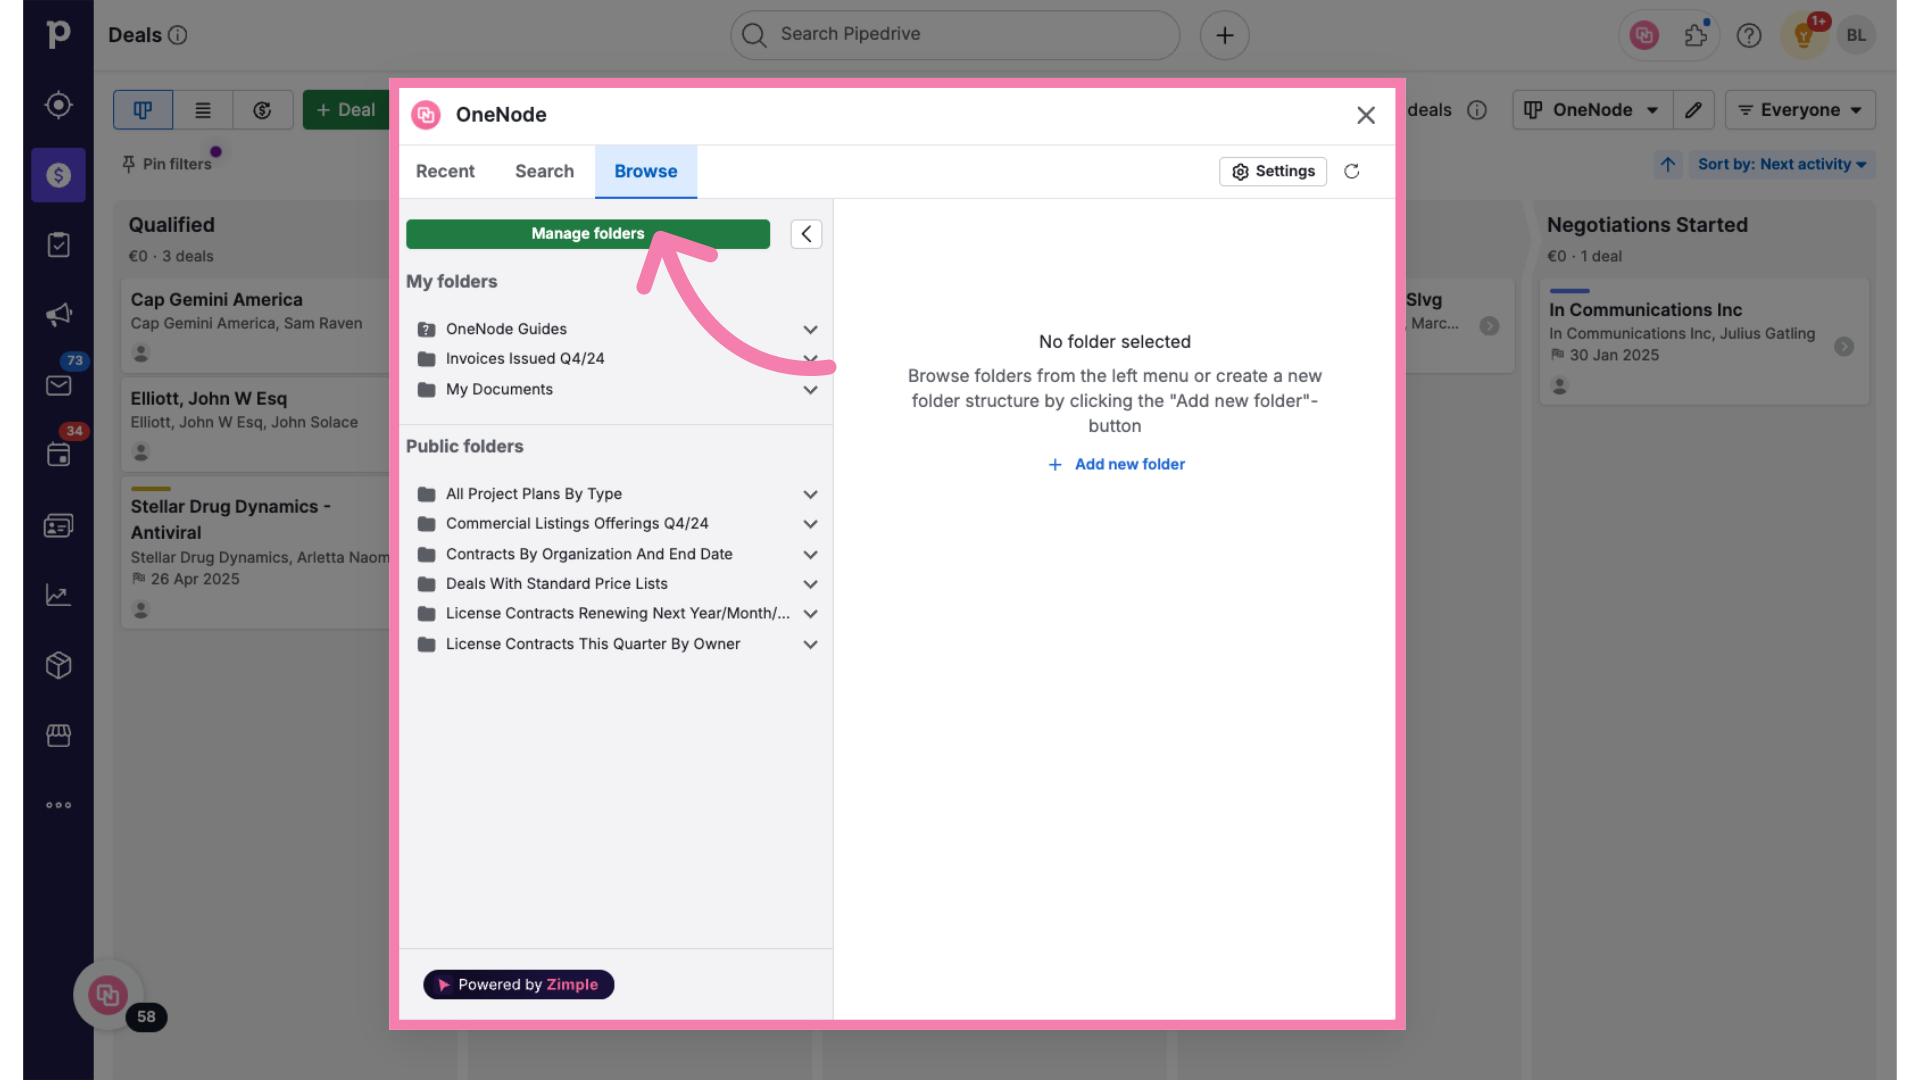
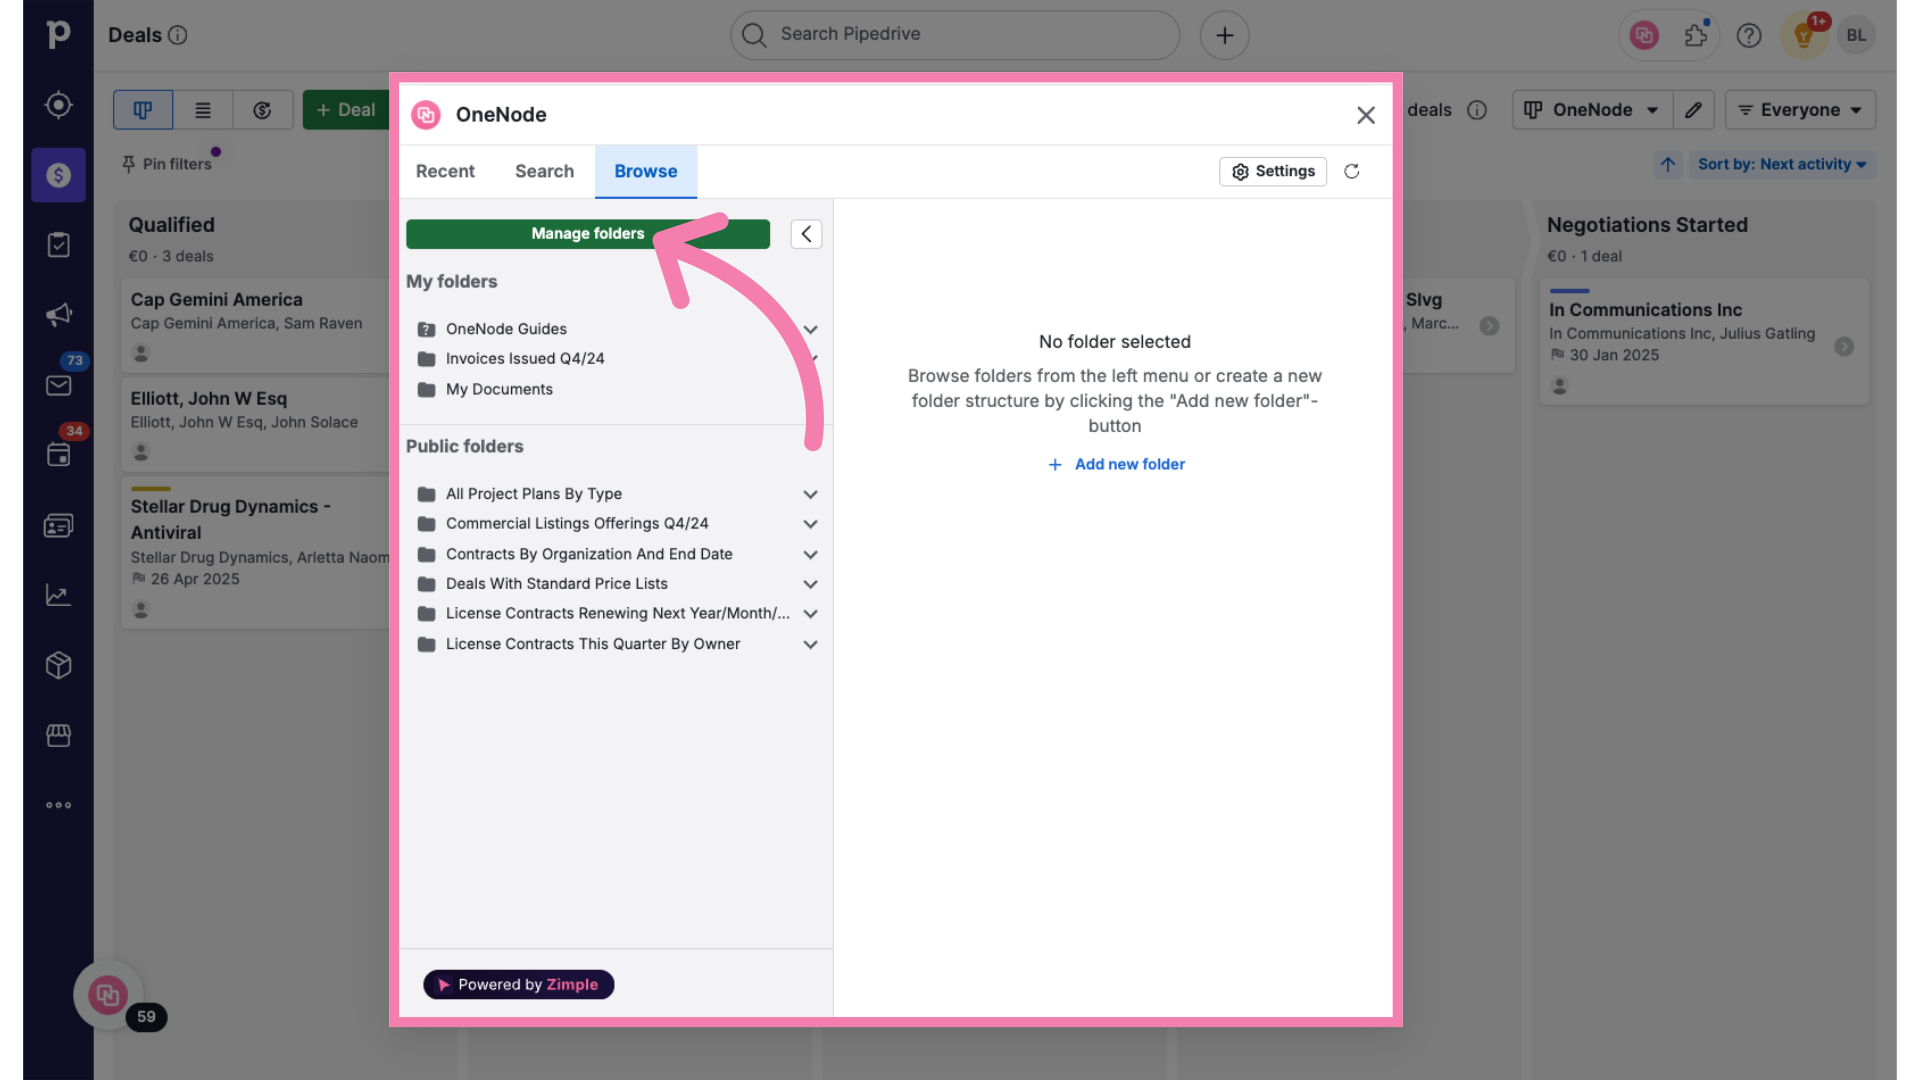
5. Click "Manage Folders"
Click on the "Manage Folders" button
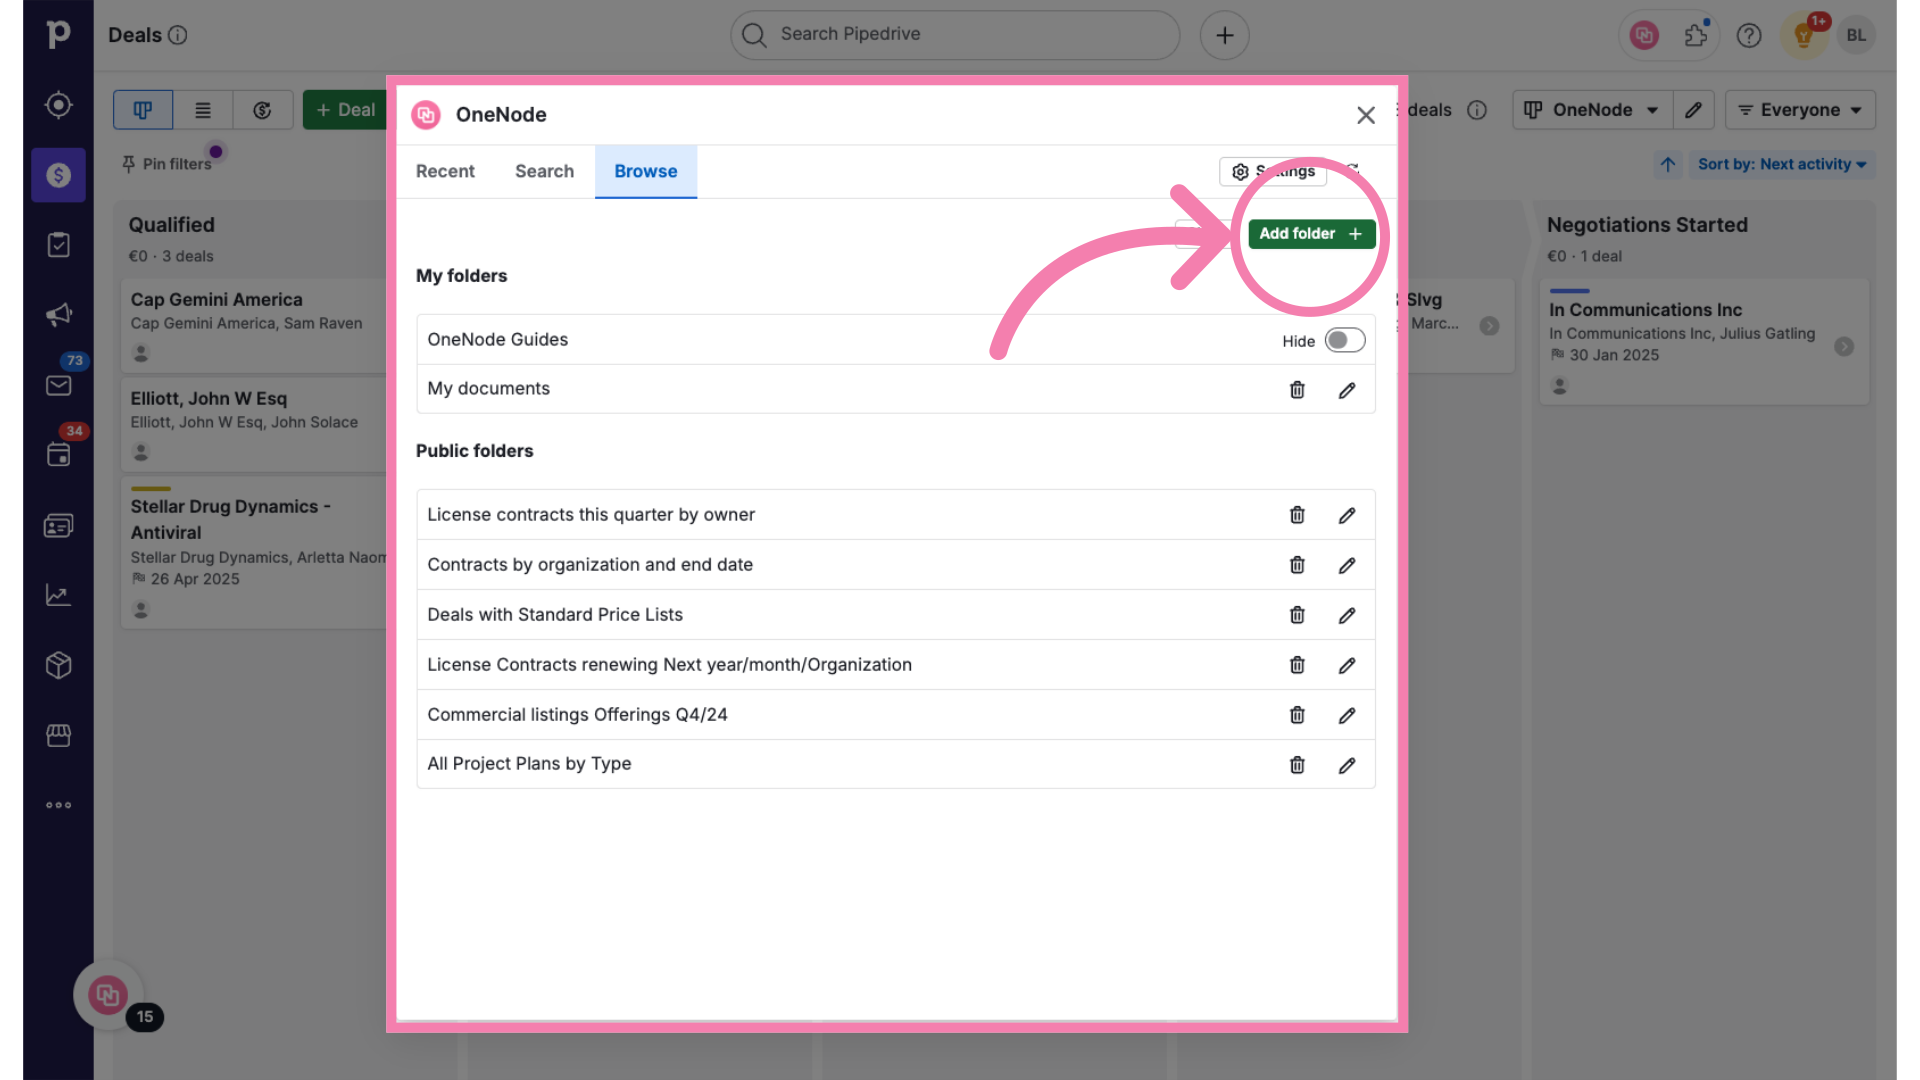
6. Click "Add folder"
Select the "Add folder" button on the upper right
7. Configure the Folder properties
And let's get started.
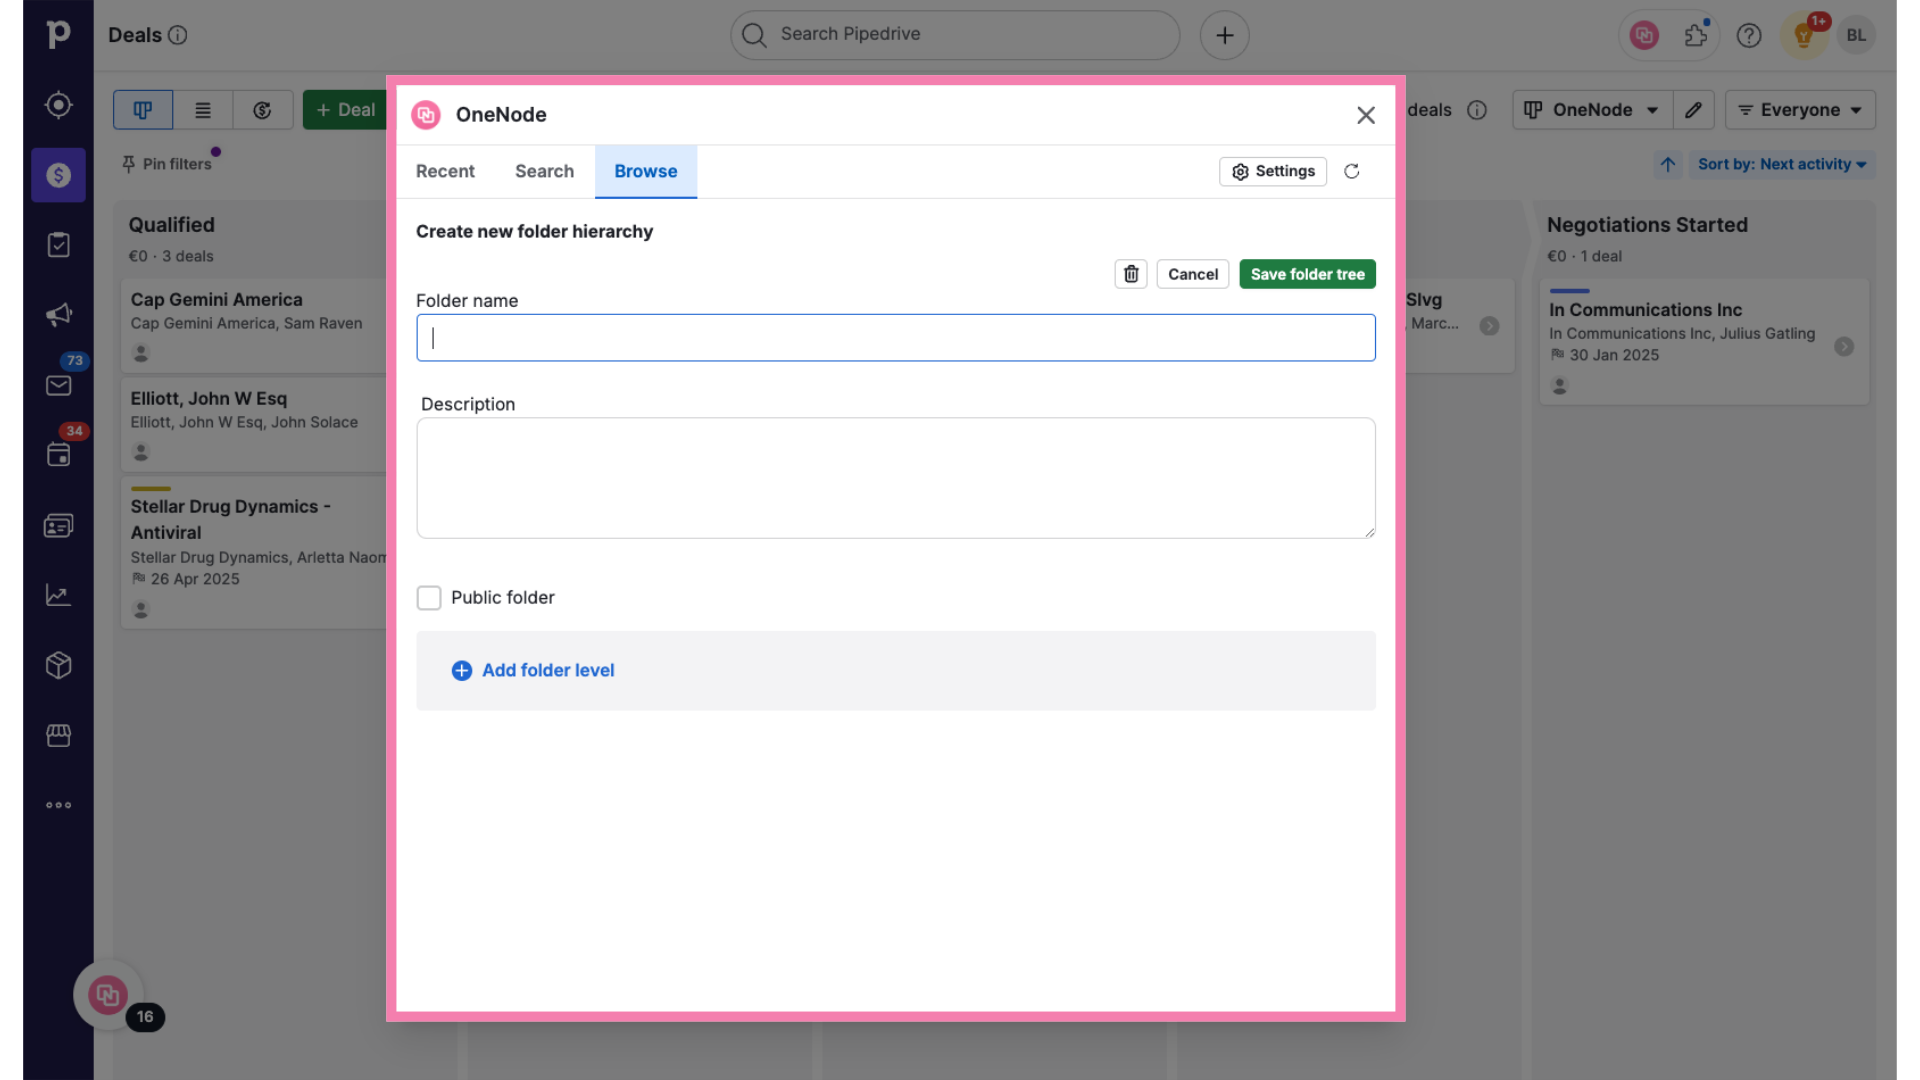
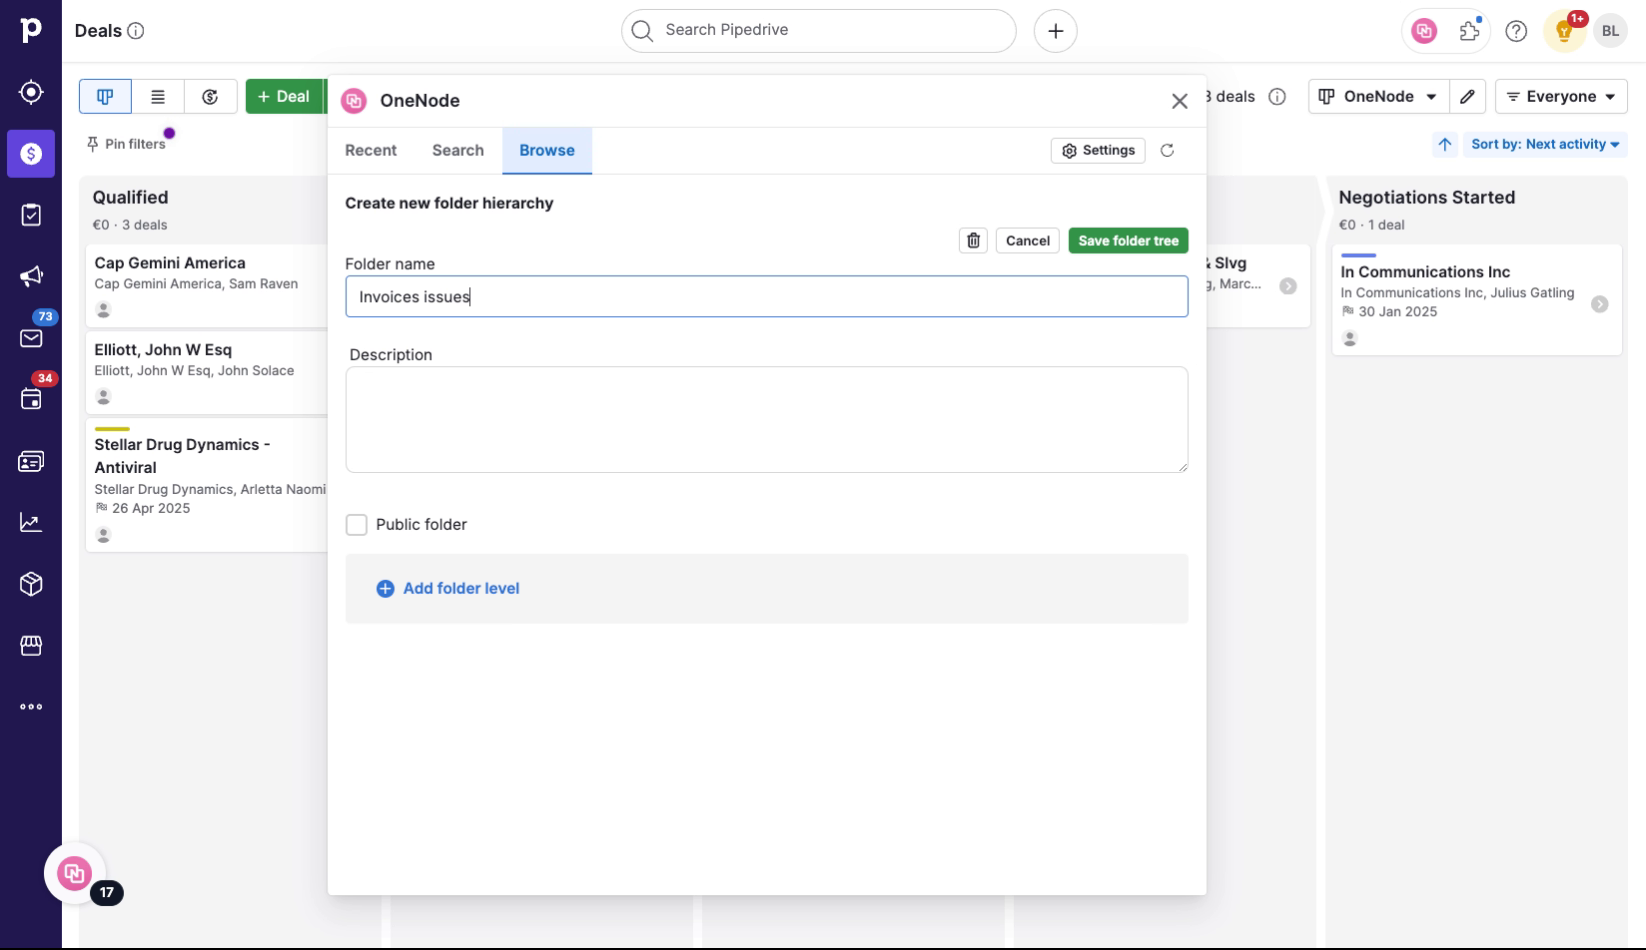
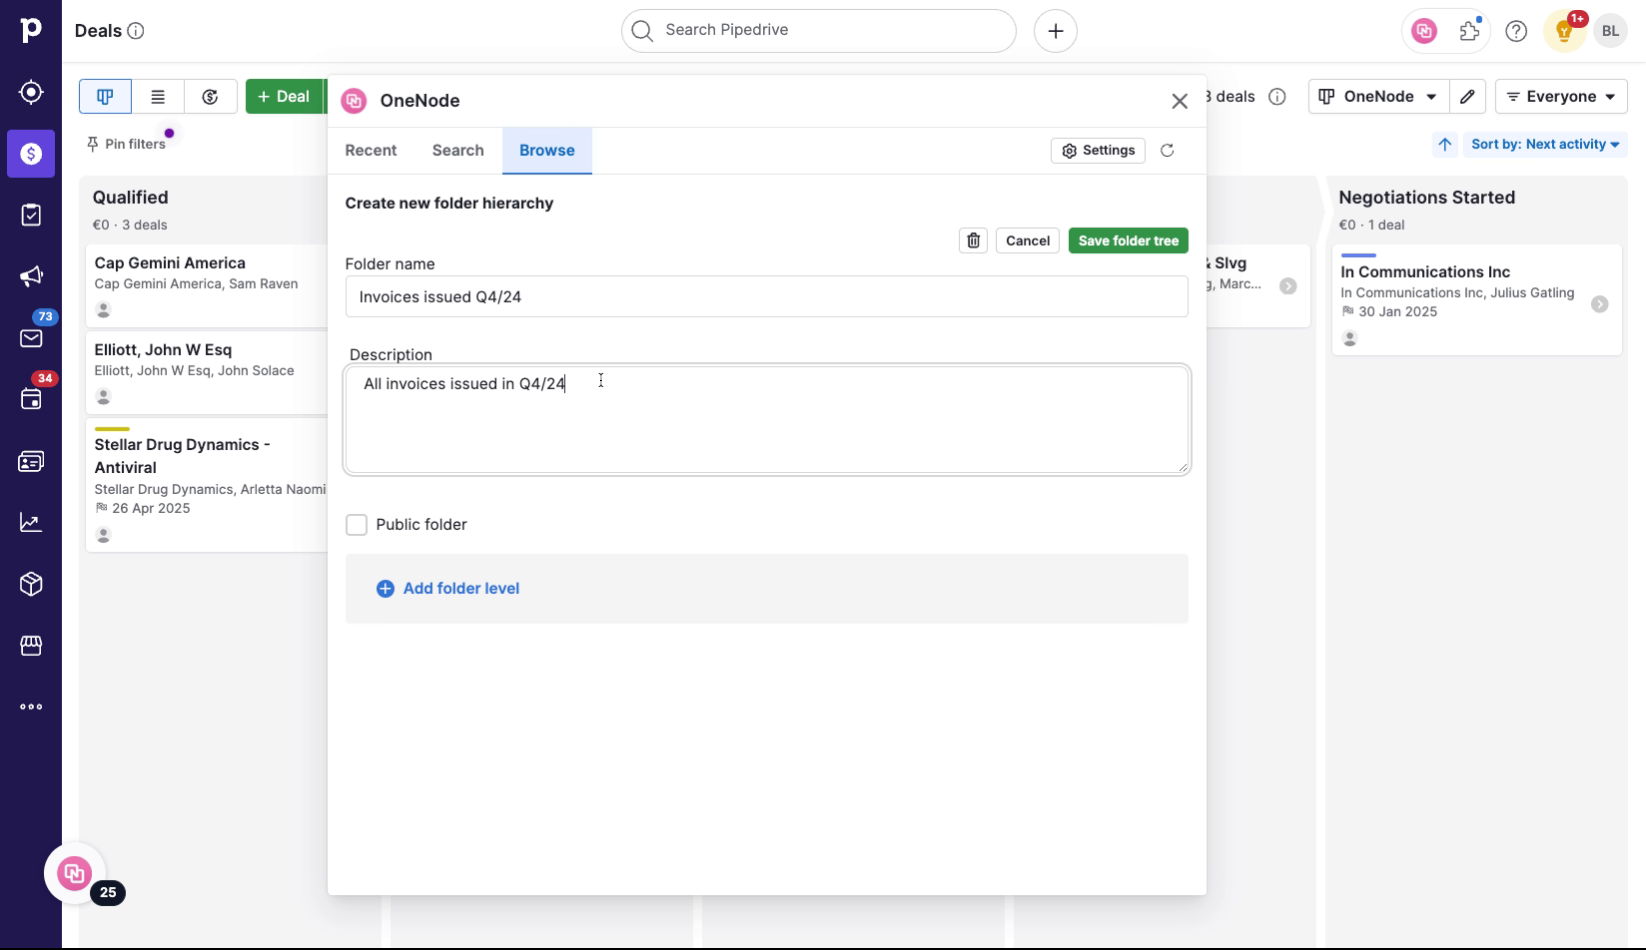
8. Define a Folder Name
We will create a folder that displays all invoices issued in the last quarter of 2024. Let's give it a name.
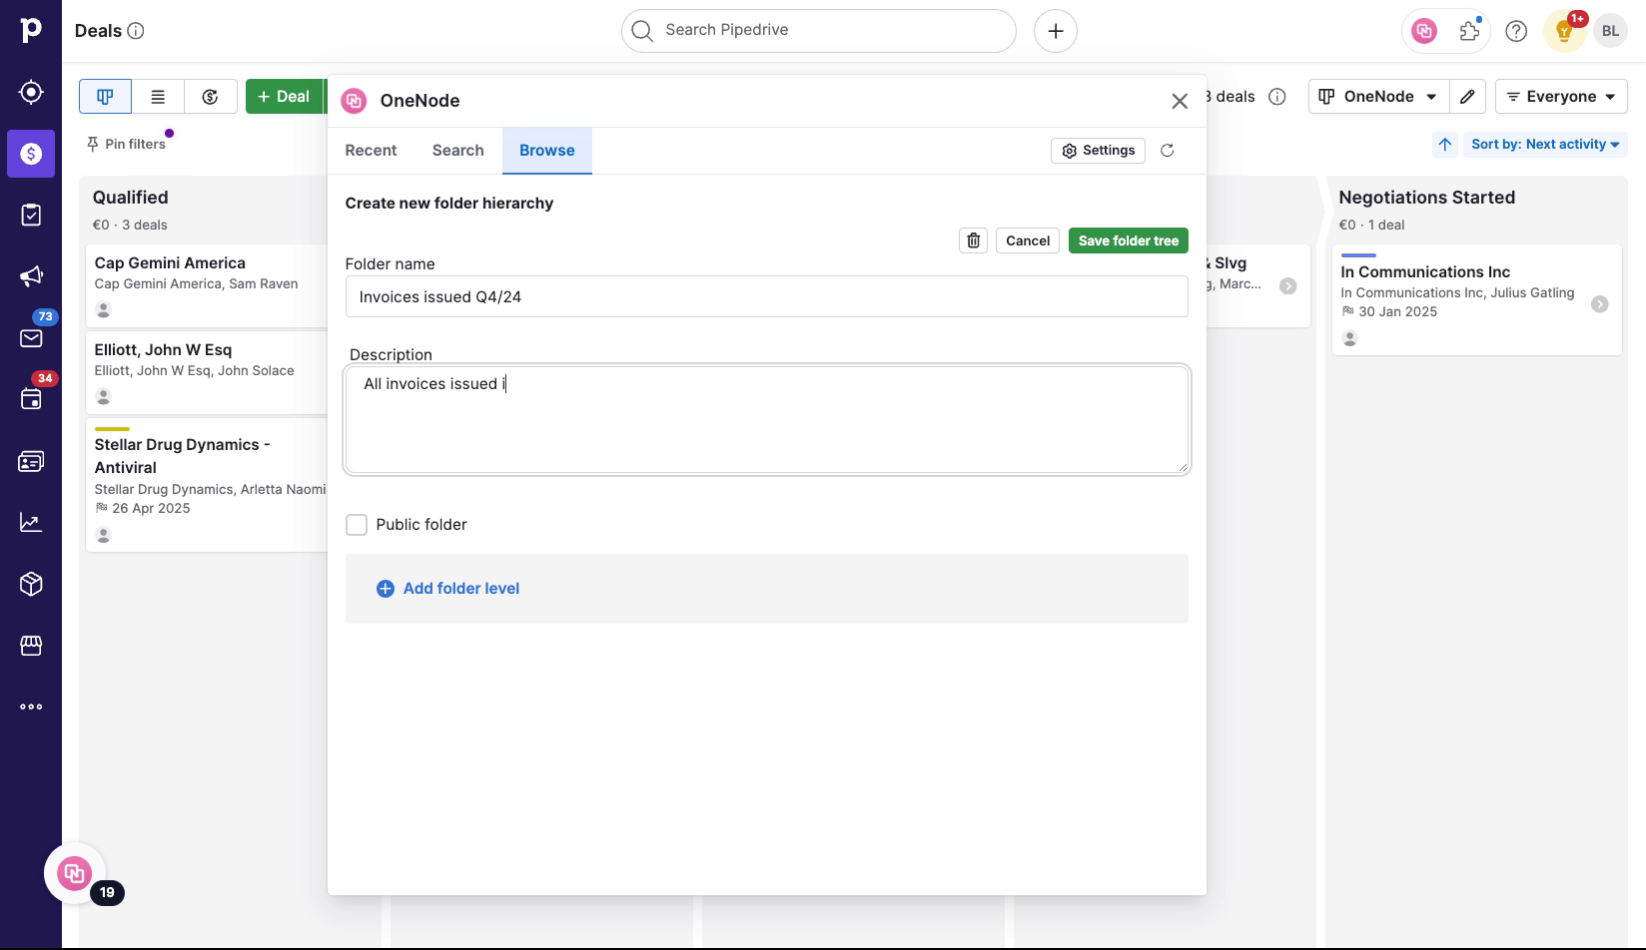
9. Write a description
In the Description field, try to specify the characteristics of the folder you are creating.
10. Describe the filters
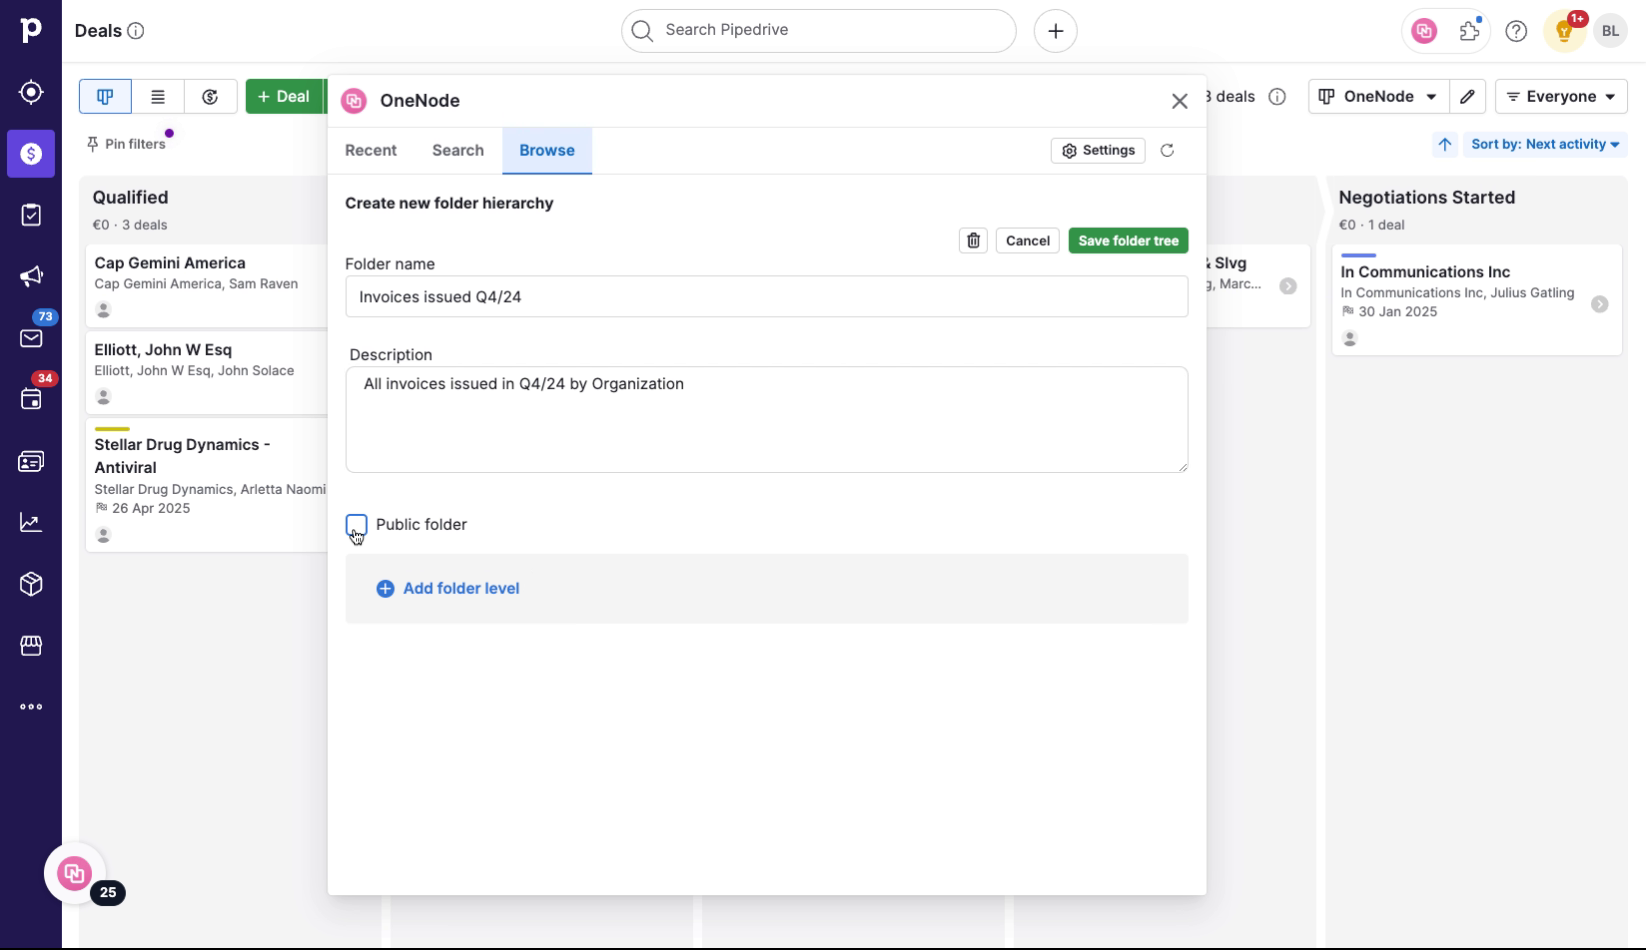
11. Set Visibility
Check if you would like to make this folder public for all users
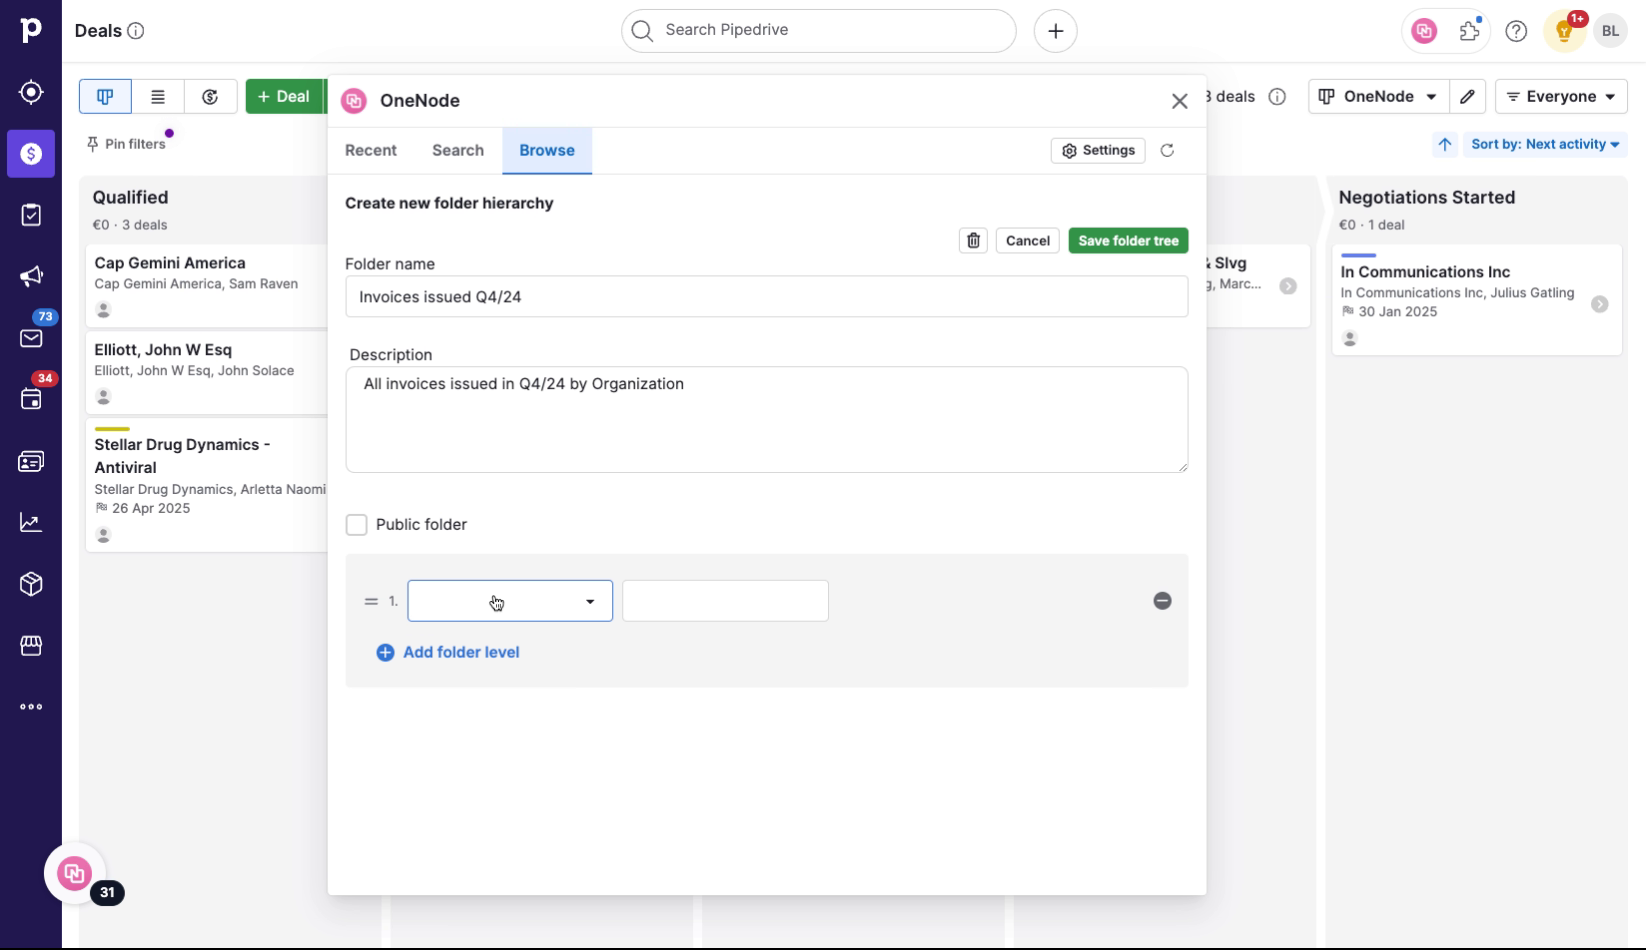
12. Set the first folder level
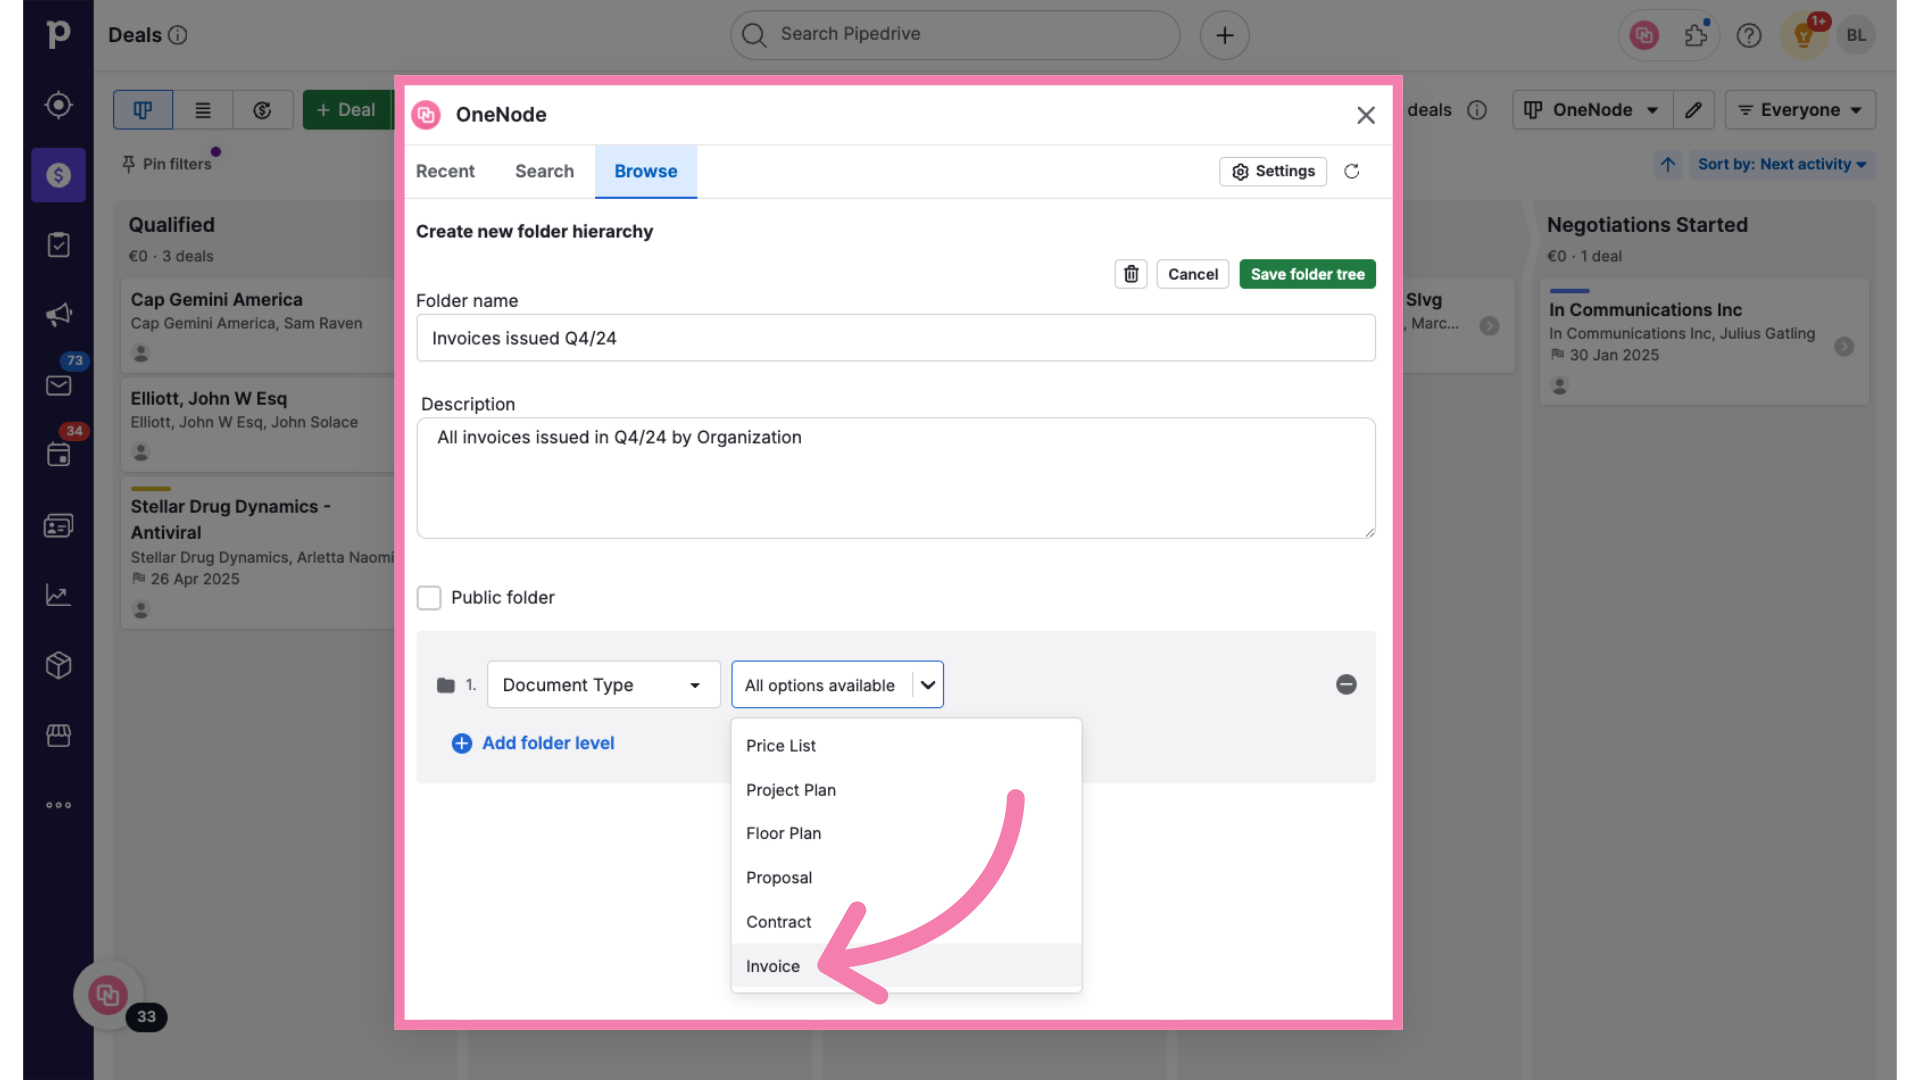
Otherwise go ahead and set the first parameter. First, choose the Document Type from the options in the dropdown.
13. Select "Invoice"
And choose the Invoice Type
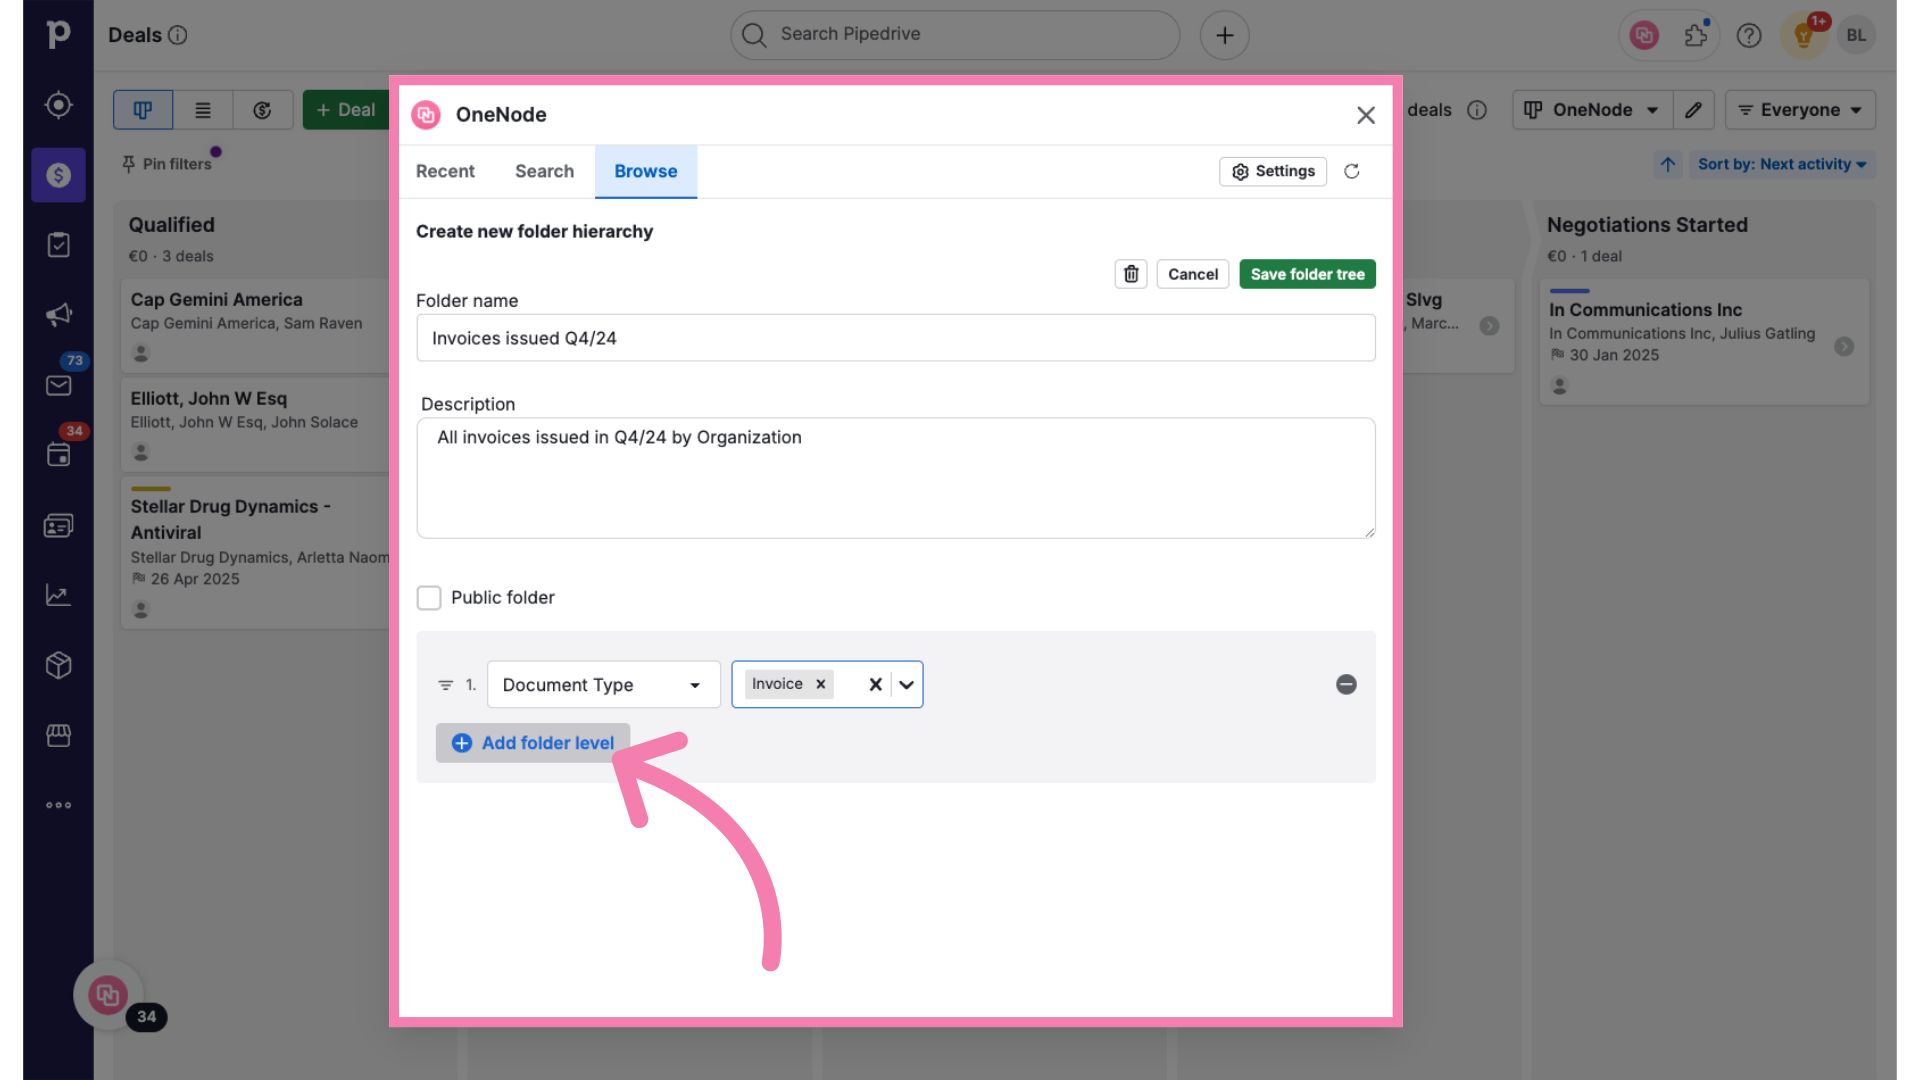
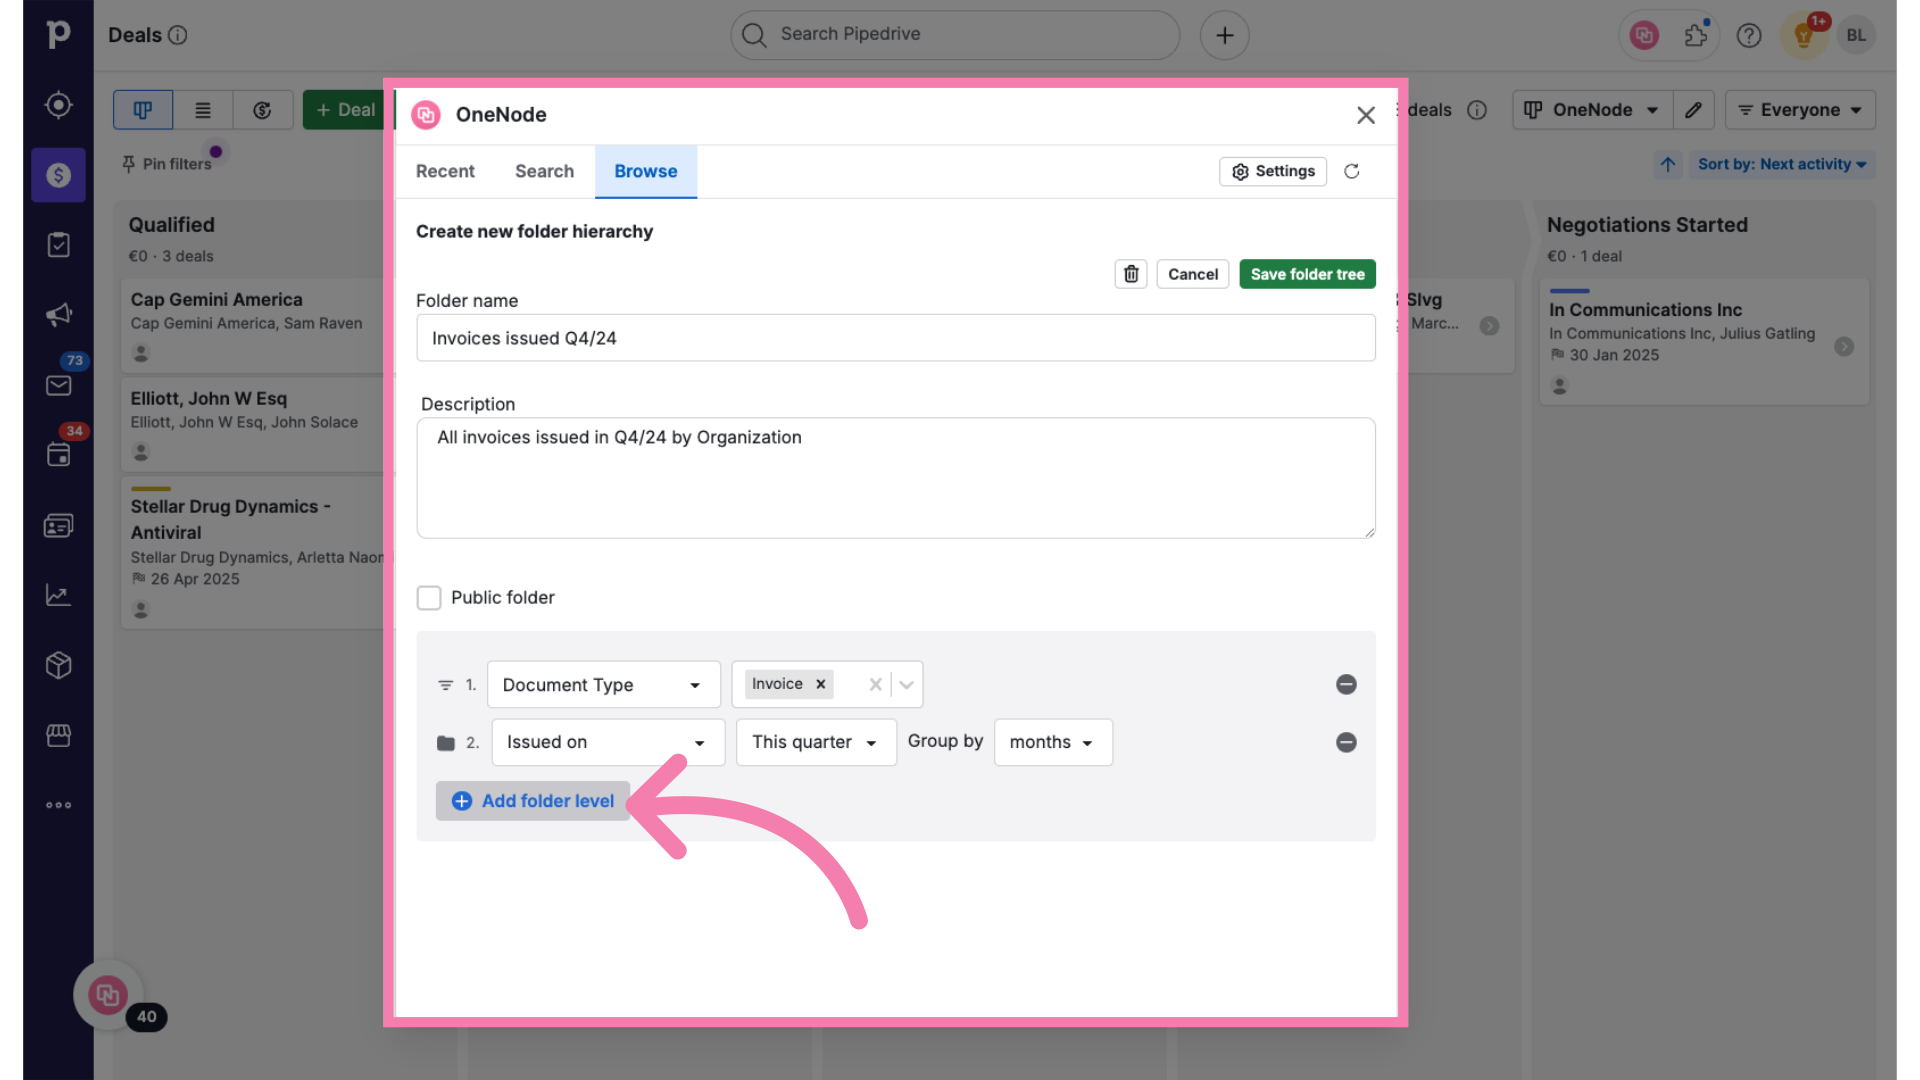
14. Click "Add folder level"
All right. Let's add another folder level.
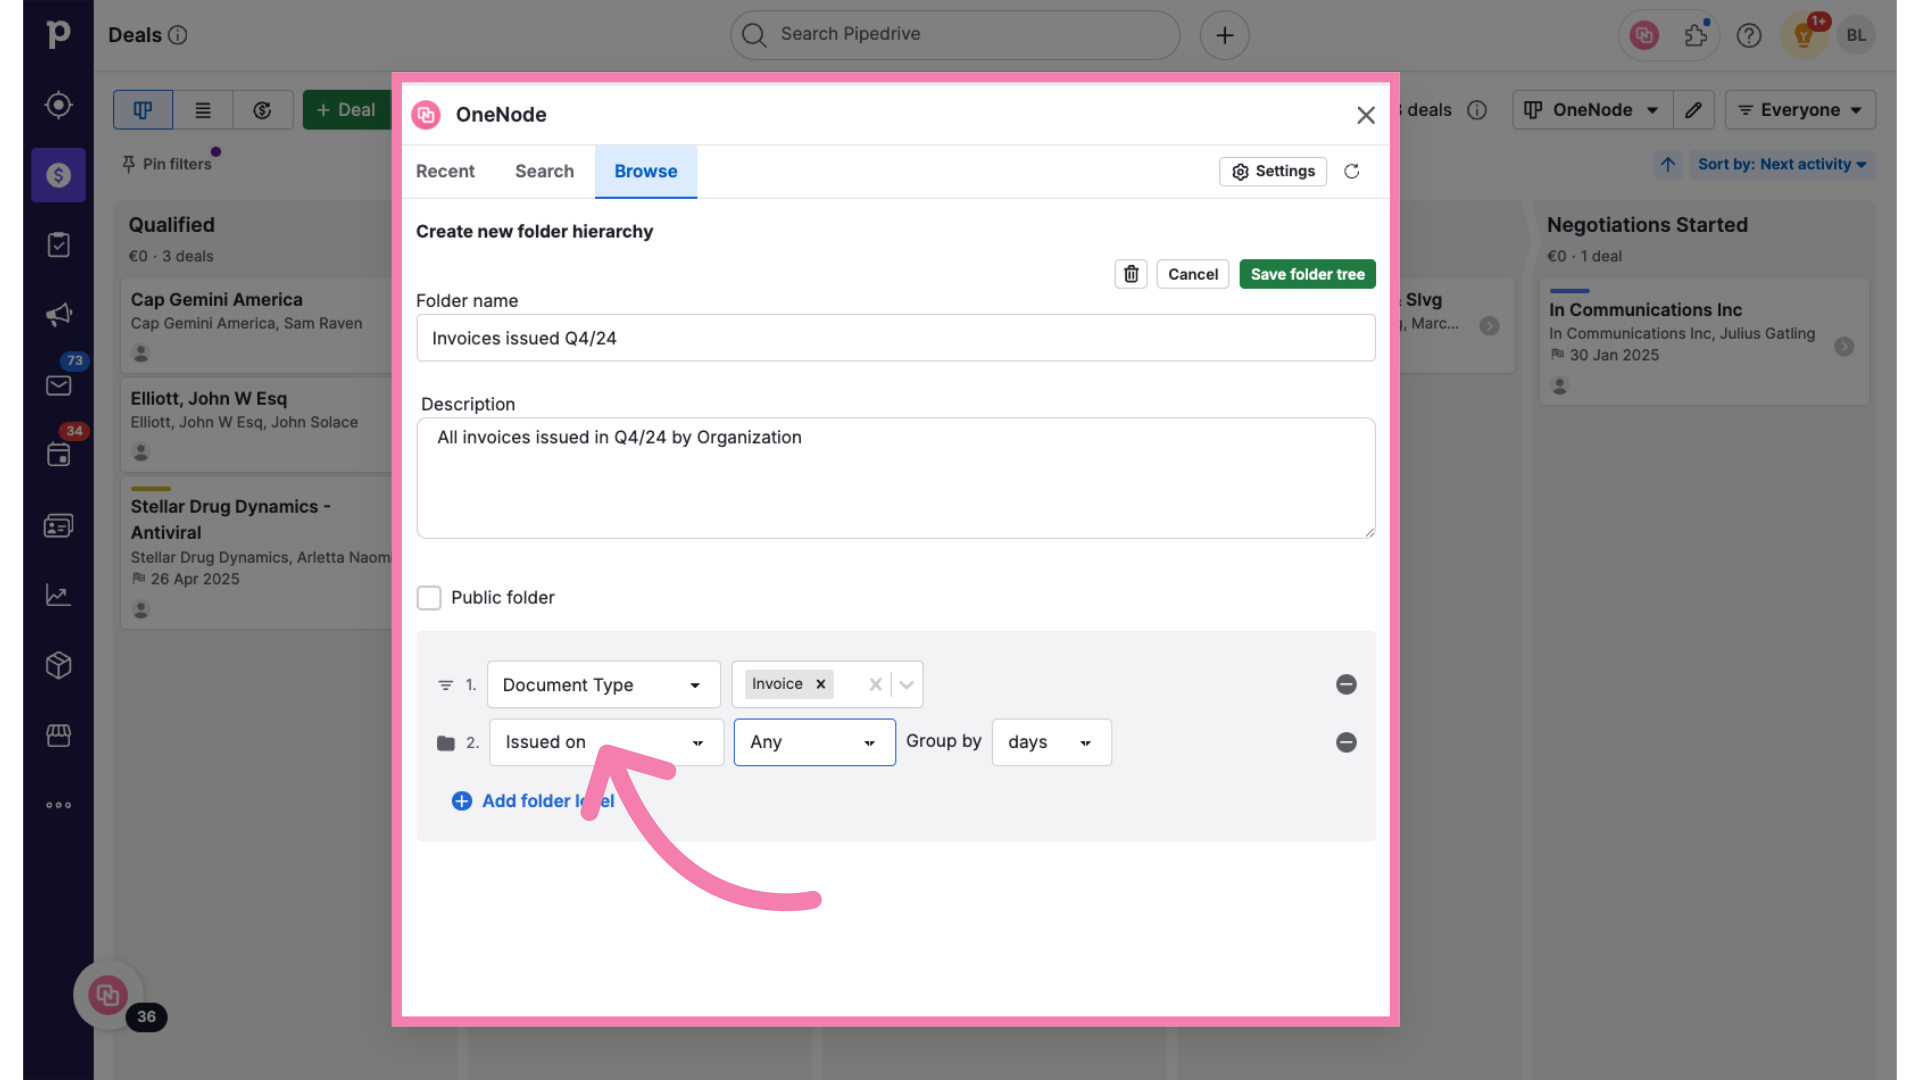
15. Define the second parameter
Now we need to make sure we filter only those invoices Issued on the last quarter of 2024.

16. Select "Issued on"
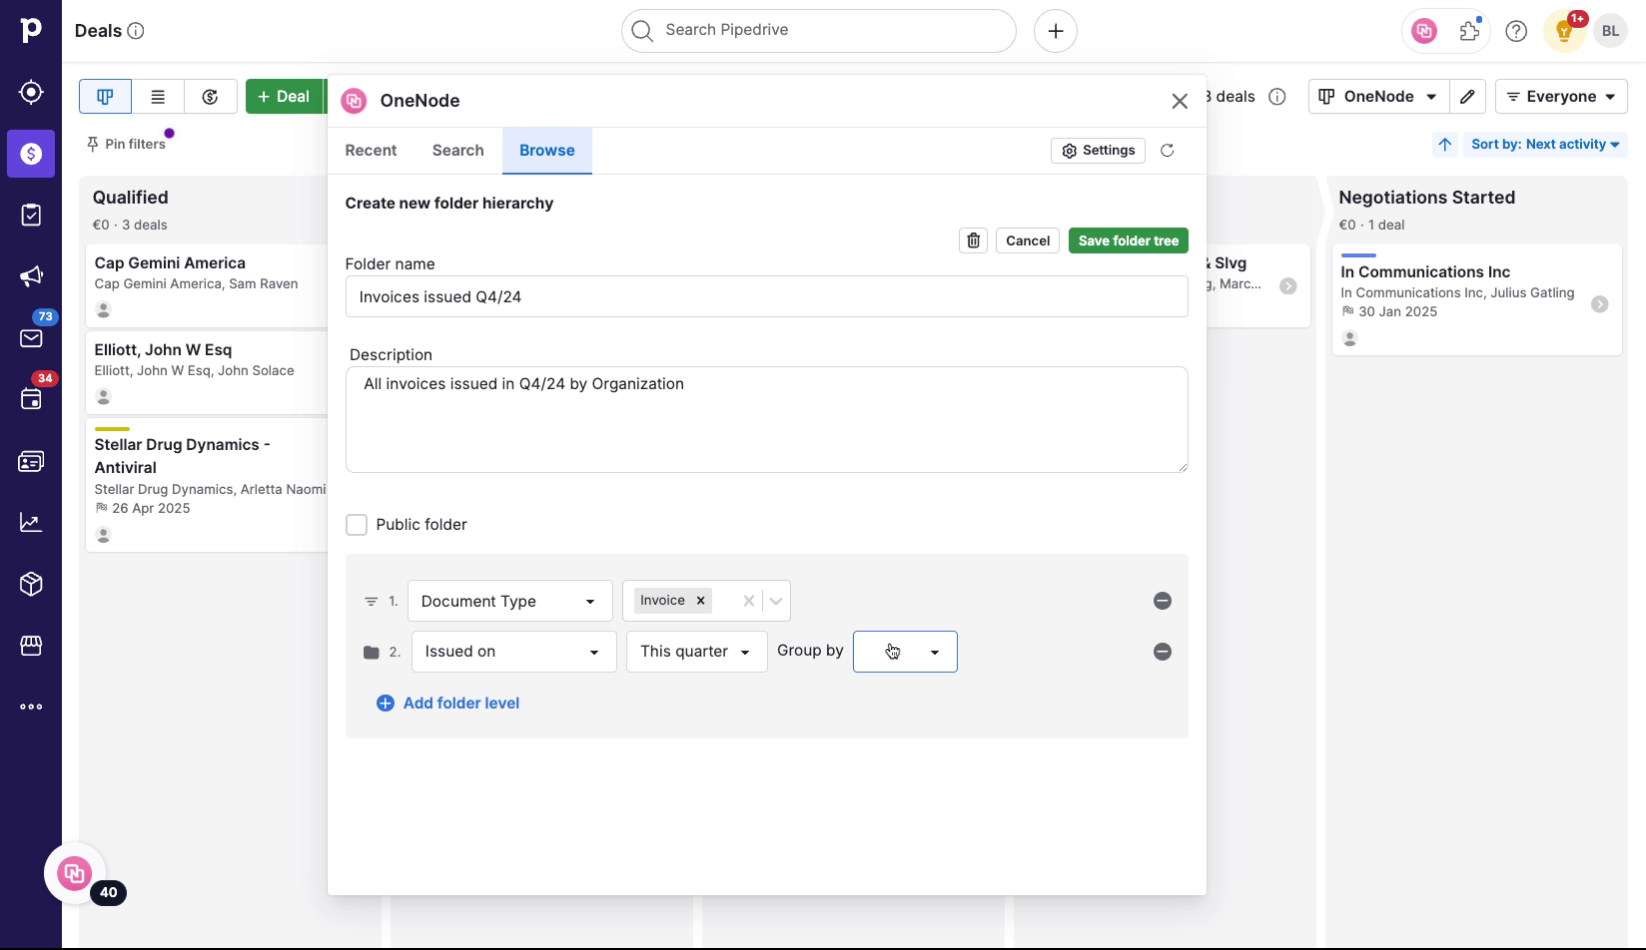
17. Define the time period
set the period to "this quarter"
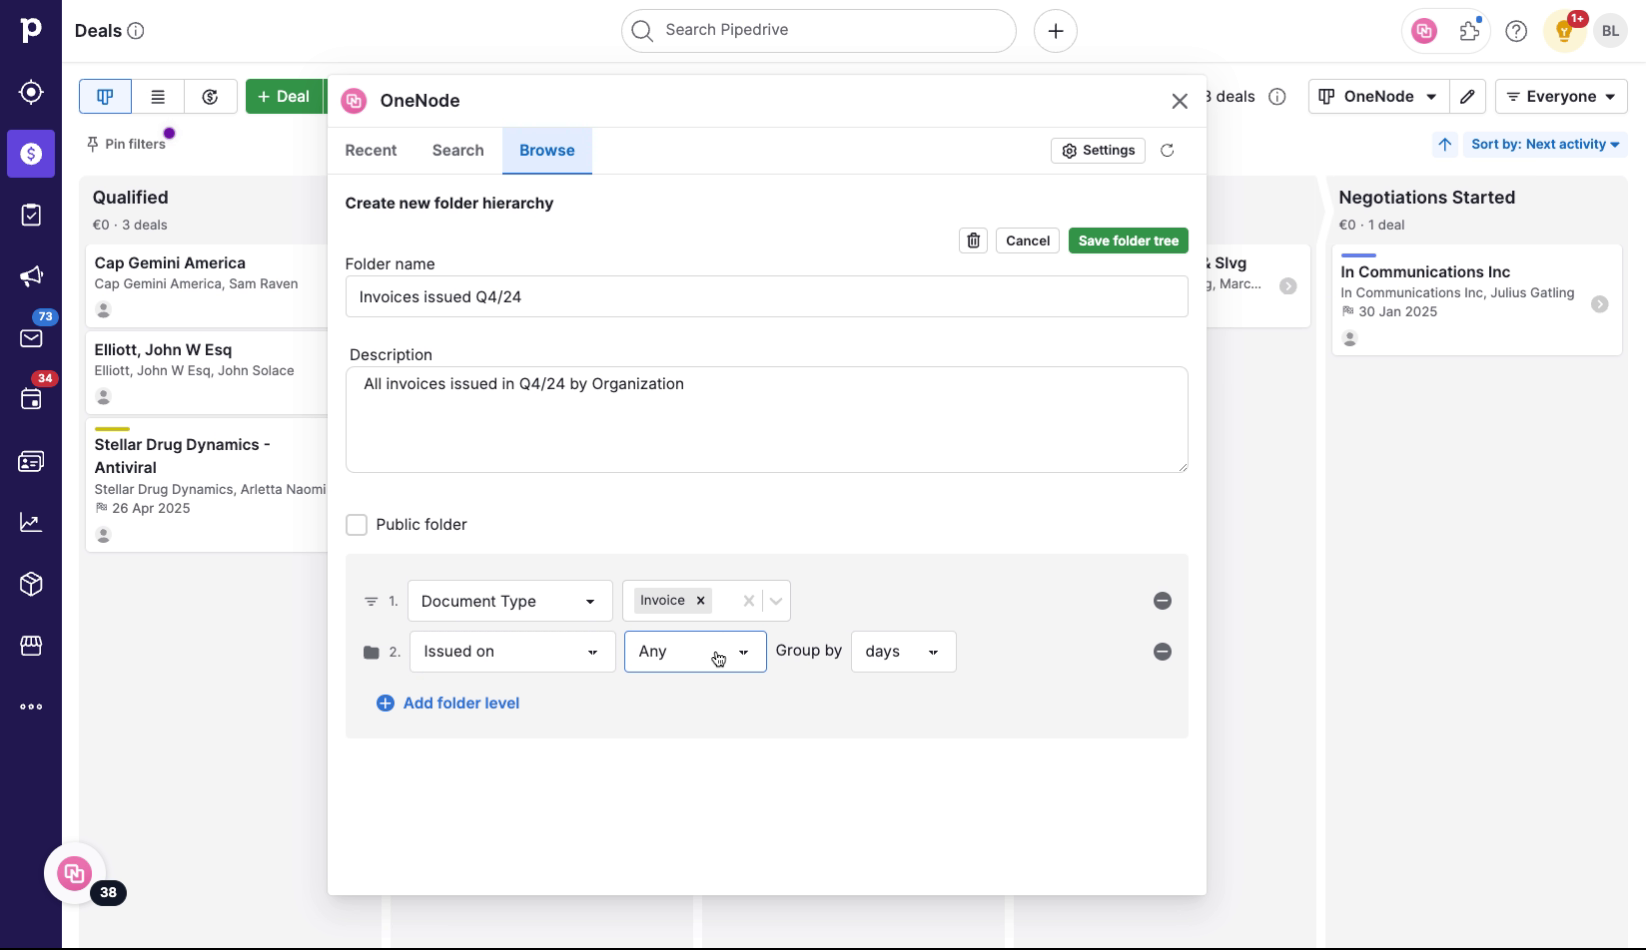
18. Group by
And group by Months
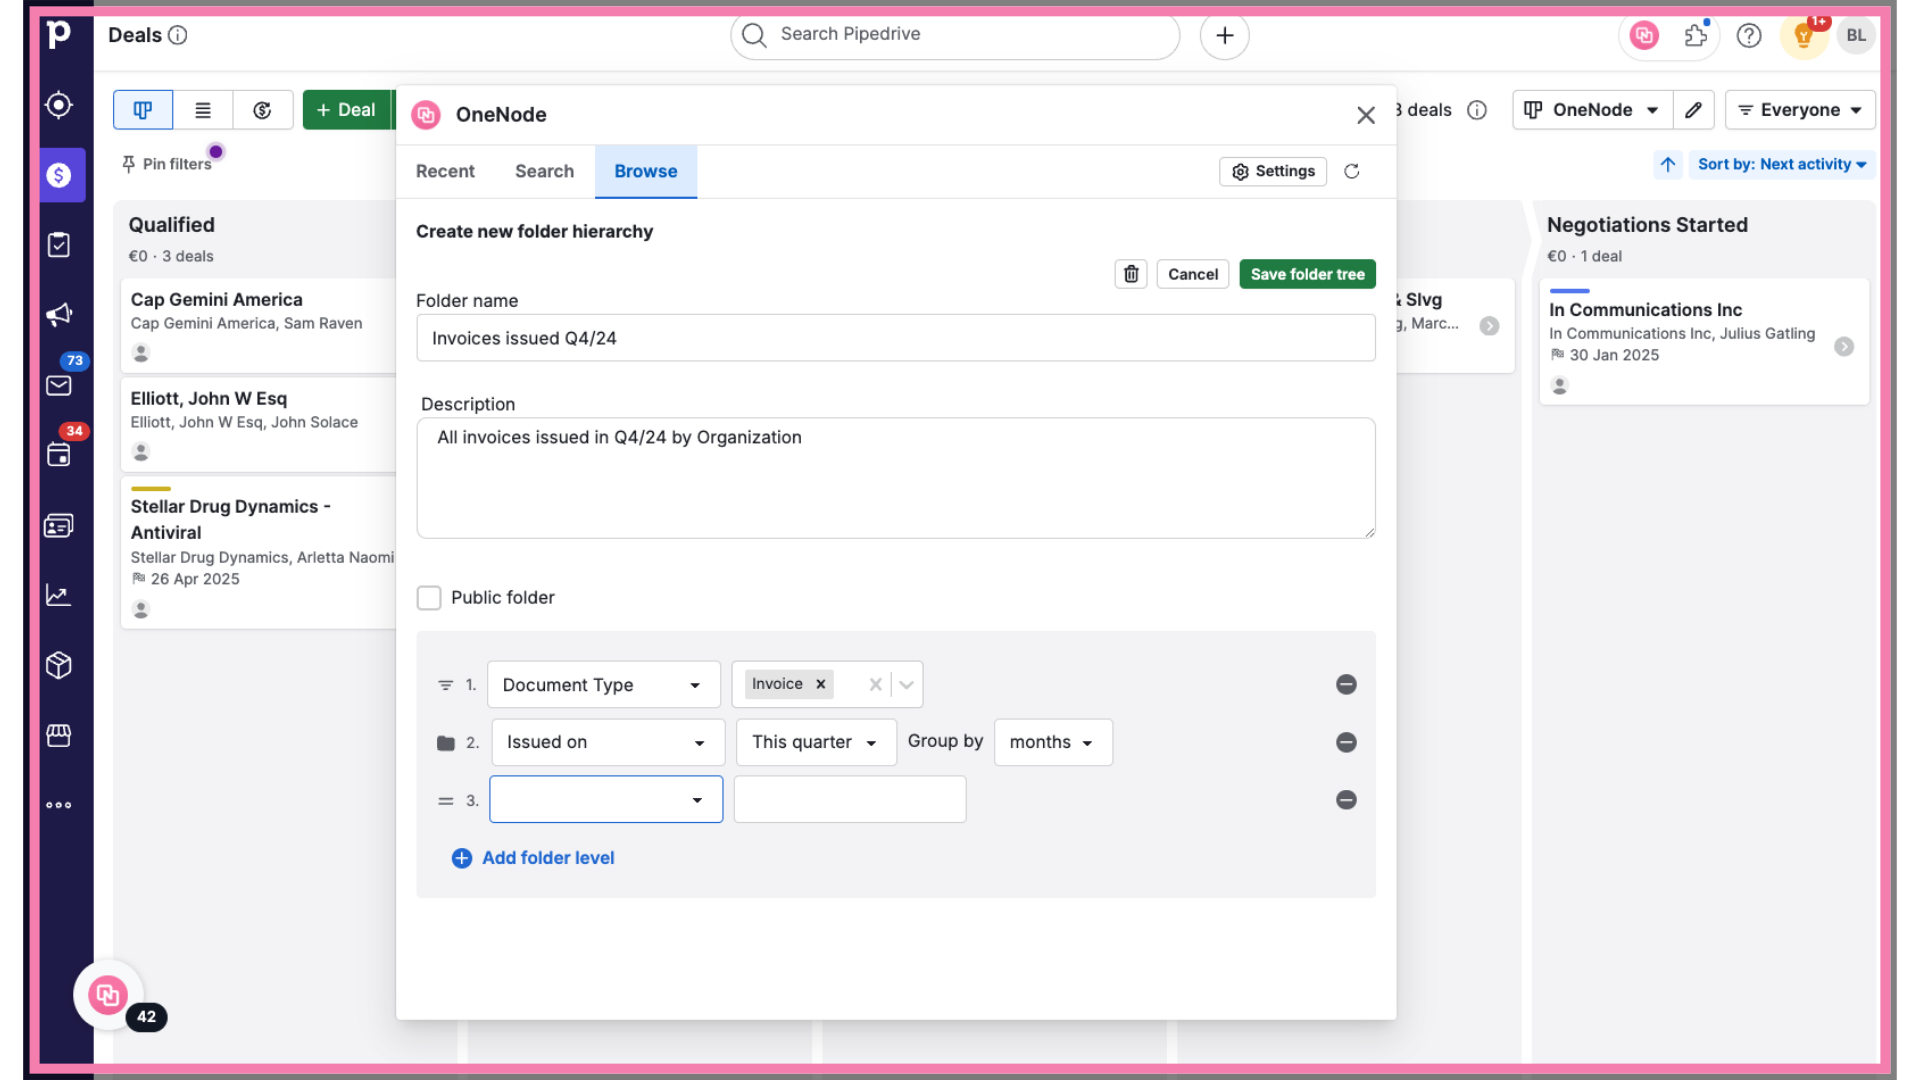
19. Click "Add folder level"
Ok, now the final folder level.
20. Display options
Click to display the options
21. Select Organization
And select "Organization"
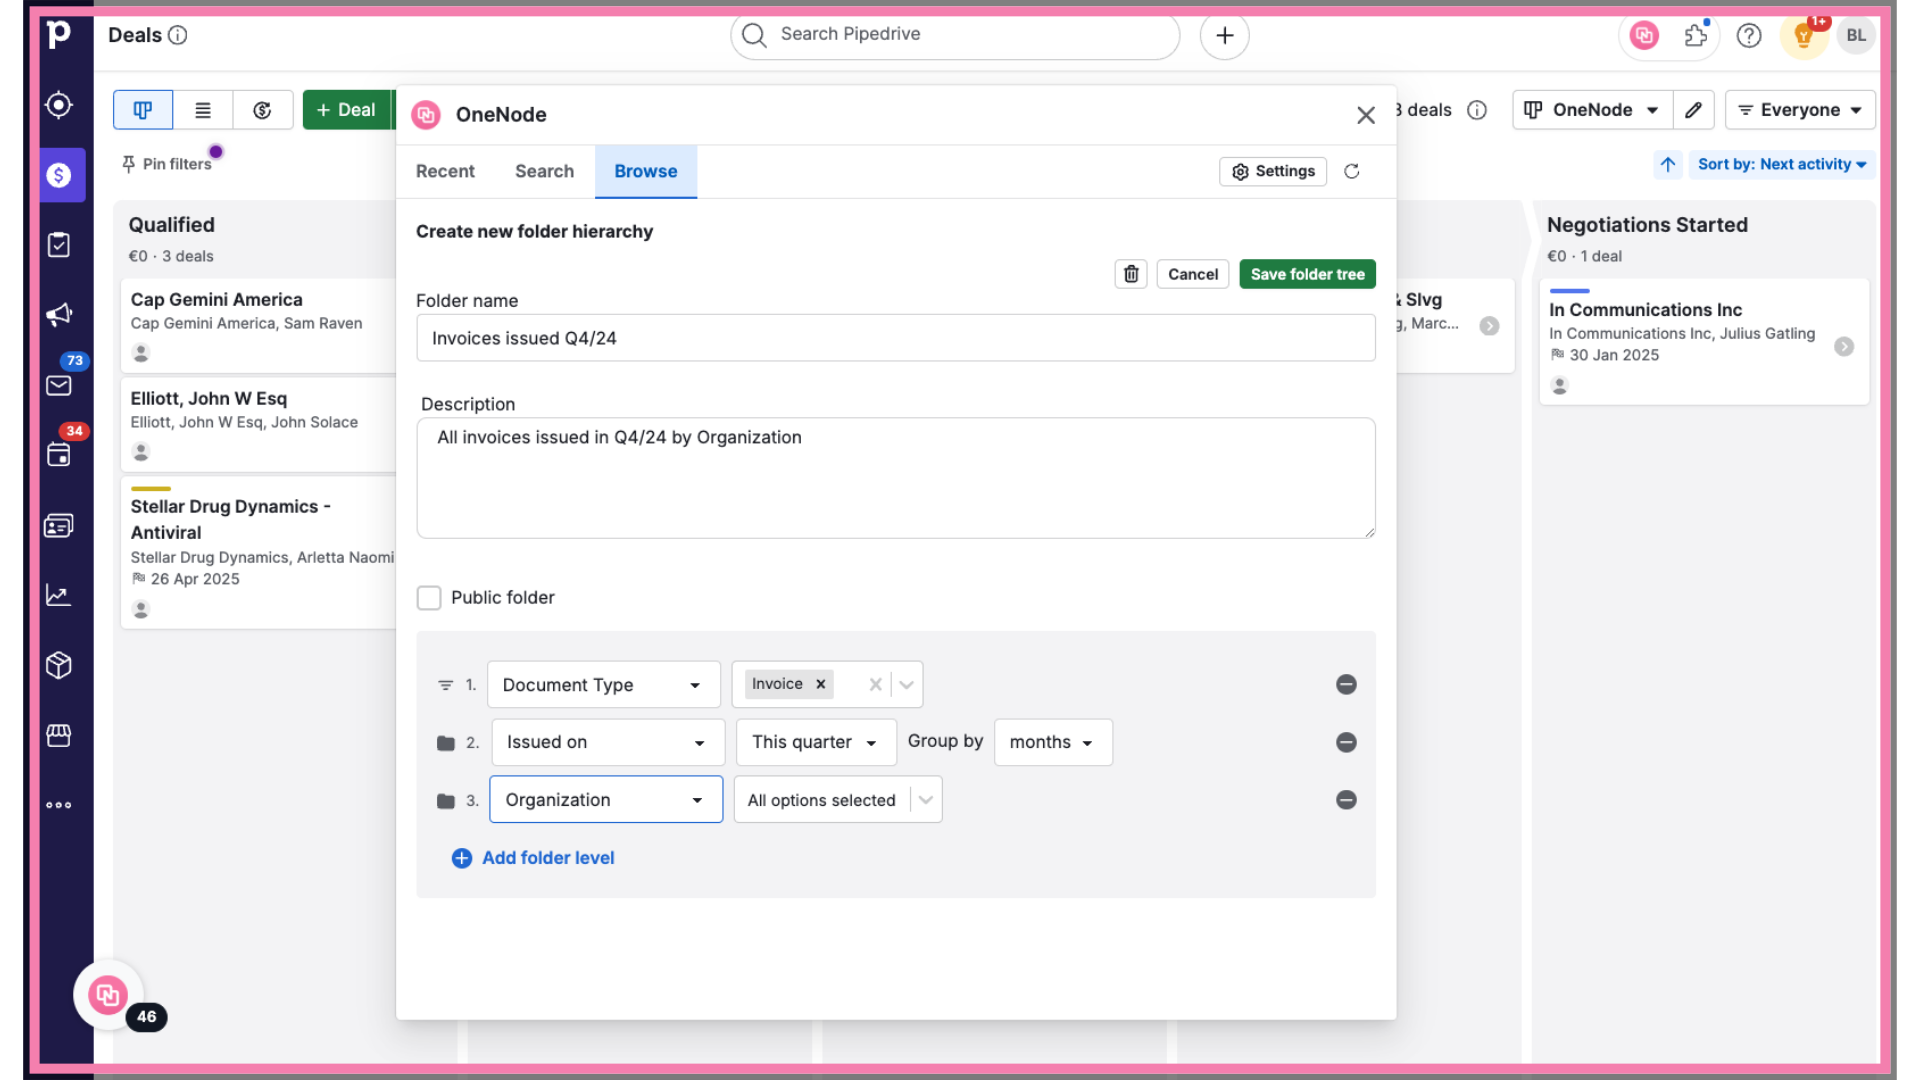
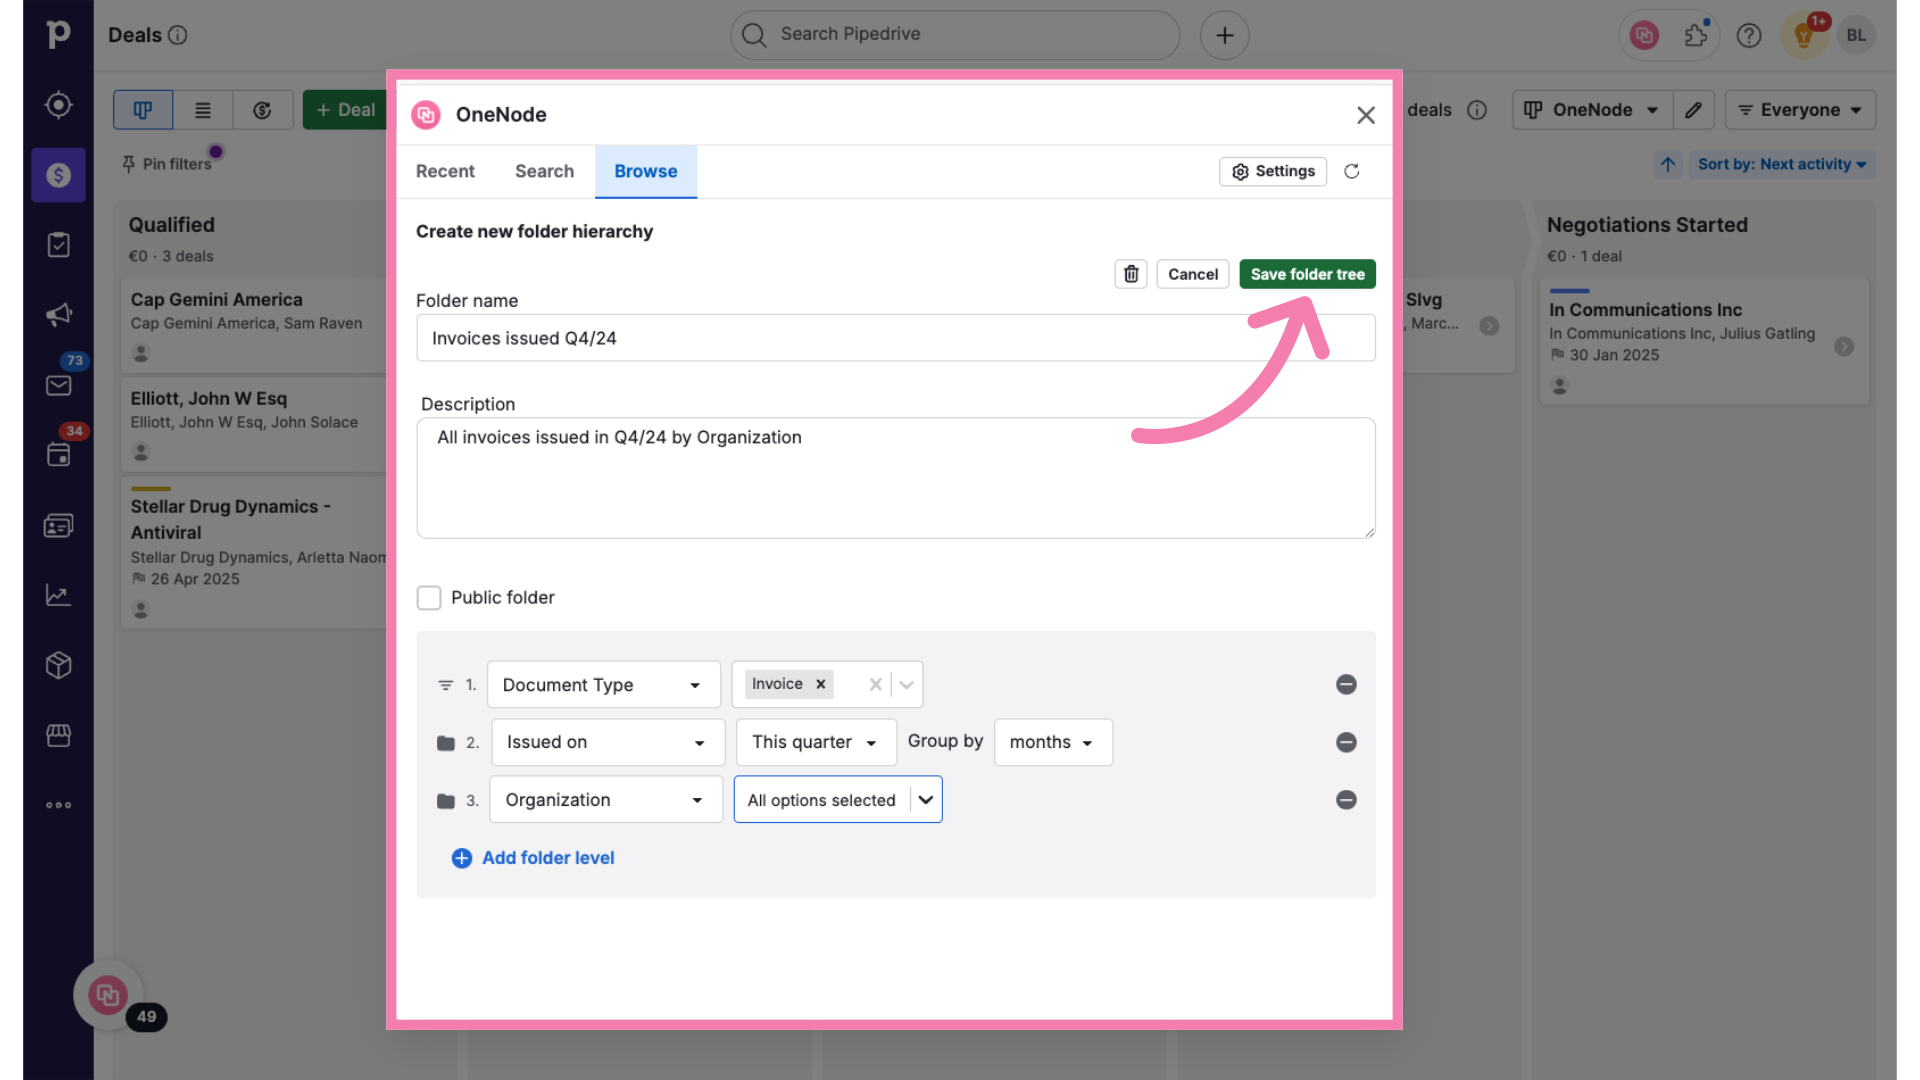
22. Click "Save folder tree"
This is it! This folder will display all organizations with linked Invoices that were issued this quarter. Click Save folder tree
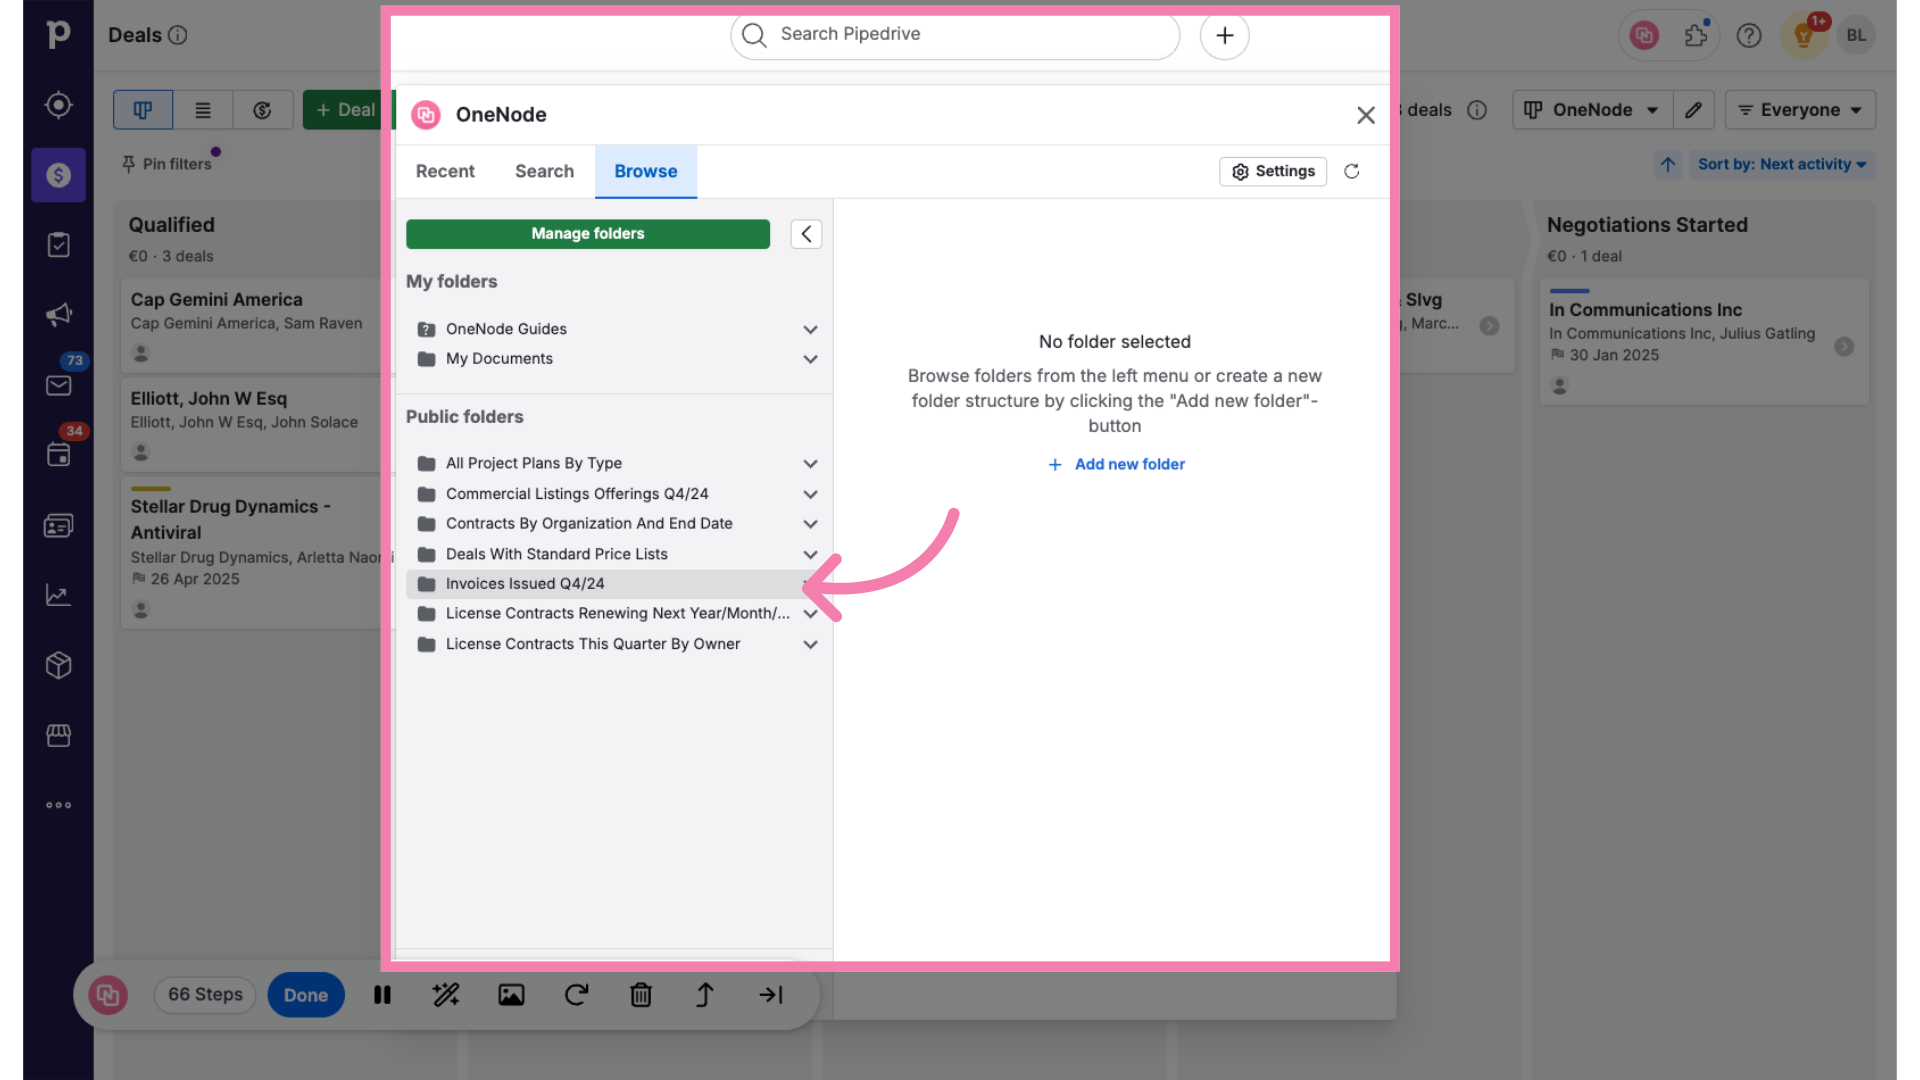
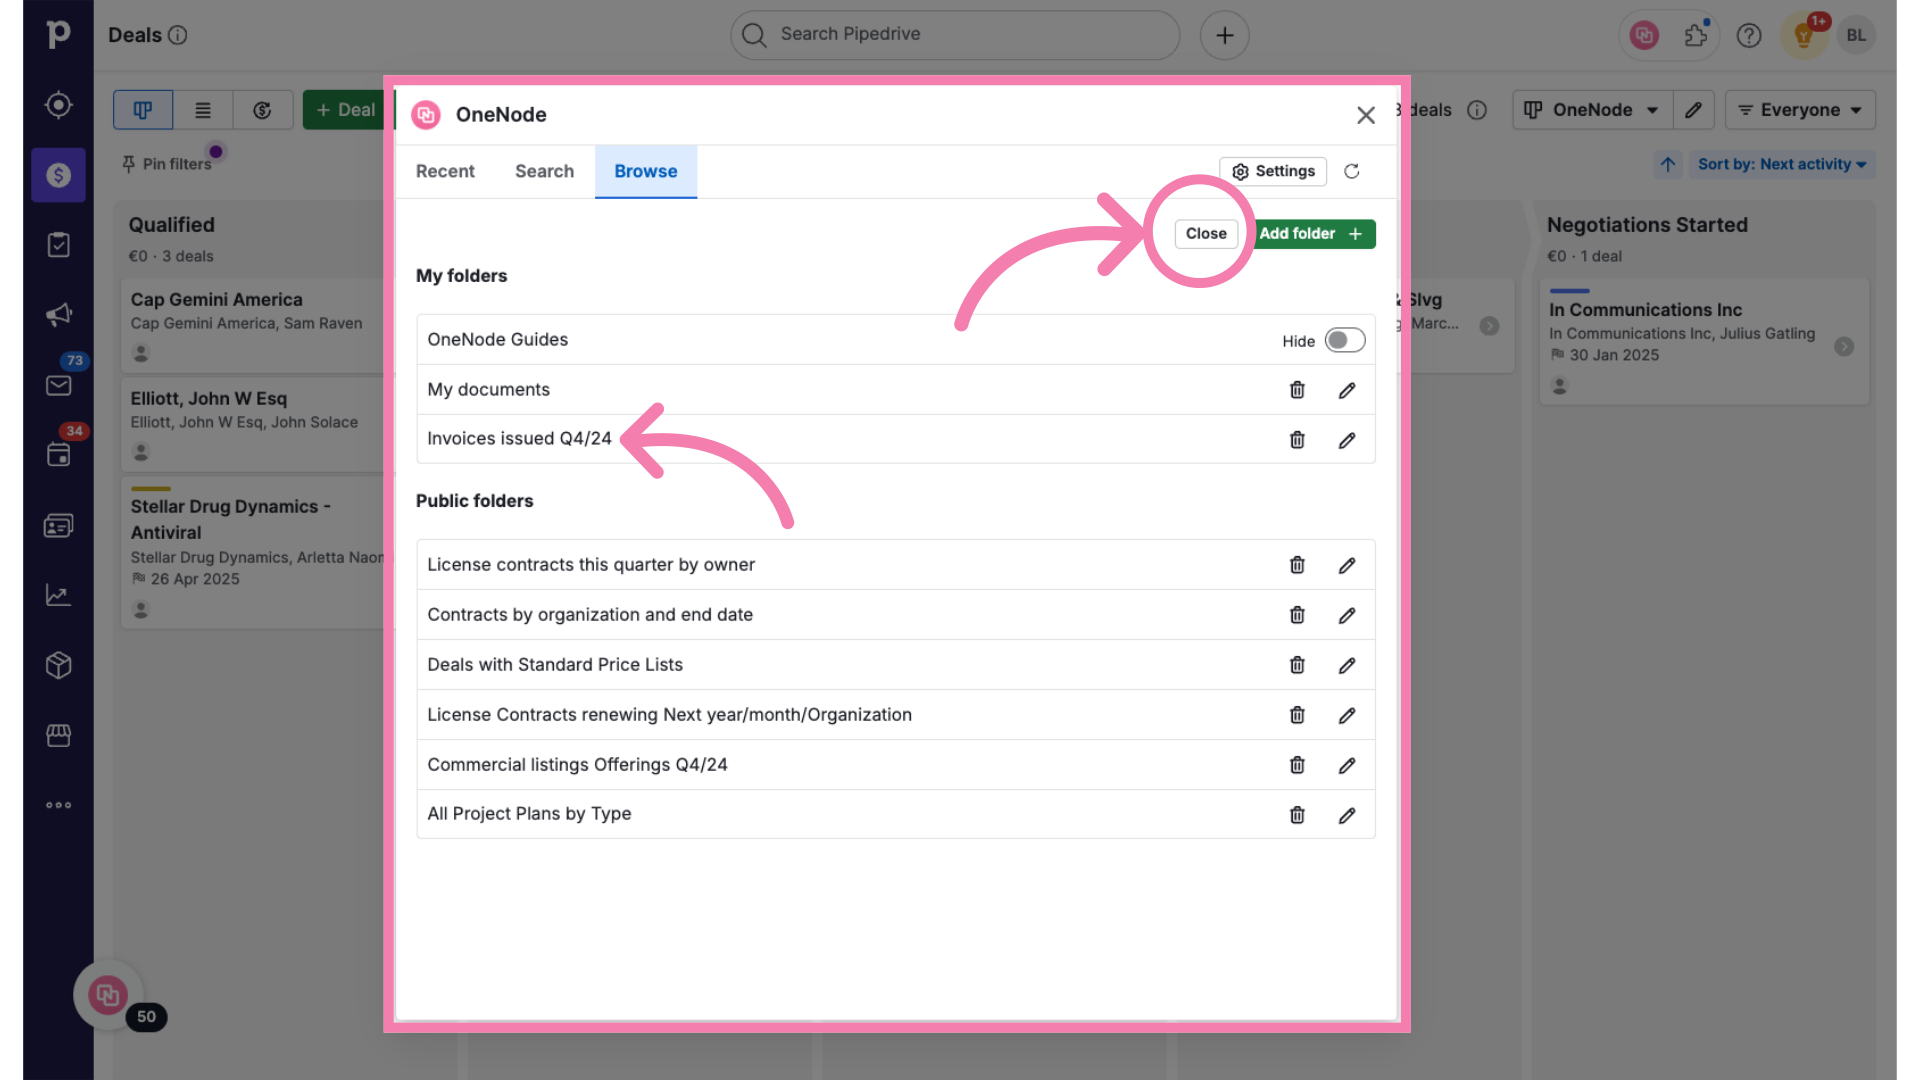
23. Close and Click "Browse"
And there we have it. The newly created Folder as part of "My Folders". Now click Close to return to the Browsing window.
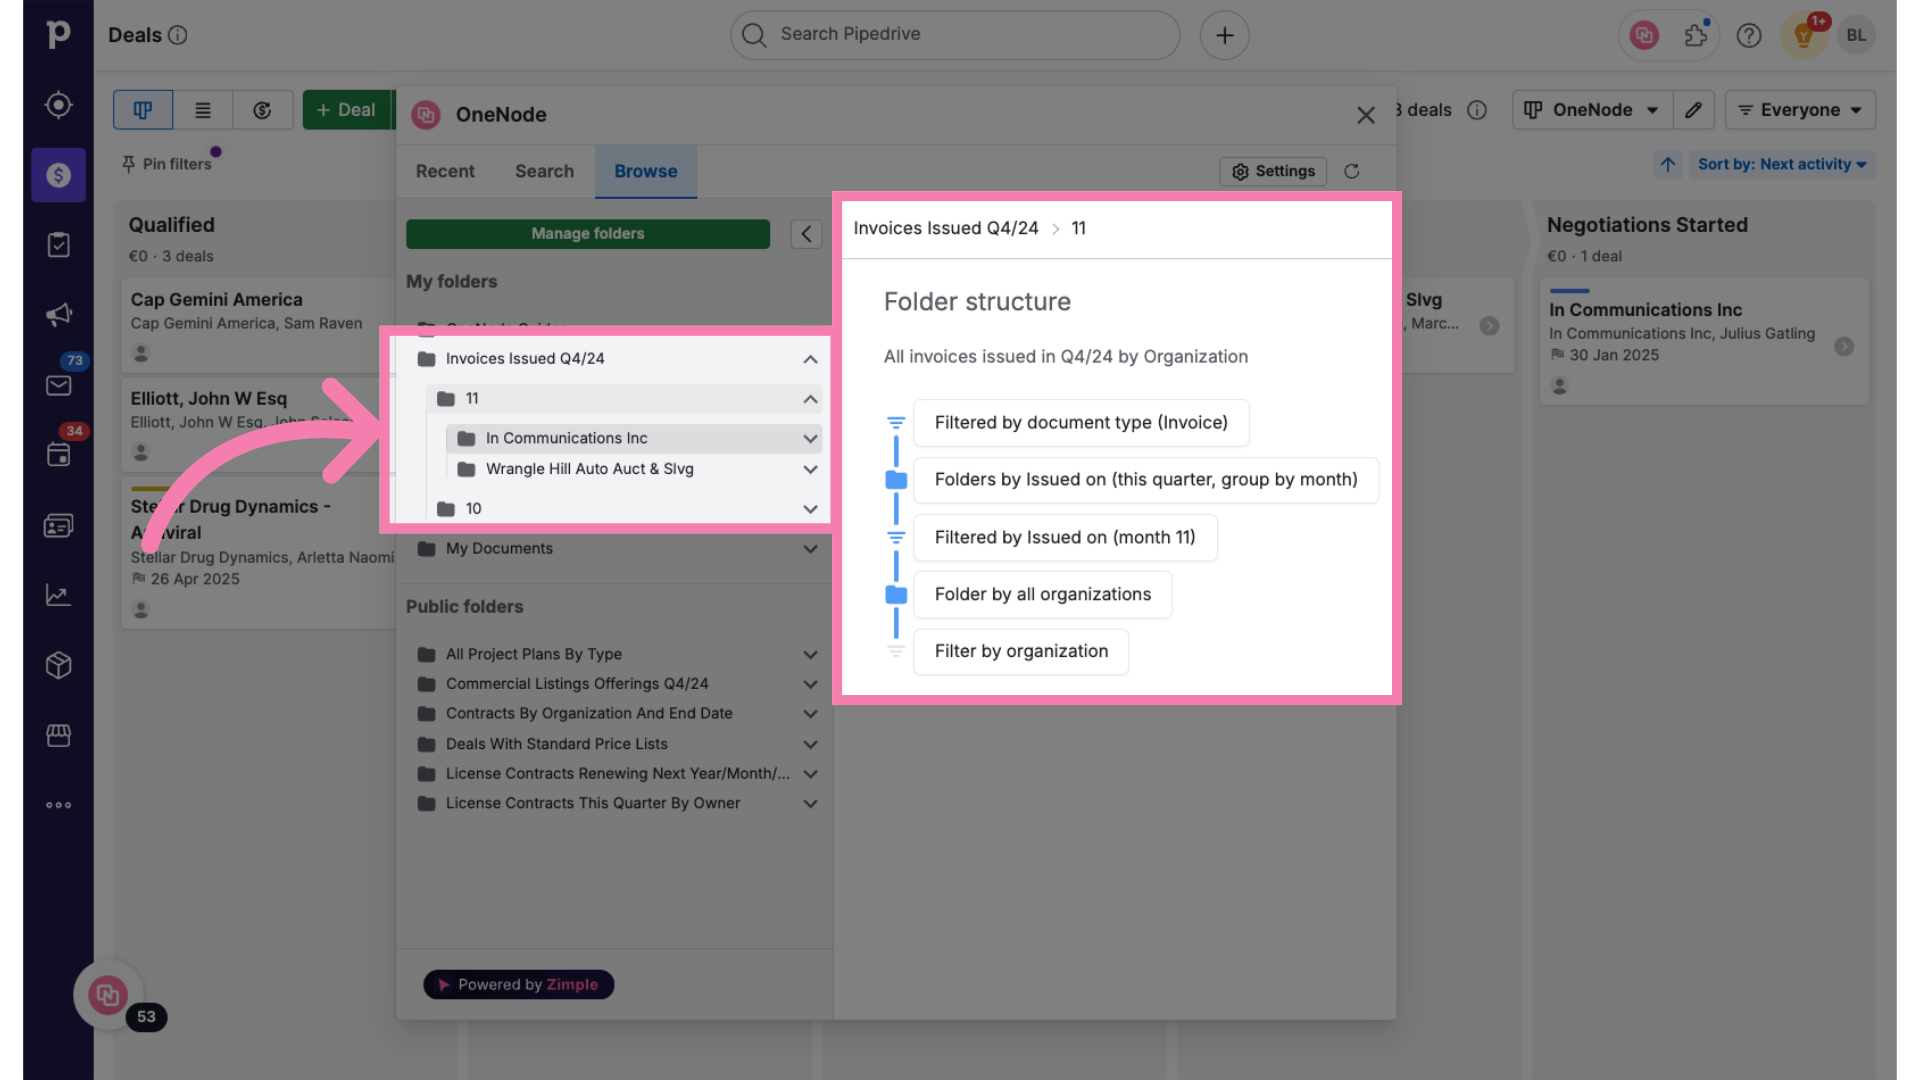
24. Expand the folder
We can see that invoices were issued in October and November. Click on one of the organizations with invoices issued in November.
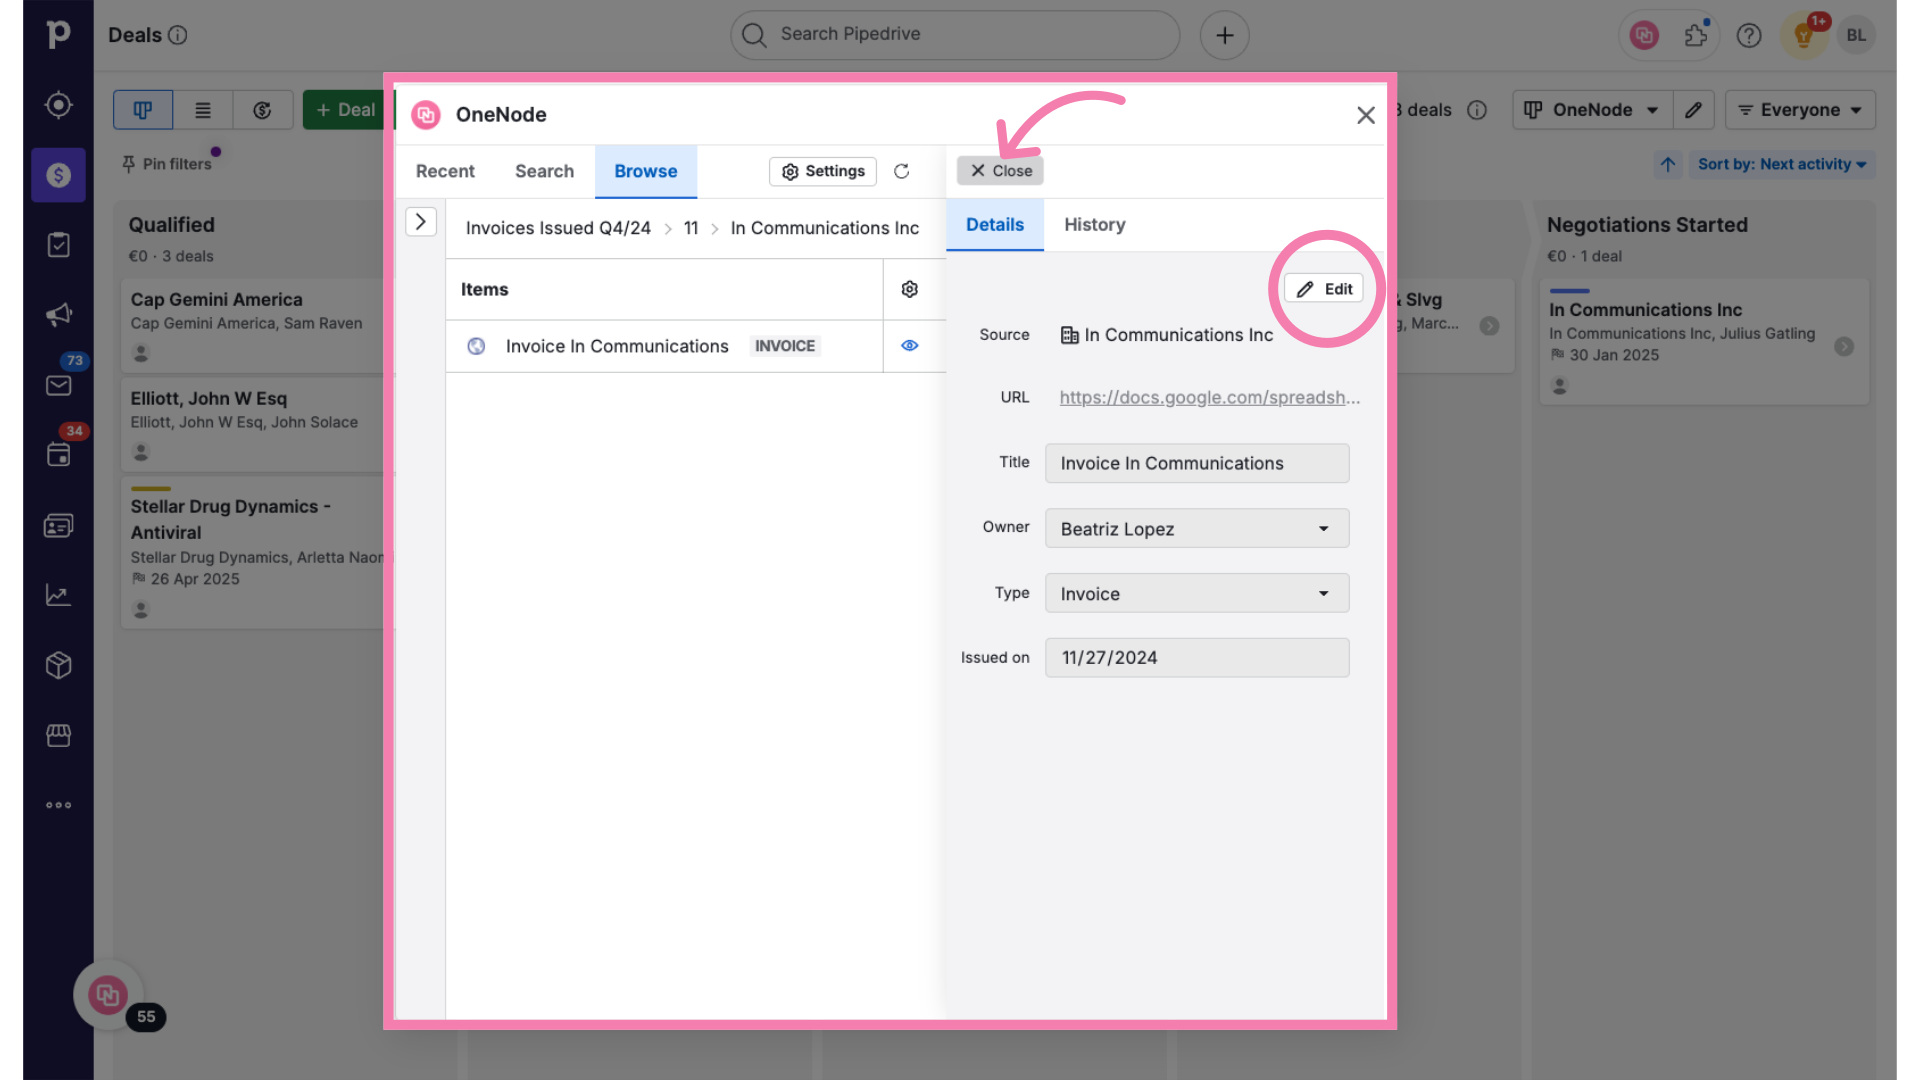
25. Check the Document
You can review the details for this Organization's Invoice by clicking the Eye icon

26. Review Details
And make any adjustments with the Pen Icon
27. Folder Management
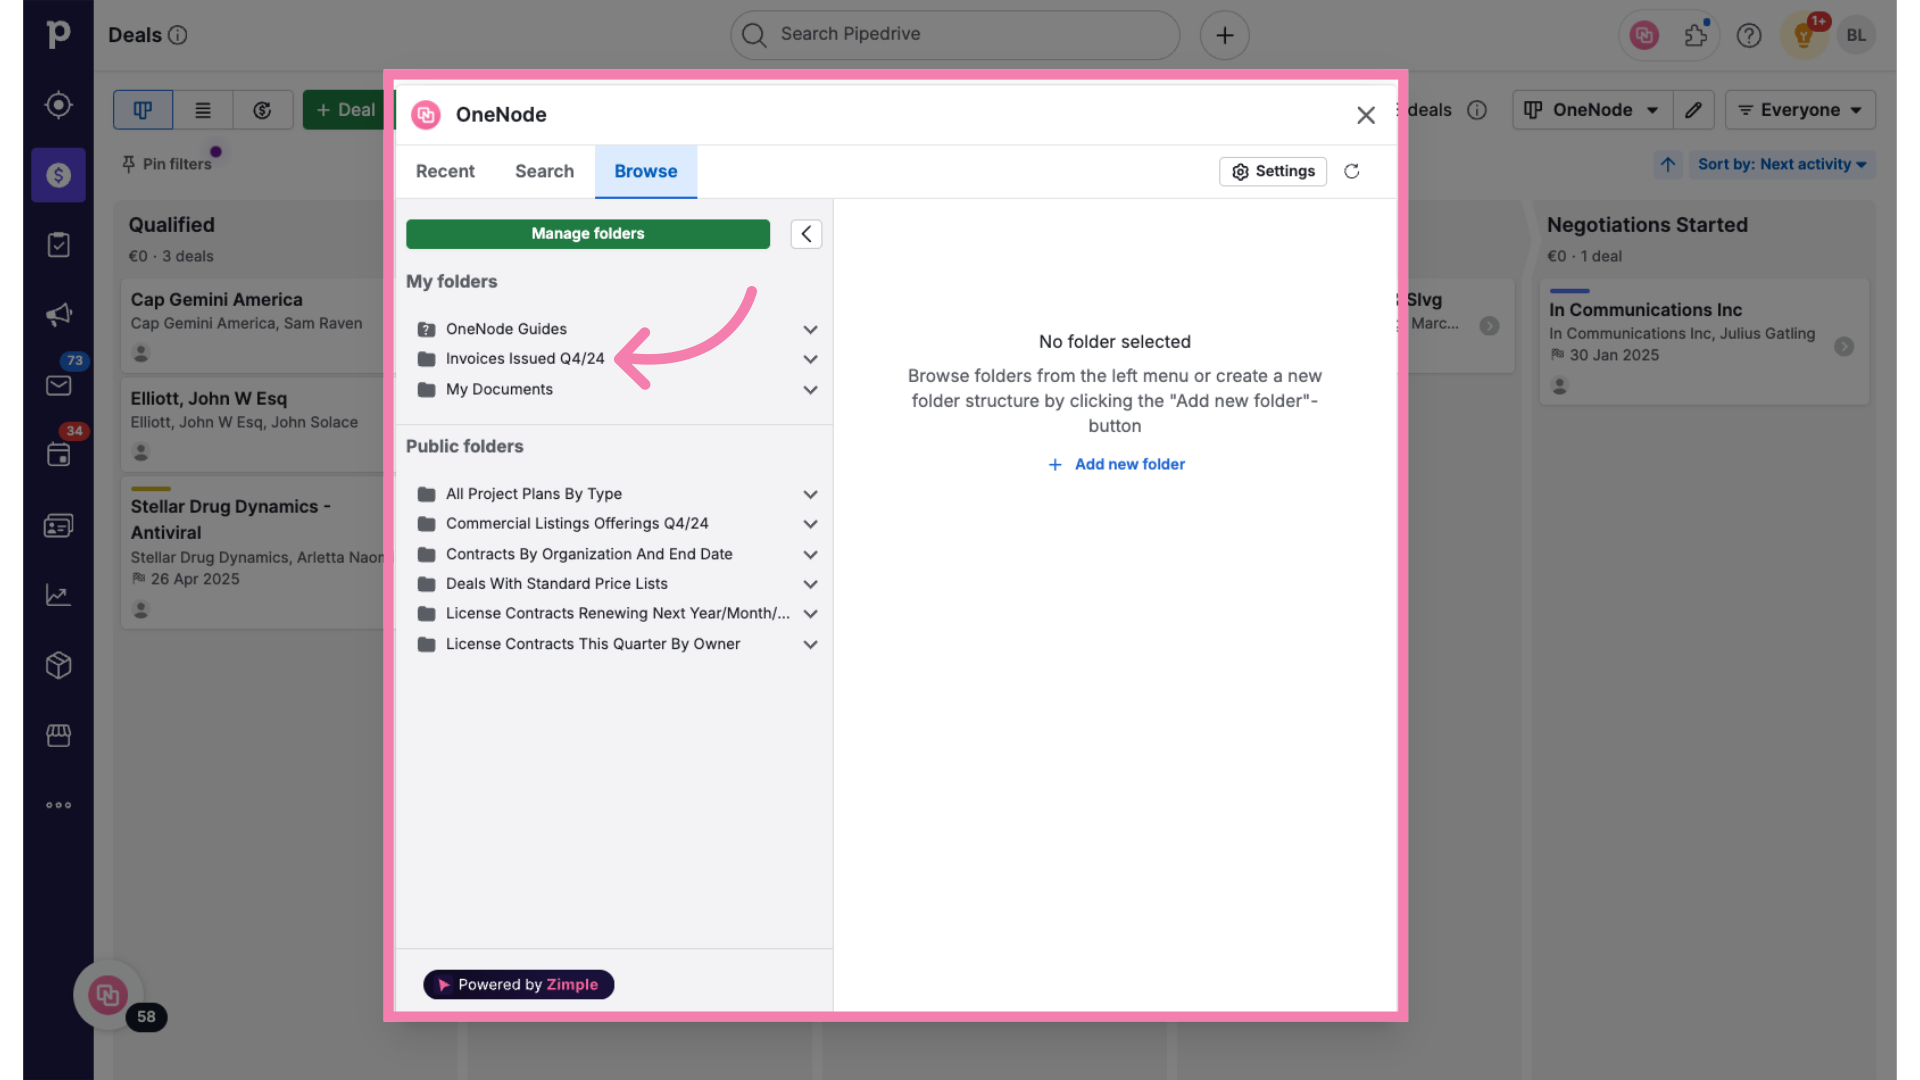
28. Click "Manage folders"
But if you decide you want to make this folder public after all, simply click on "Manage Folders" again.
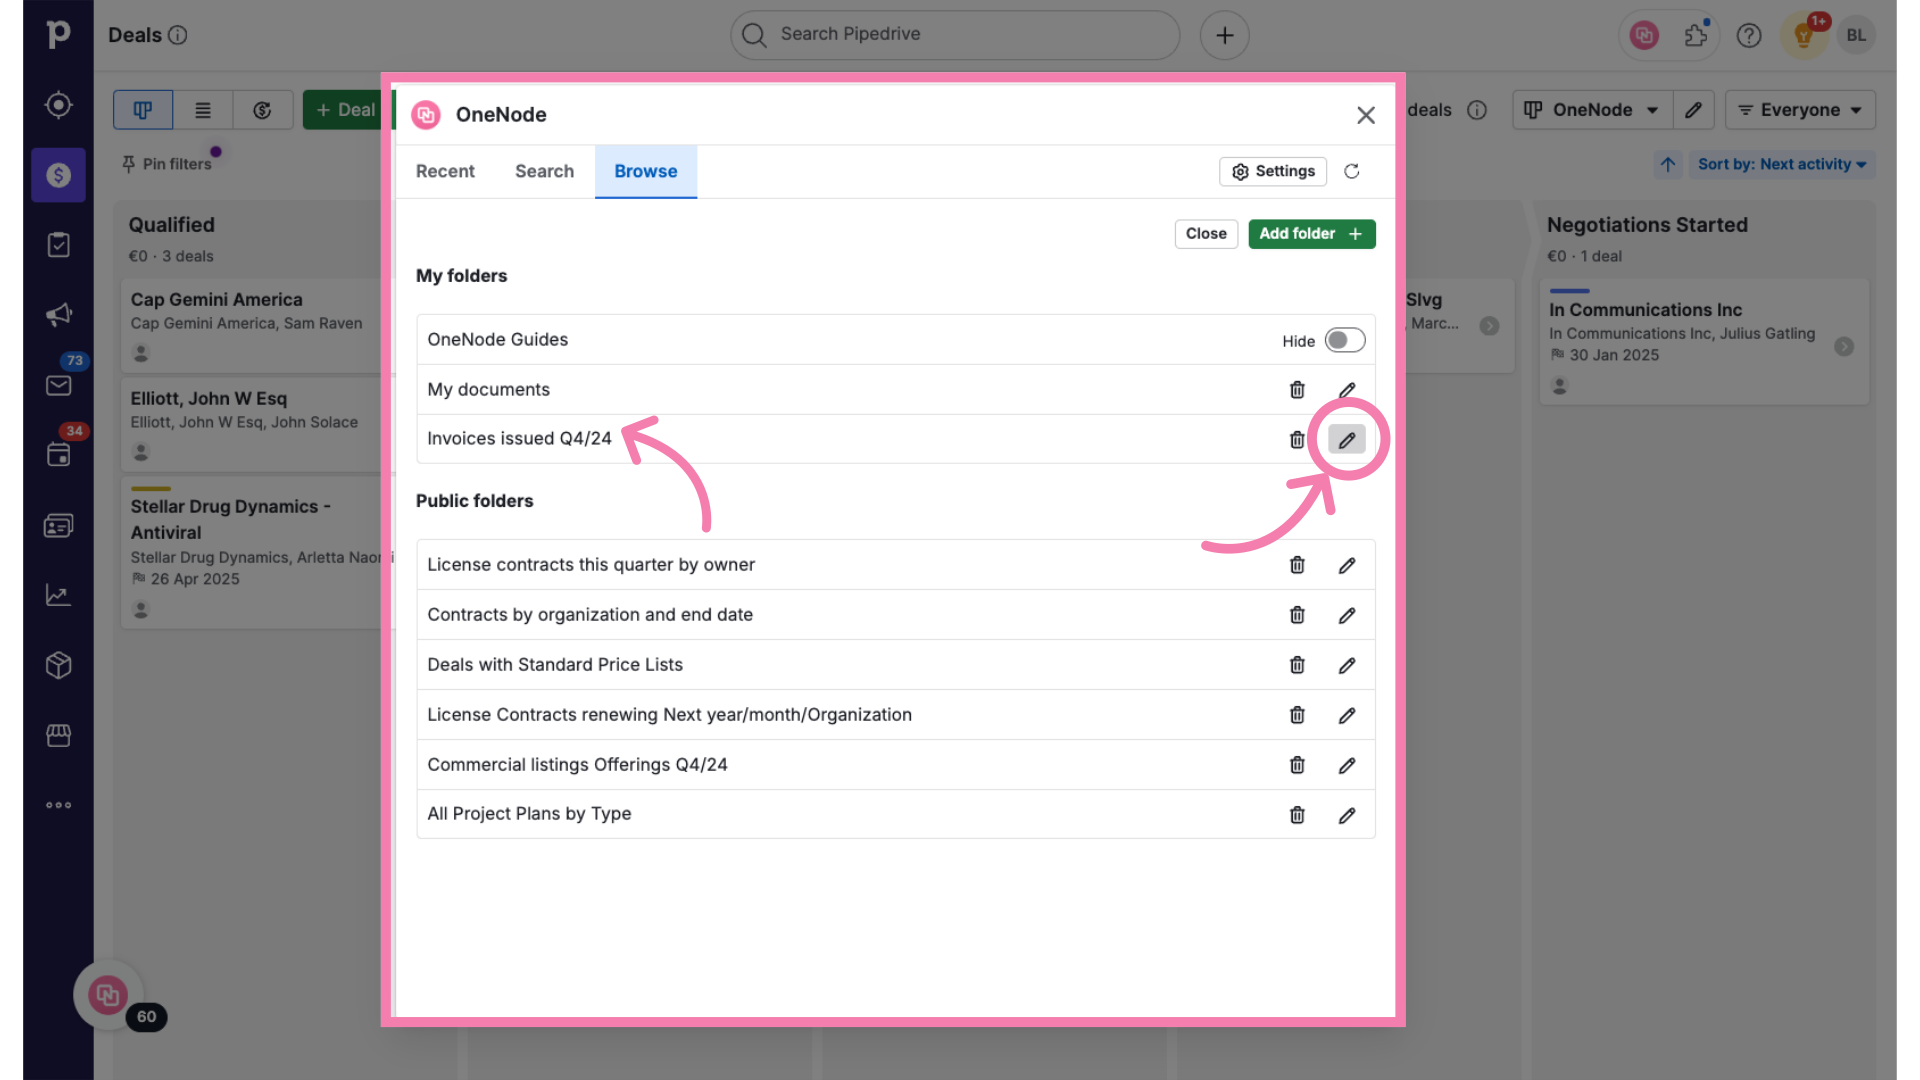
29. Select the Pen Icon to edit
And make any changes by selecting the Pen Icon in front of the folder name
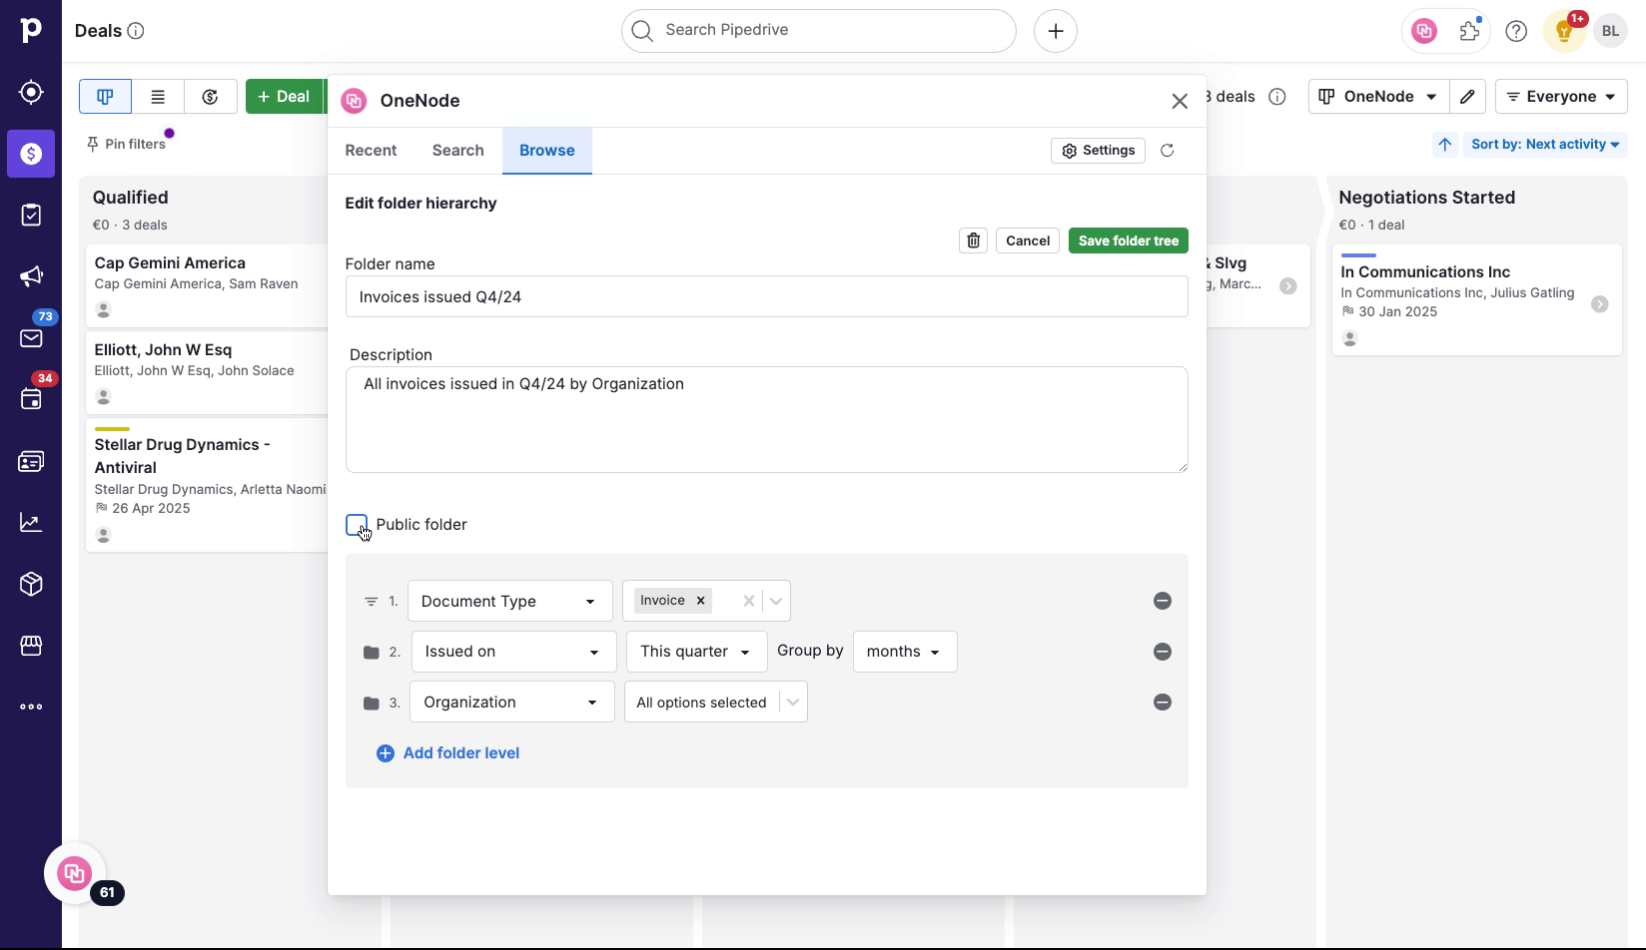
30. Make Public
Simply tick the "Public folder" checkbox and click Save.
31. Review the changes