Upload a new file
Upload a new file
This video will walk you through the process of uploading a new file directly from the Organization view in Pipedrive
1. Select an Organization
As an example, we’ll use a Proposal document. Start by selecting the Organization you want to link the document to, and locating the OneNode panel on the left.
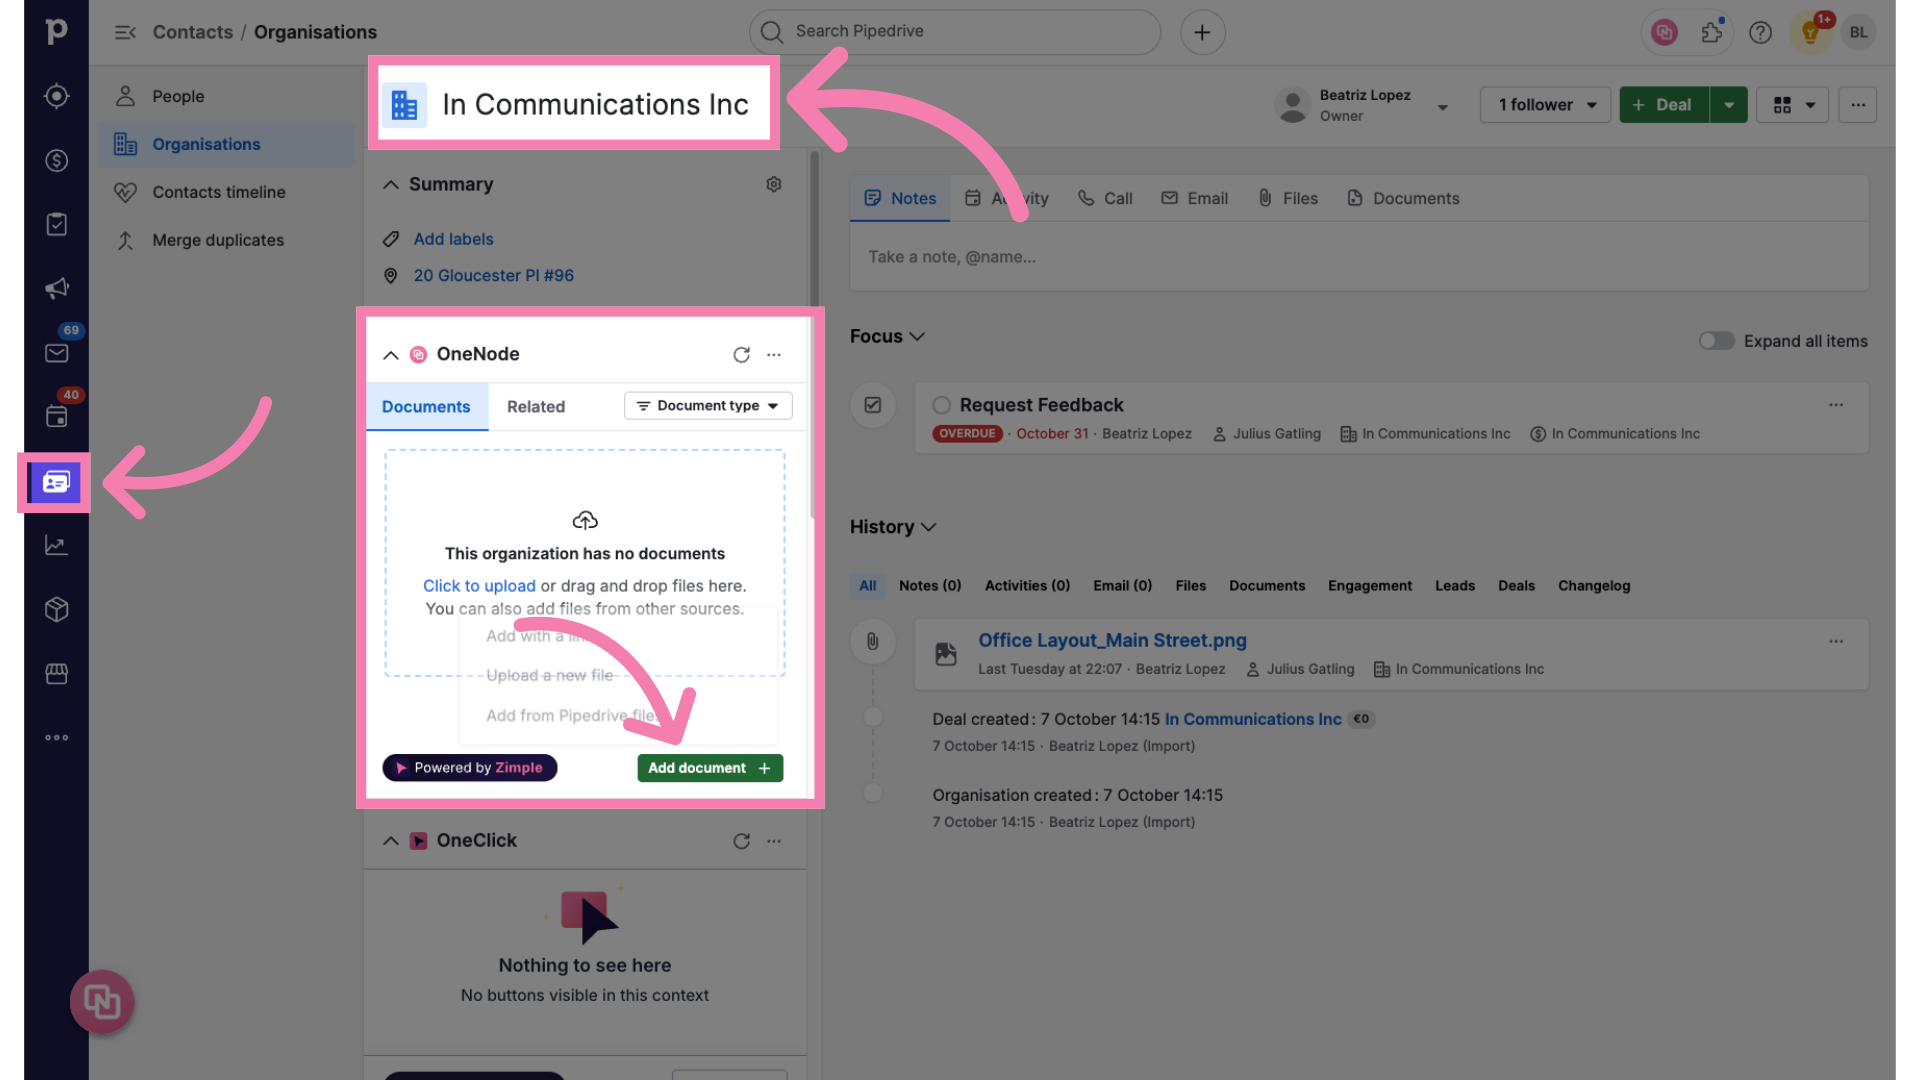
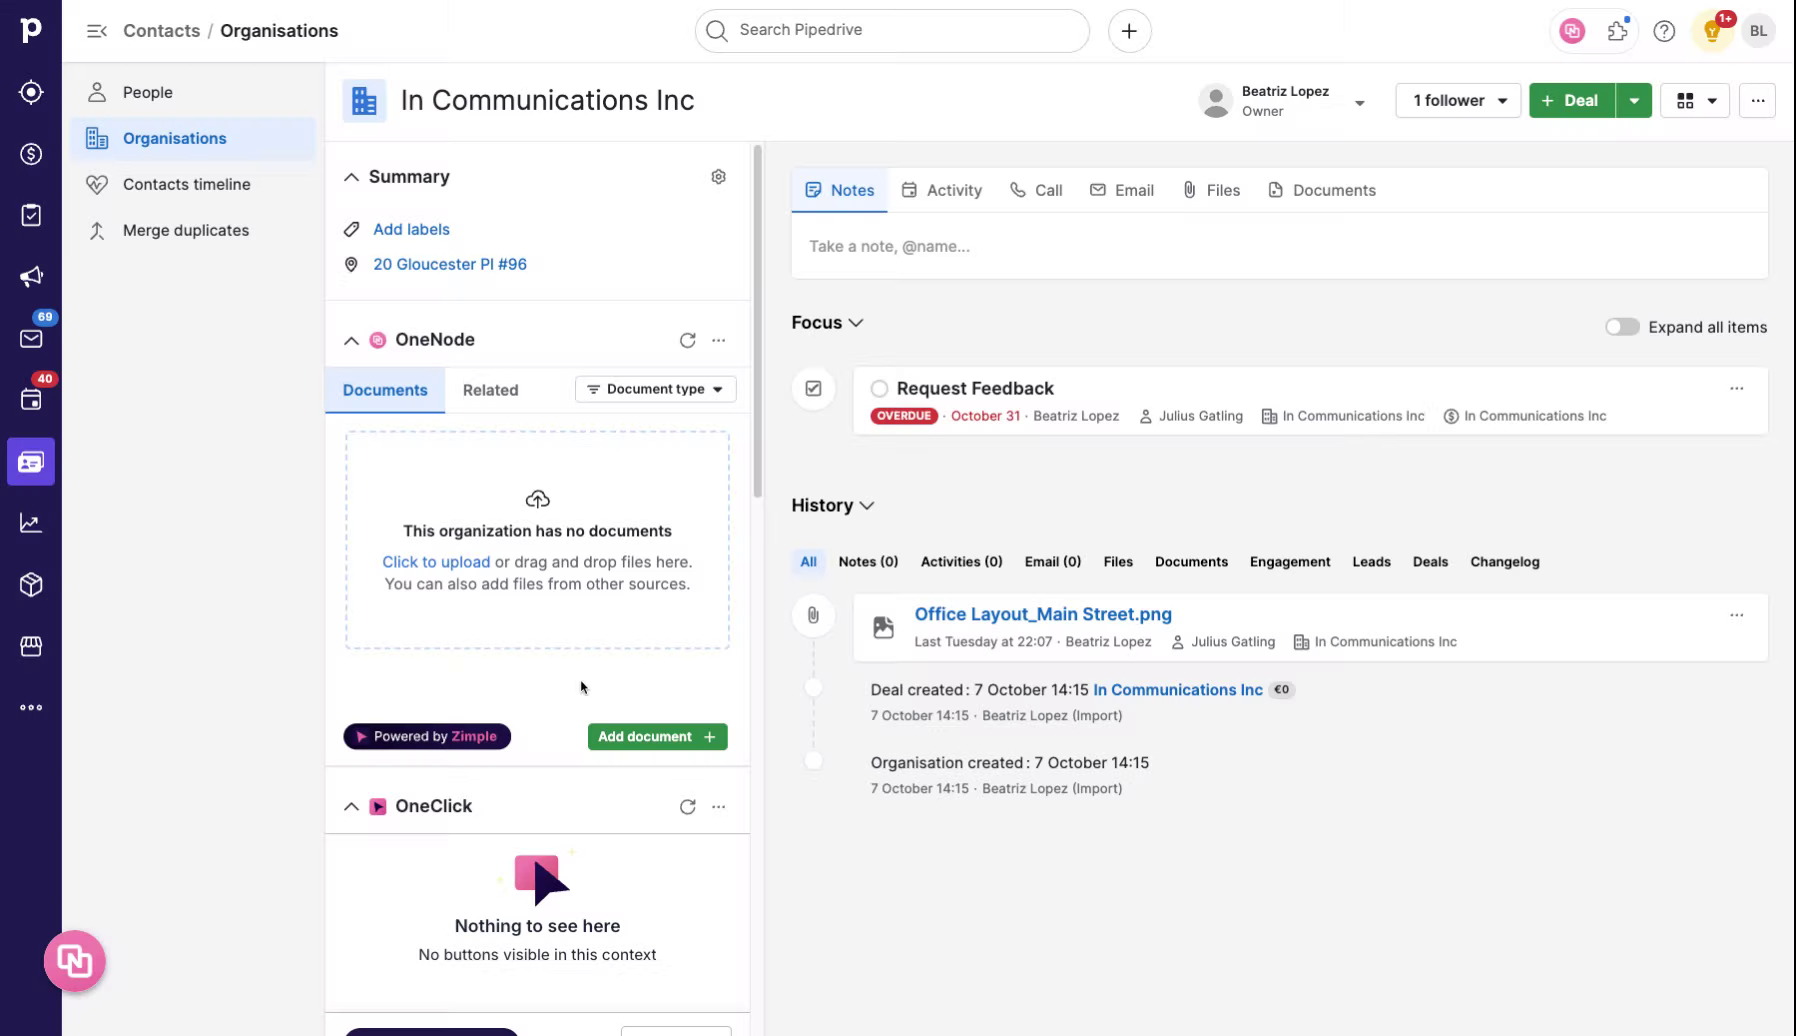
2. Click on "Add new document"
Click on Add new document
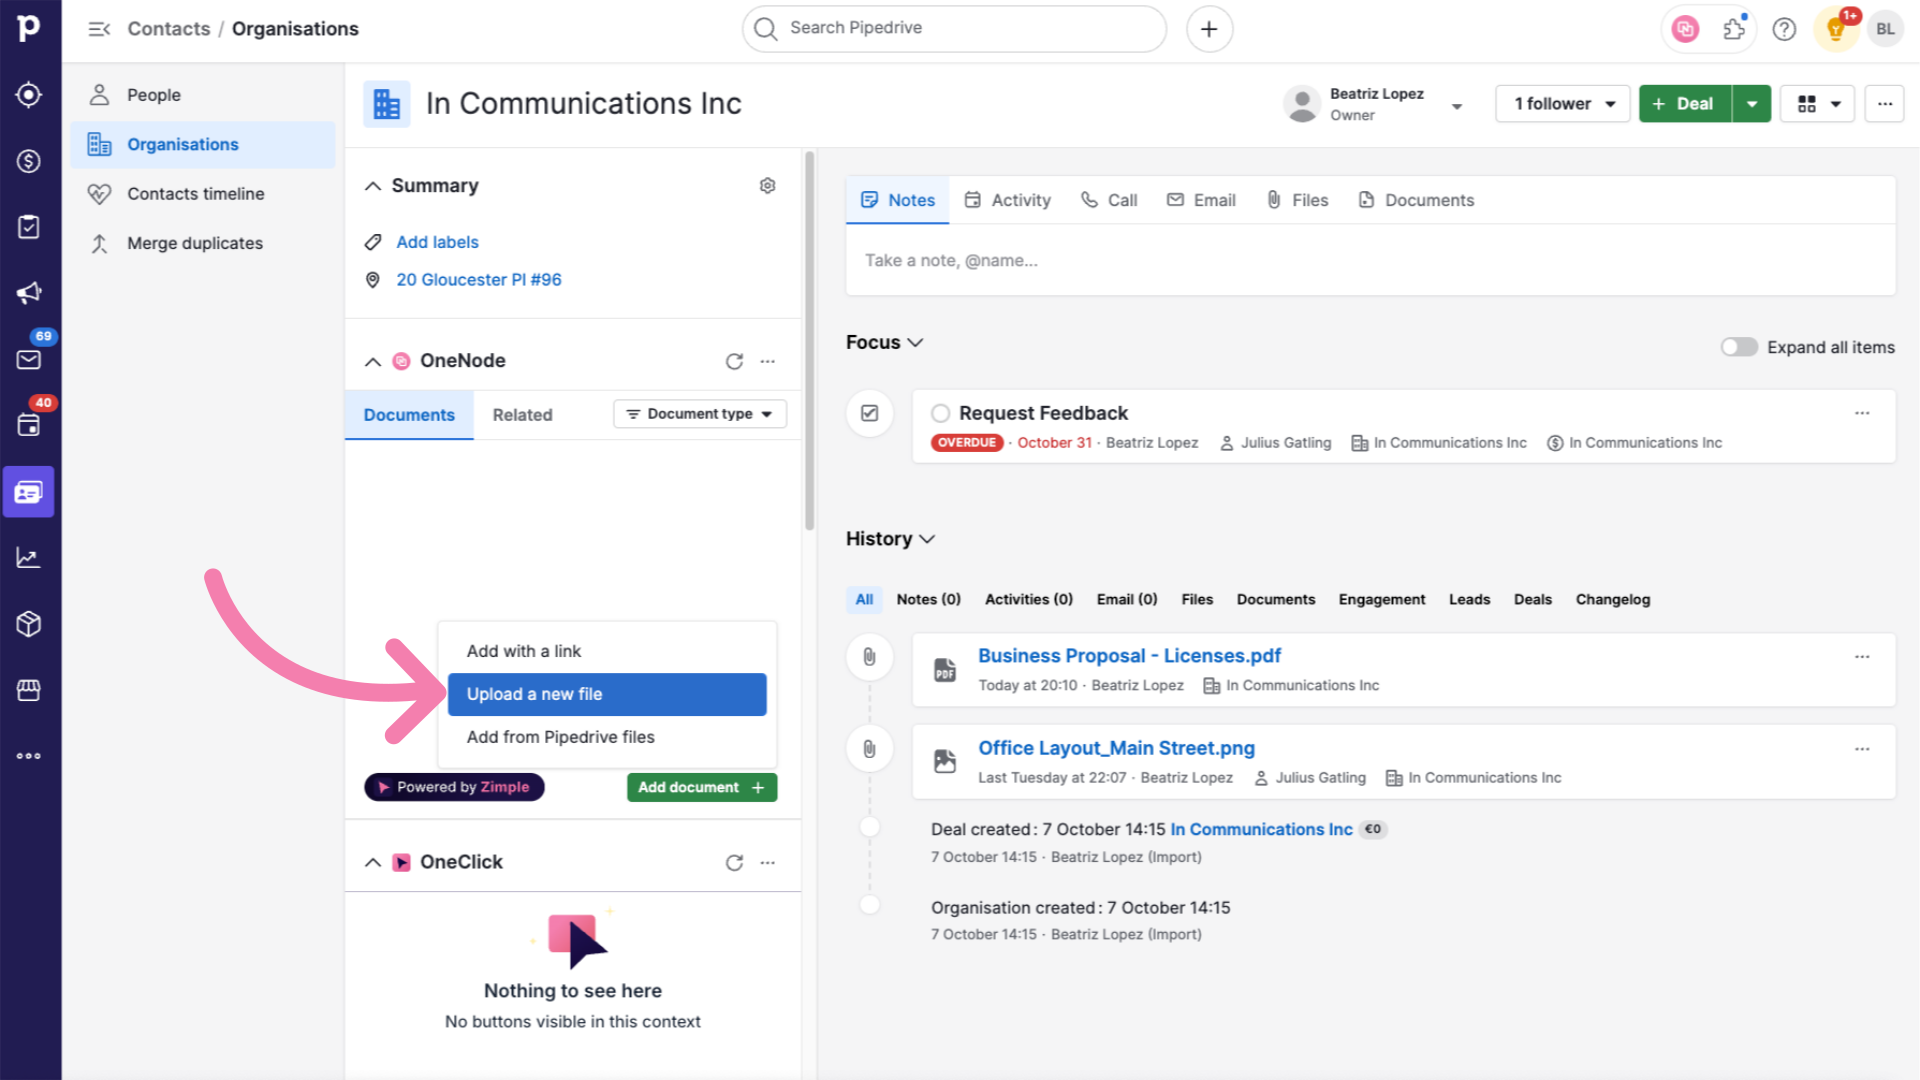
3. Select "Upload new file"
and select Upload a new file
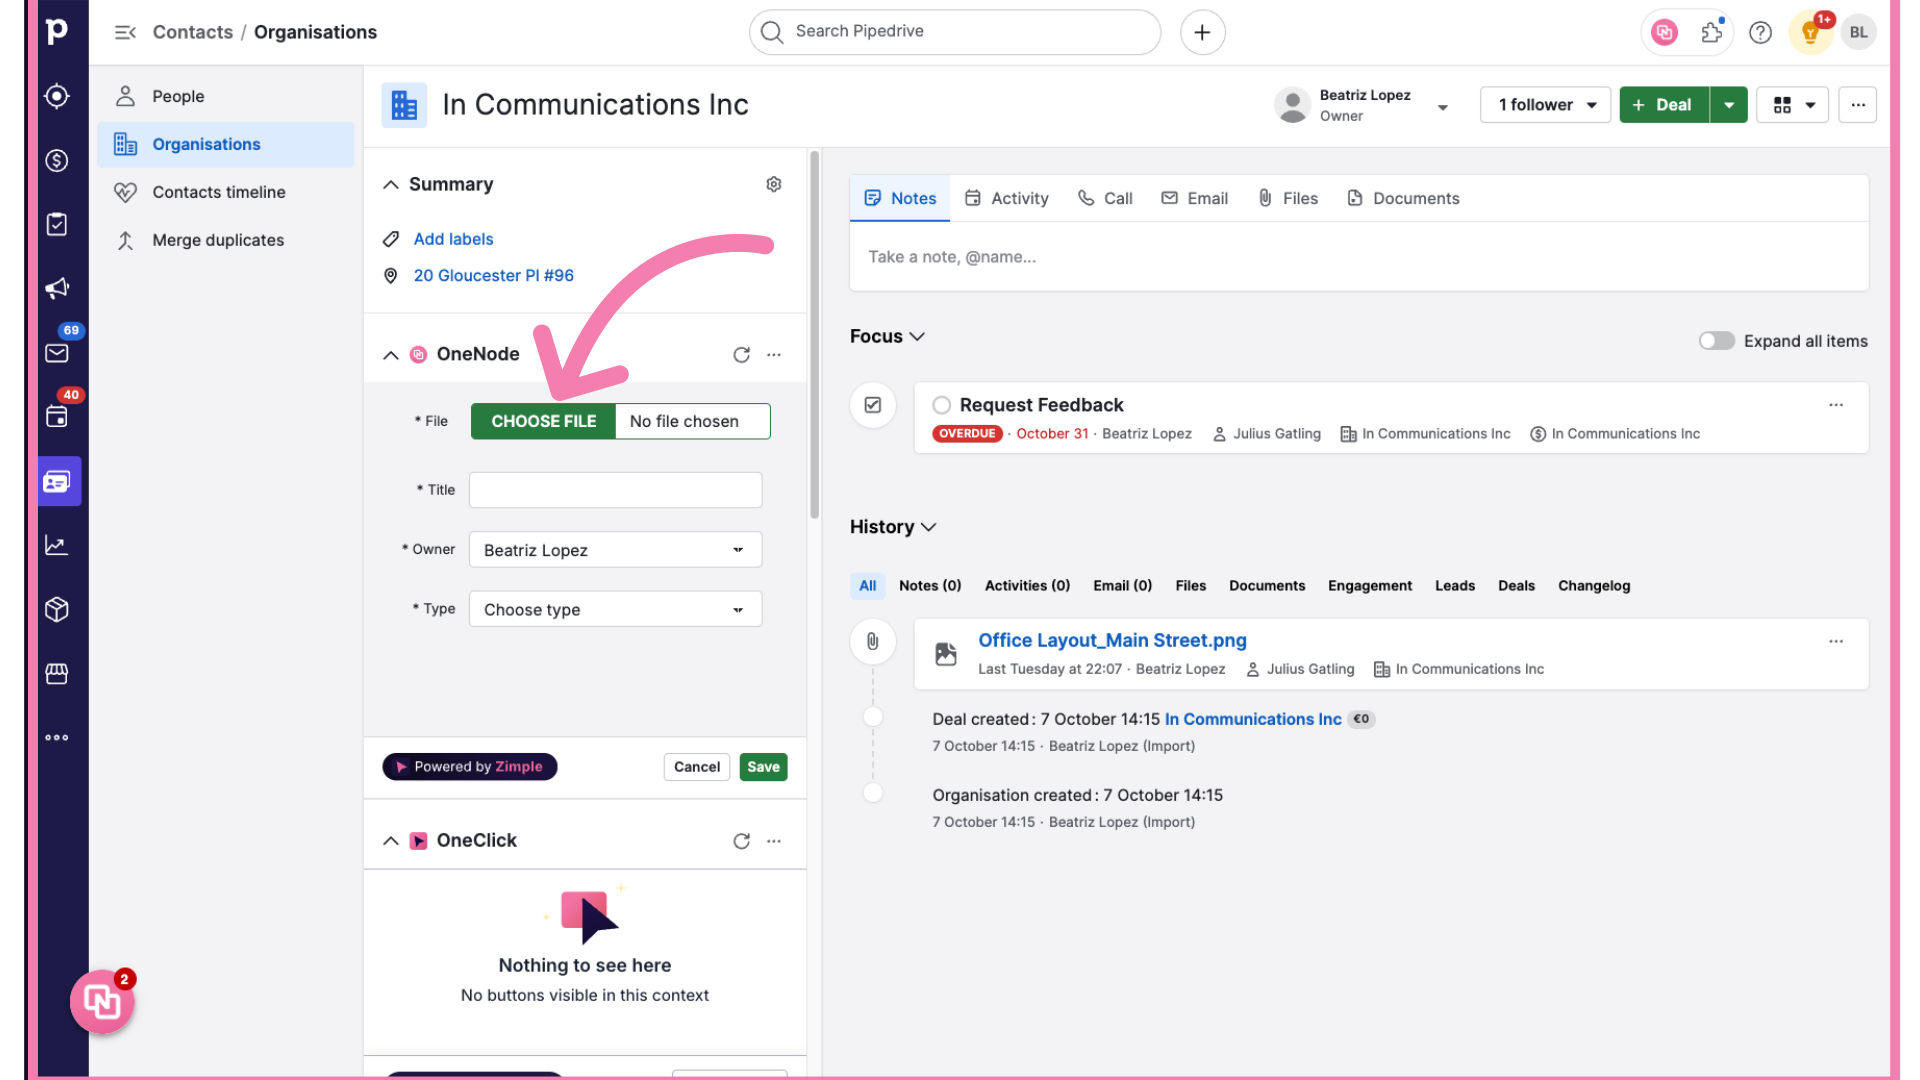
4. Click "Choose file"
Now Click on the "Choose File" button
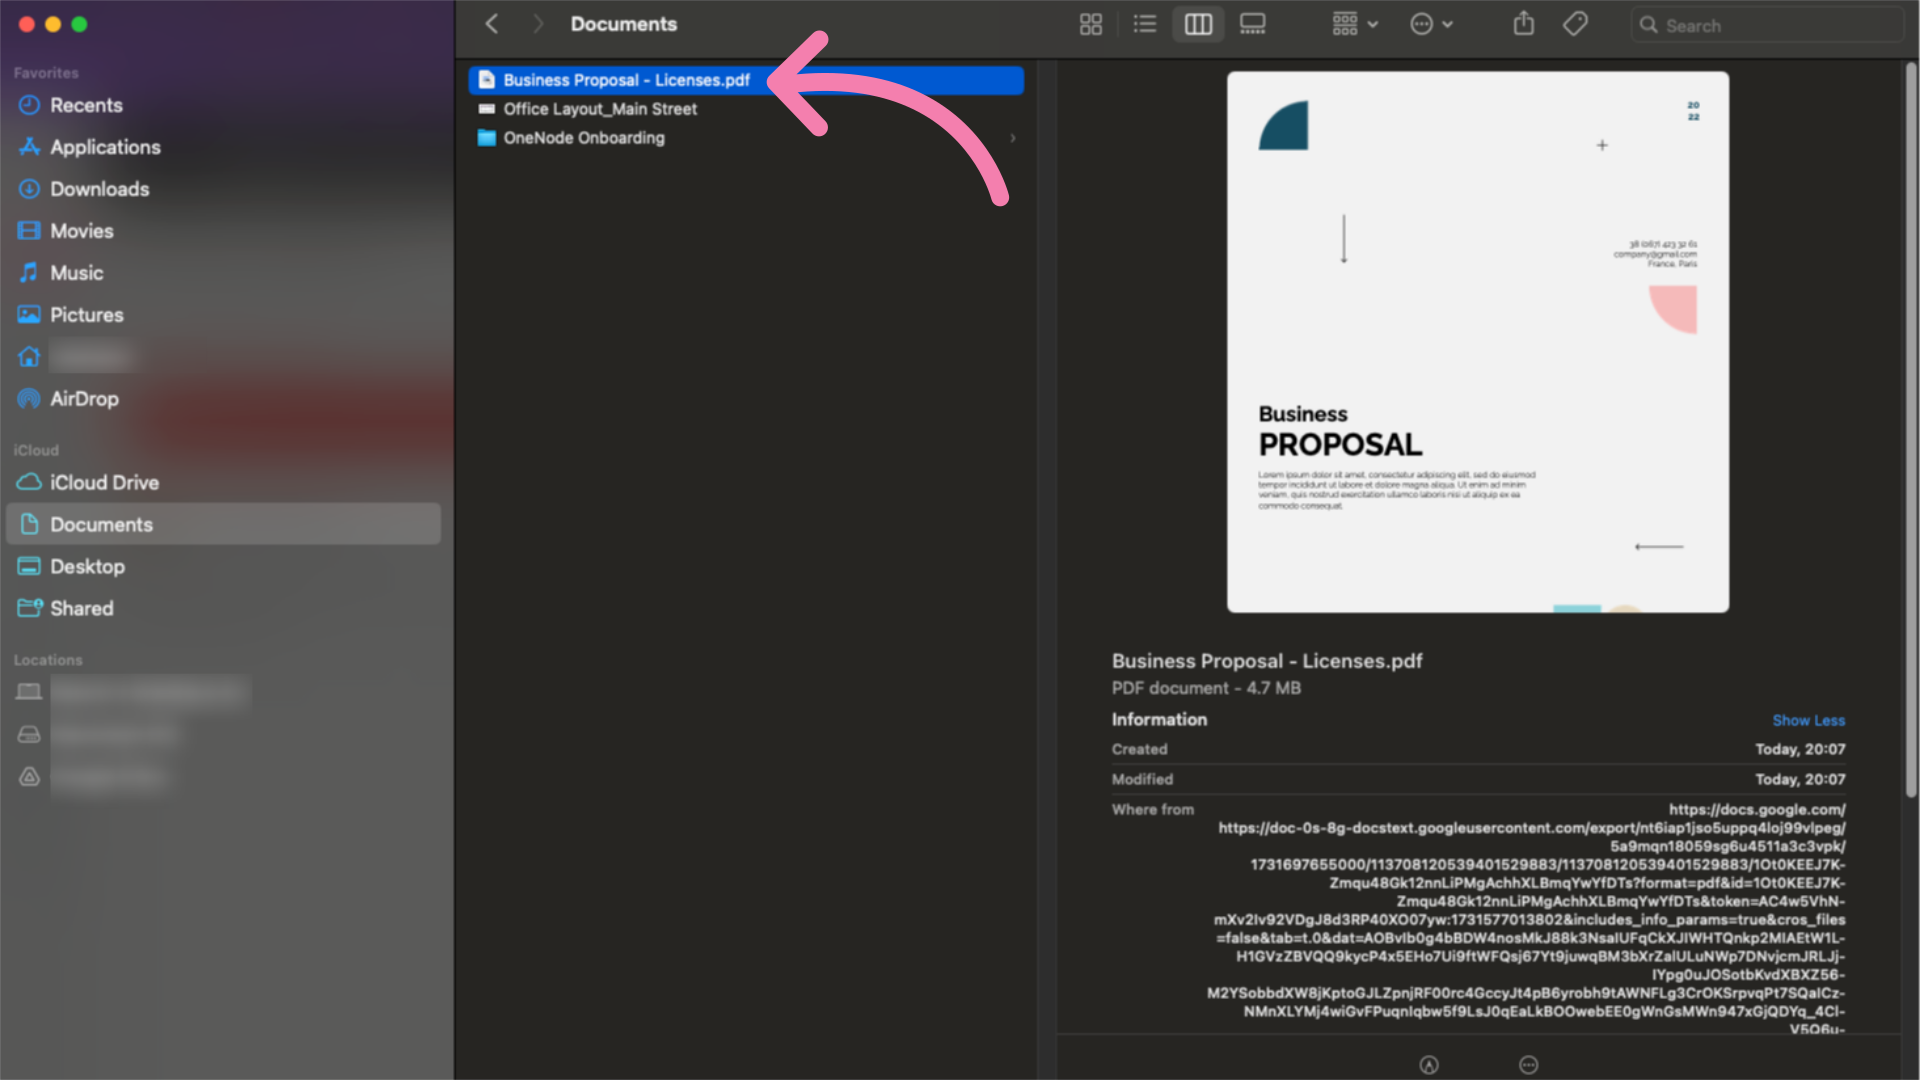
5. Select the document
and select the document from your files
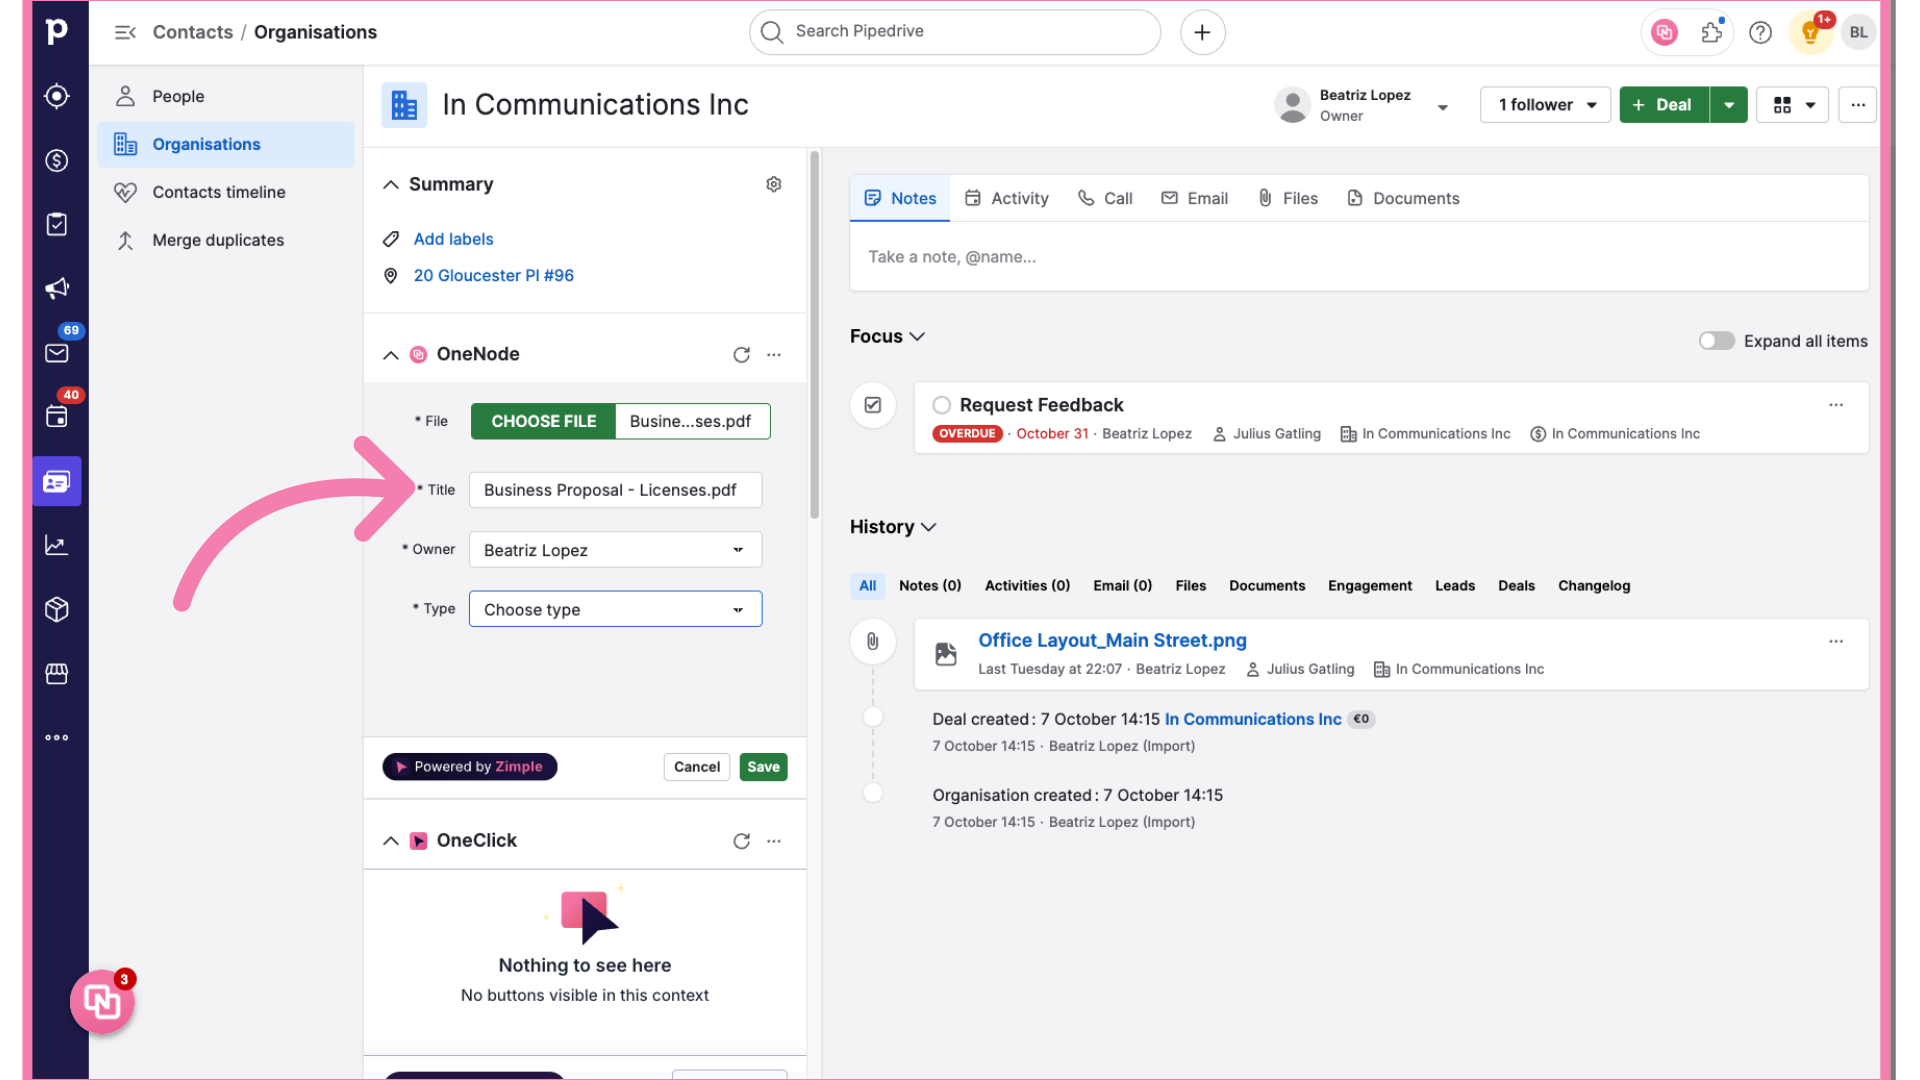
6. Type a document title
Type a Document title or keep the original file name if you'd like.
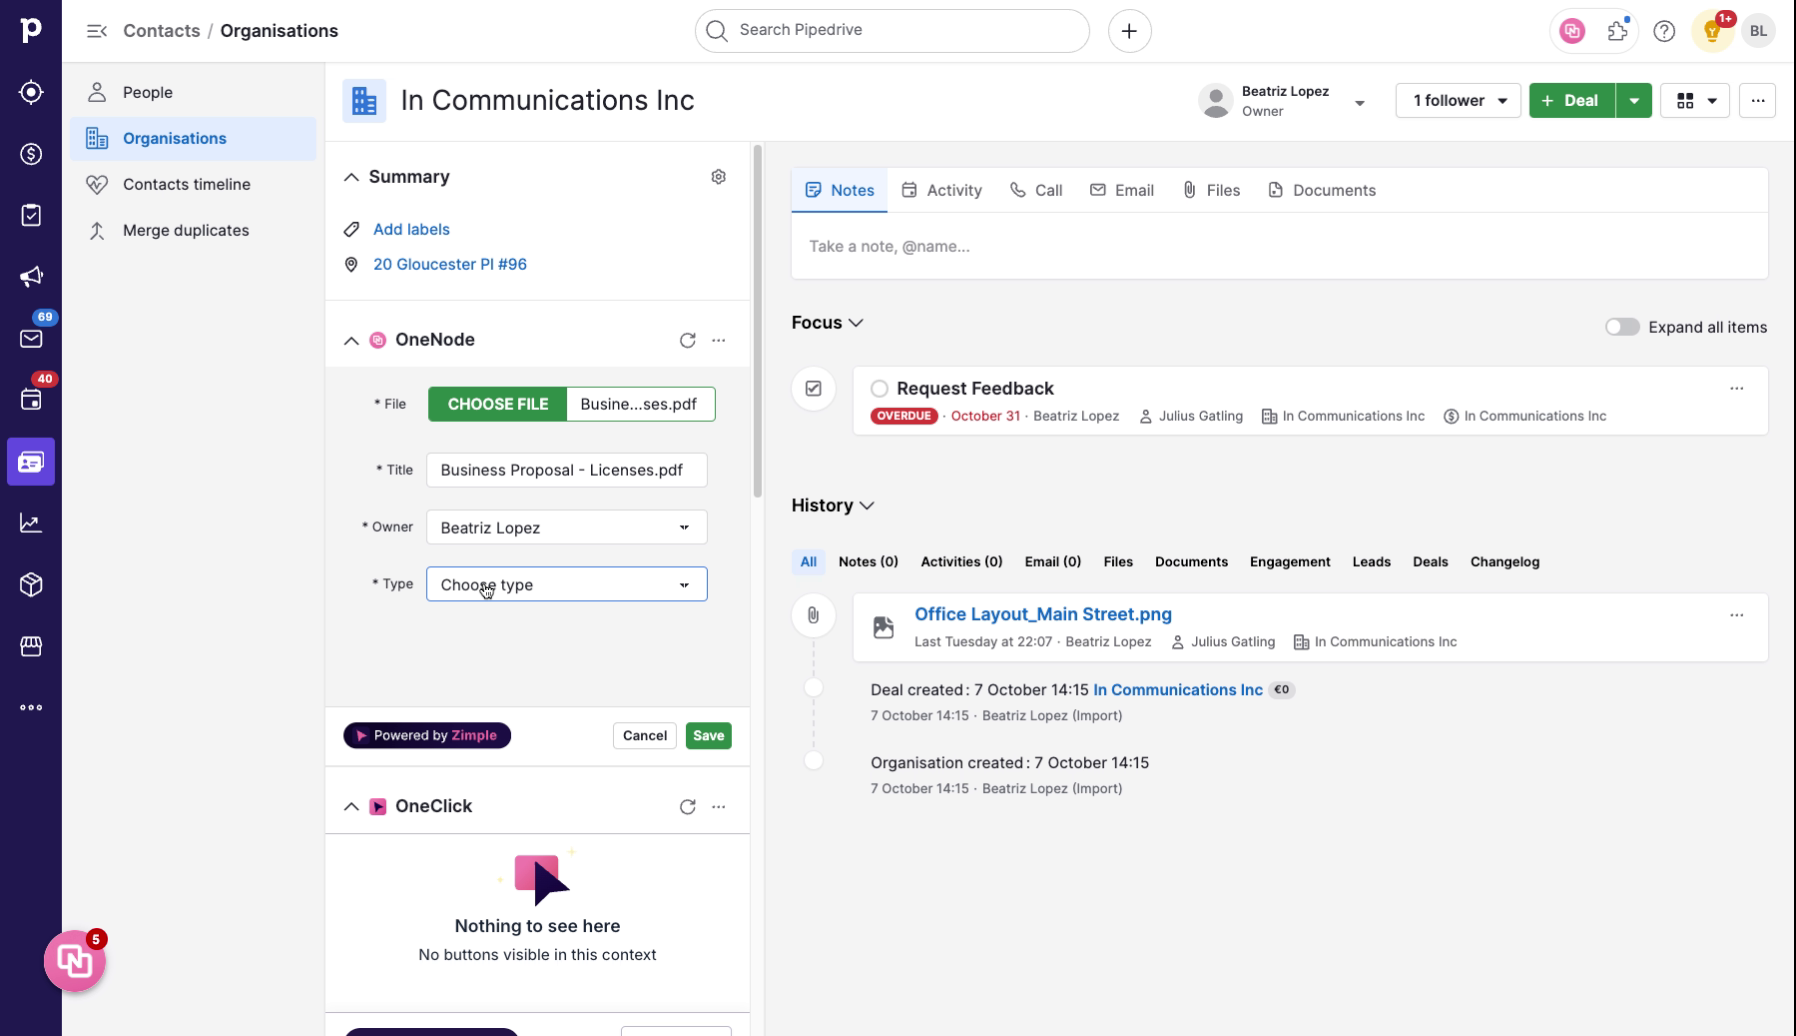
7. Fill "Choose type Price List Project Plan Proposal"
and then, for the Document Type field, select "Proposal"
8. Complete the new fields
Two new fields will appear. Choose the contract type that matches this License Proposal. In this case it is the License Agreement
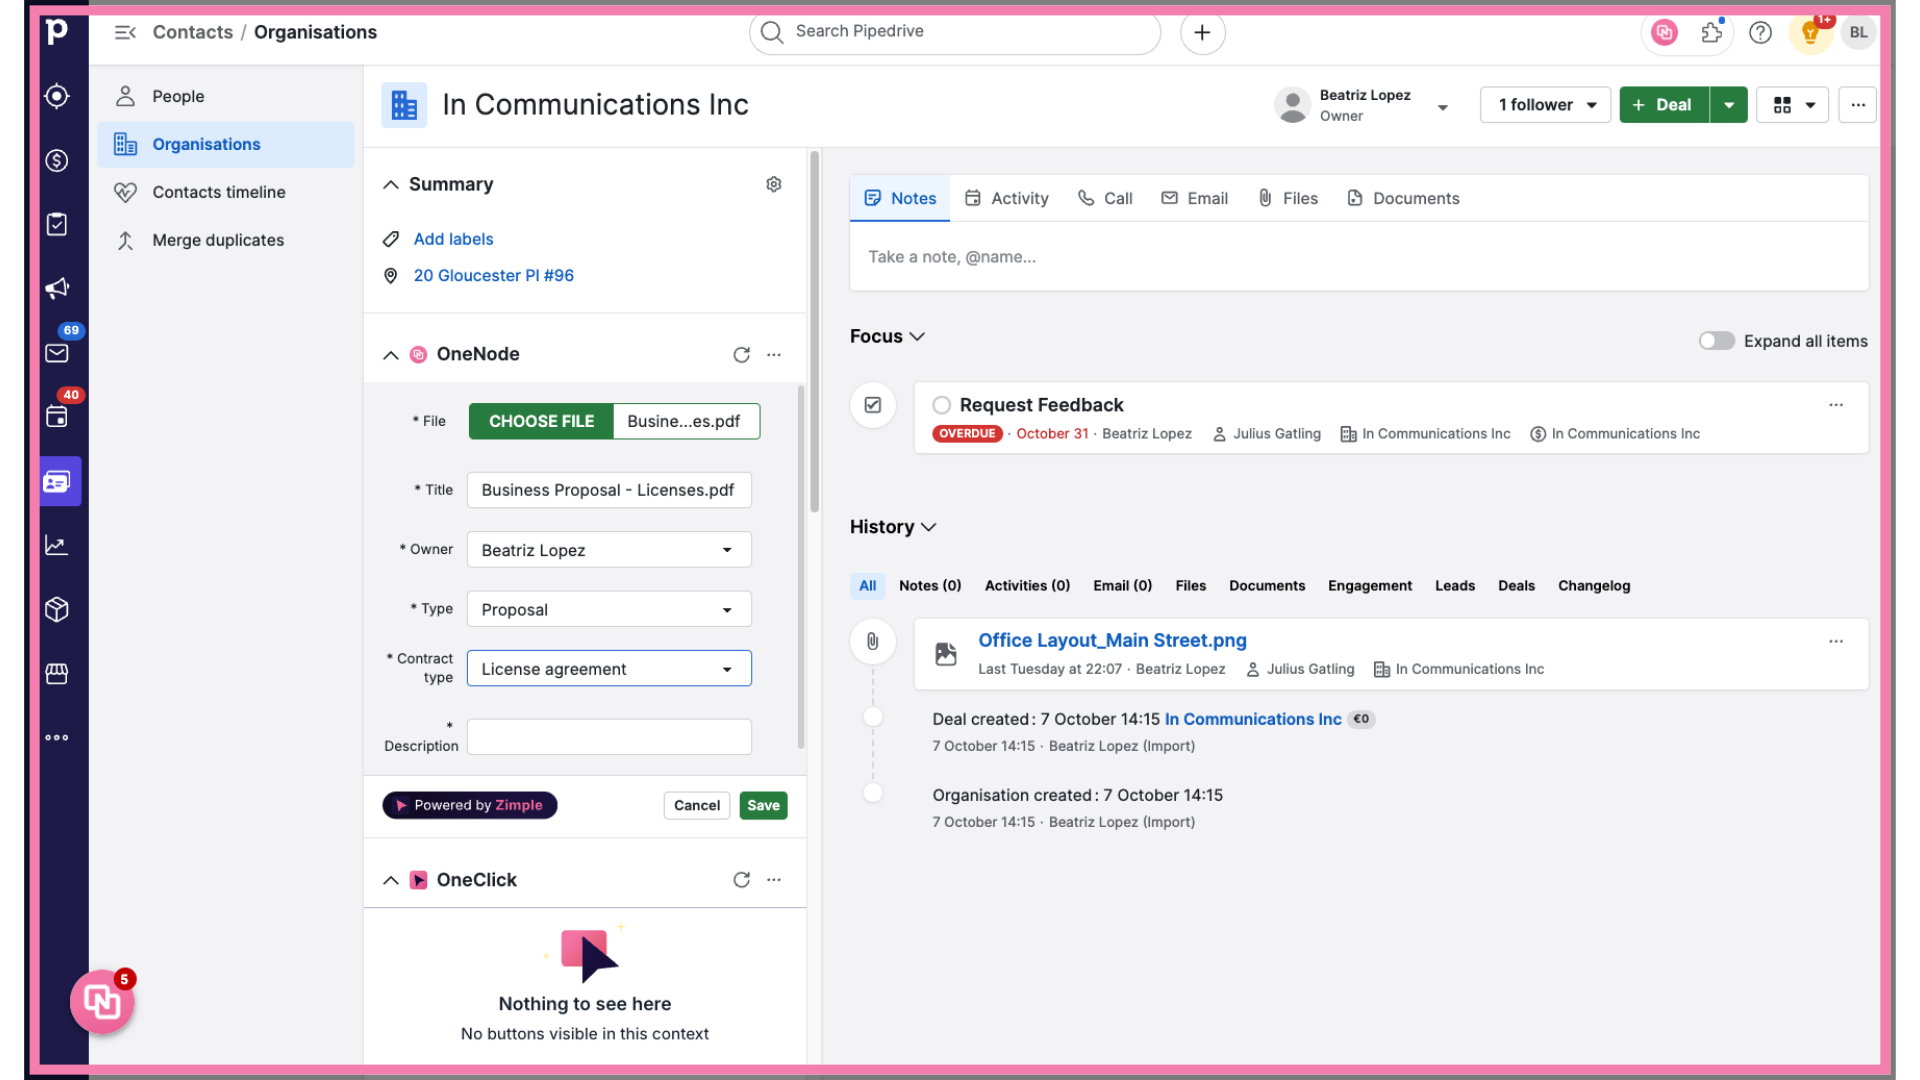
9. Add a description
Type any additional information in the Description field
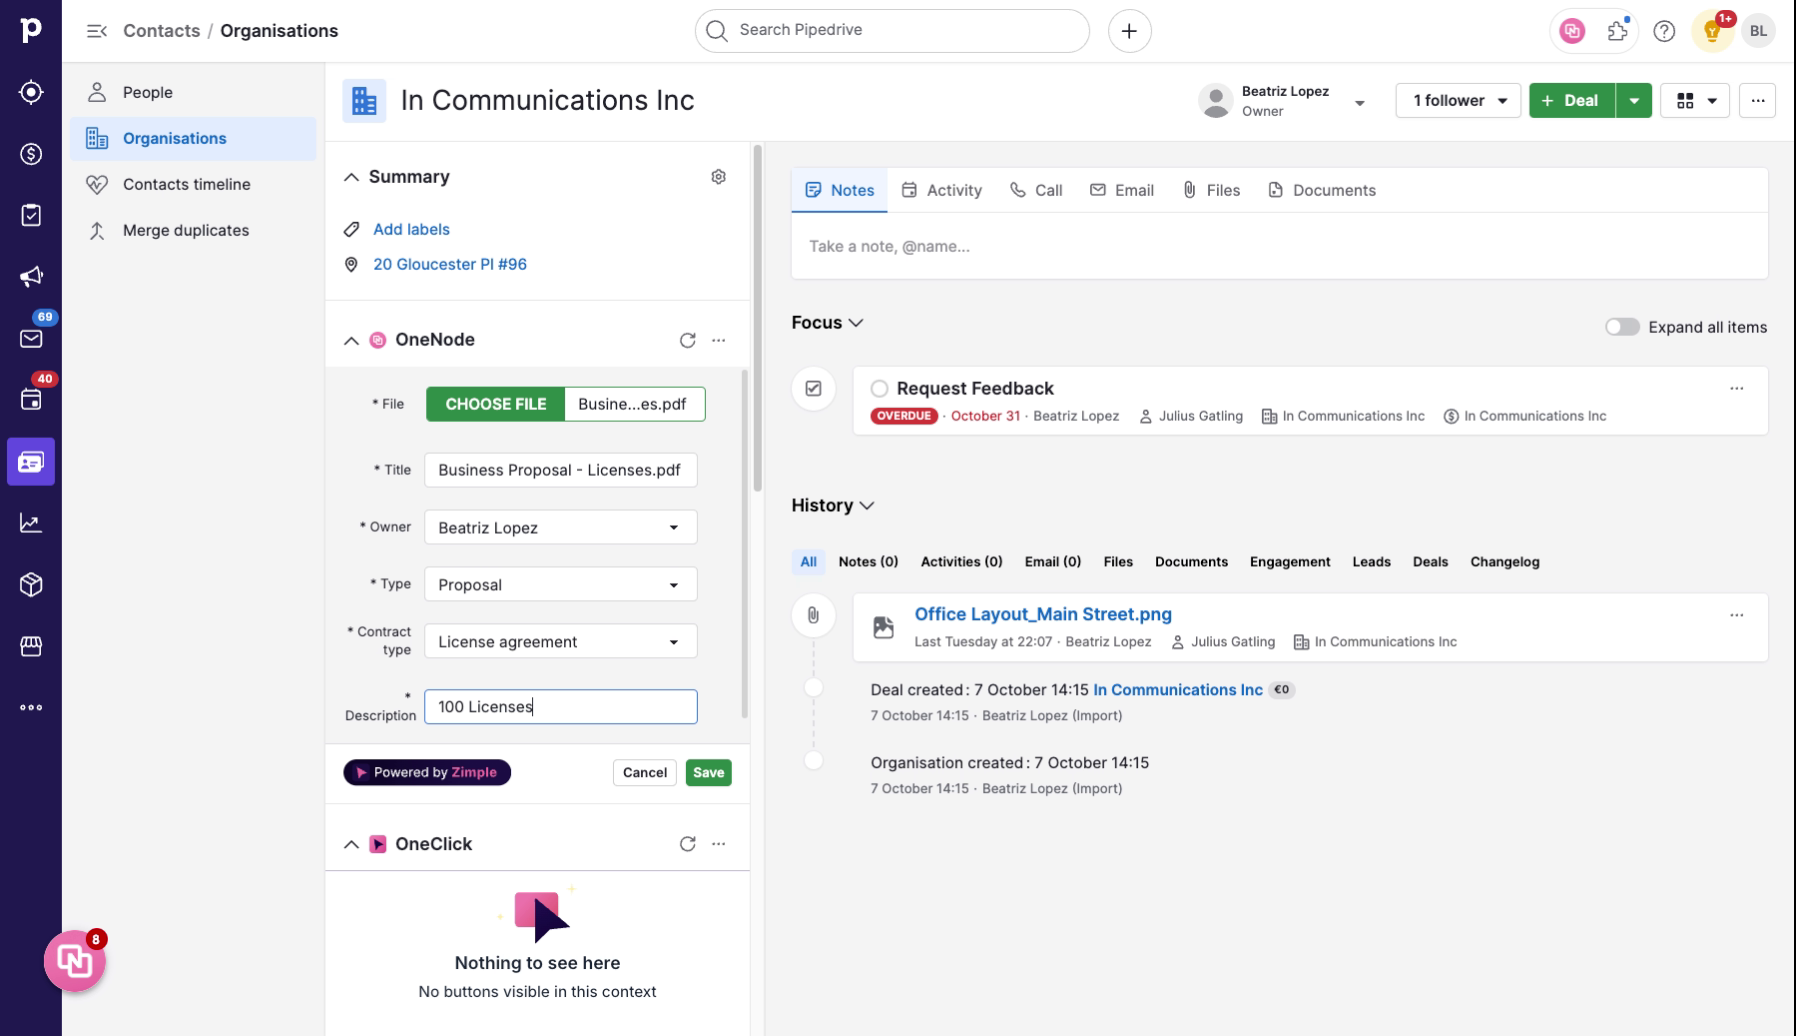
10. Click "Save"
And lastly, Save the changes made by clicking on the save button.
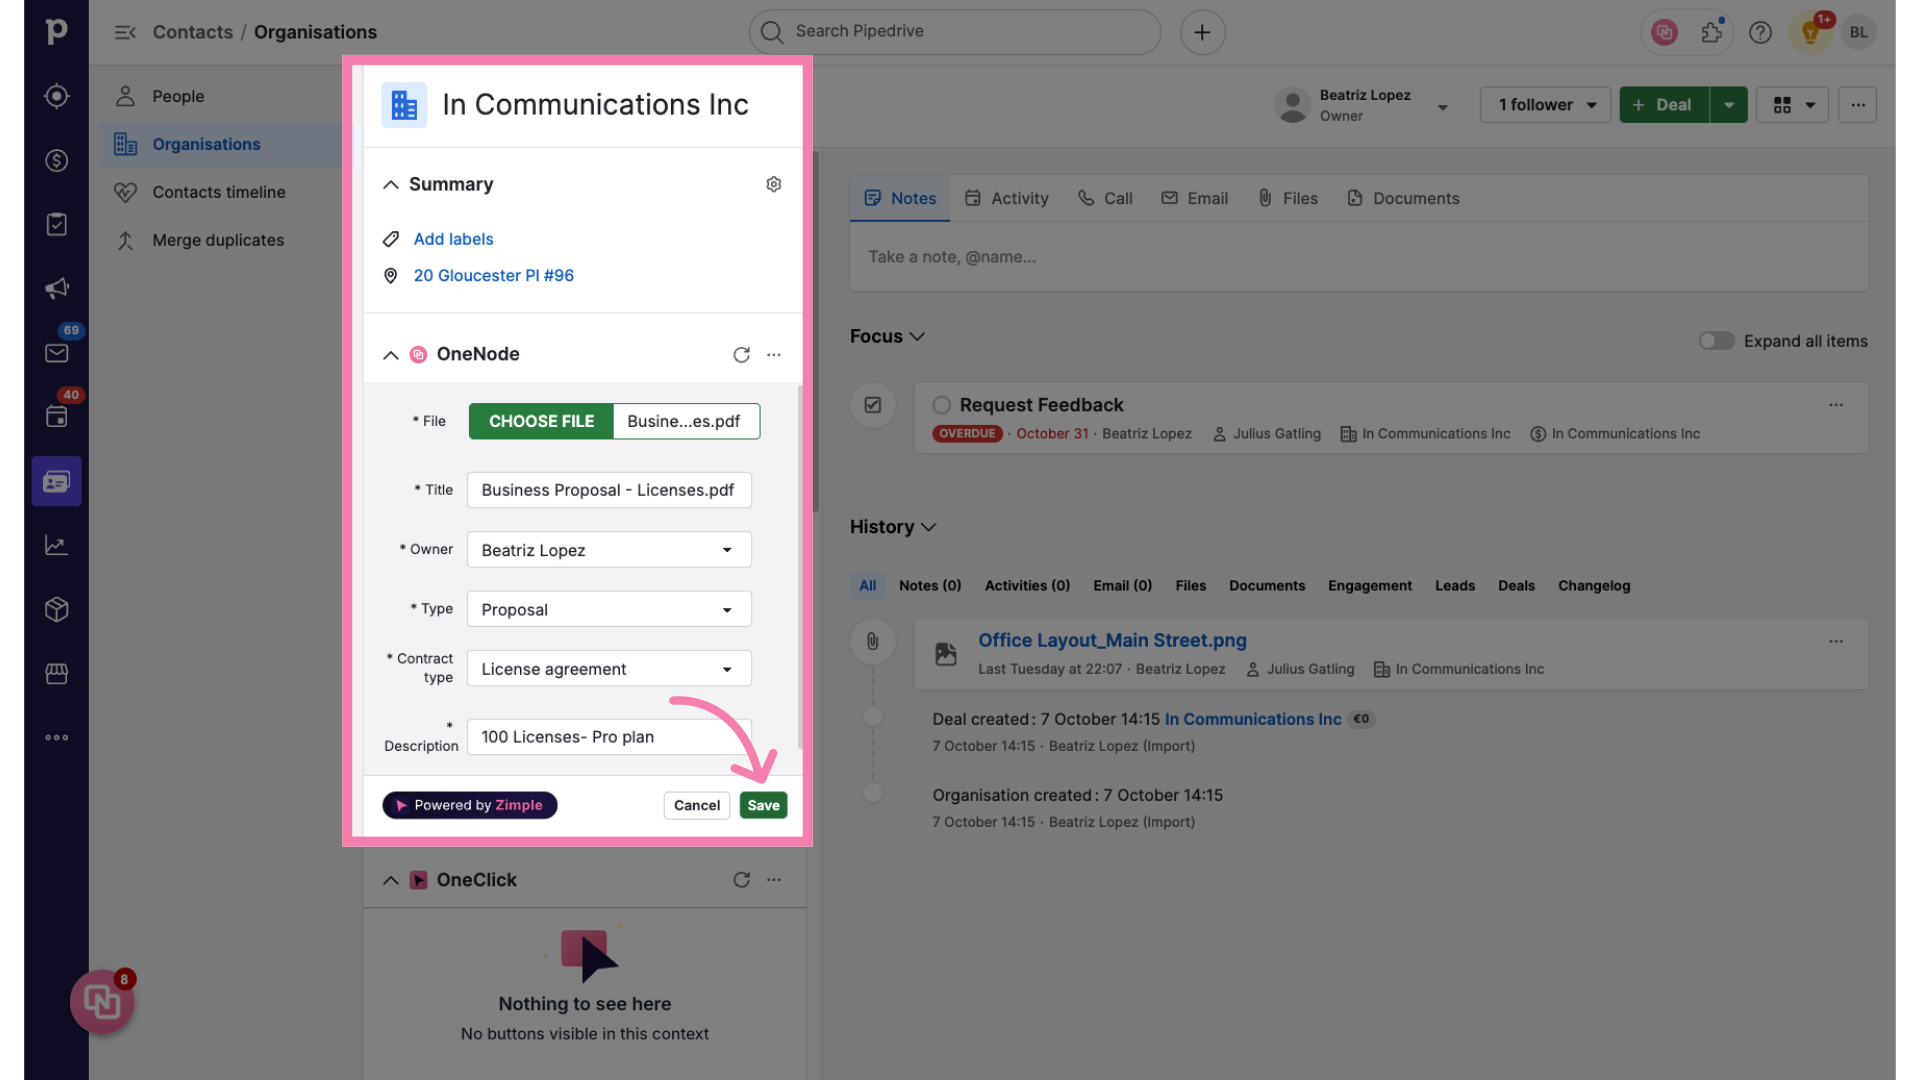
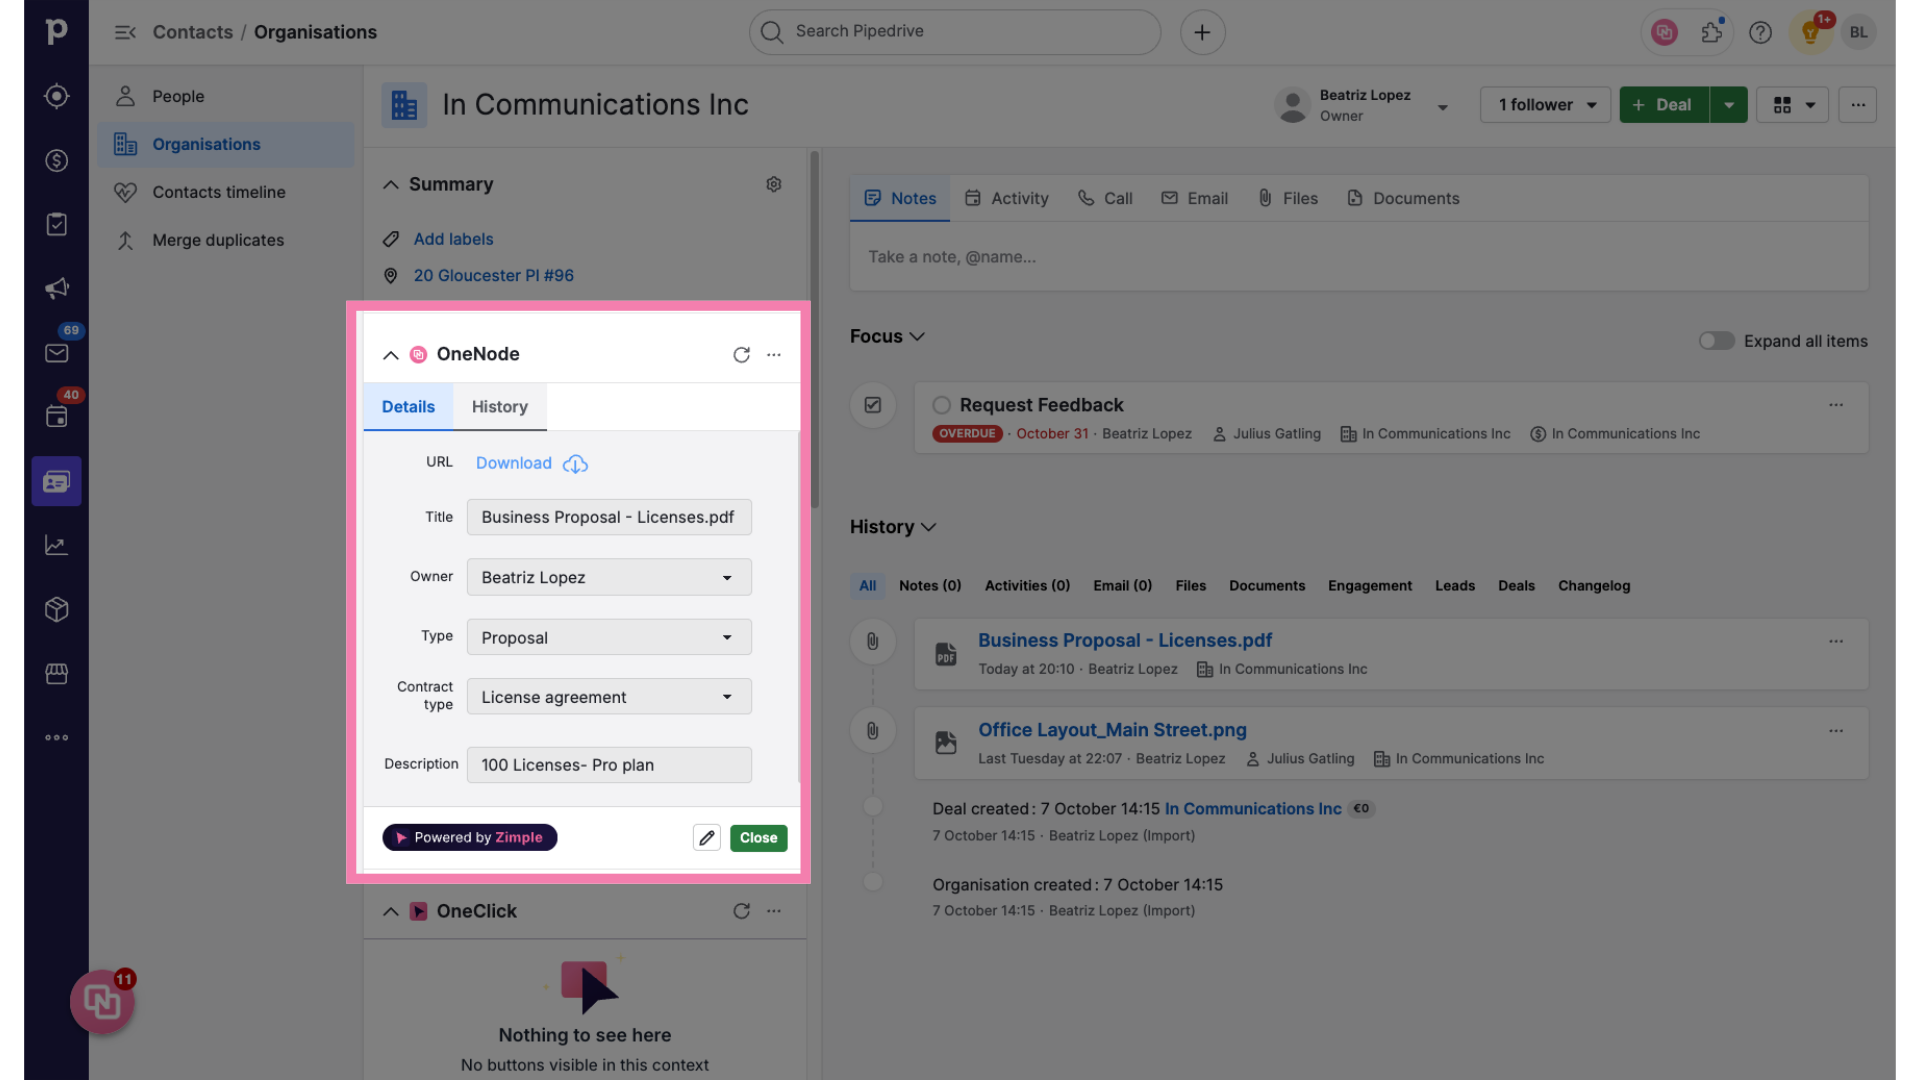
11. Review and edit
There you go! The Proposal for 100 licenses has been added to this organization.
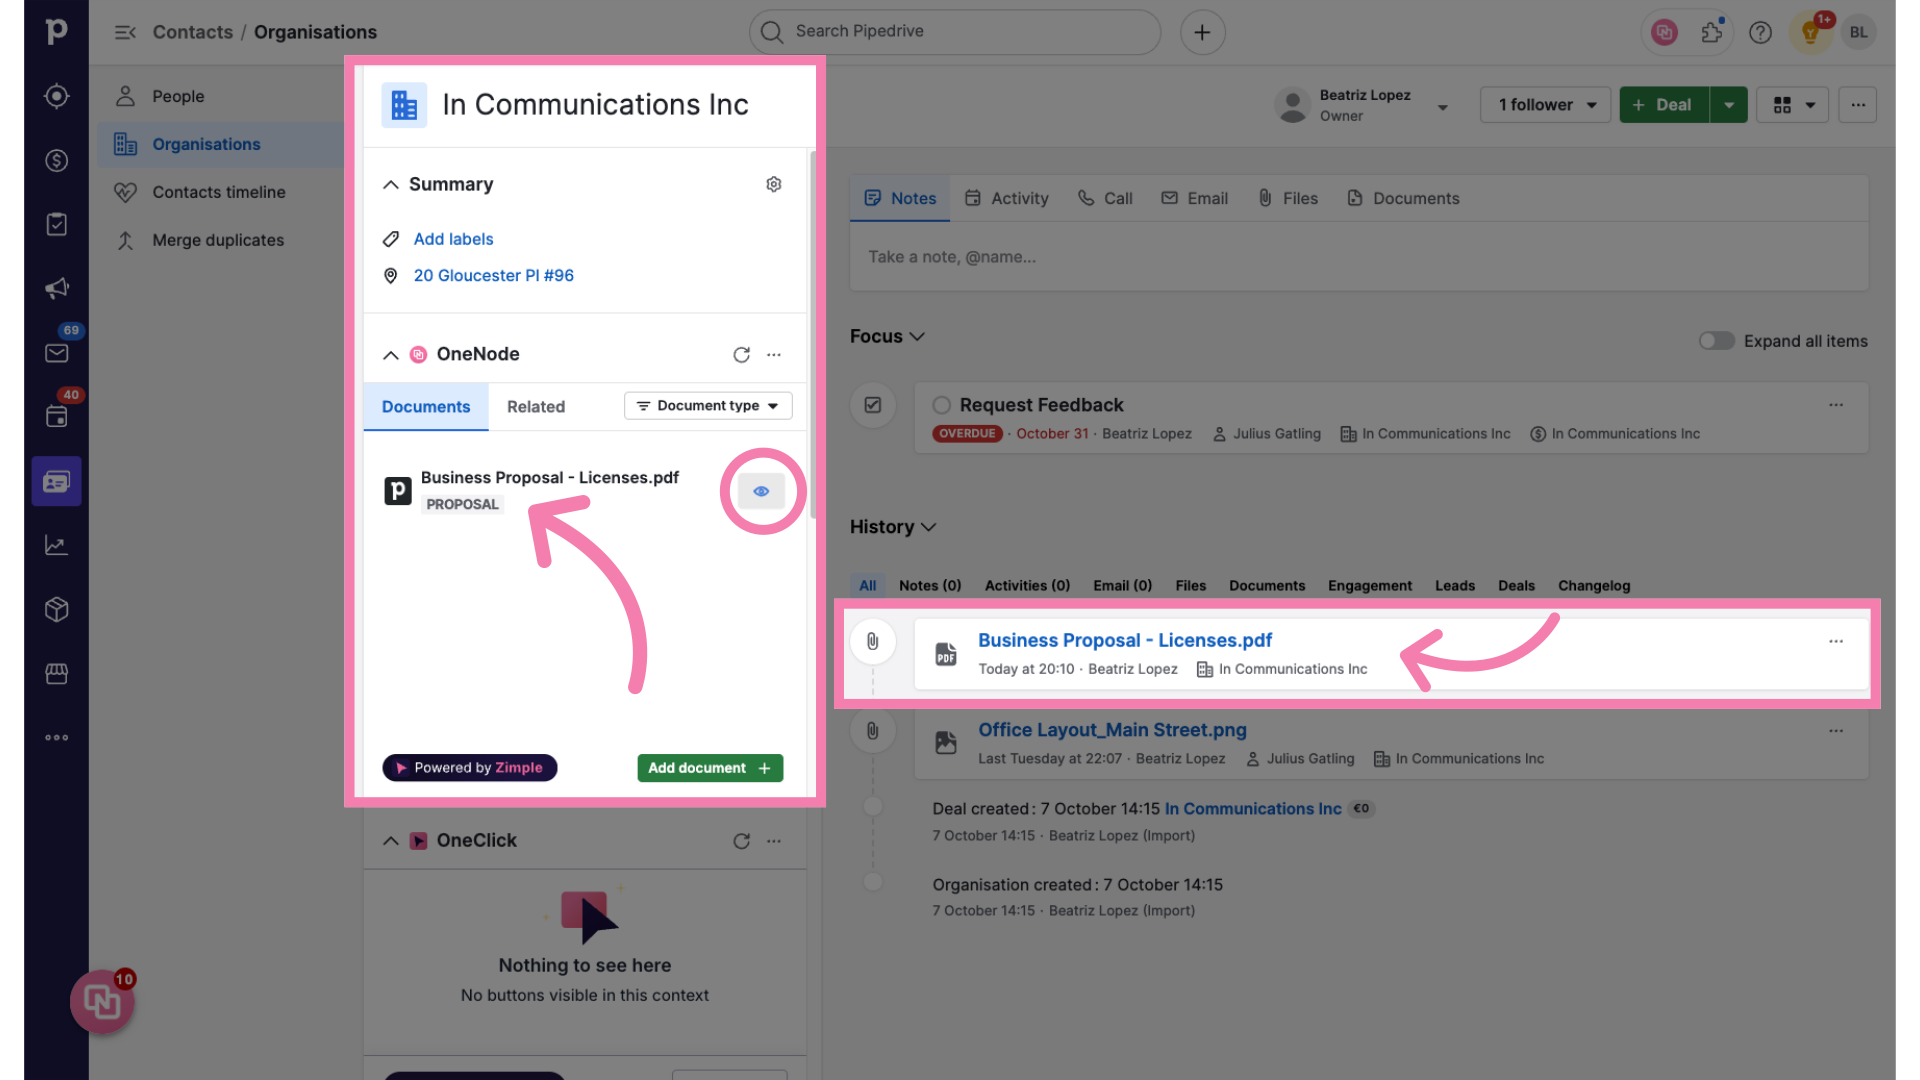
12. Check details and history
Edit and view the document details and history anytime from the OneNode panel at the Organization view
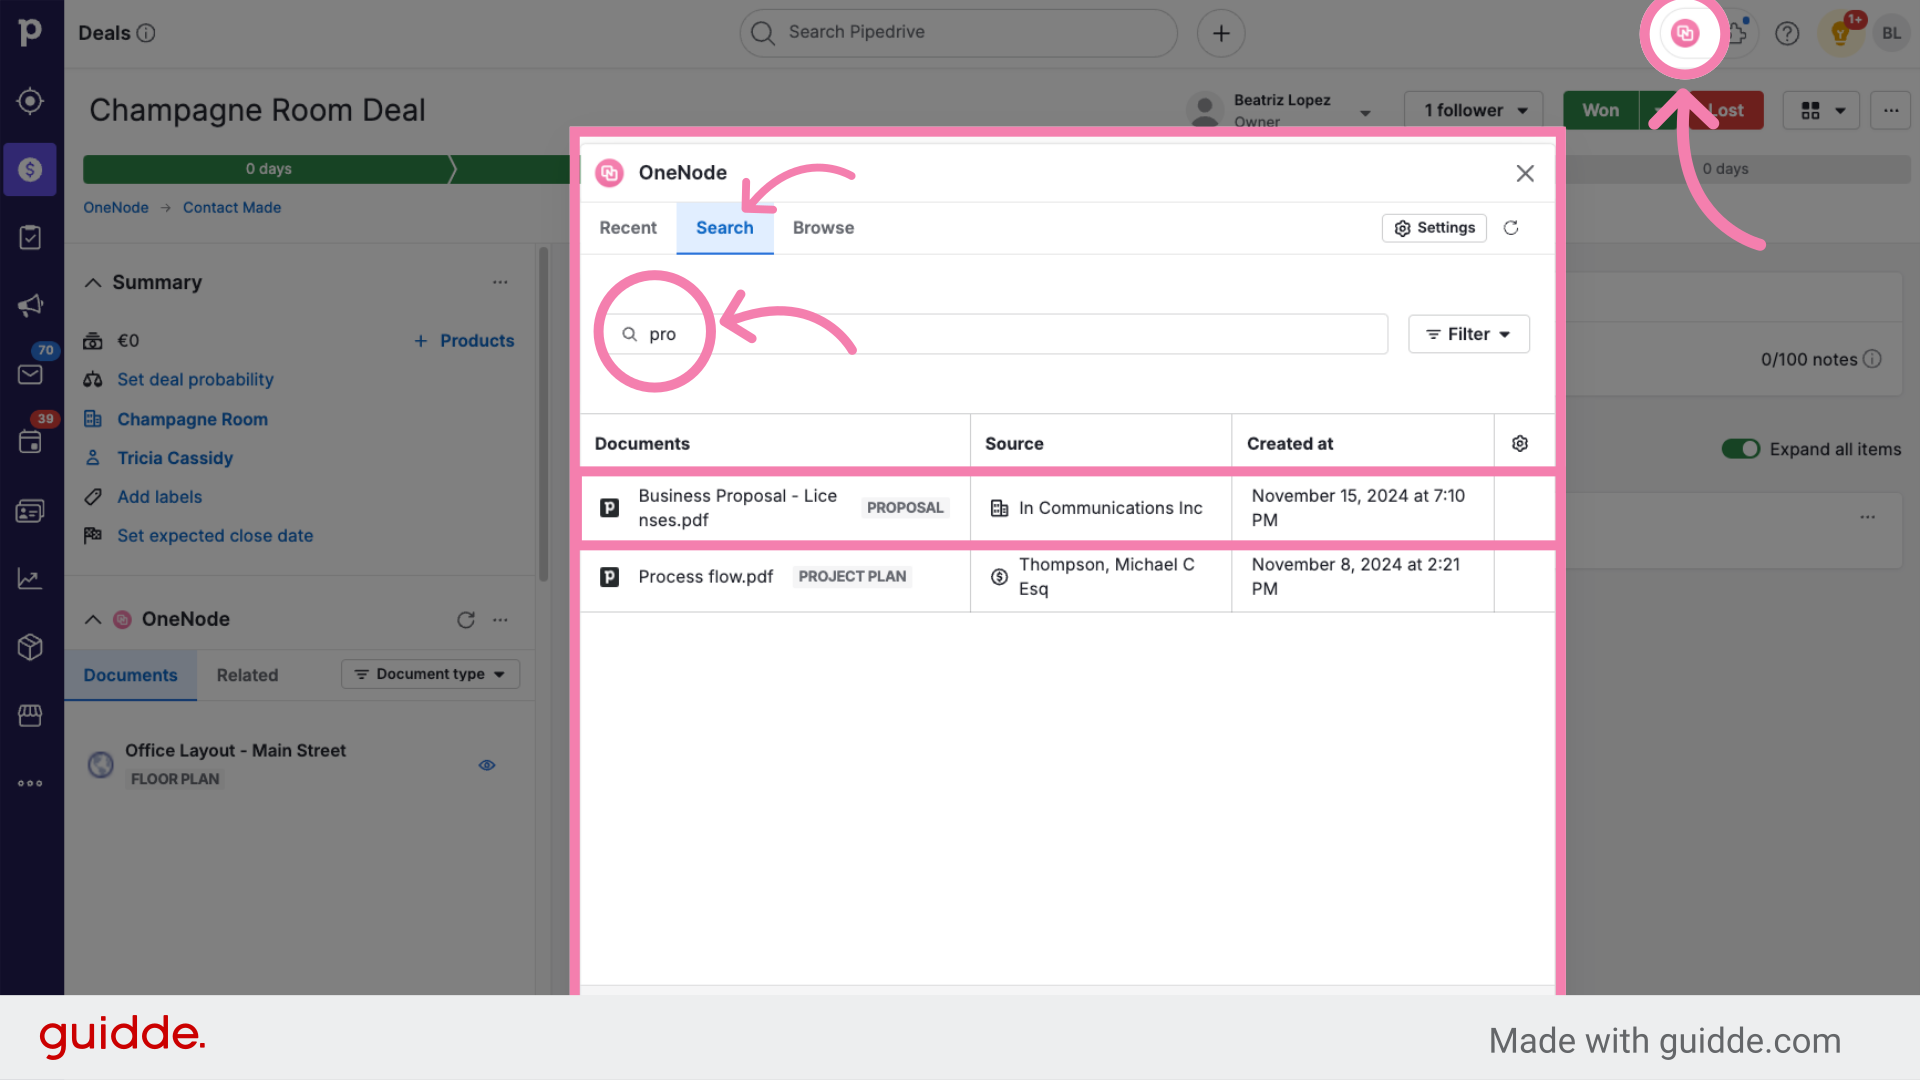
13. Use the Search tool
Or find this document by clicking on OneNode's main panel anytime and typing three letters in the Search bar.
