Managing Folders
Once created, Dynamic Folders can be easily managed and edited further.
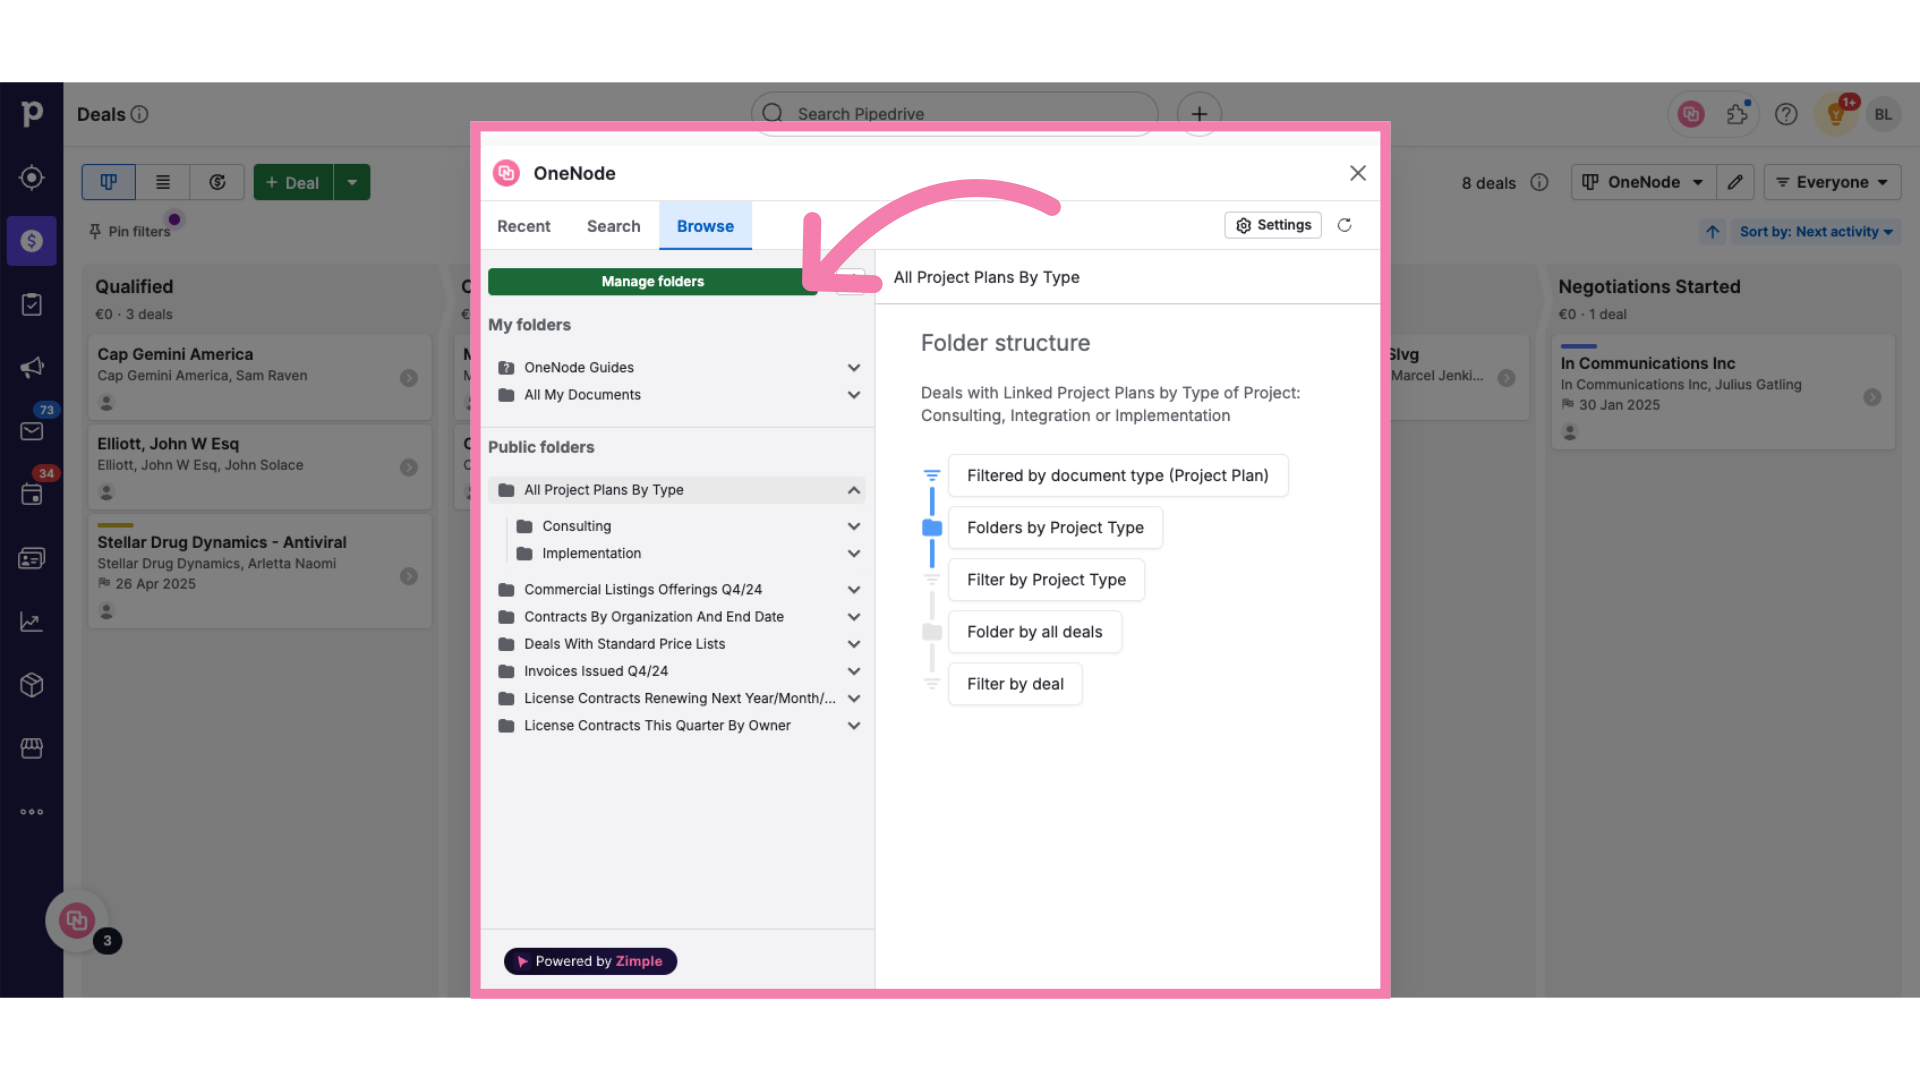
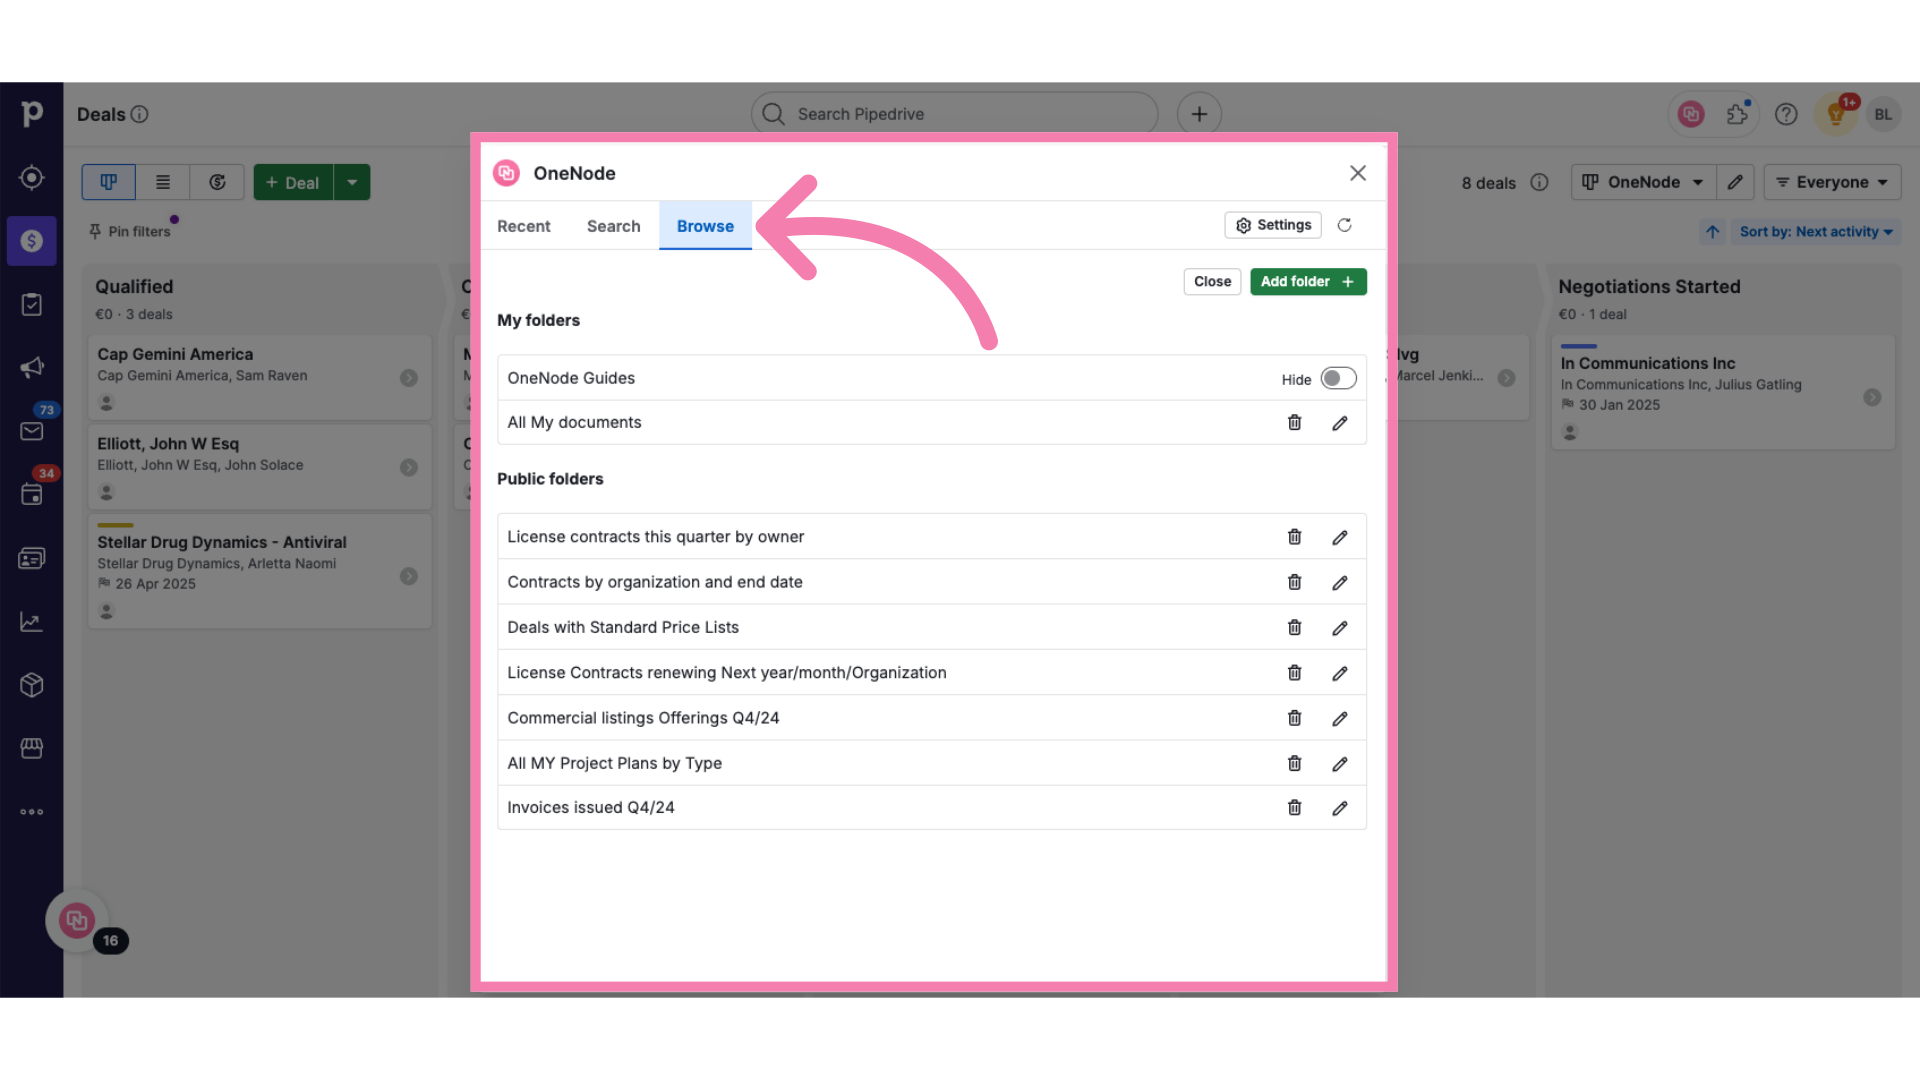
- Head to the Browse tab
- Select Manage Folders
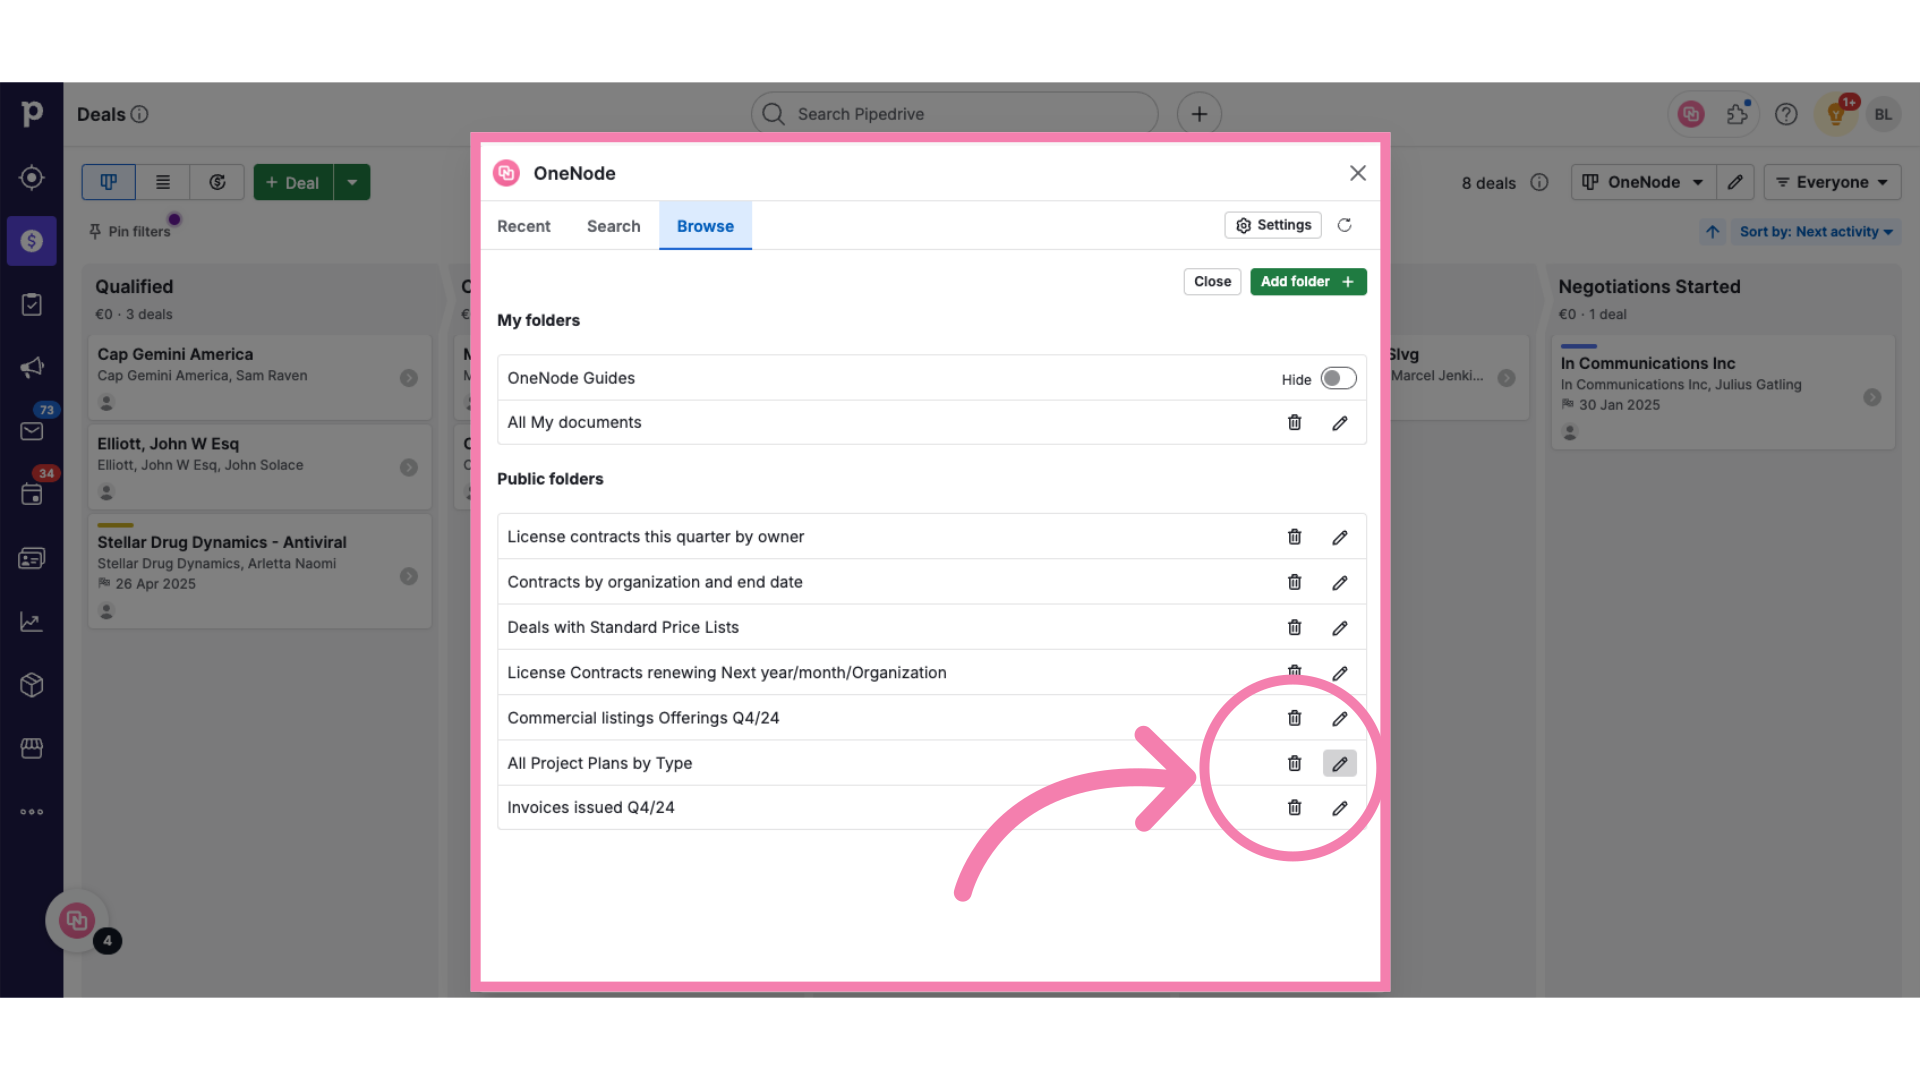
- Click on the Pen Icon in front of the folder that you would like to edit
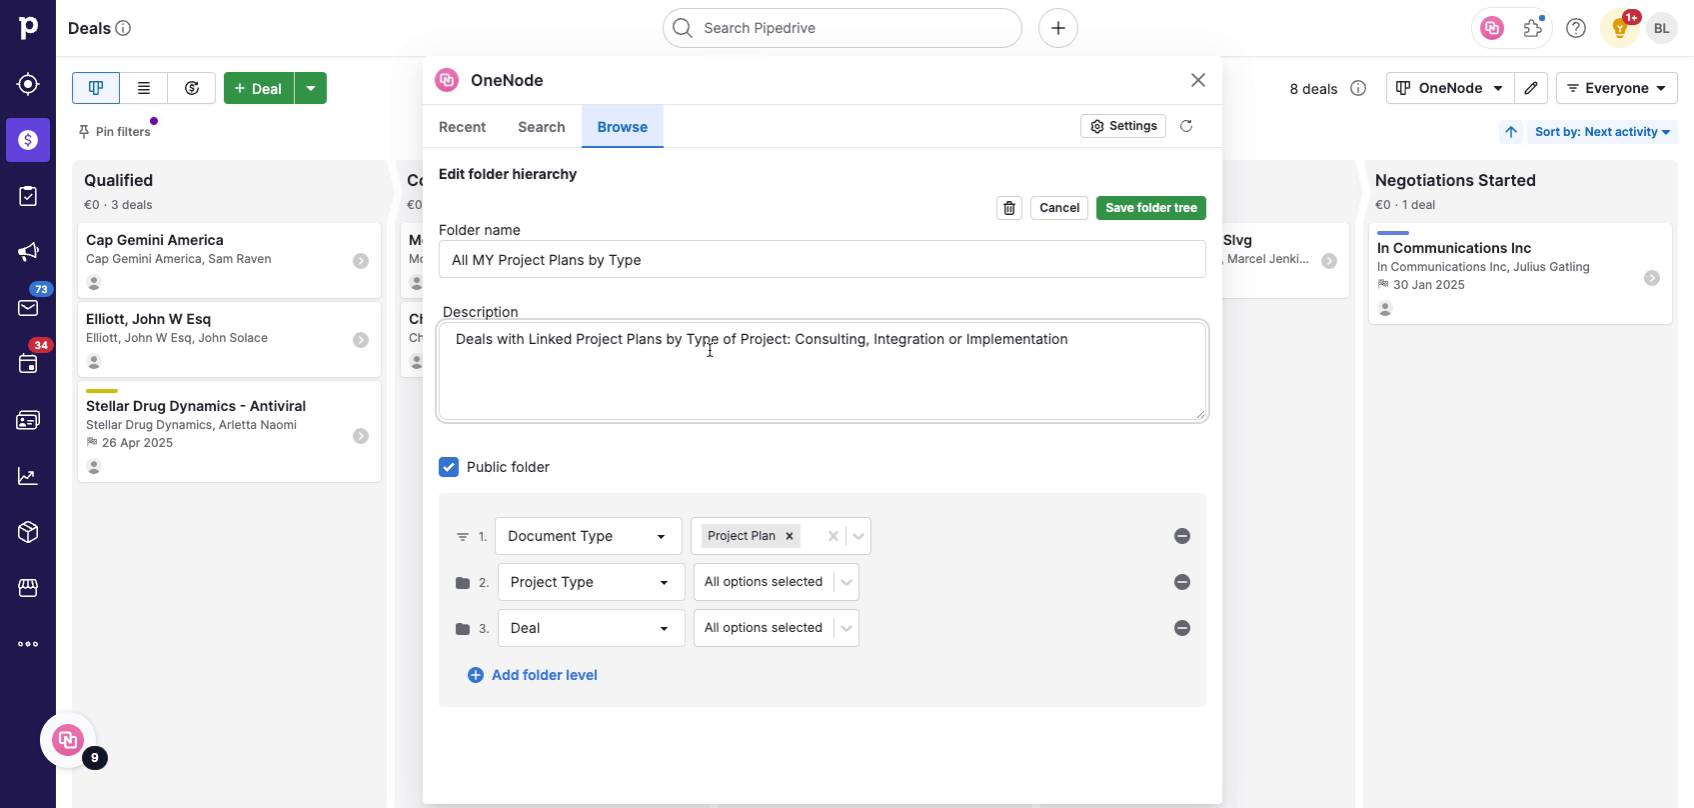
- Edit the folder Name, Description and Folder levels
- Click Save.
To delete folders, simply follow steps 1. and 2. above and click on the Trash icon instead.
Managing Folders
The previous video on Creating Dynamic Folders provided an overview of the folder editing options available in OneNode's Browse feature.
1. Introduction
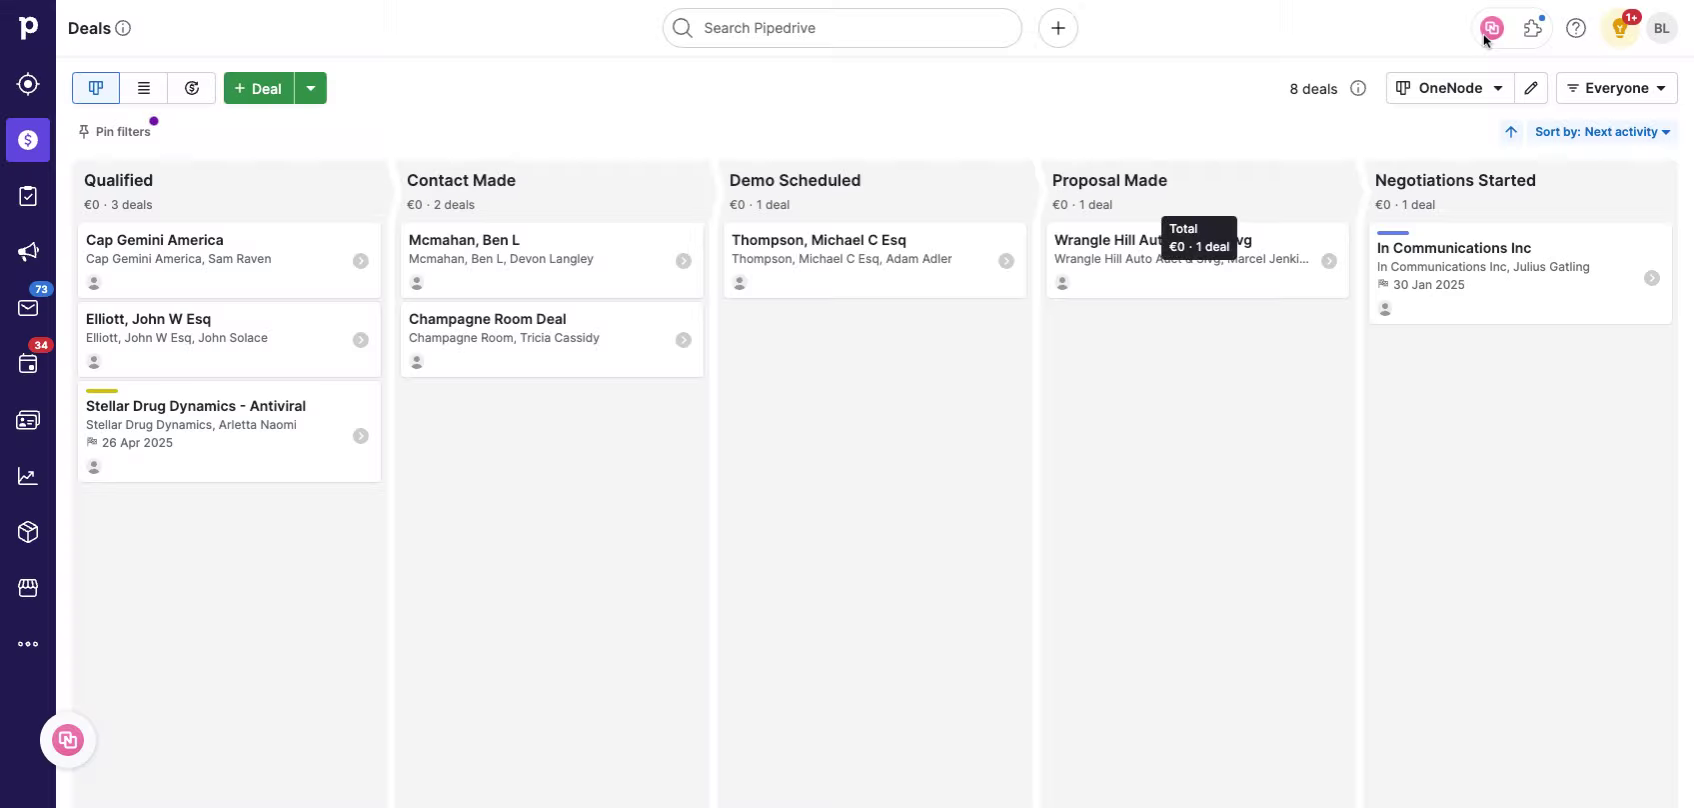
2. Open OneNode
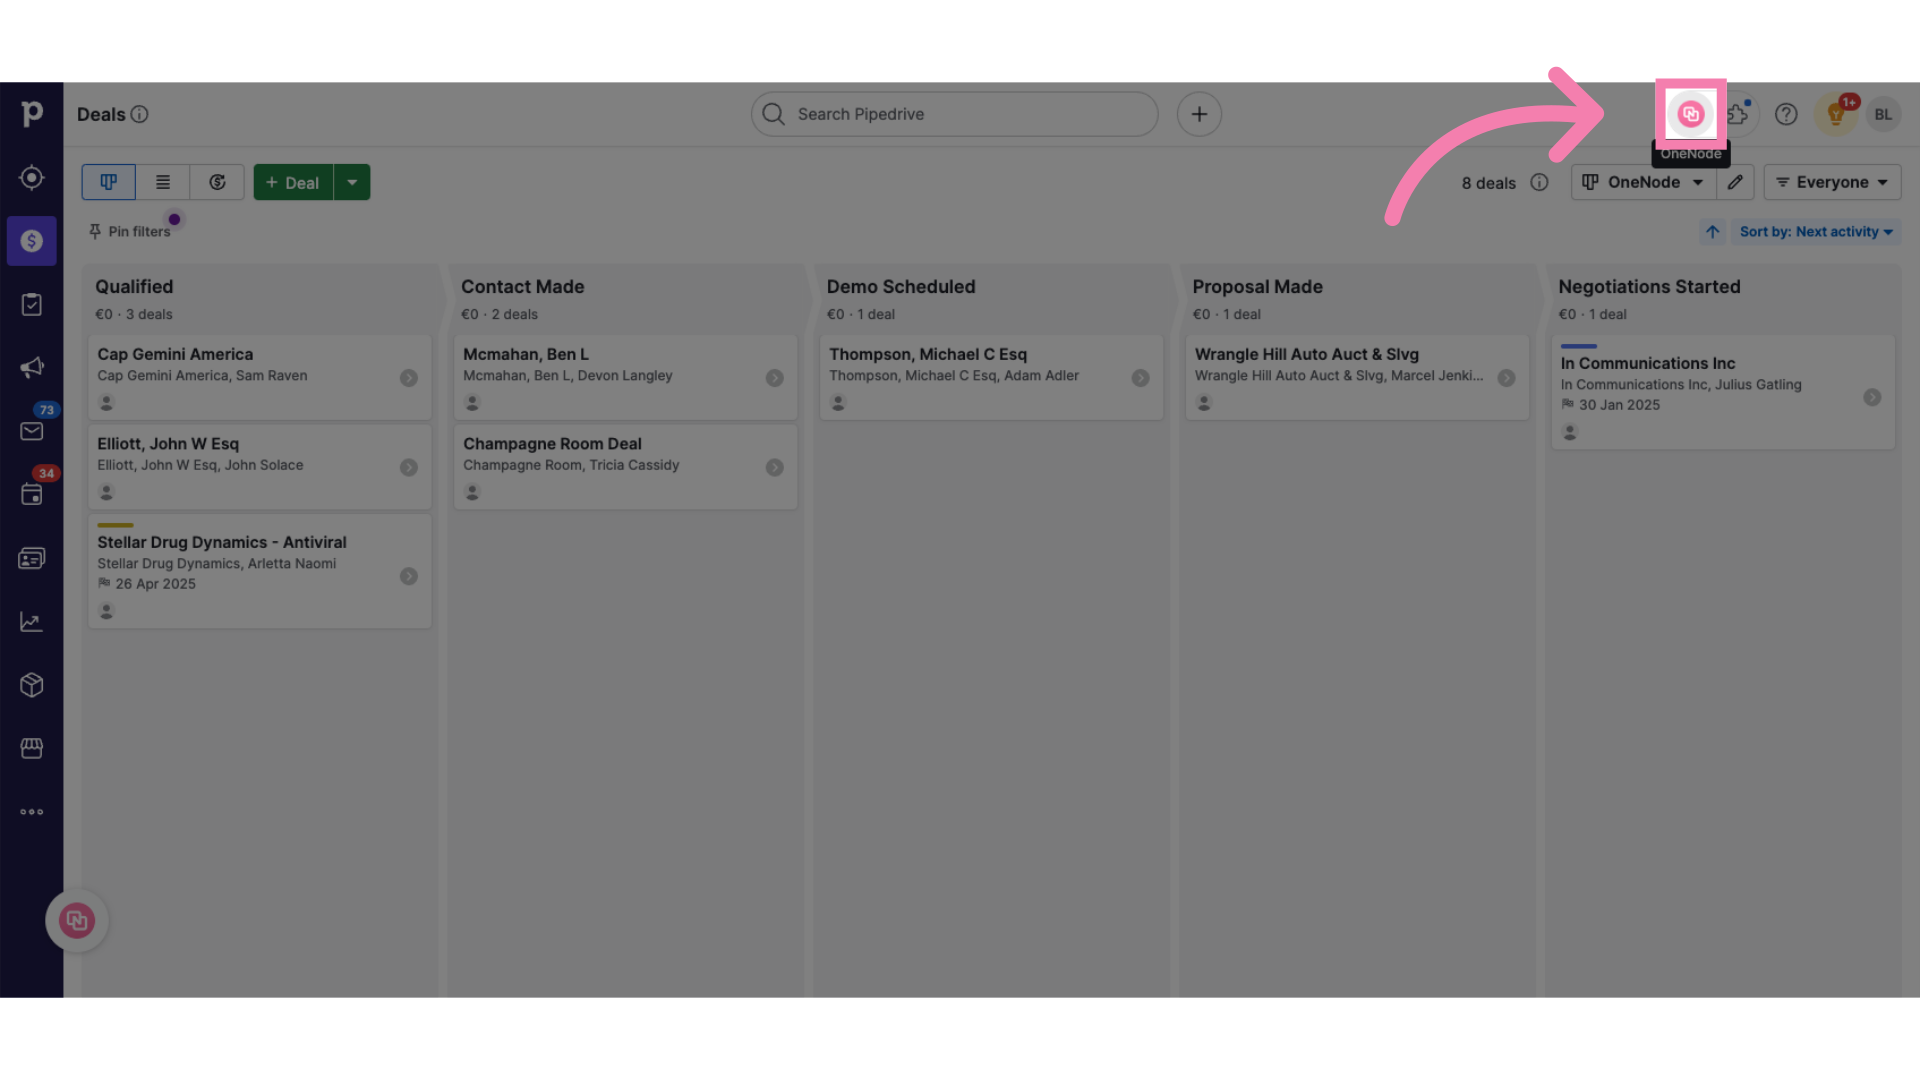
3. Select "Browse"
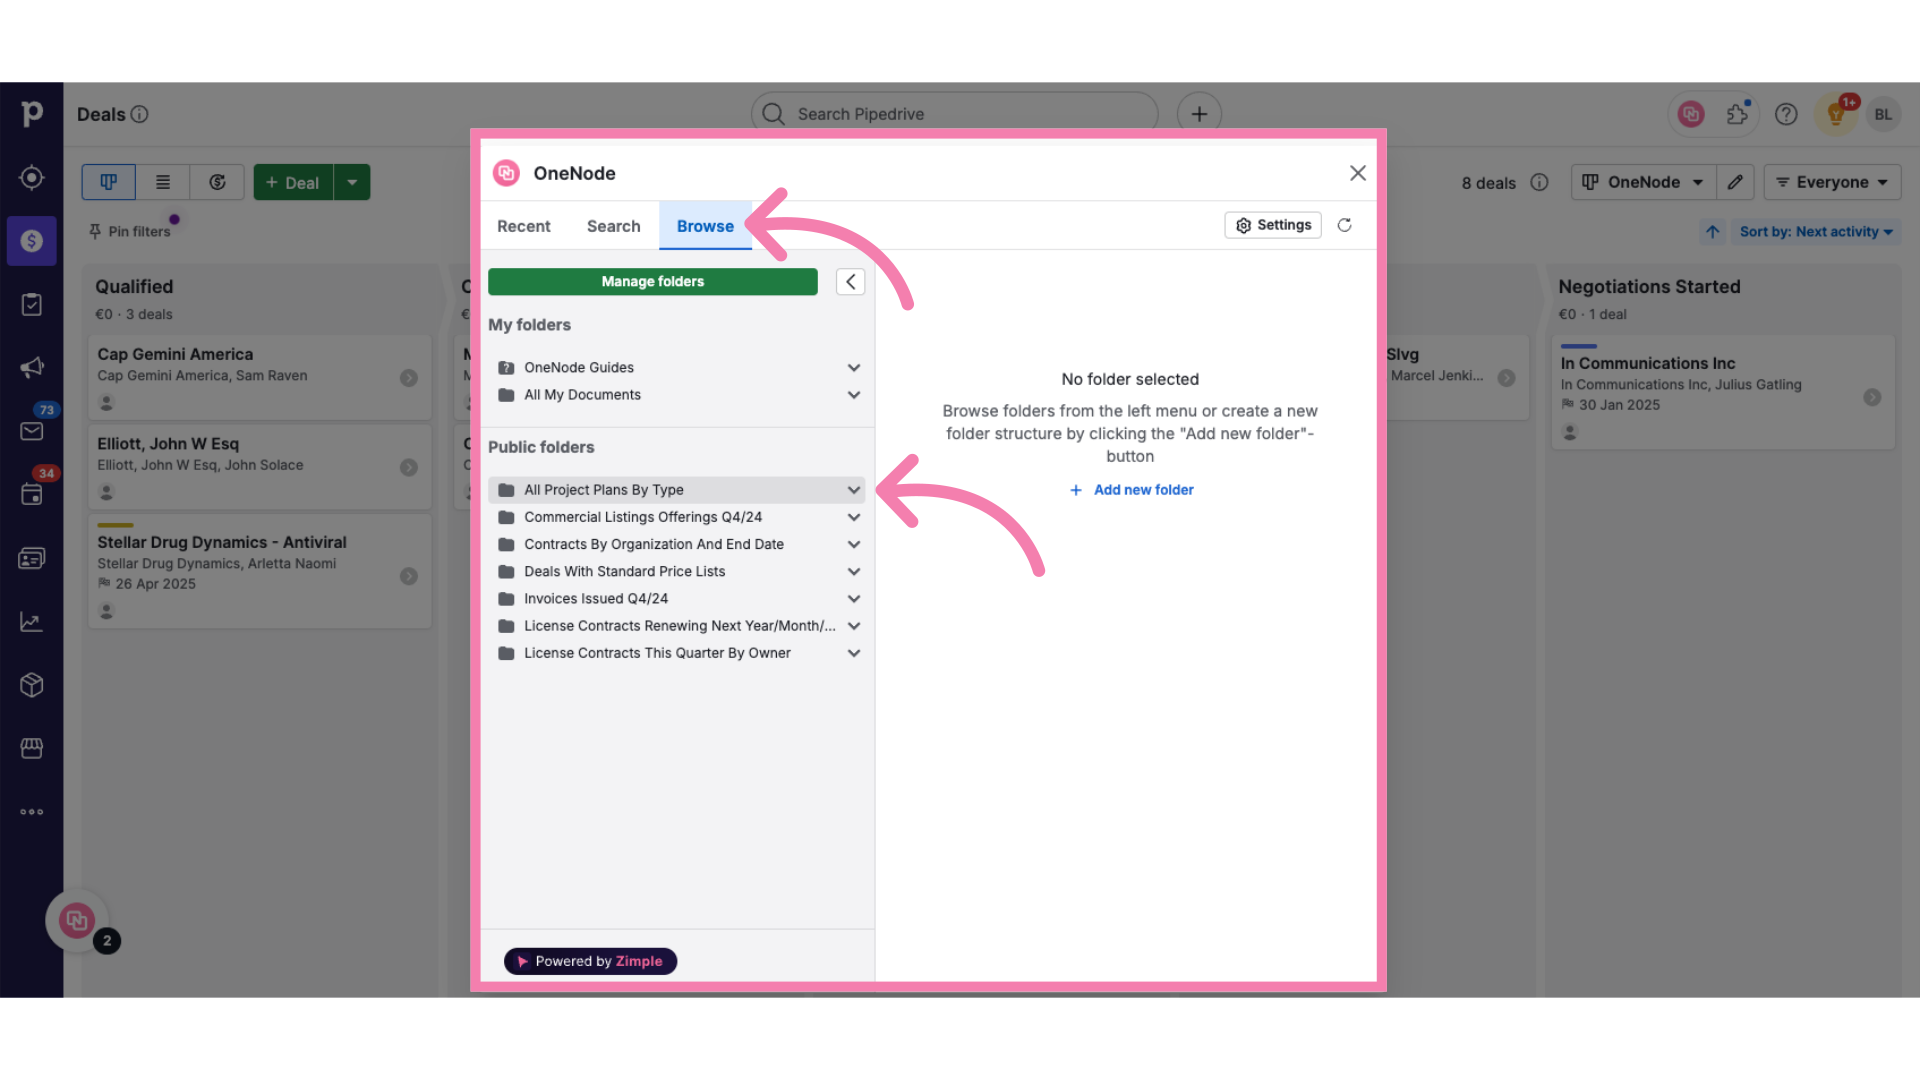
4. Click "Manage folders"
Click on the Manage Folders option
5. Click on the Pen Icon
And continue by selecting the Pen Icon in front of the Folder that you wish to edit.
6. Rename the folder
Let's rename this folder. Instead of a universal folder called: "All Project Plans by type"

7. Type the new name
Let's call it "All MY Project Plans by type", to filter those that are owned by me only.

8. Update the Description
Similarly, let's update the description to include the "Owned by me" modification.
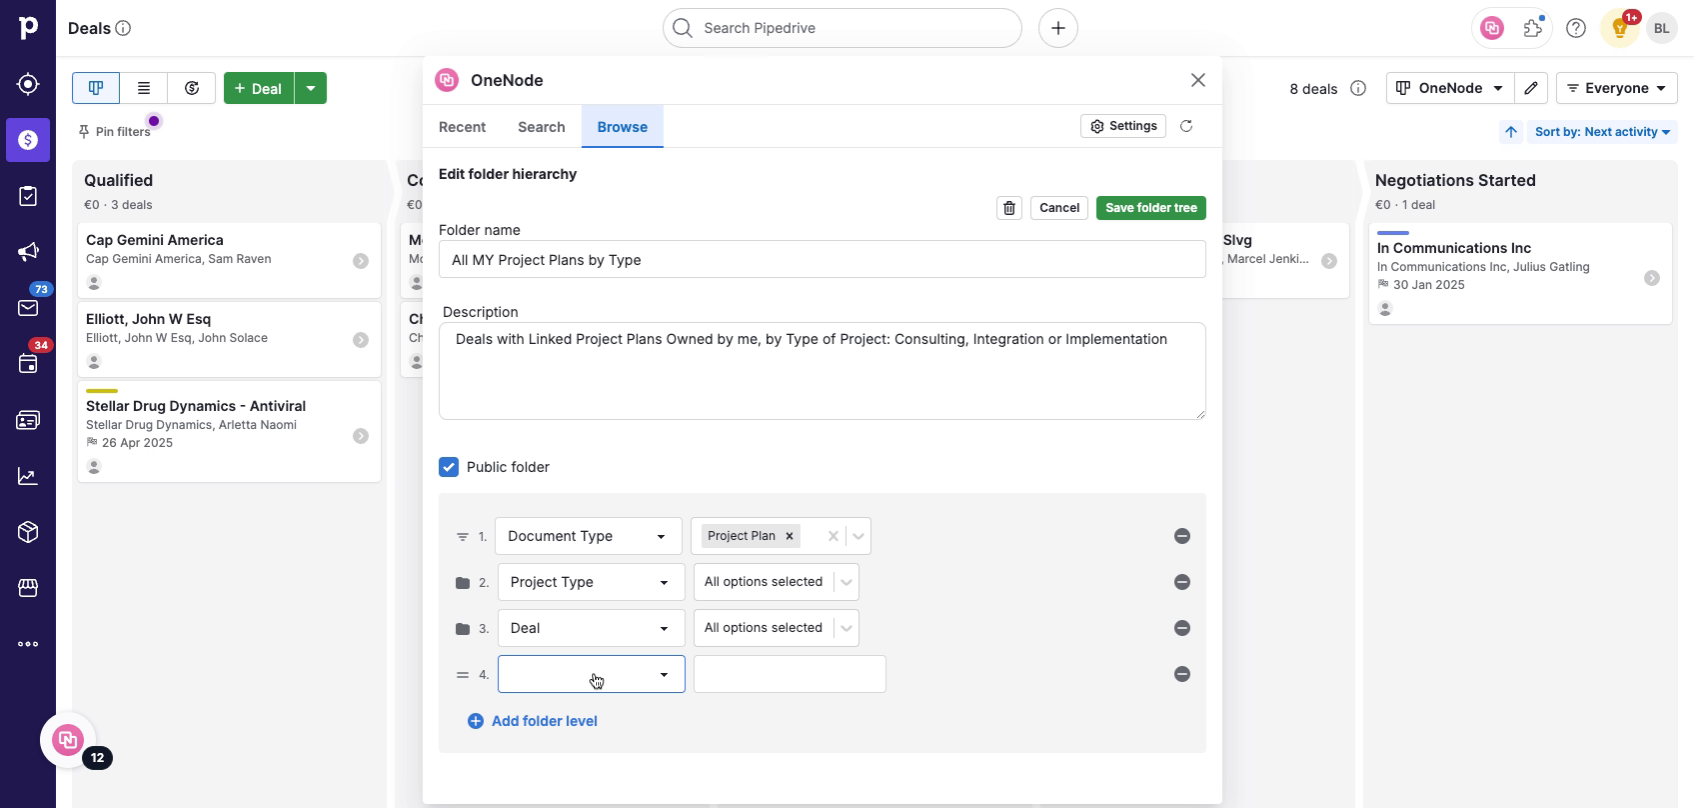
9. Click "Add folder level"
Now let's add the new condition.
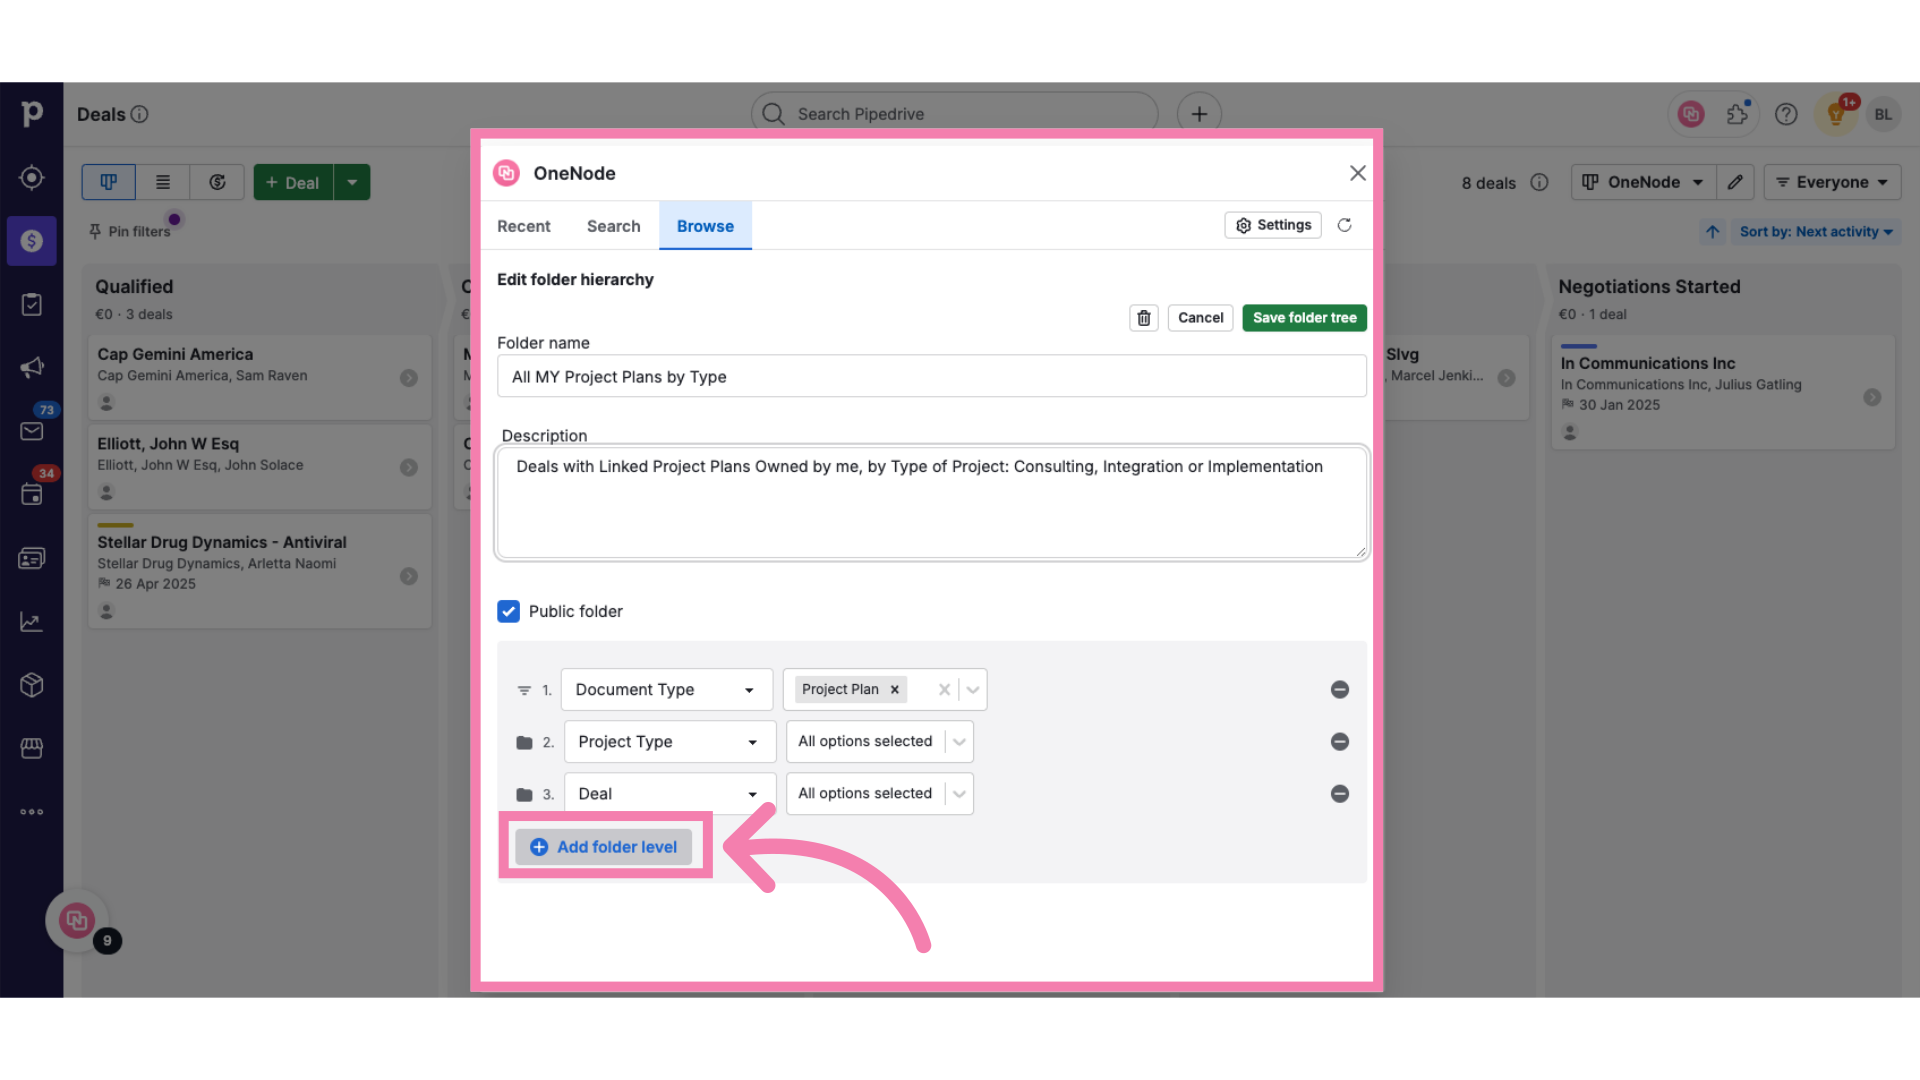
10. Select the folder level property
Select the "Document Owner" property from the drop-down
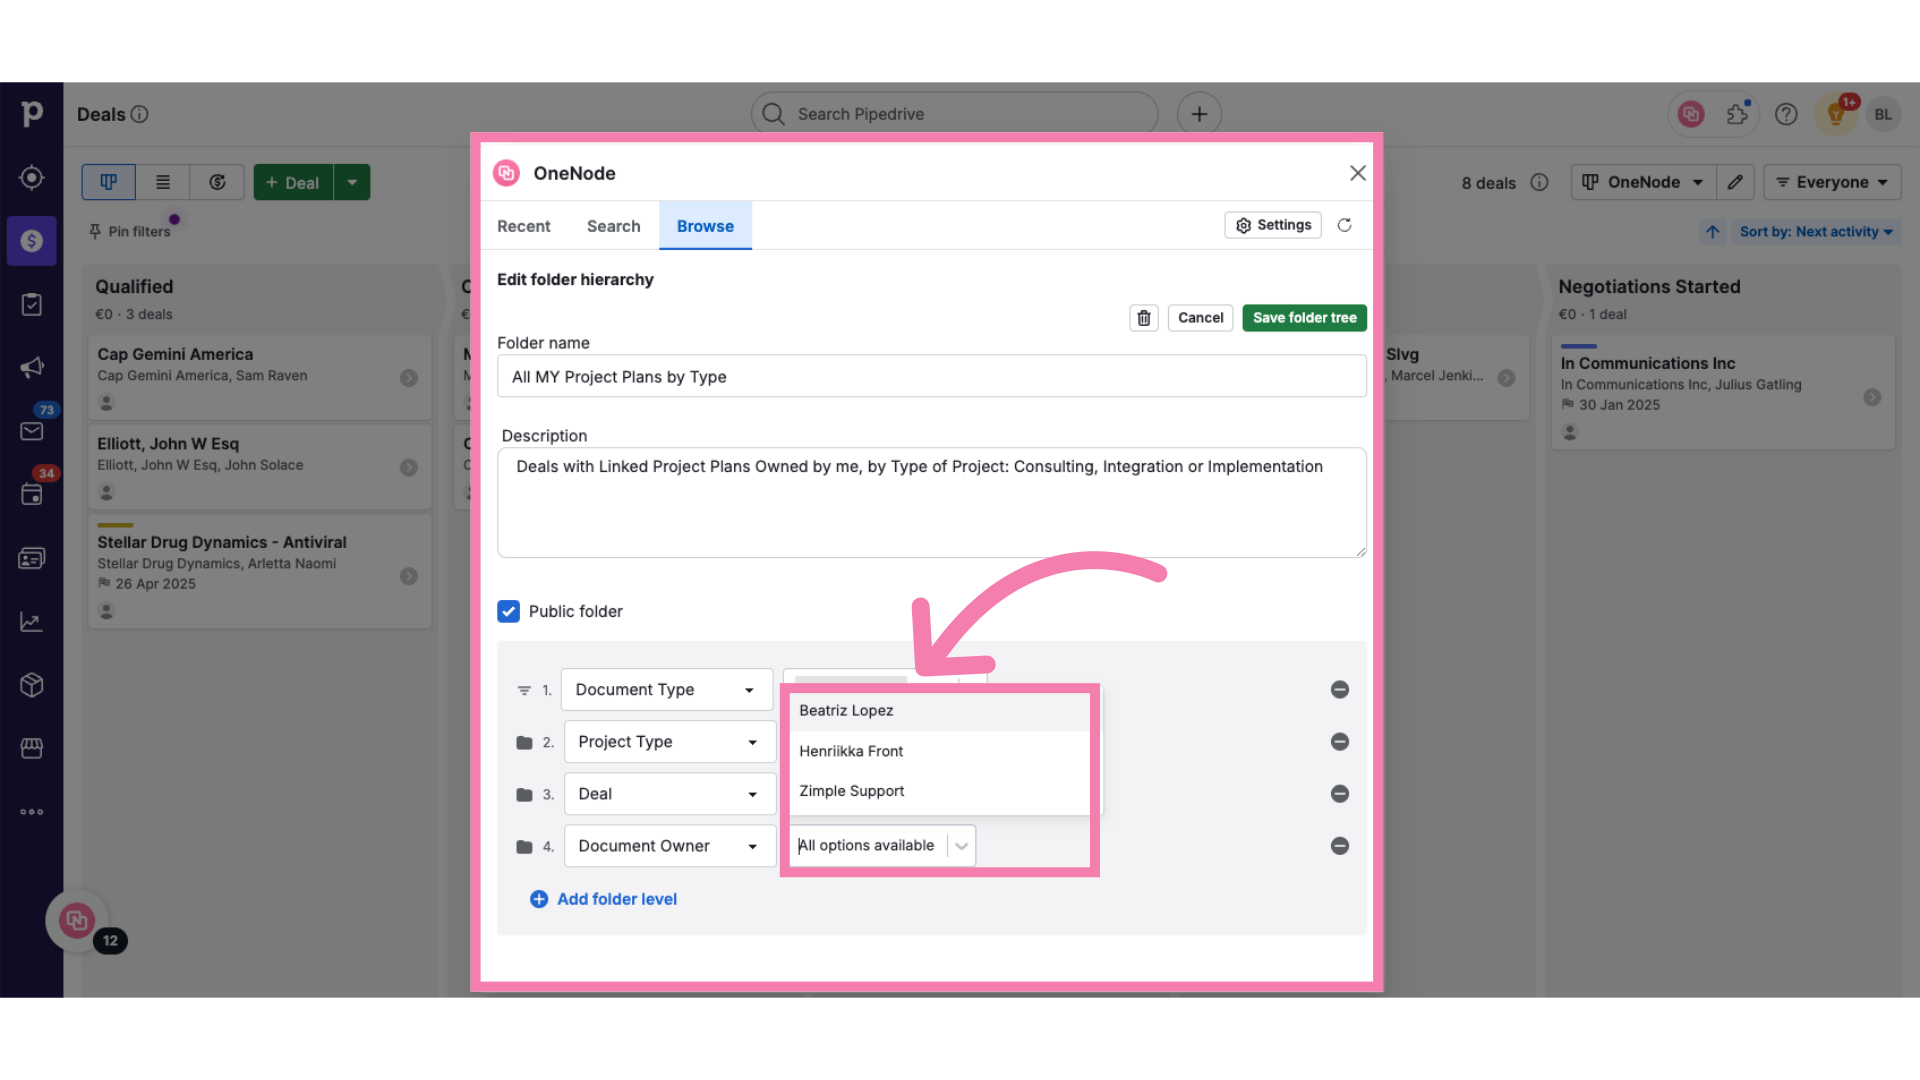
11. Choose the user
Continue by choosing your user name
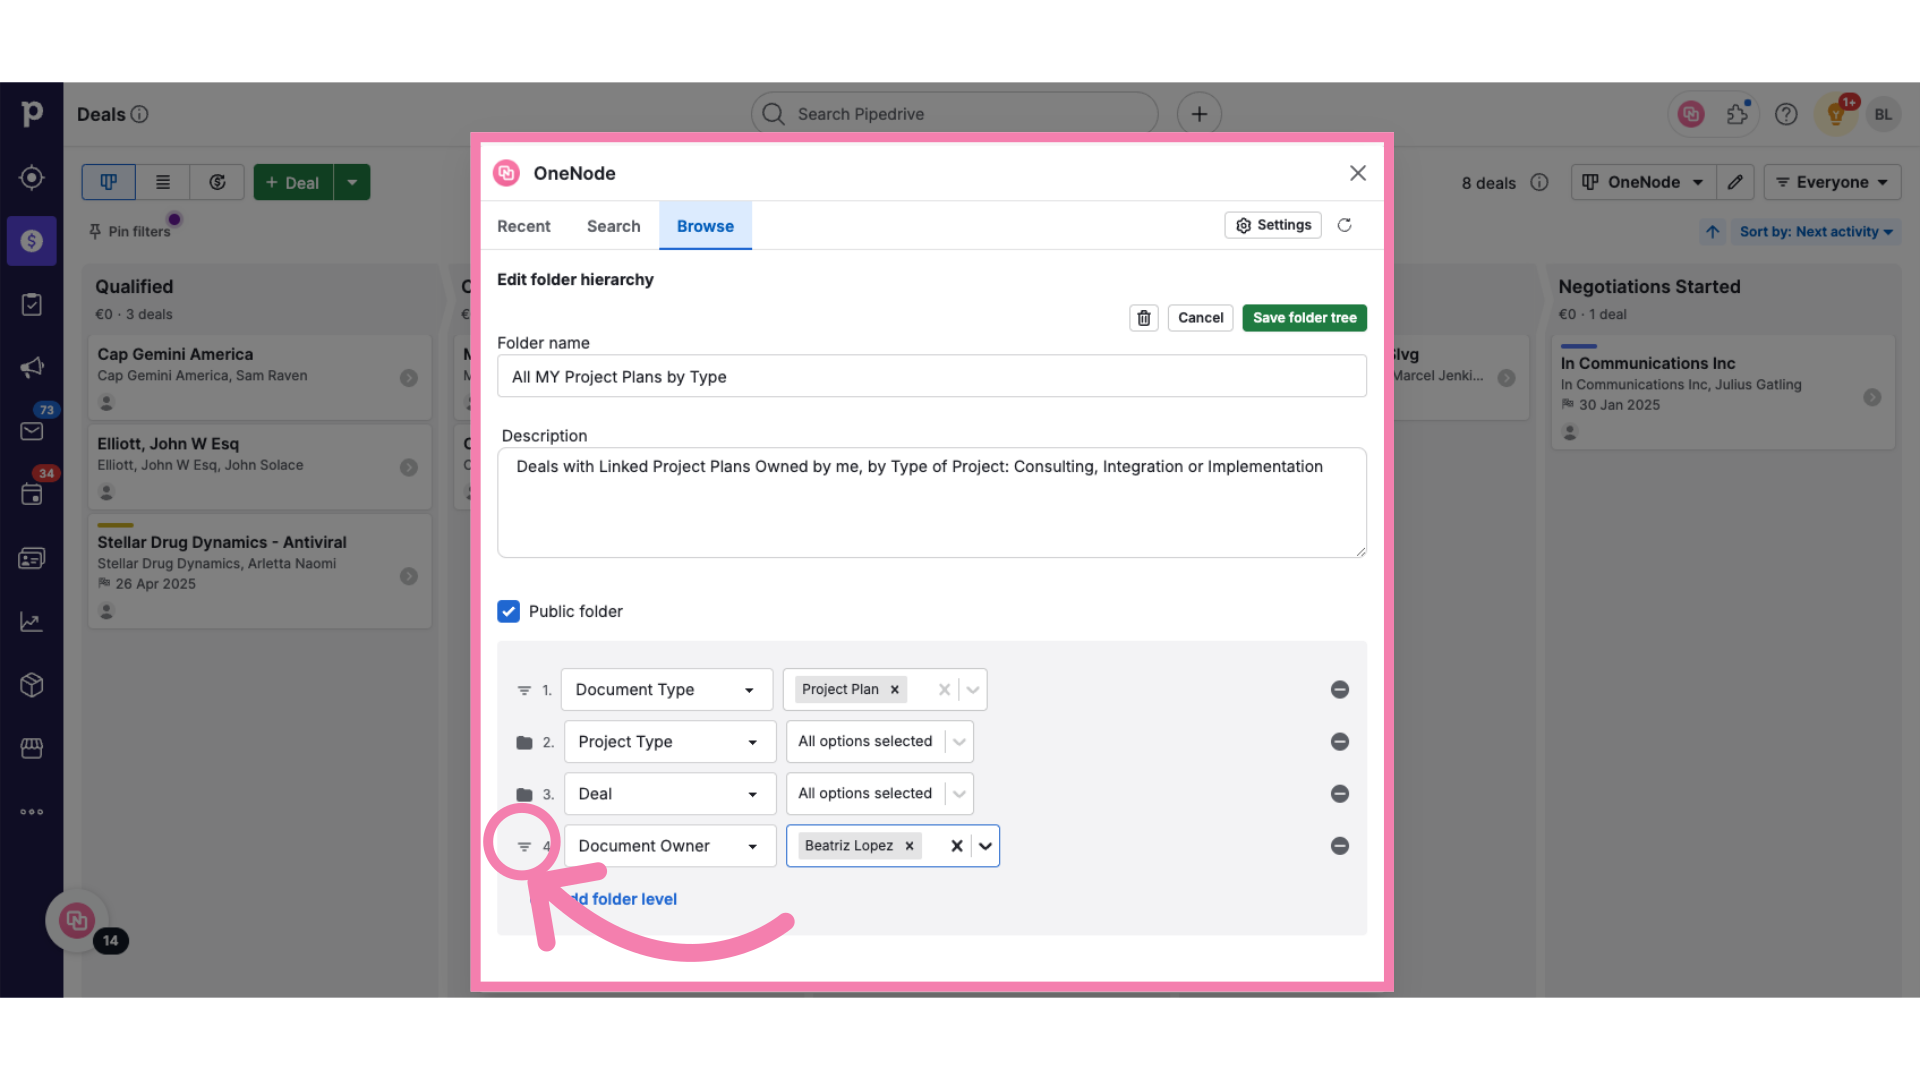
12. Drag the filter
Once done, drag the filter from the icon located right before the numeral.
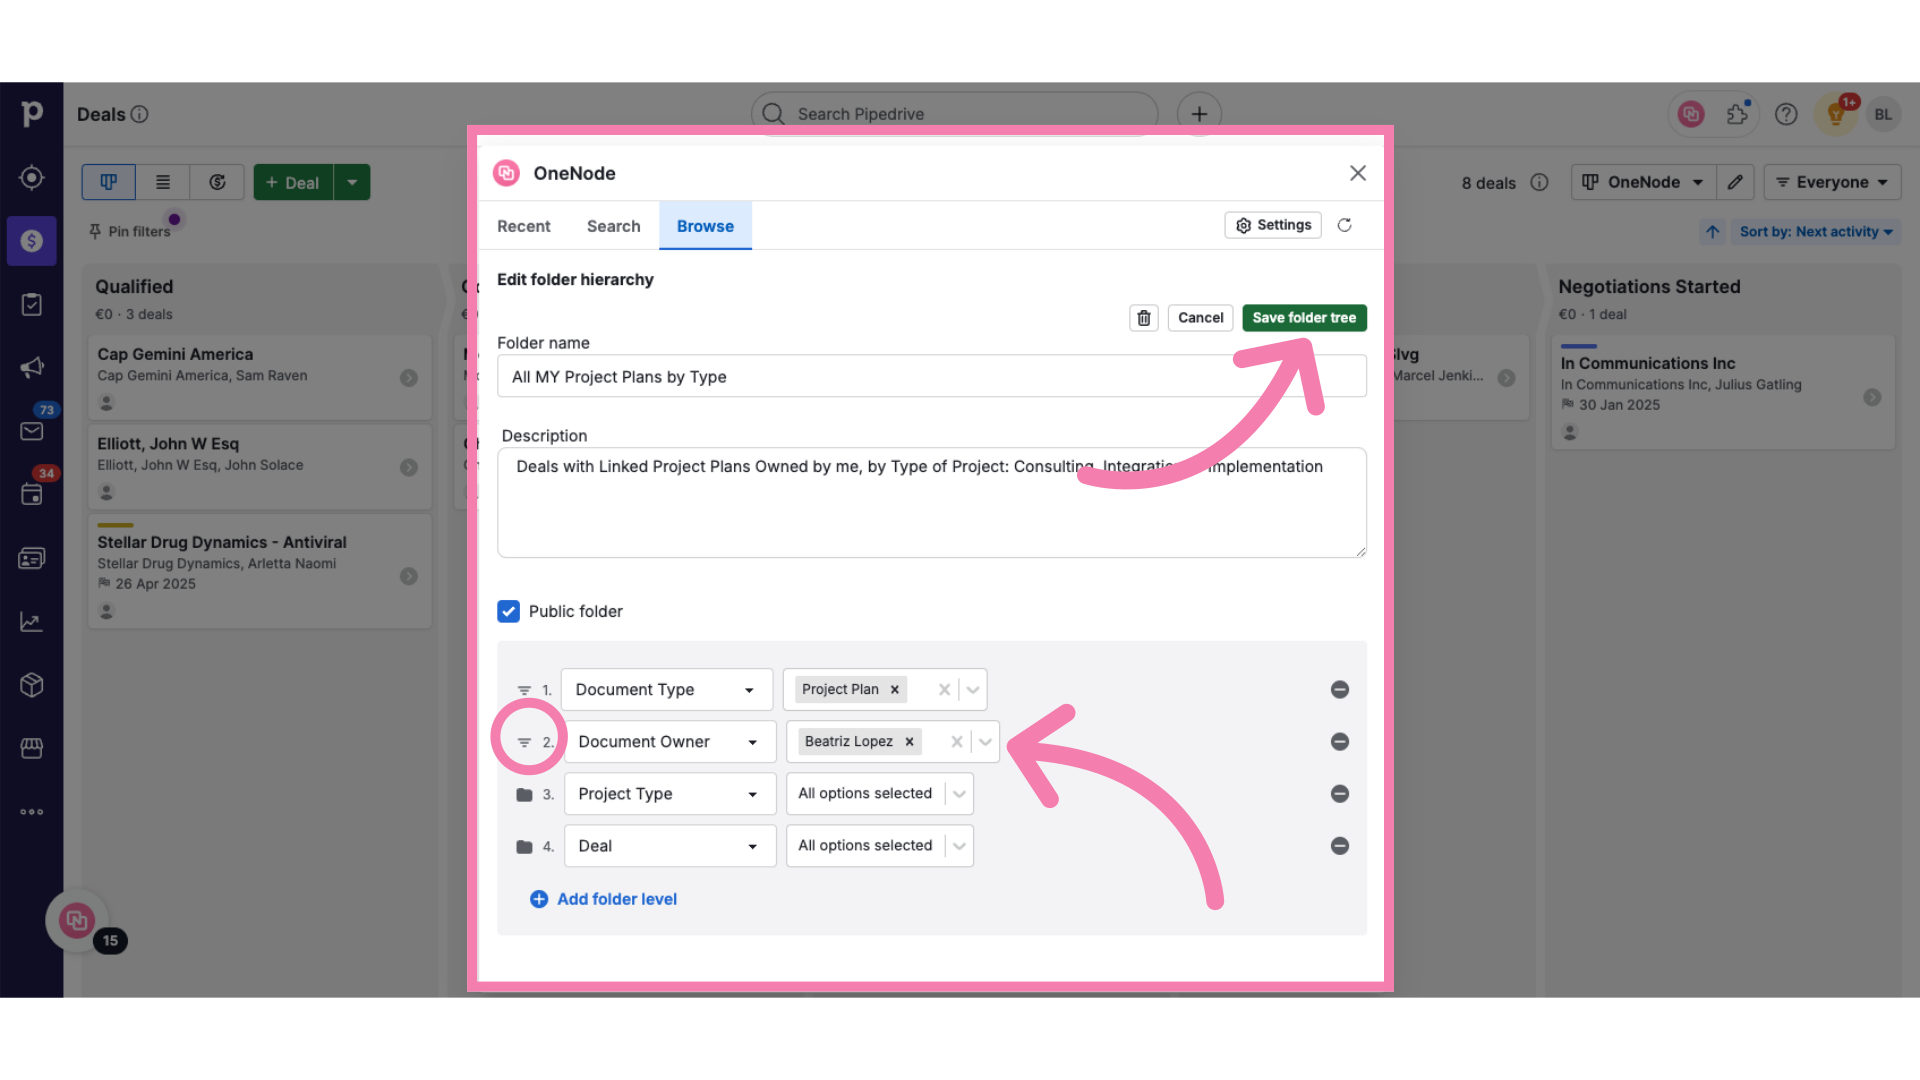
13. Click "Save folder tree"
And drop it right under the first filter. Don't forget to save!
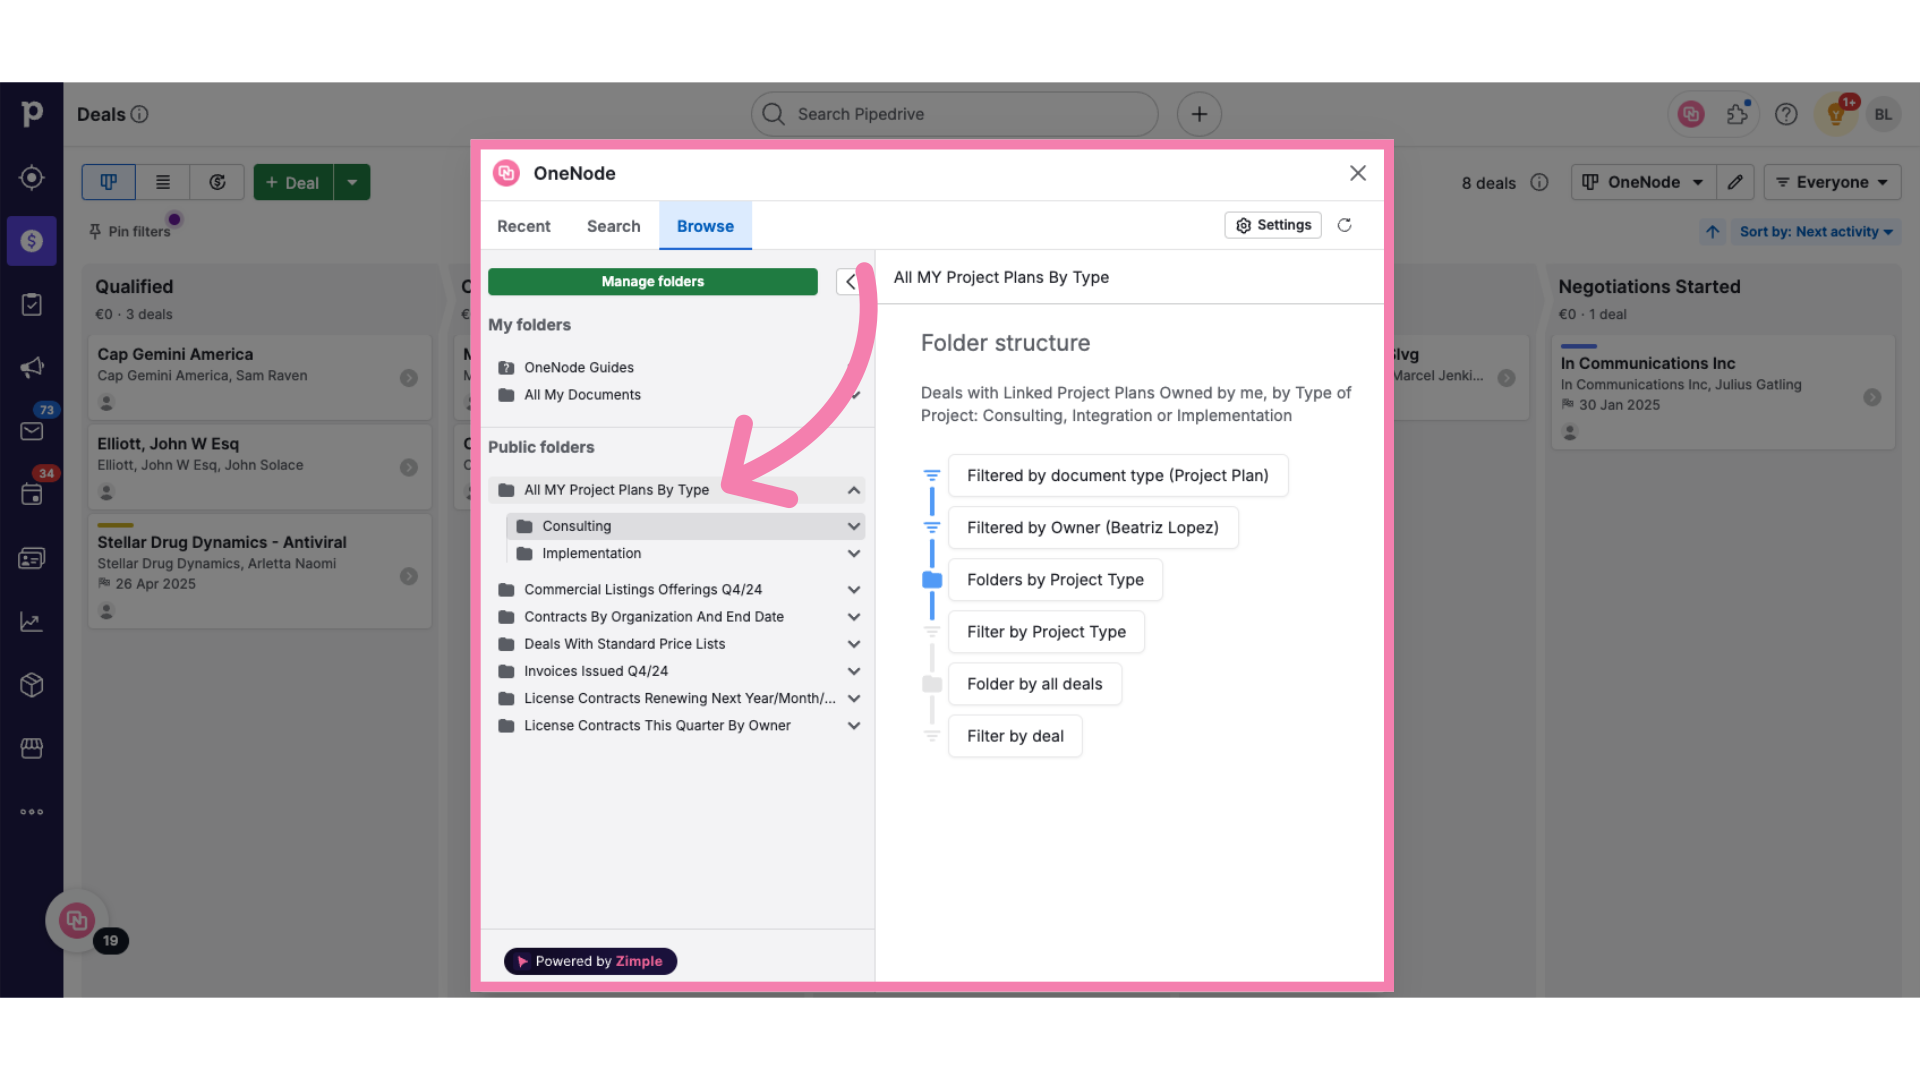
14. Click "Browse"
Return to the browsing tab to check the newly modified filter
15. Expand the folder
And that's it! Review the changes made by expanding the folder.