
Add with a link
Adding a document link from the deal, organization or person view is as easy as copy-pasting.
Watch the video below for a Floor Plan Management use case in real estate, where OneNode enables Pipedrive users to link any document’s web location—whether from cloud storage or third-party applications—to Deals, People, or Organizations.
This video demonstrates the process from the user’s perspective, with a OneNode admin having previously set up the Floor Plan document type and created five document custom fields.
Add with a Link
This video demonstrates how to add a Floor Plan document type, including a link to drawings stored in a collaborative diagram application called Lucid.
1. Introduction
By the end, you’ll see that regardless of where the document or drawing is stored, you can effortlessly link its web location to Pipedrive using OneNode.
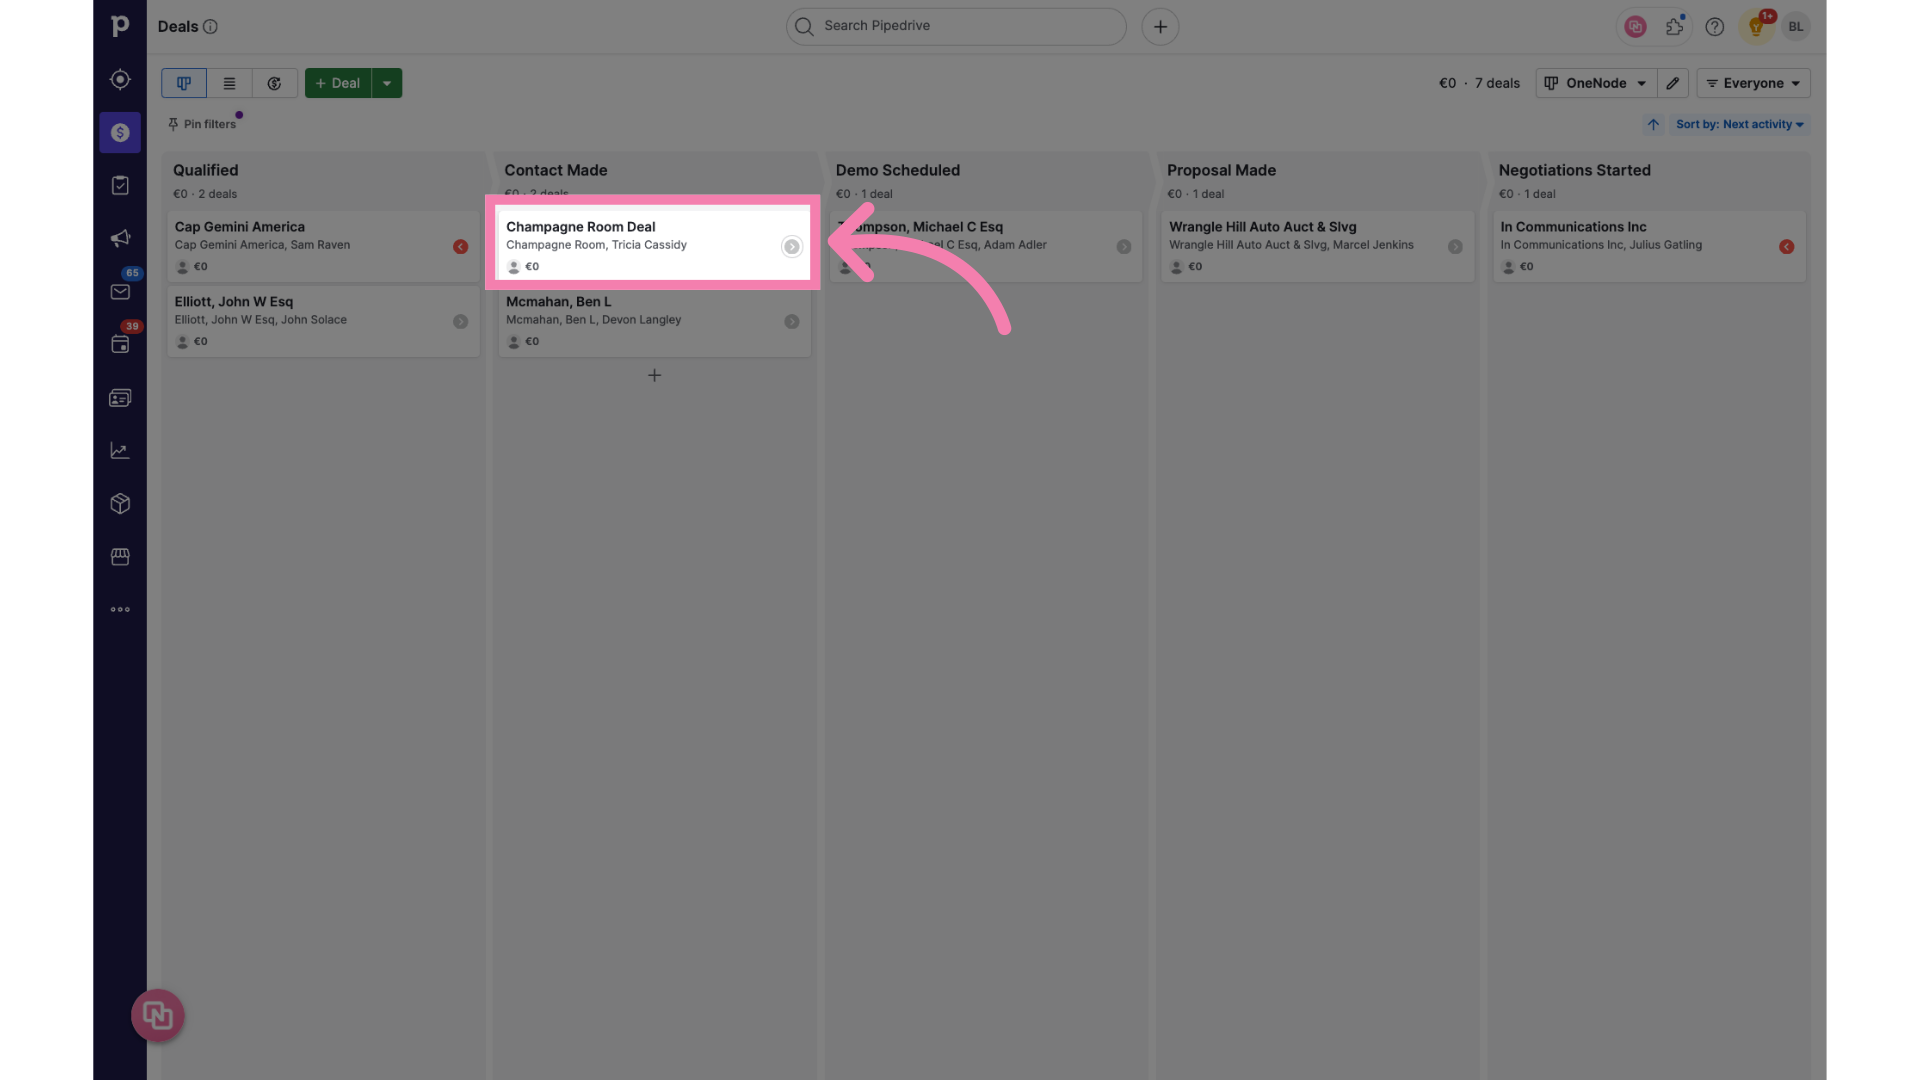
2. Select the deal
First select the Deal you want to link the Floor Plans to. If you need to, you may also link it to Organizations or Persons in Pipedrive.
3. Click "Add document"
Look for the OneNode panel on the left and Click on the "Add document" button.
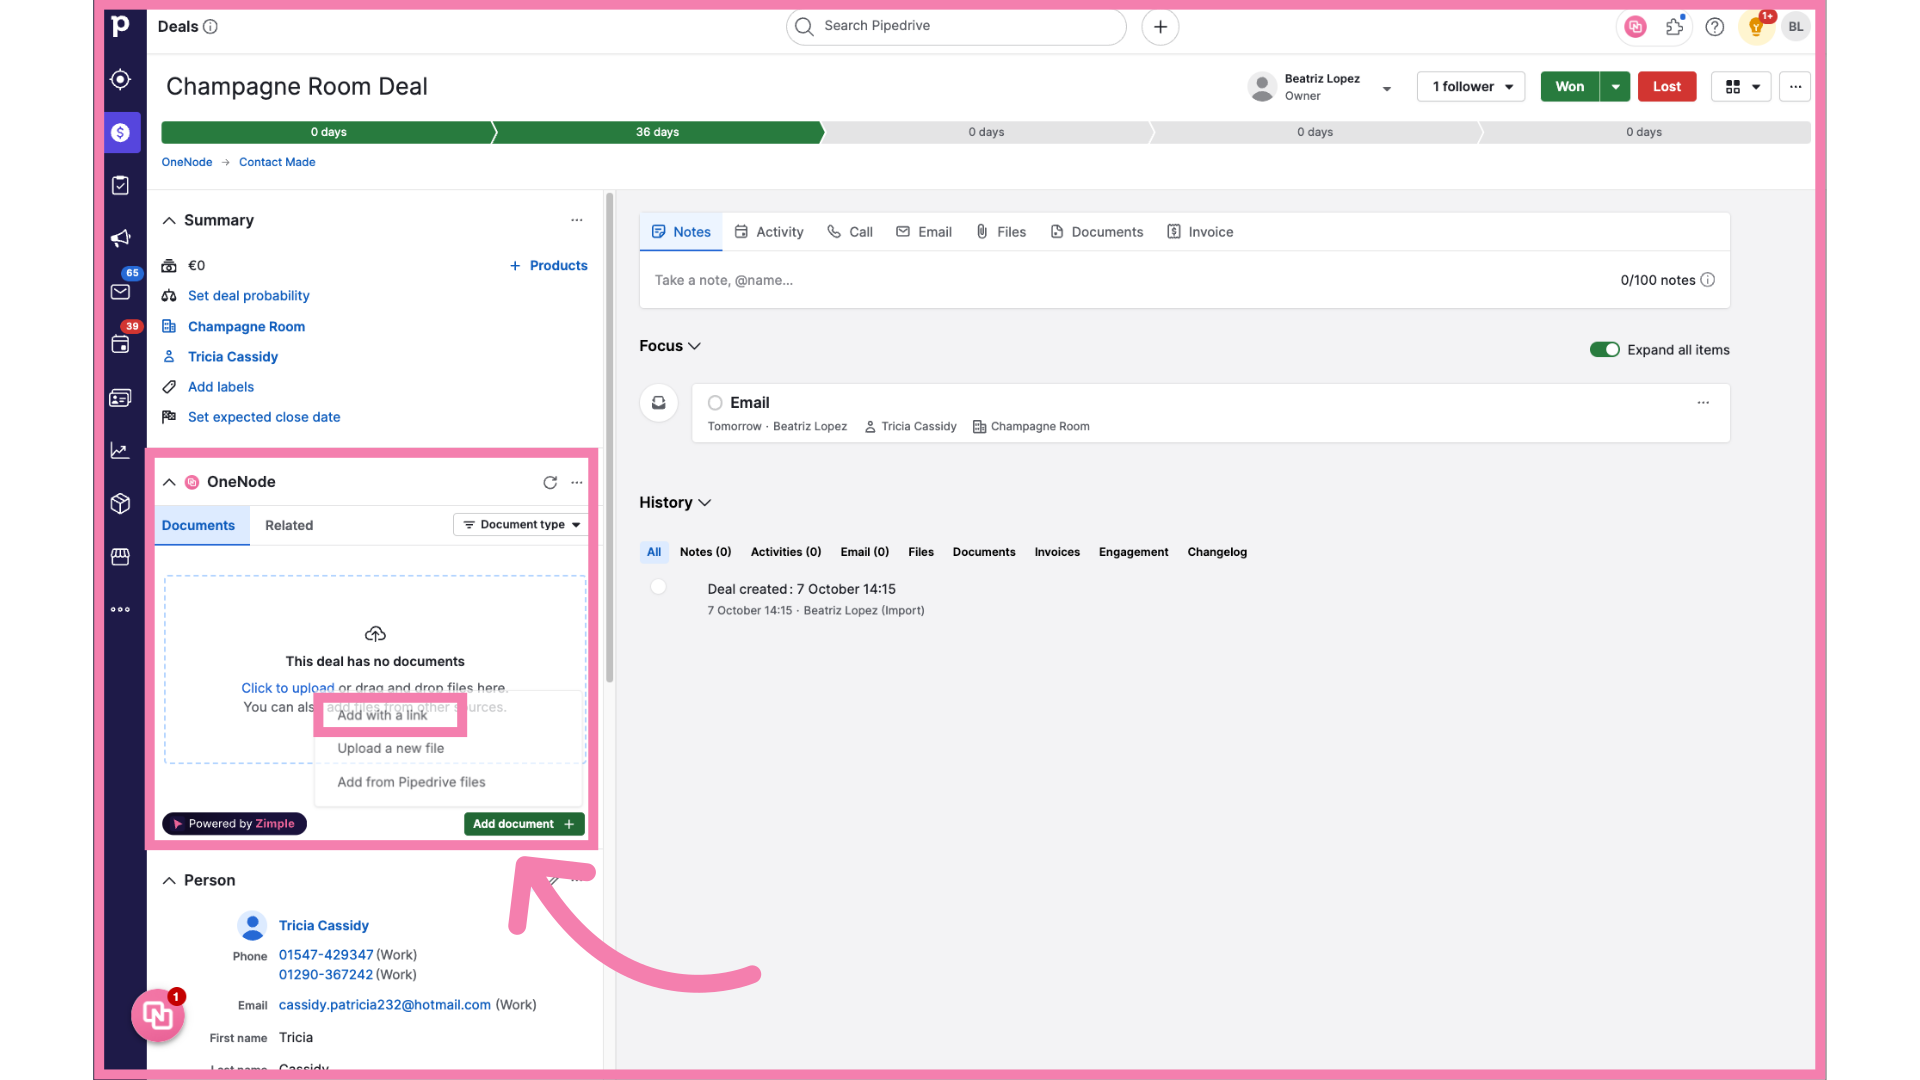
4. Select "Add with a Link"
From the three options,Choose the first one. "Add with a link".

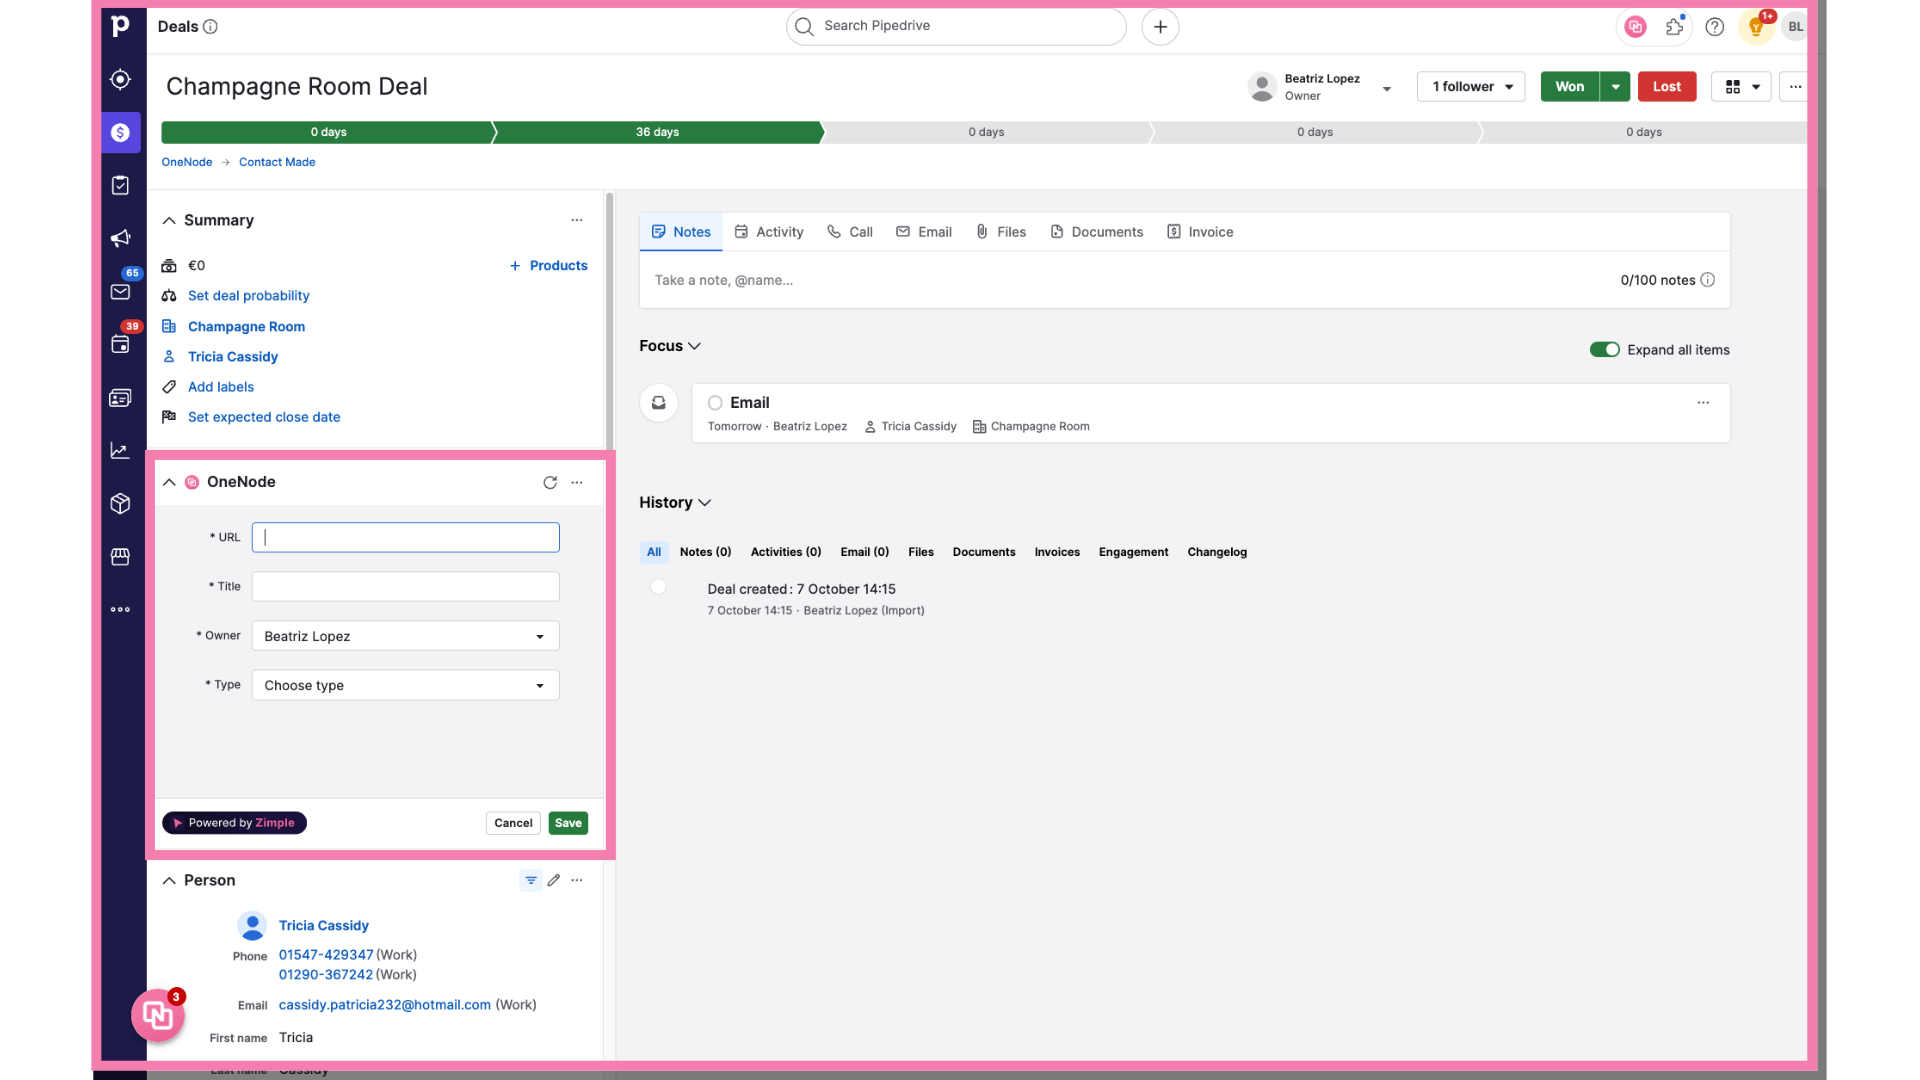
5. Complete the fields
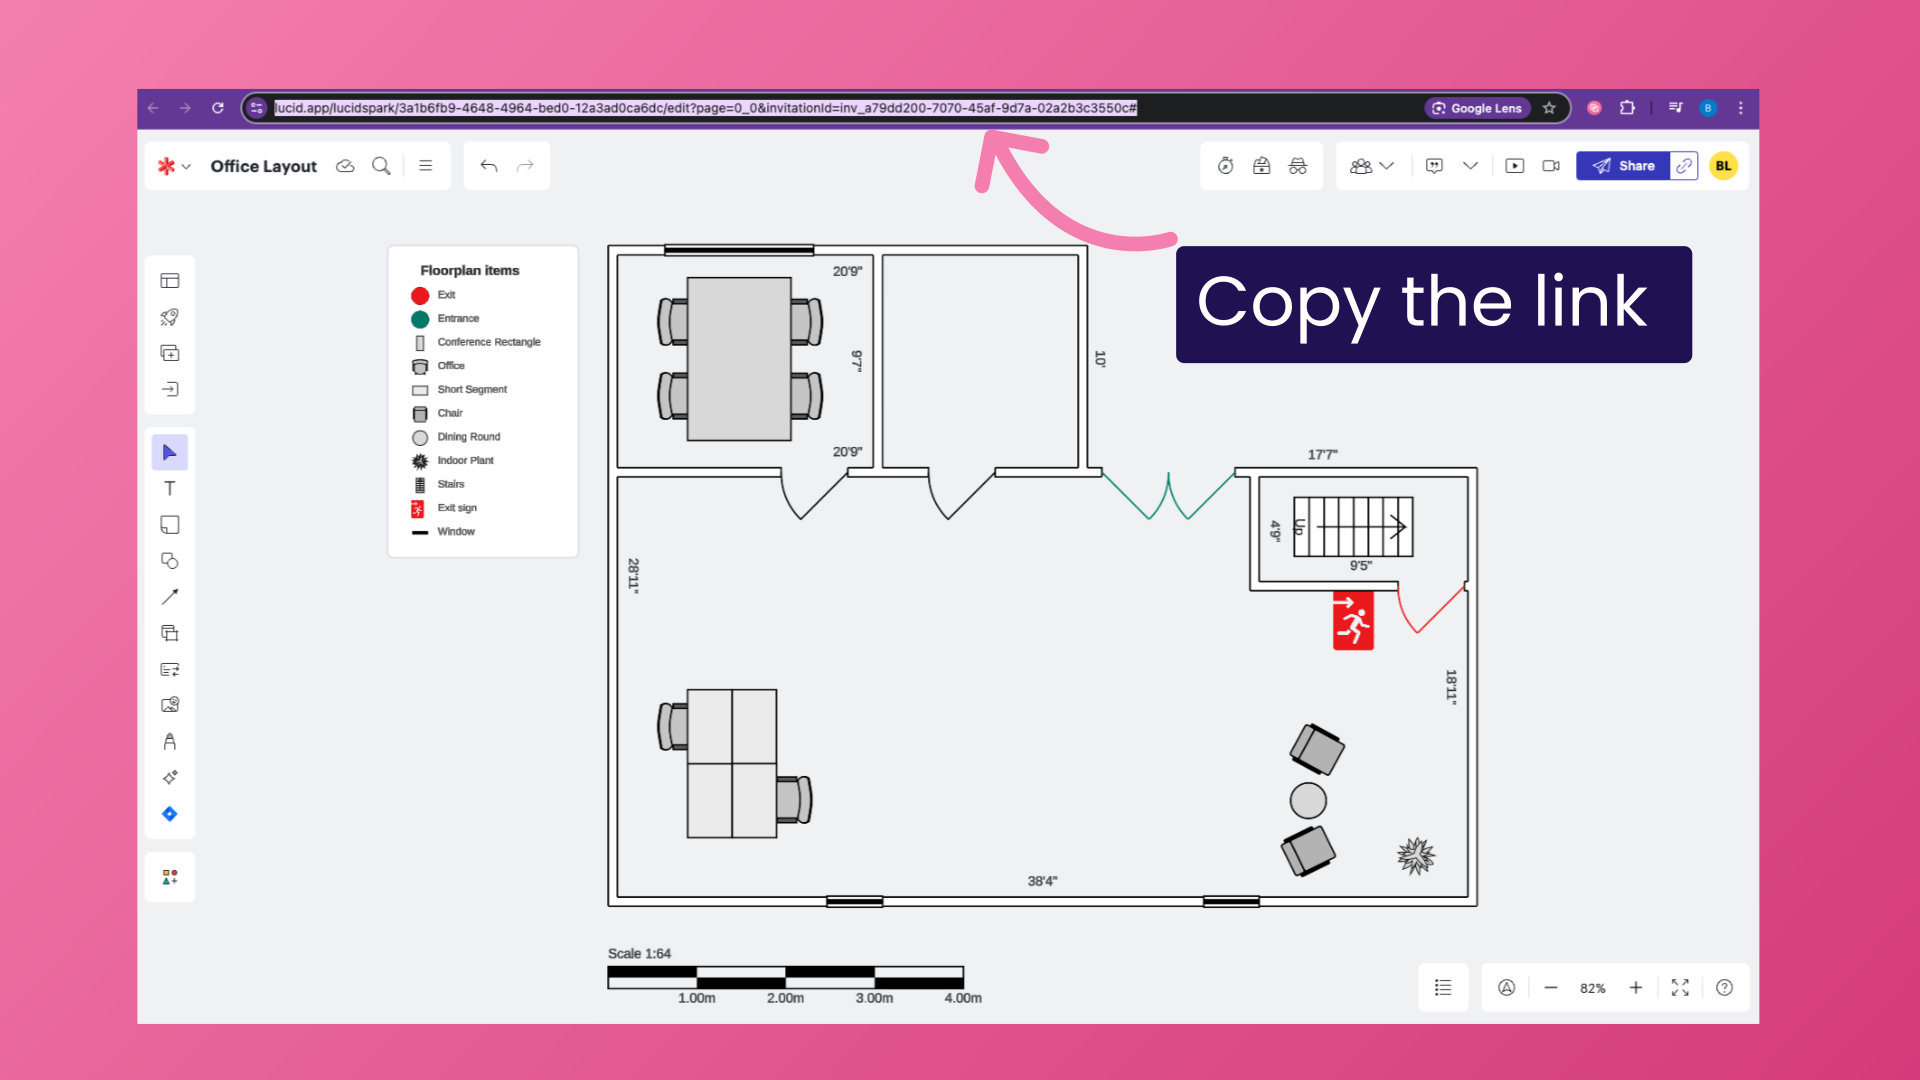
6. Copy the link
So go to the browser tab or web app where the Floor Plan document is stored and simply copy the link
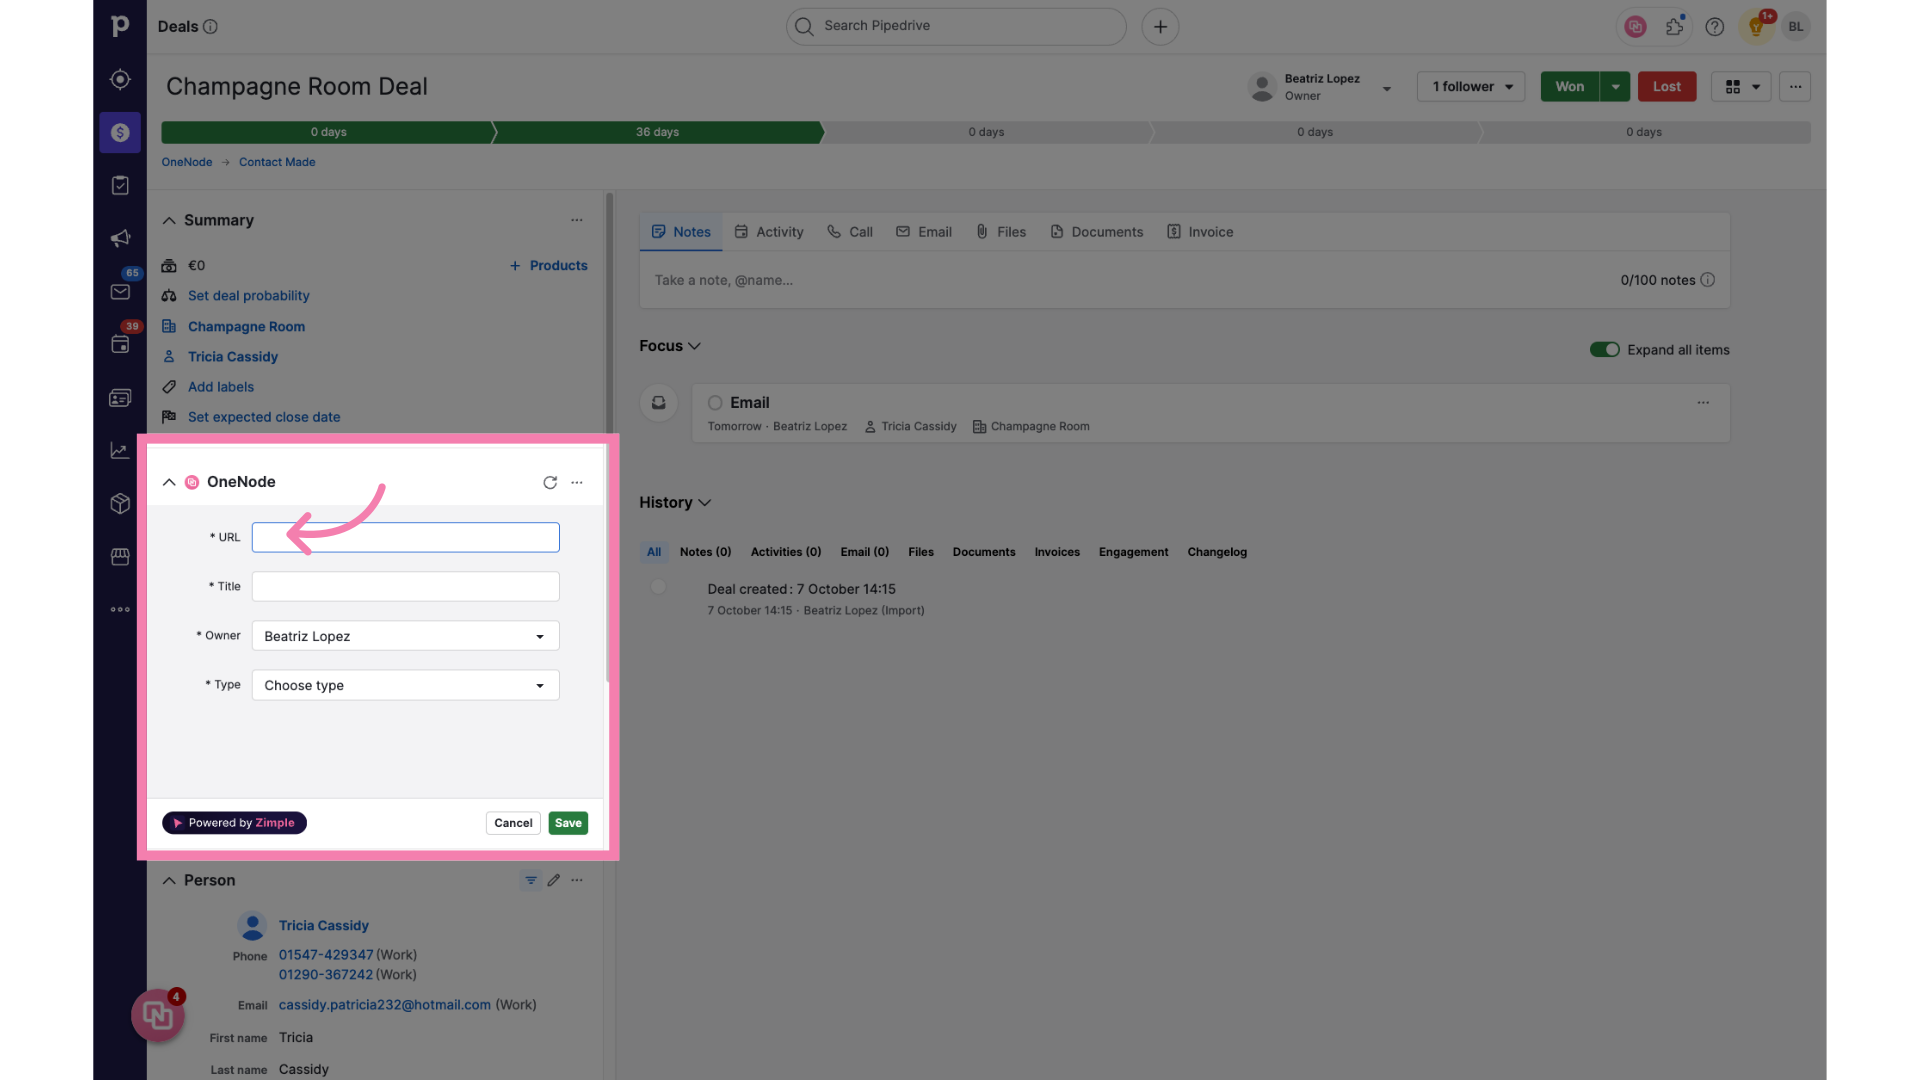
7. Paste the Link
Return to Pipedrive and paste it in the URL field
8. Type a Title
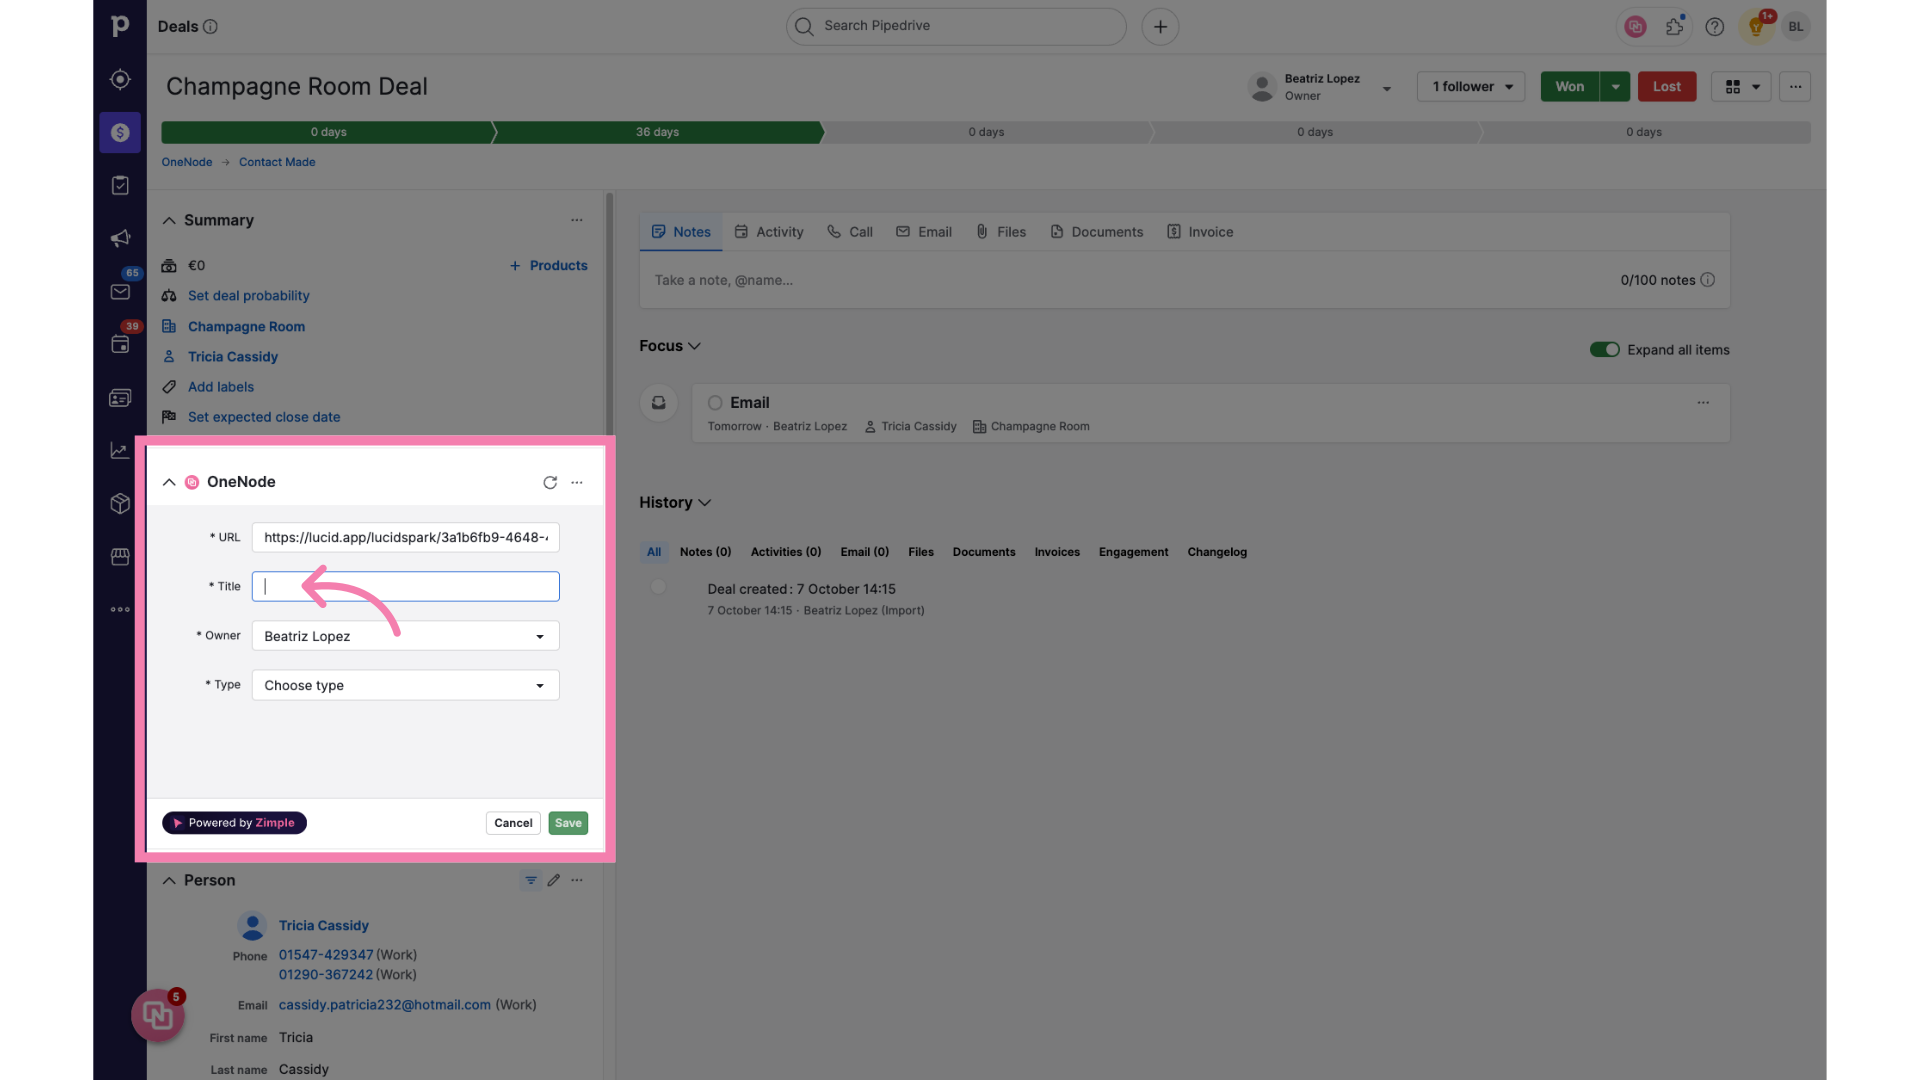
9. Fill "Office Layout - Main Street"
Type a file name. This is an Office Layout in Main Street

10. Modify the Owner
If necessary, adjust the document owner
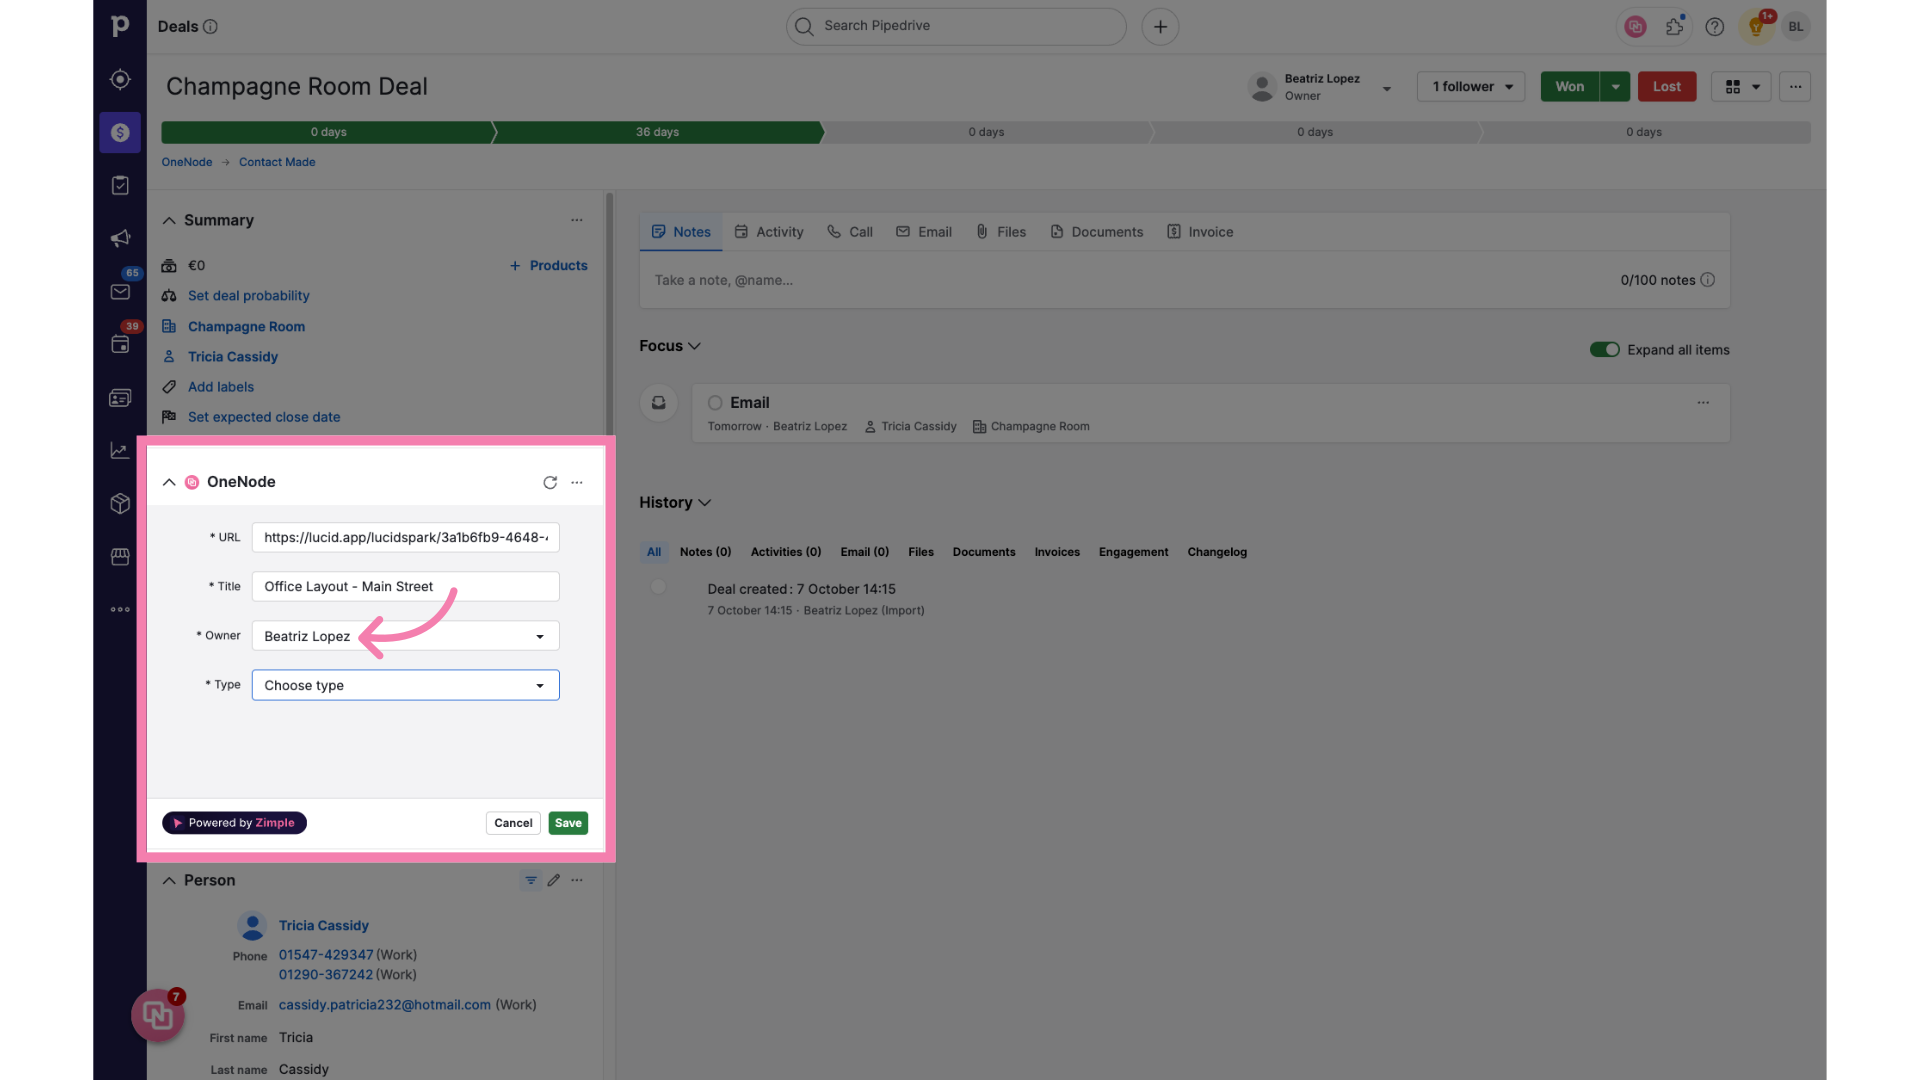
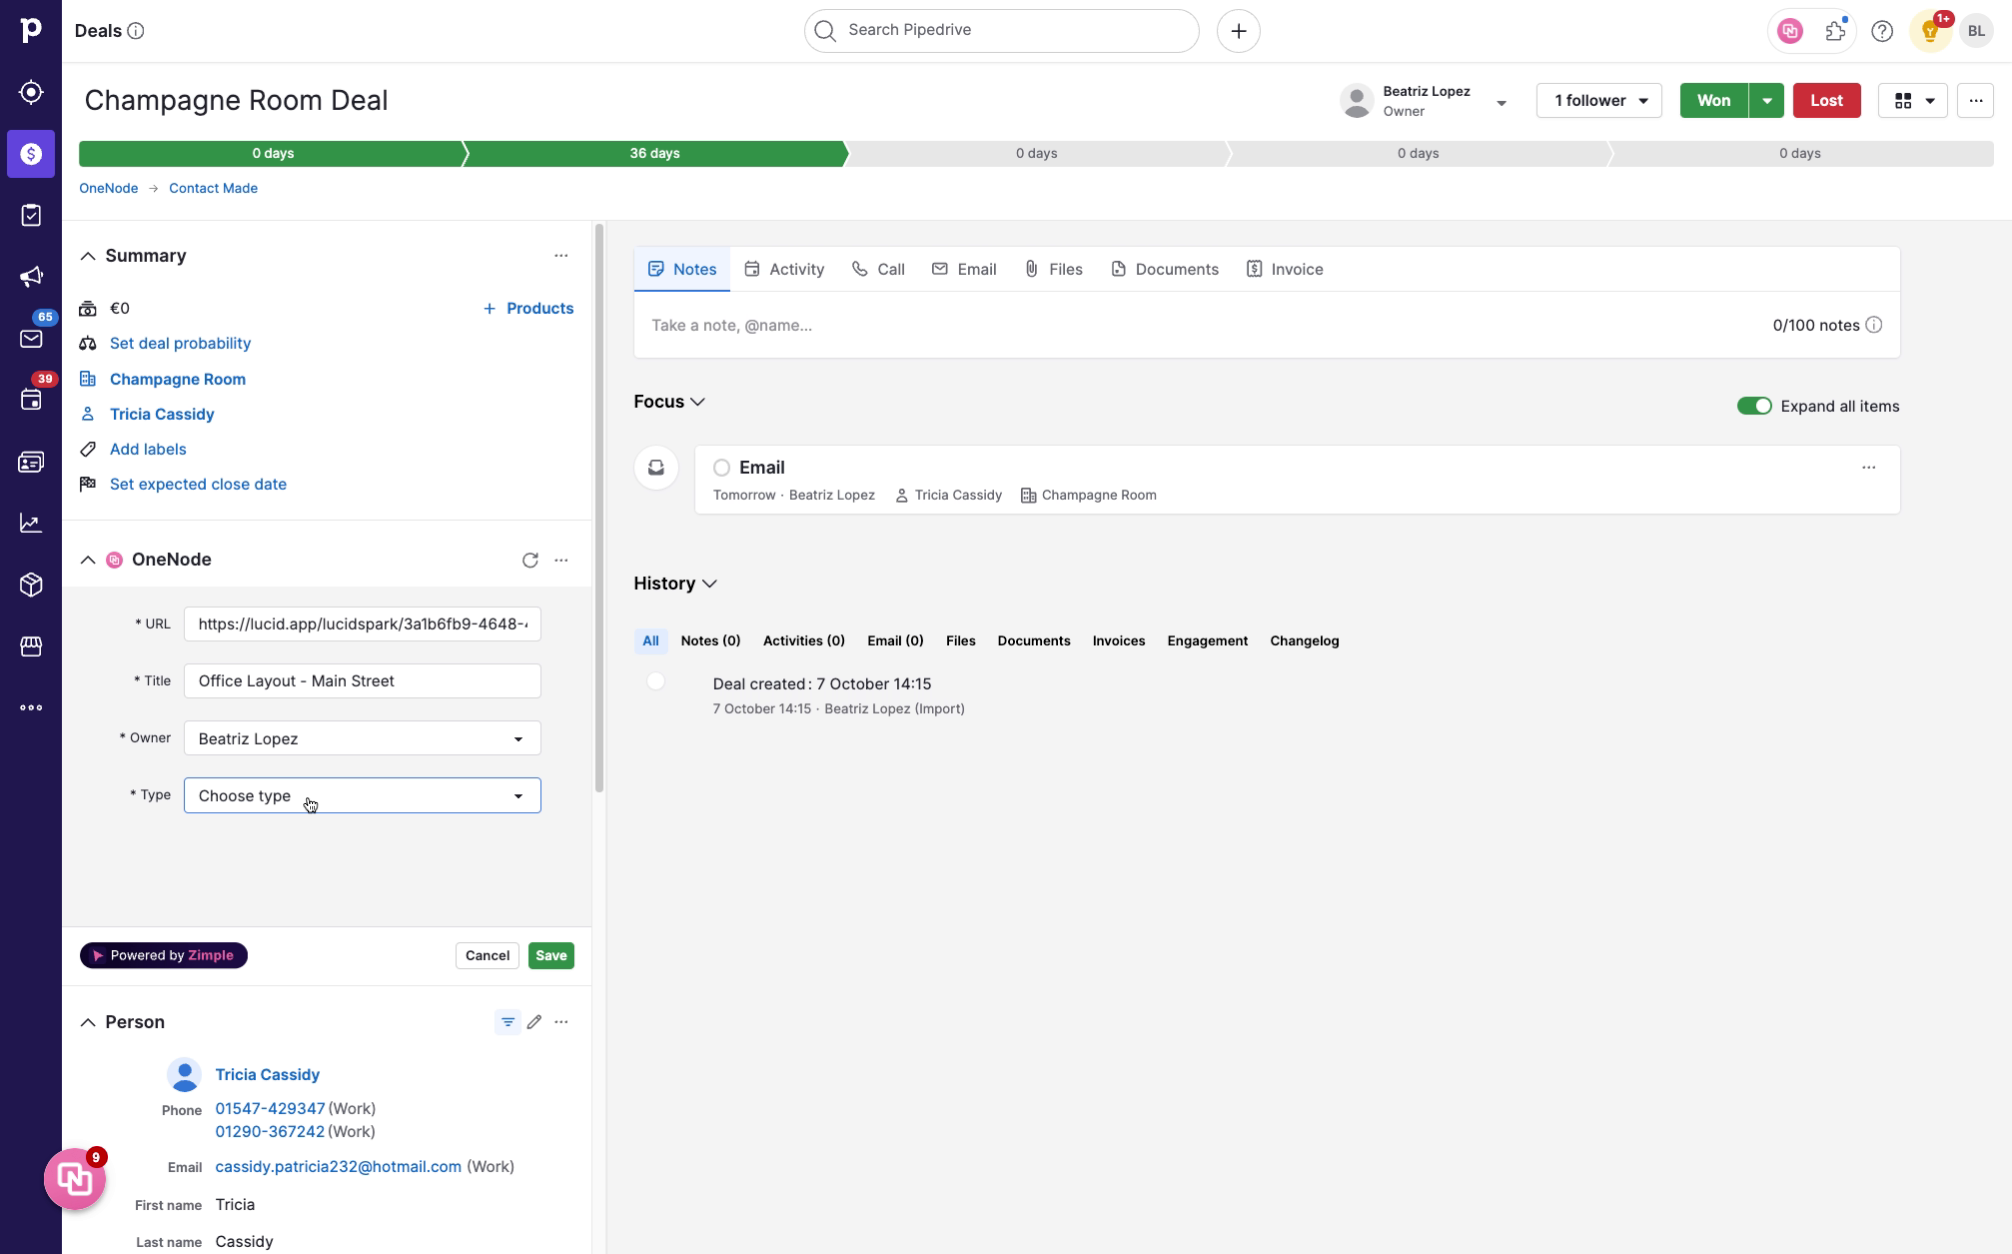
11. Choose the Document Type
And lastly, click on the Document Type and select the "Floor Plan" option.
12. Complete the fields
Oh! but not so fast! OneNode's admin has created additional fields for the Floor Plan Type of document.
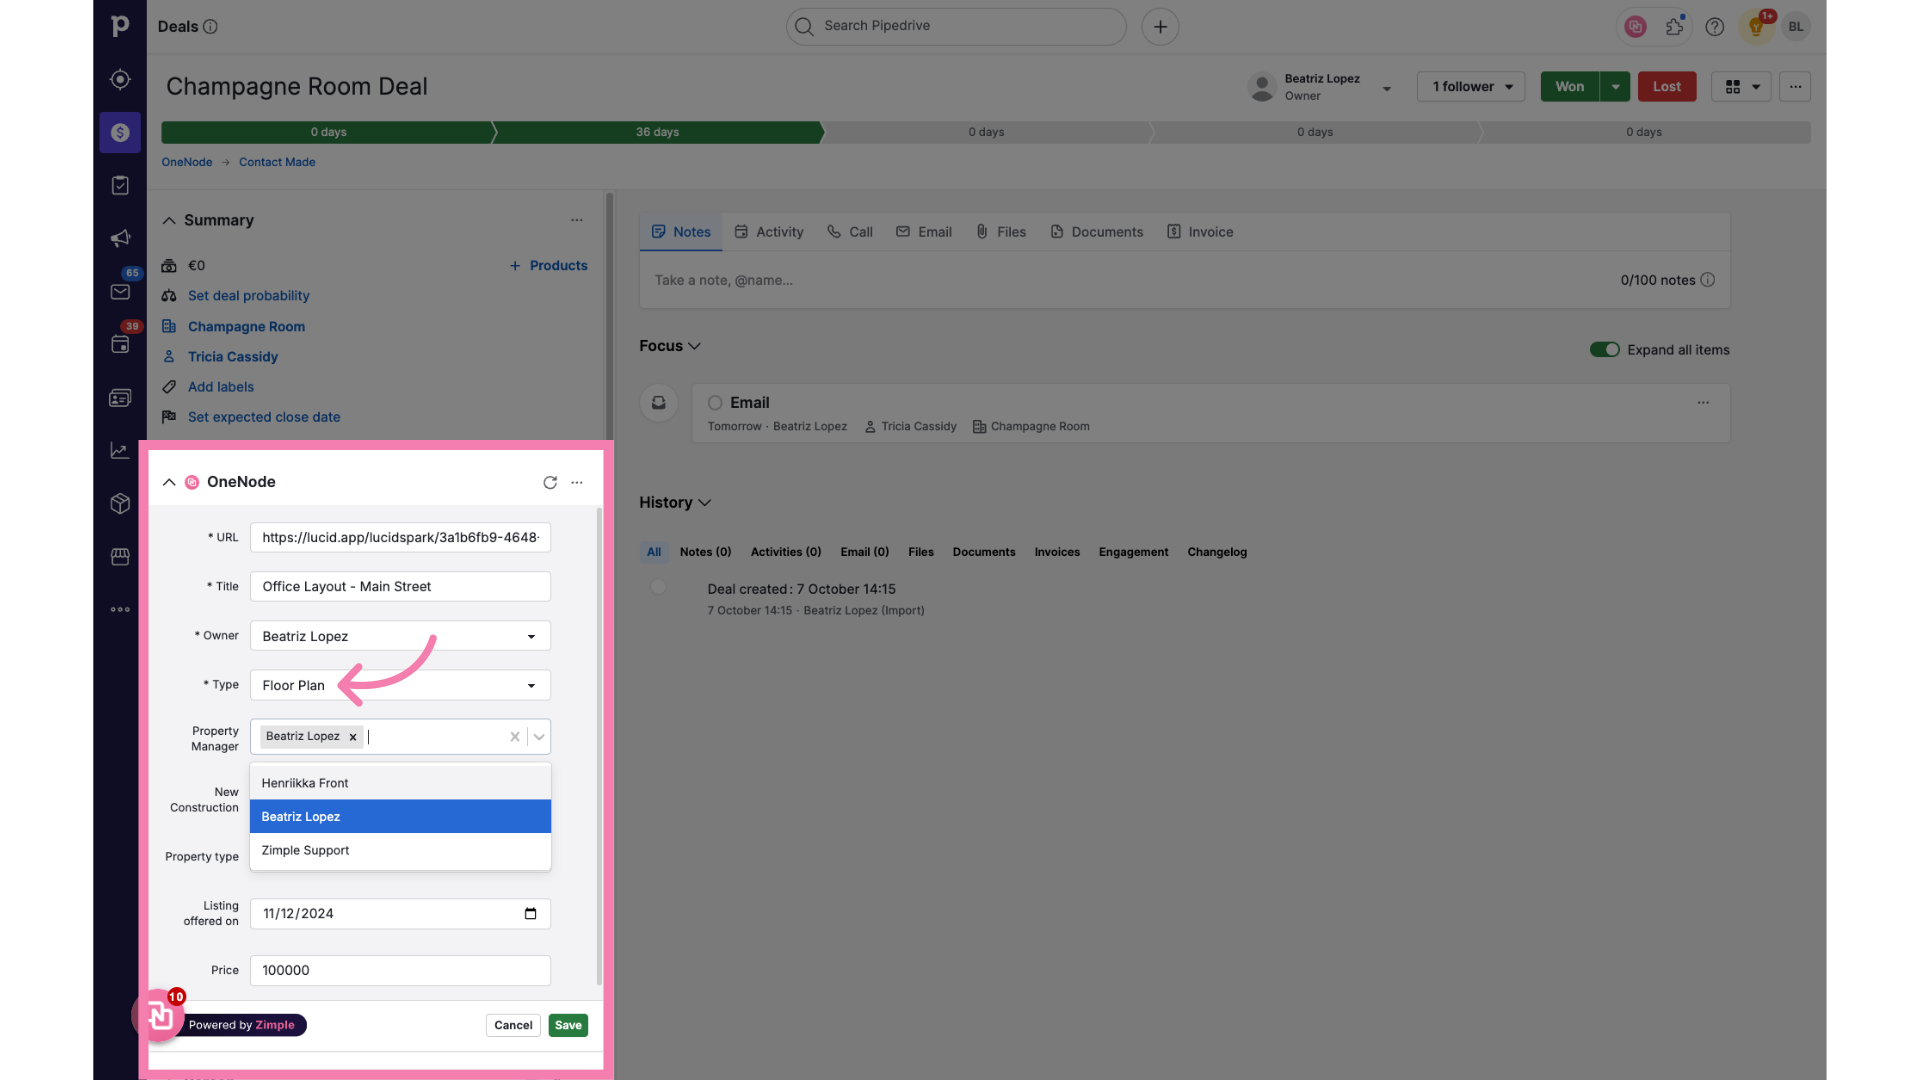
13. Select the Property Manager
First select the Property Manager from the list of users

14. Keep the toggle switched on
Next, leave the New construction checkbox switched on, unless that's not the case
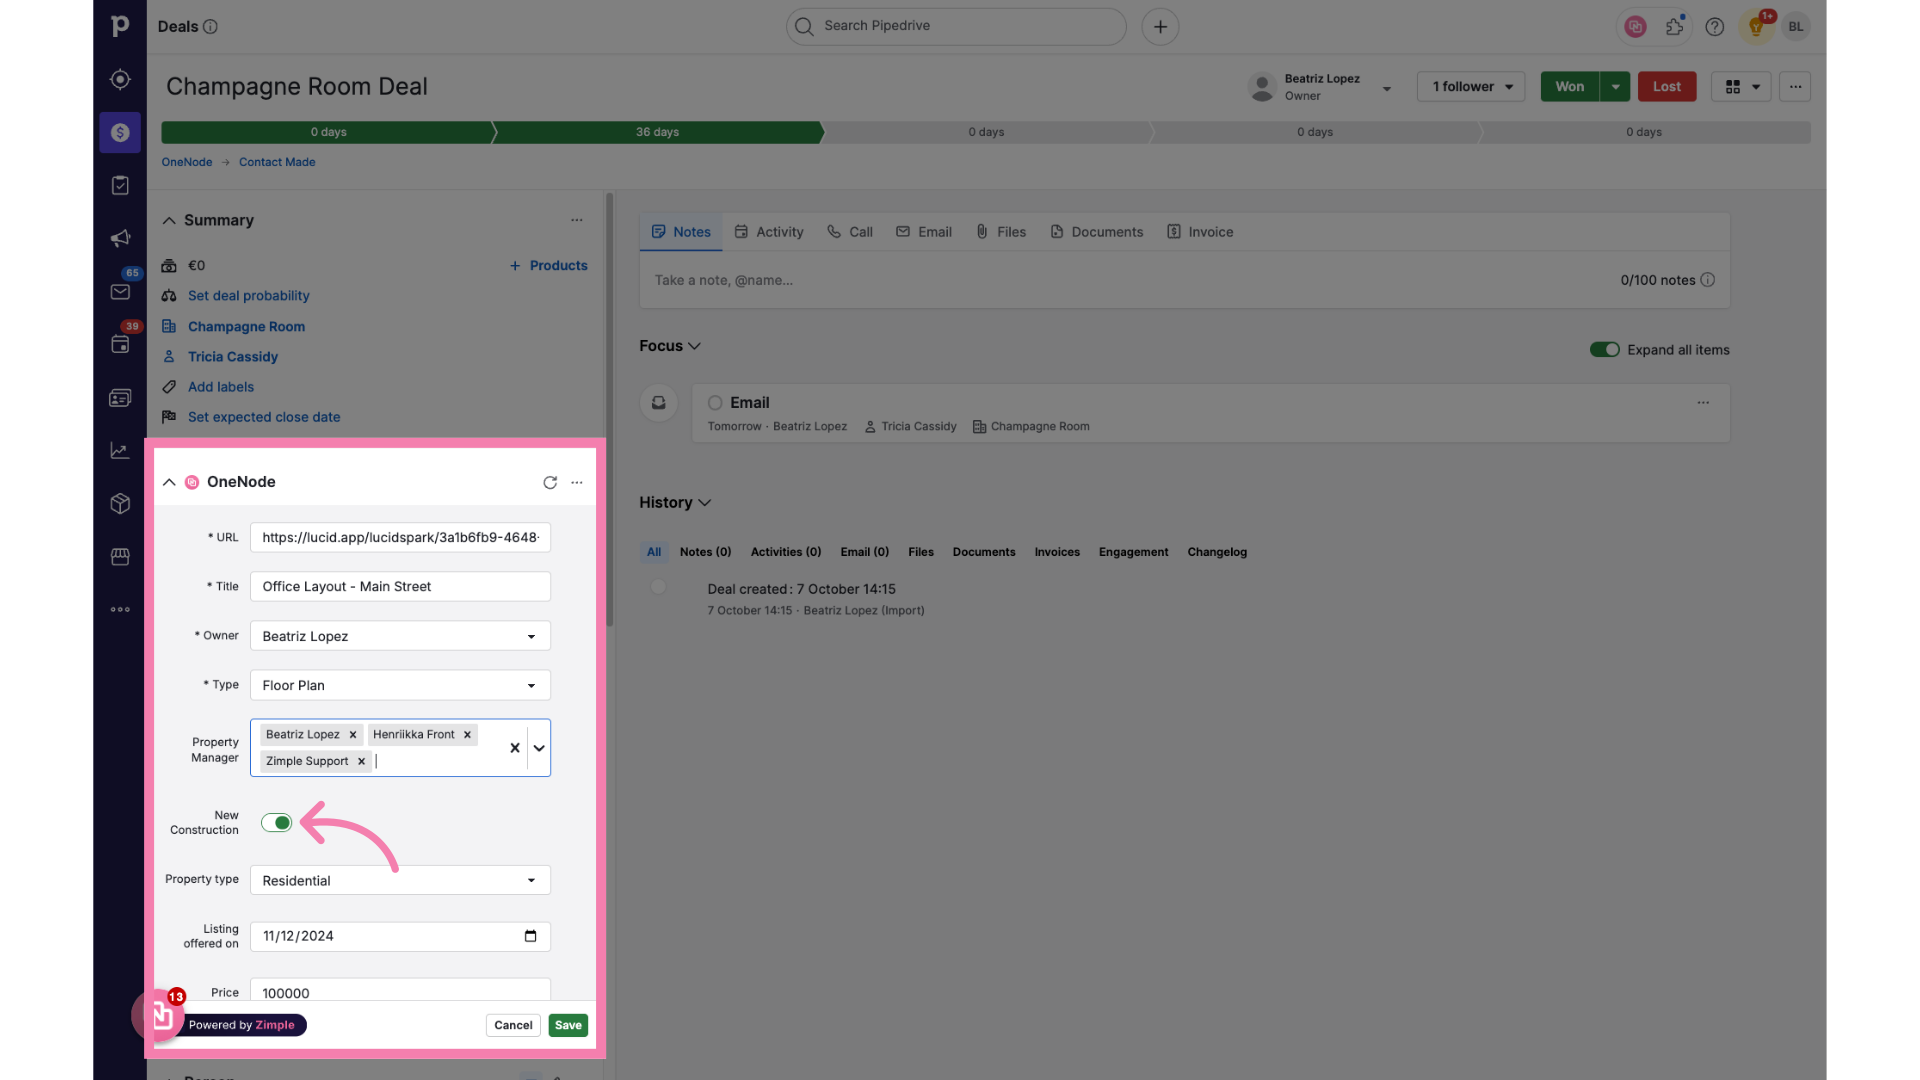
15. Choose the "Property Type"
In the Property type, choose Commercial, since this is an office floor plan
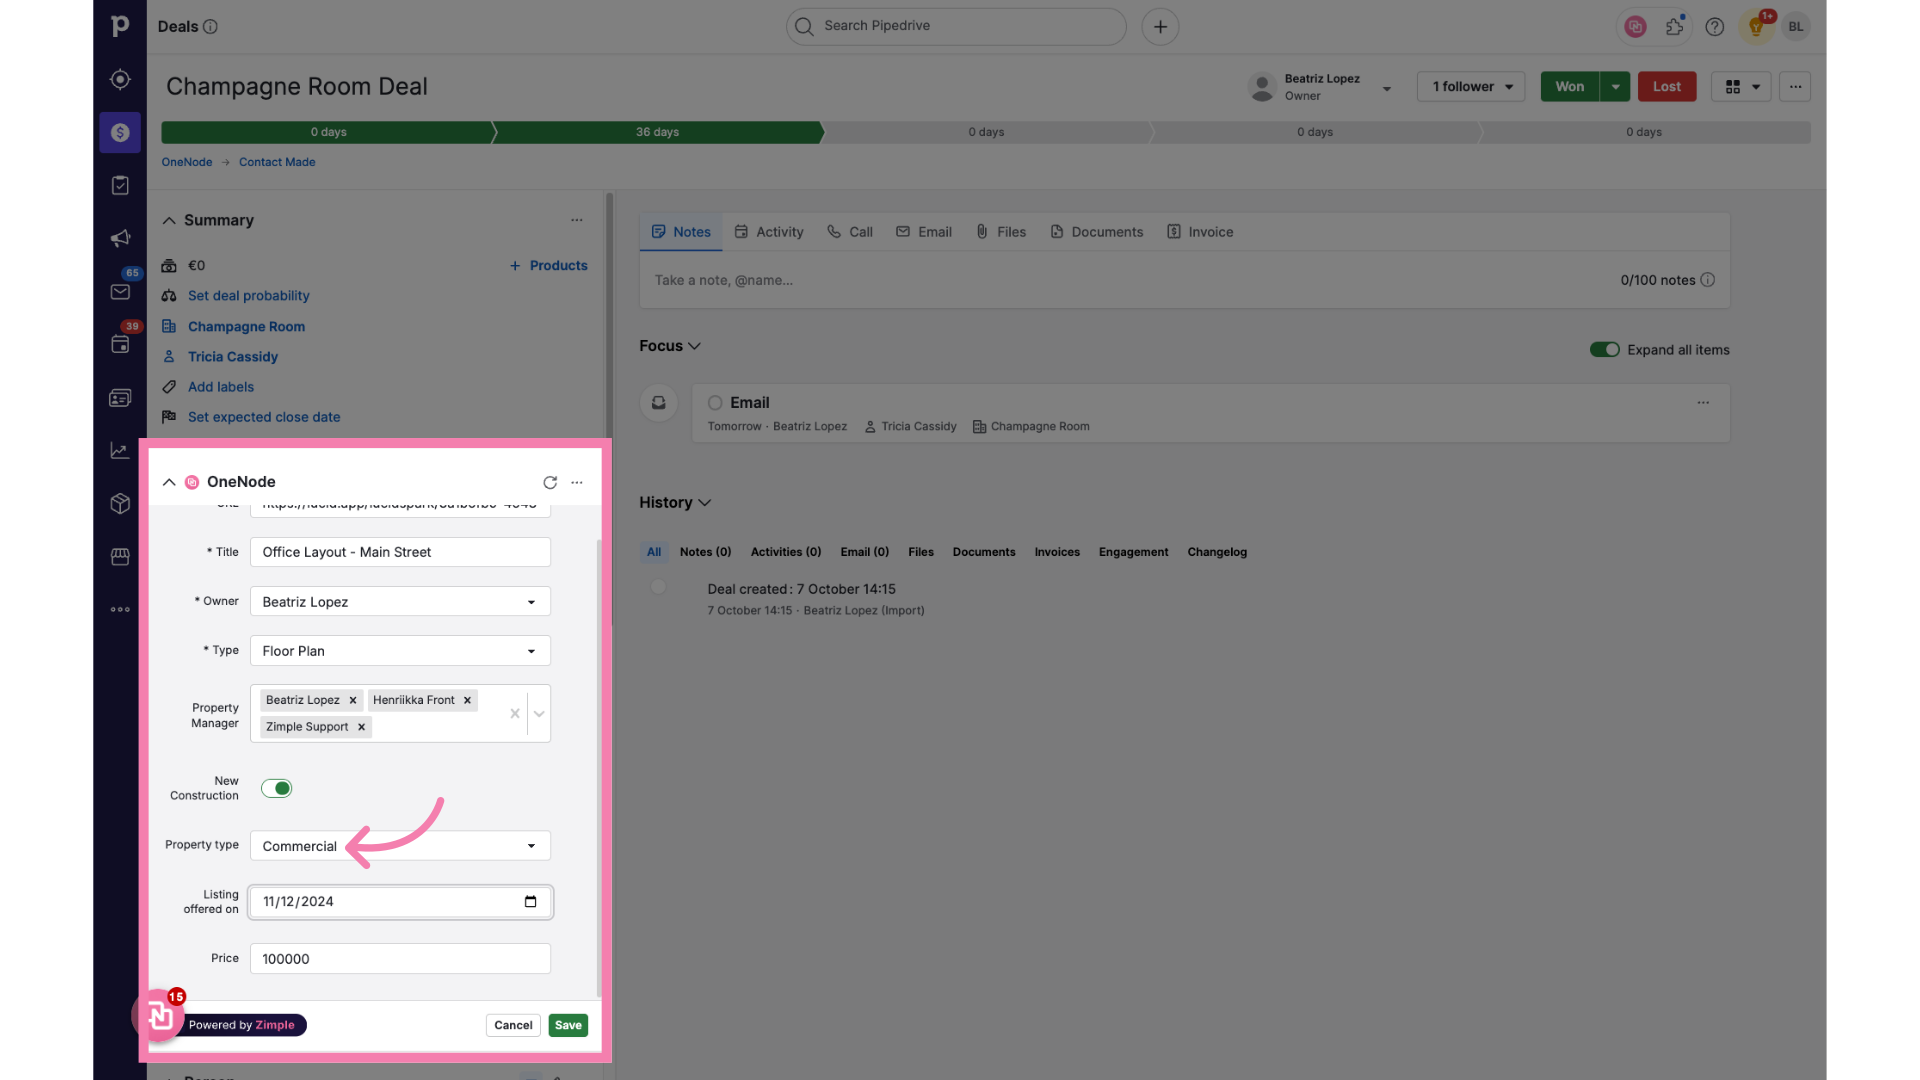
16. Complete "Listing offered on"
Then choose the date in which the floor plan was shared with the deal contact
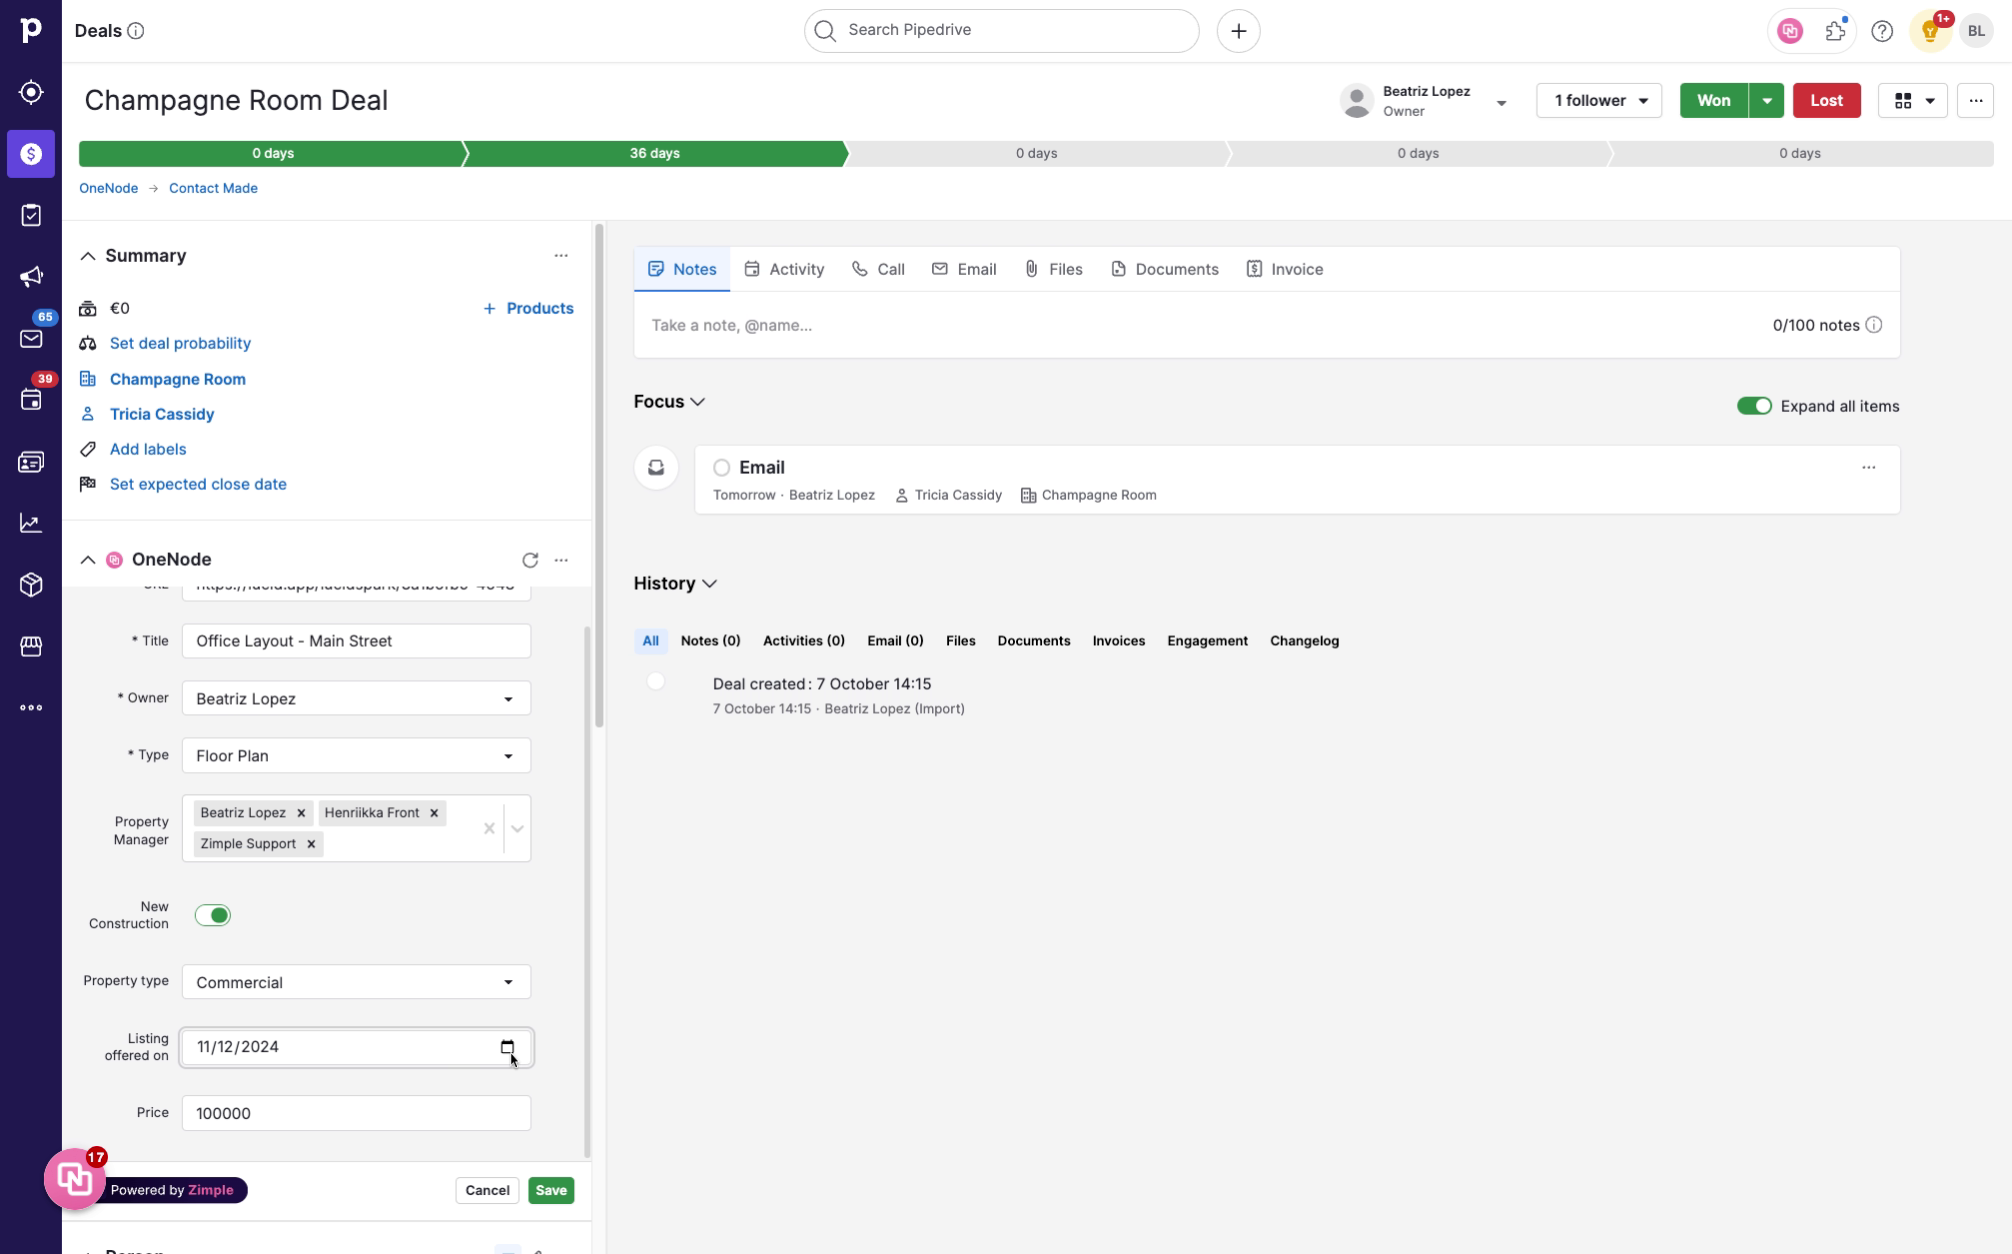
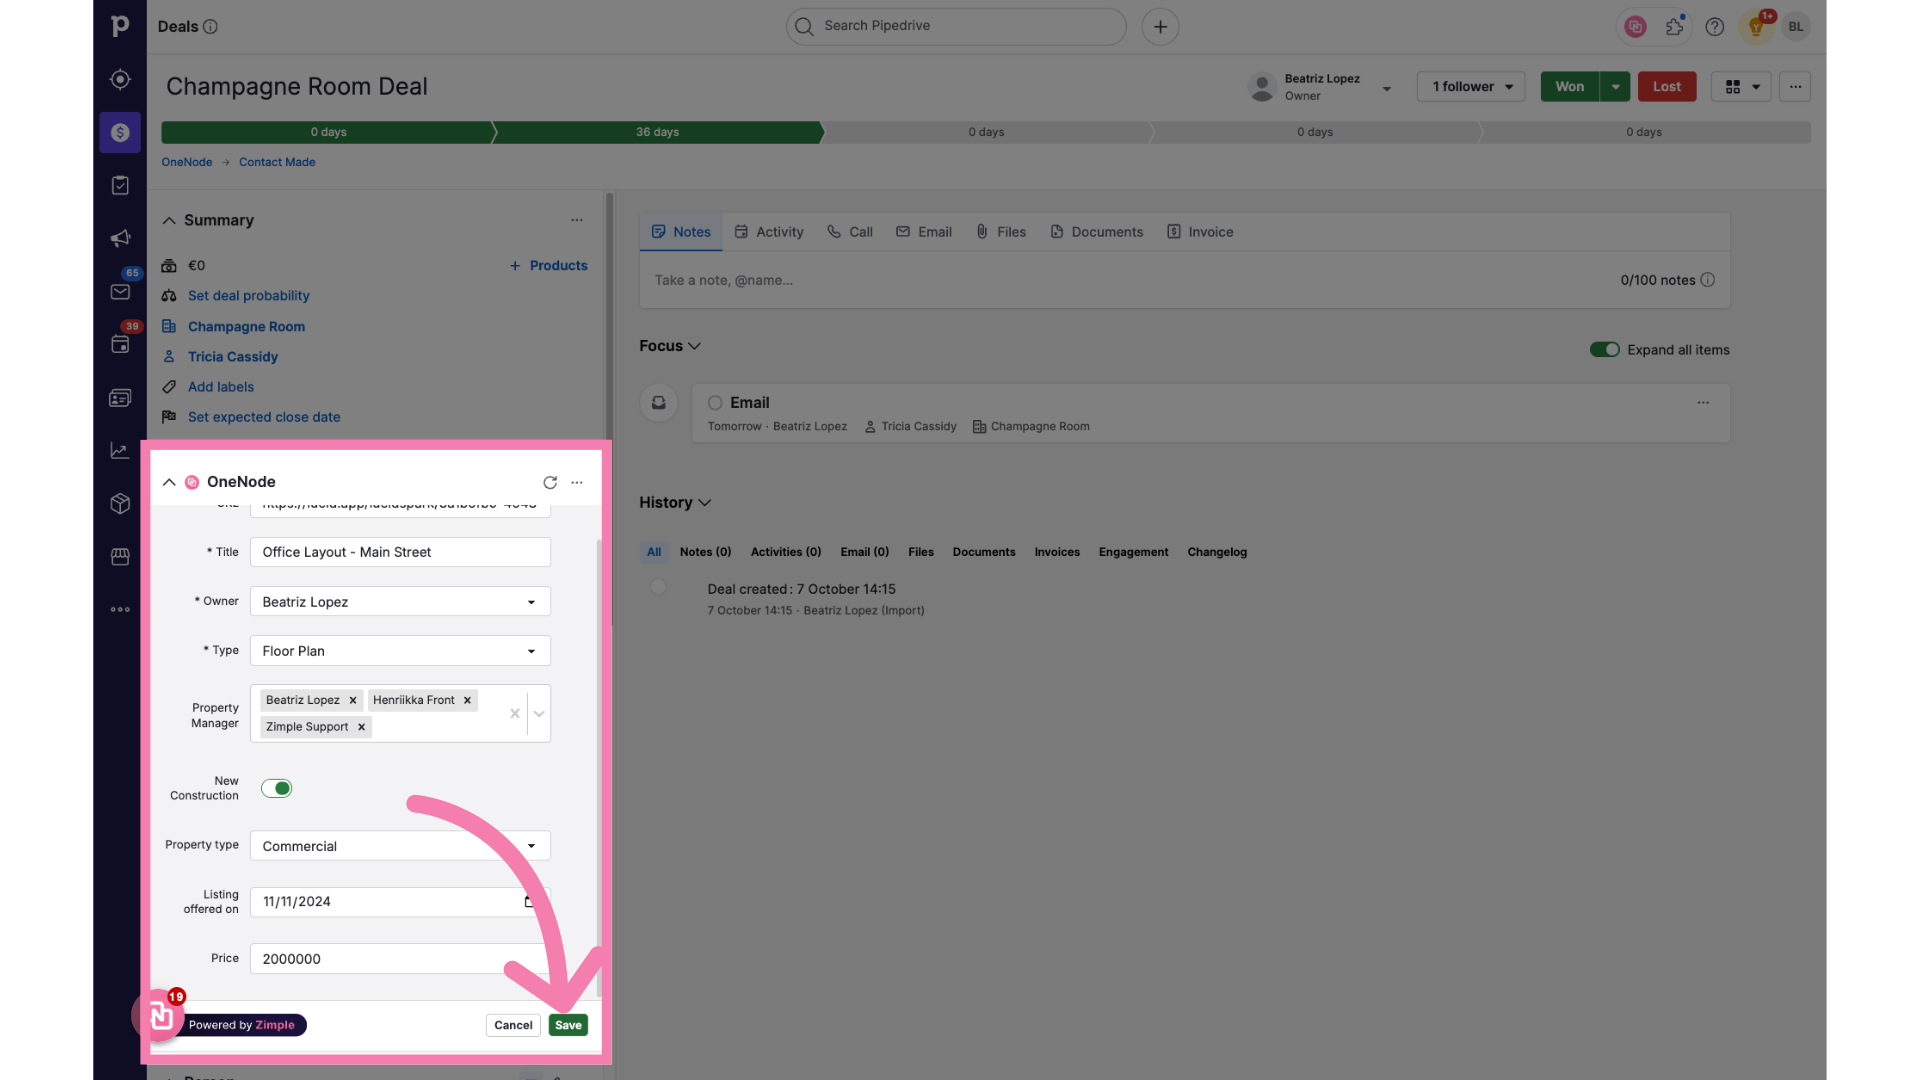
17. Fill the "Price"
Lastly, enter the price
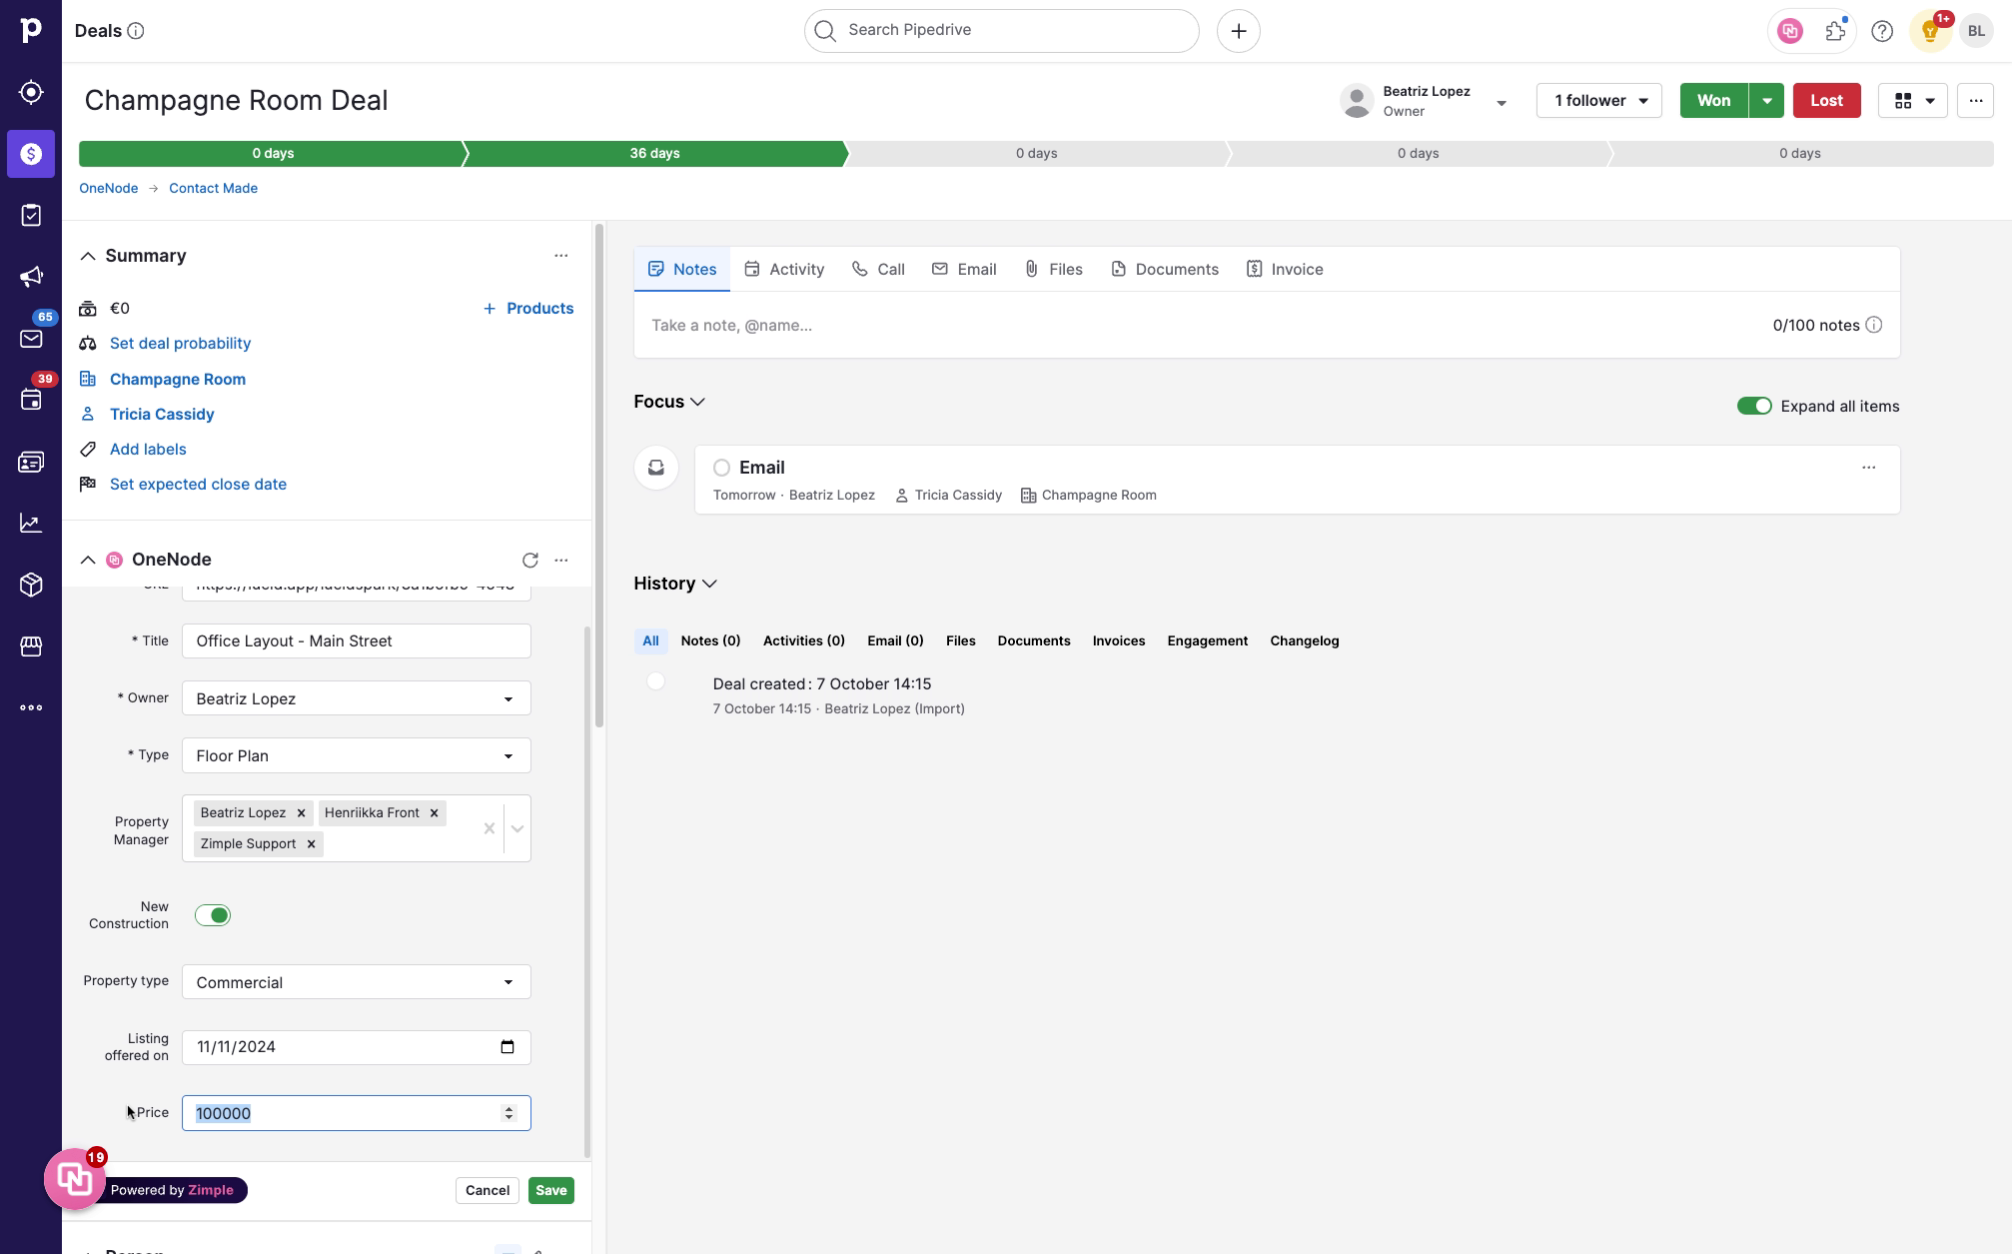
18. Click "Save"
And Click on "Save".
19. The document has been added!
There you have it— This Floor Plan is now linked to the Deal.
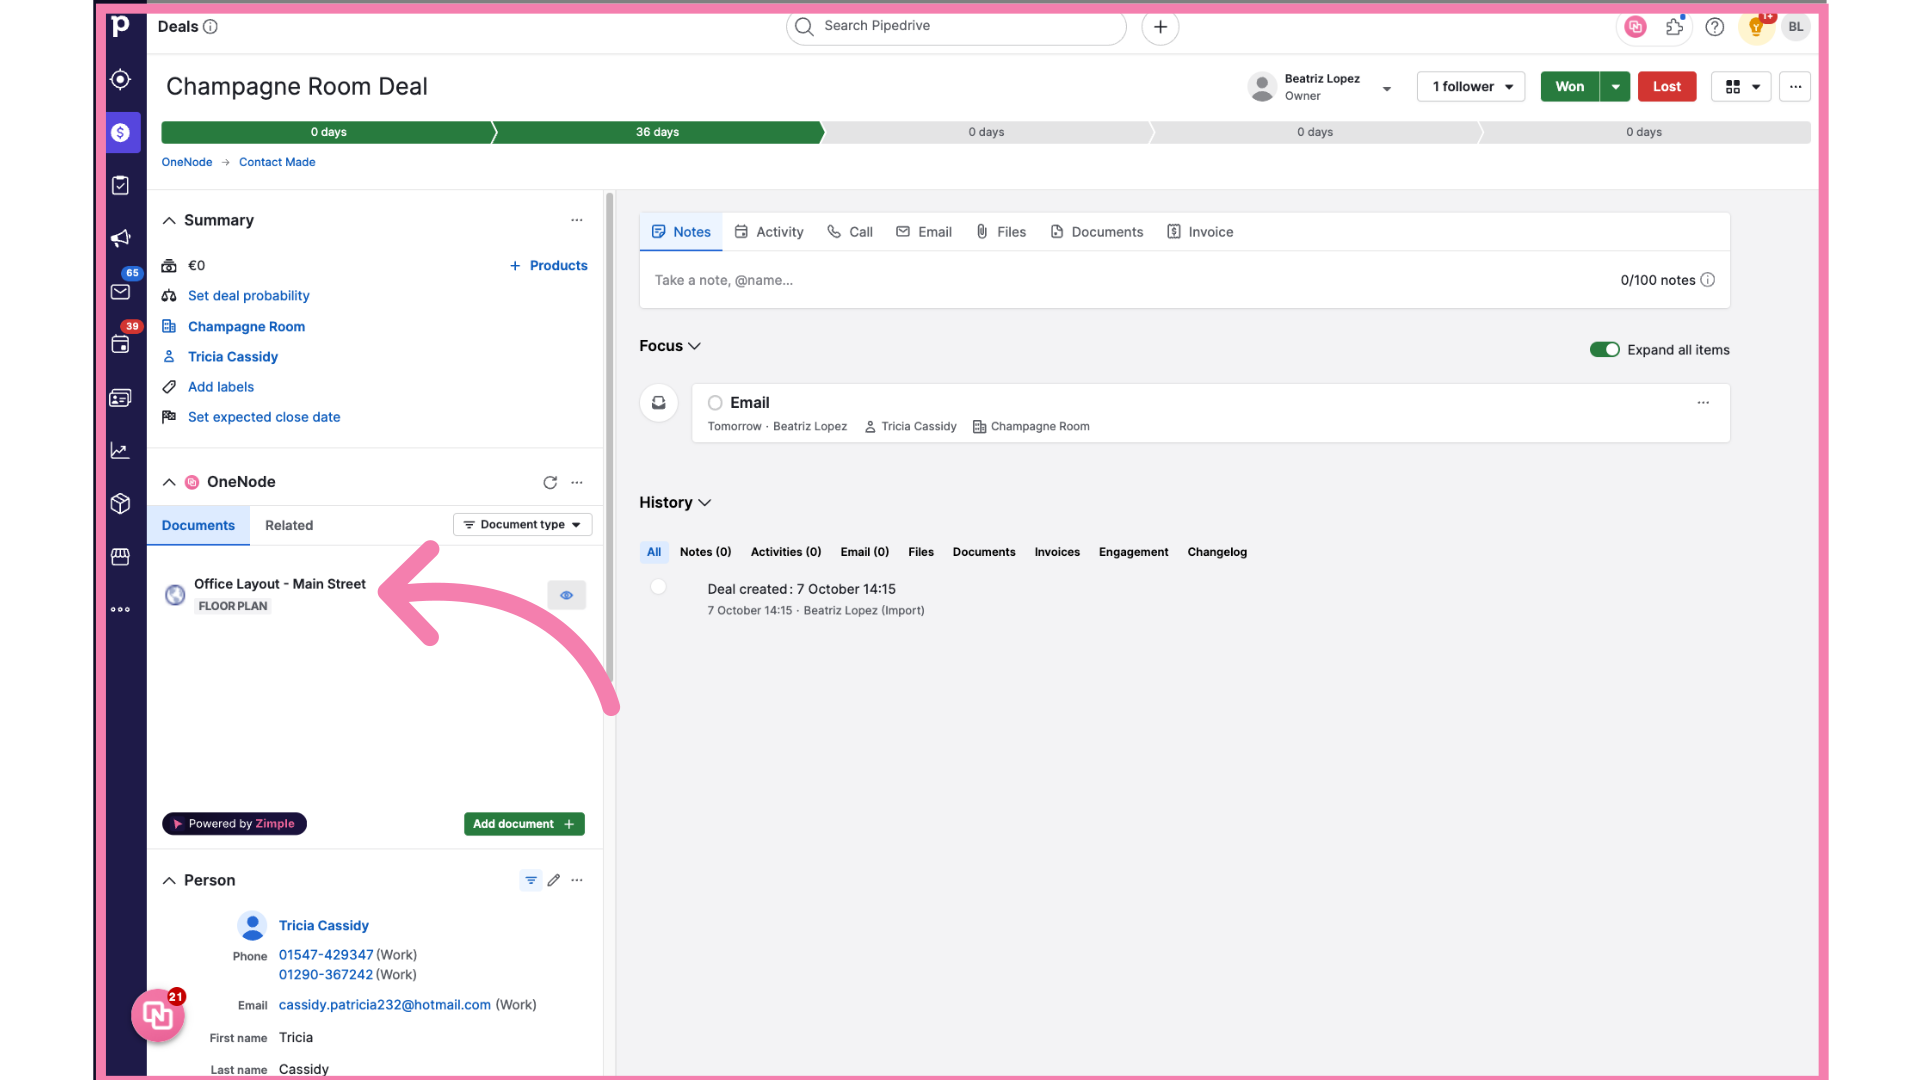
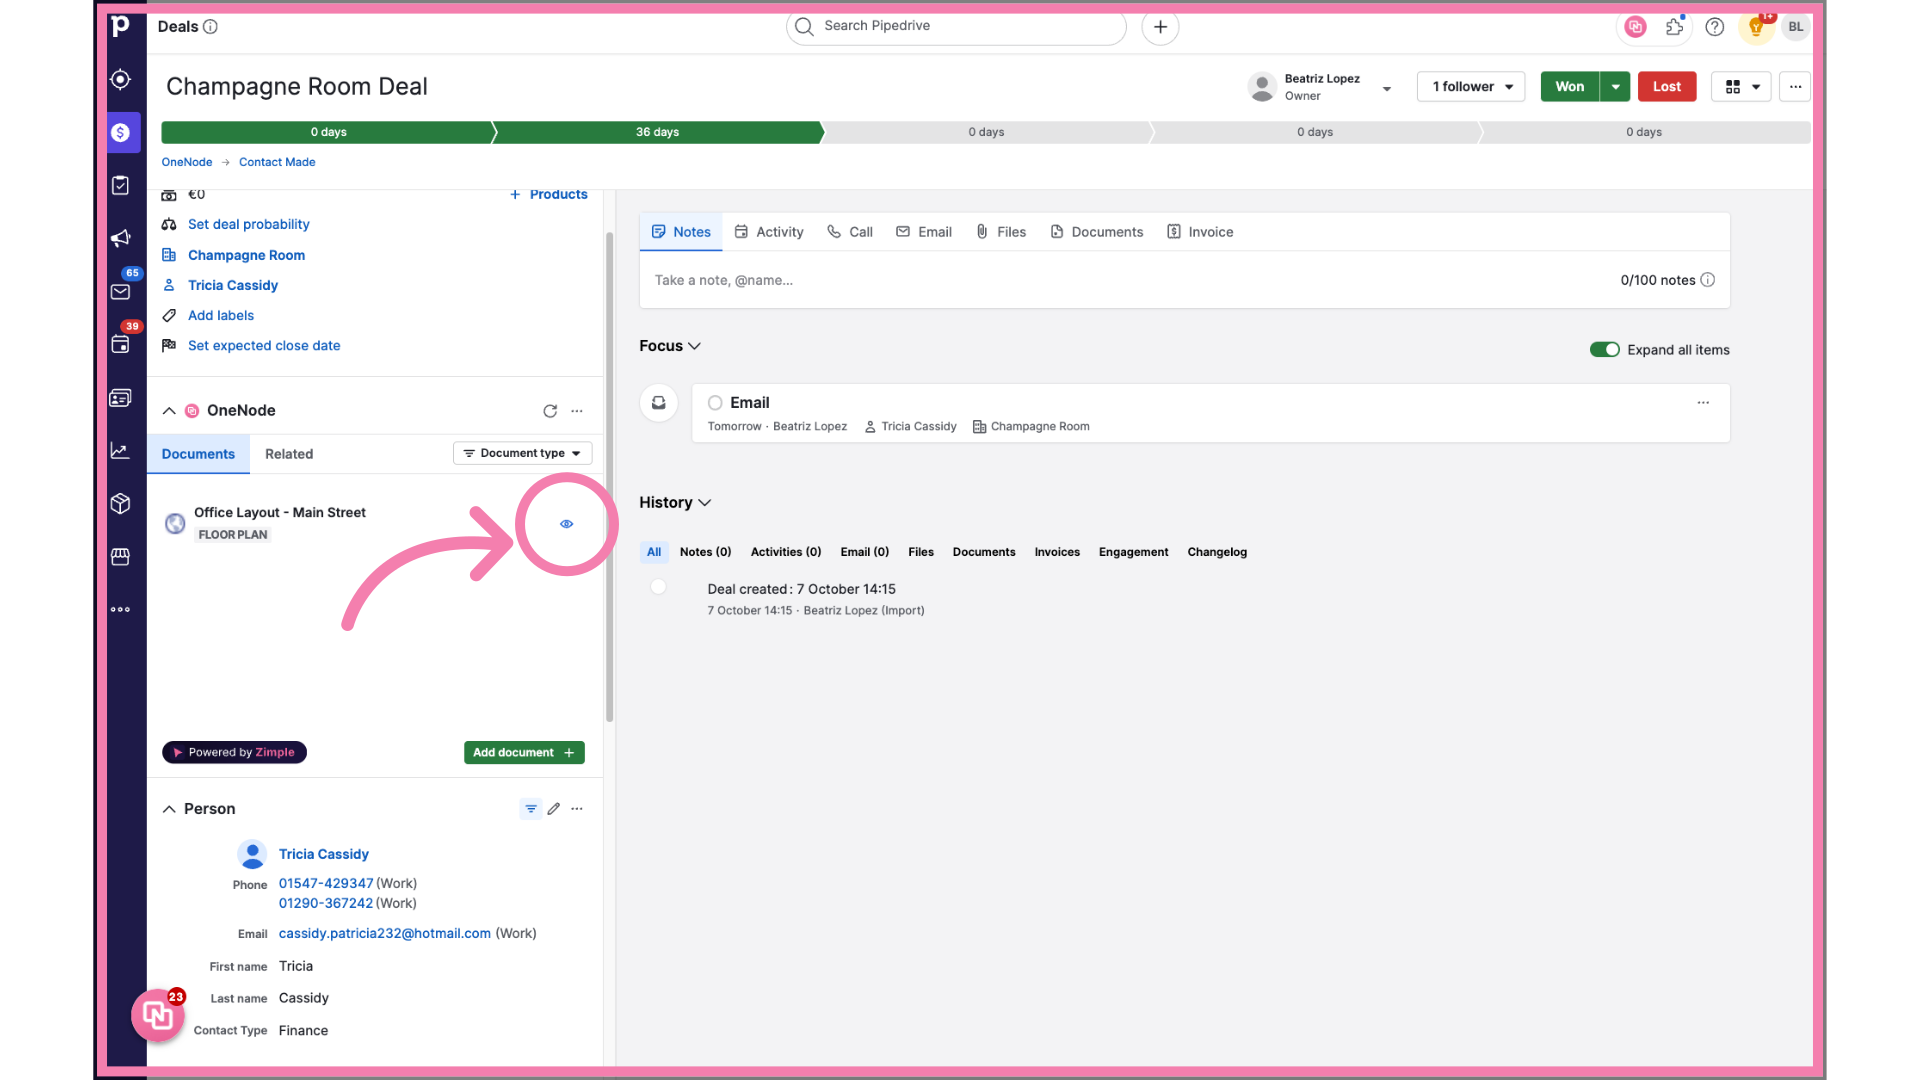
20. Click on the Eye Icon
Review the document details at anytime by clicking on the eye icon on the right
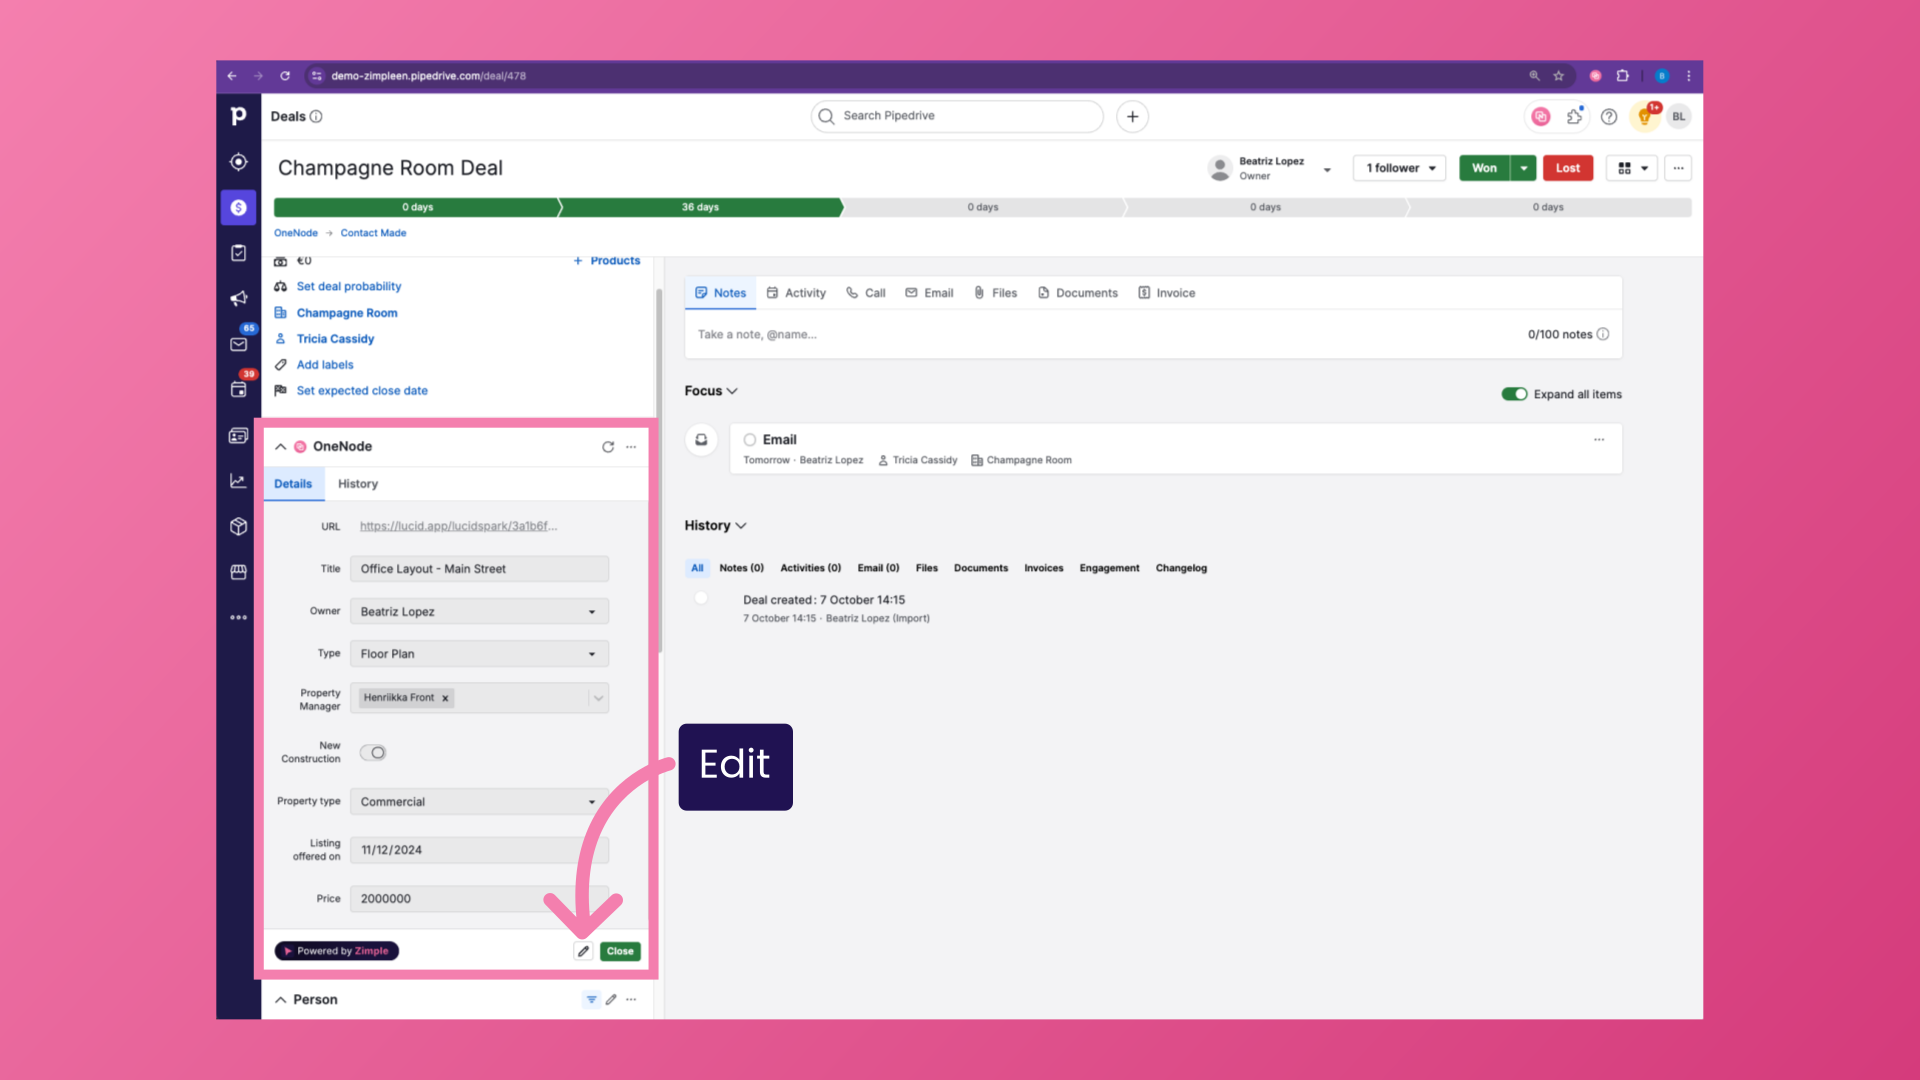
21. Edit
To edit the details click on the Pen icon, make the changes, and click Save.
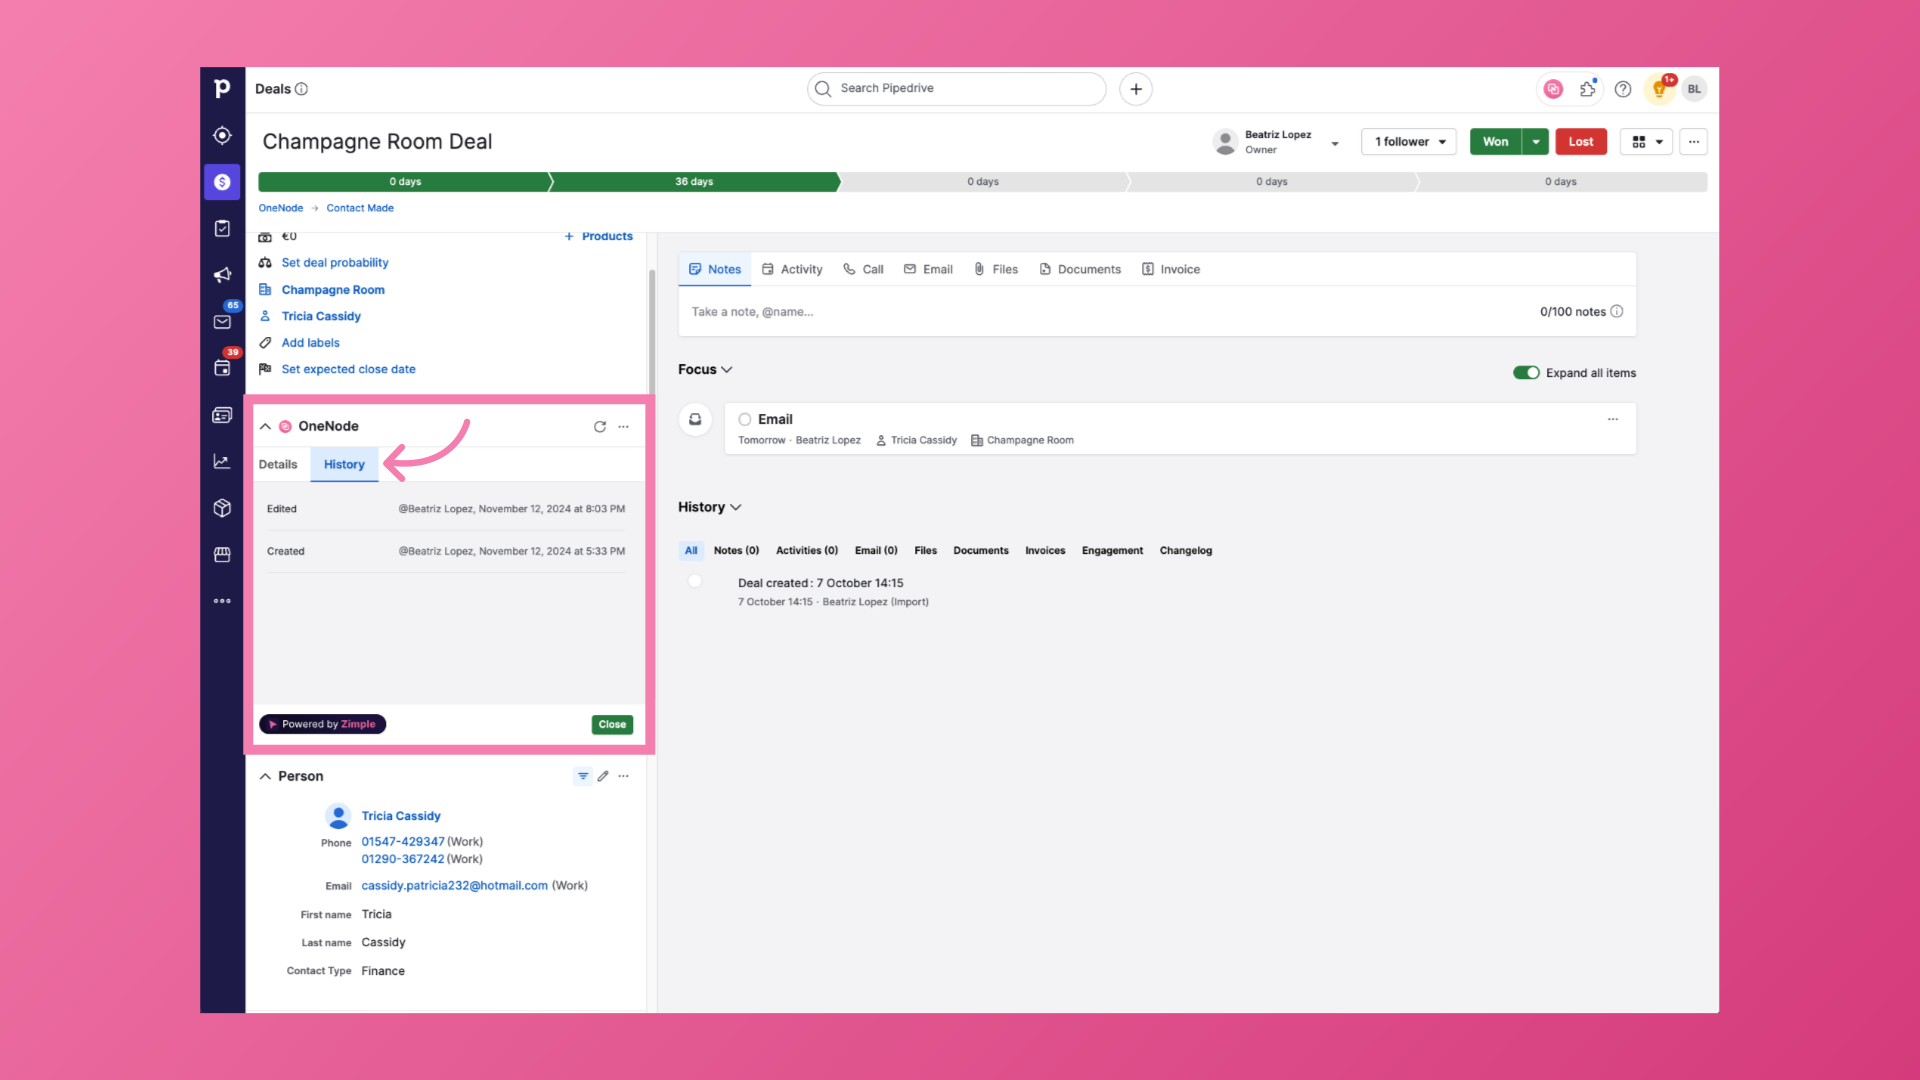
22. Track document changes
You can also track any changes with the History tab
23. Locate the document

Adding documents with a Link is as easy as copy- pasting. And, guess what?!—it gets even easier! Watch OneNode's Chrome Extension video to find out how.